 TutorialKart.com
Deploy a React Application using AWS Amplify
In this tutorial, we will deploy a React application to production using AWS Amplify.
We will start with a React application running on our local system, push the source code to GitHub, connect the GitHub repository to AWS Amplify, deploy the application, connect a custom domain, enable HTTPS, and finally test continuous deployment by pushing a code change.
For this example, the application will be available at a custom domain. This custom domain is already registered and managed through Amazon Route 53.
What We Are Going to Do
The deployment flow in this tutorial is:
React application
        ↓
GitHub repository
        ↓
AWS Amplify
        ↓
Production build
        ↓
Amplify Hosting
        ↓
custom domain
        ↓
Automatic deployment on future Git pushes
AWS Amplify handles the hosting and deployment side for us. We do not need to manually create an S3 bucket, configure CloudFront, upload build files, or manage the SSL certificate separately for this setup.
Prerequisites
Before starting, make sure you have the following:
- An AWS account
- A GitHub account
- Git installed on your computer
- Node.js and npm installed
- A React application that can be built successfully
- A domain in Route 53 if you want to use a custom domain
The React application used here is a simple Vite-based project. You can follow the same process with another React application as long as you know its build command and output directory.
Step 1: Open the React Project
Open the React project in Visual Studio Code.
The project used in this example contains the normal Vite application files, including package.json, vite.config.js, index.html, and the React source files inside the src directory.
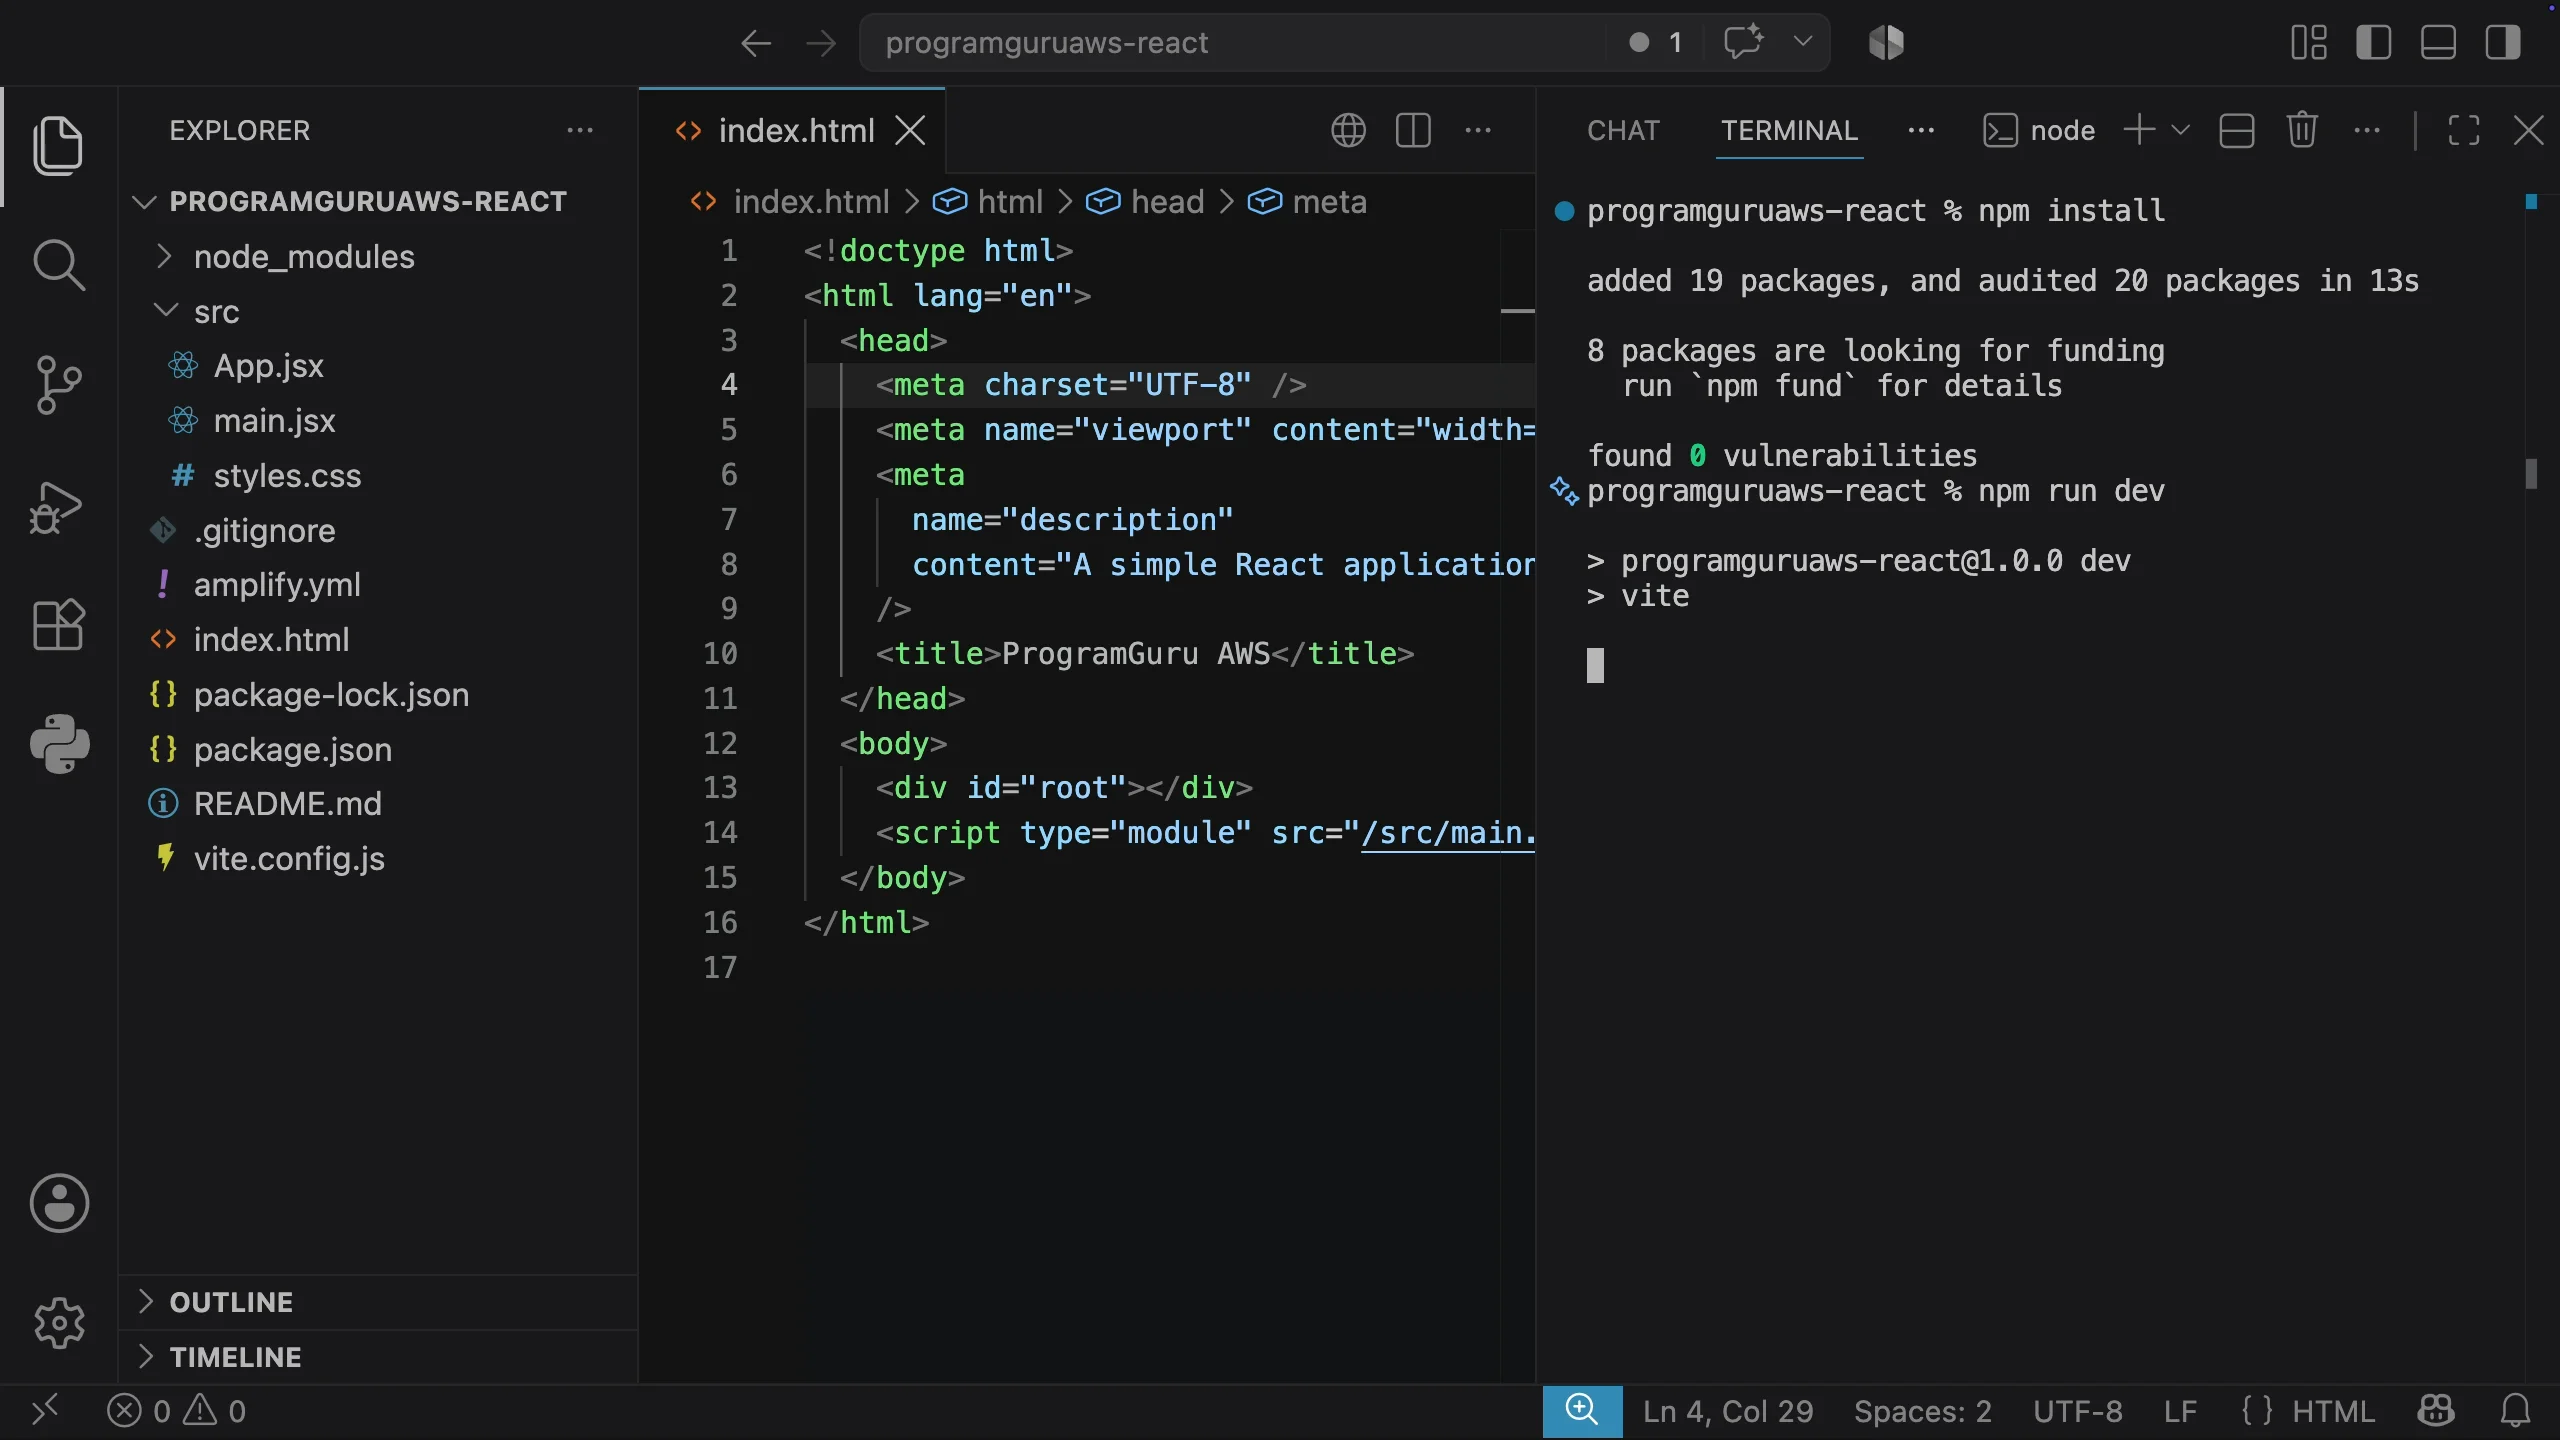
Before connecting the project to AWS, it is a good idea to verify that it works correctly on the local machine. This avoids spending time troubleshooting Amplify when the actual problem is in the application itself.
Step 2: Install the Project Dependencies
Open the terminal inside Visual Studio Code and install the dependencies defined in package.json.
npm installOnce the installation completes, start the Vite development server.
npm run devVite displays a local URL, normally similar to:
http://localhost:5173/Open this address in the browser.
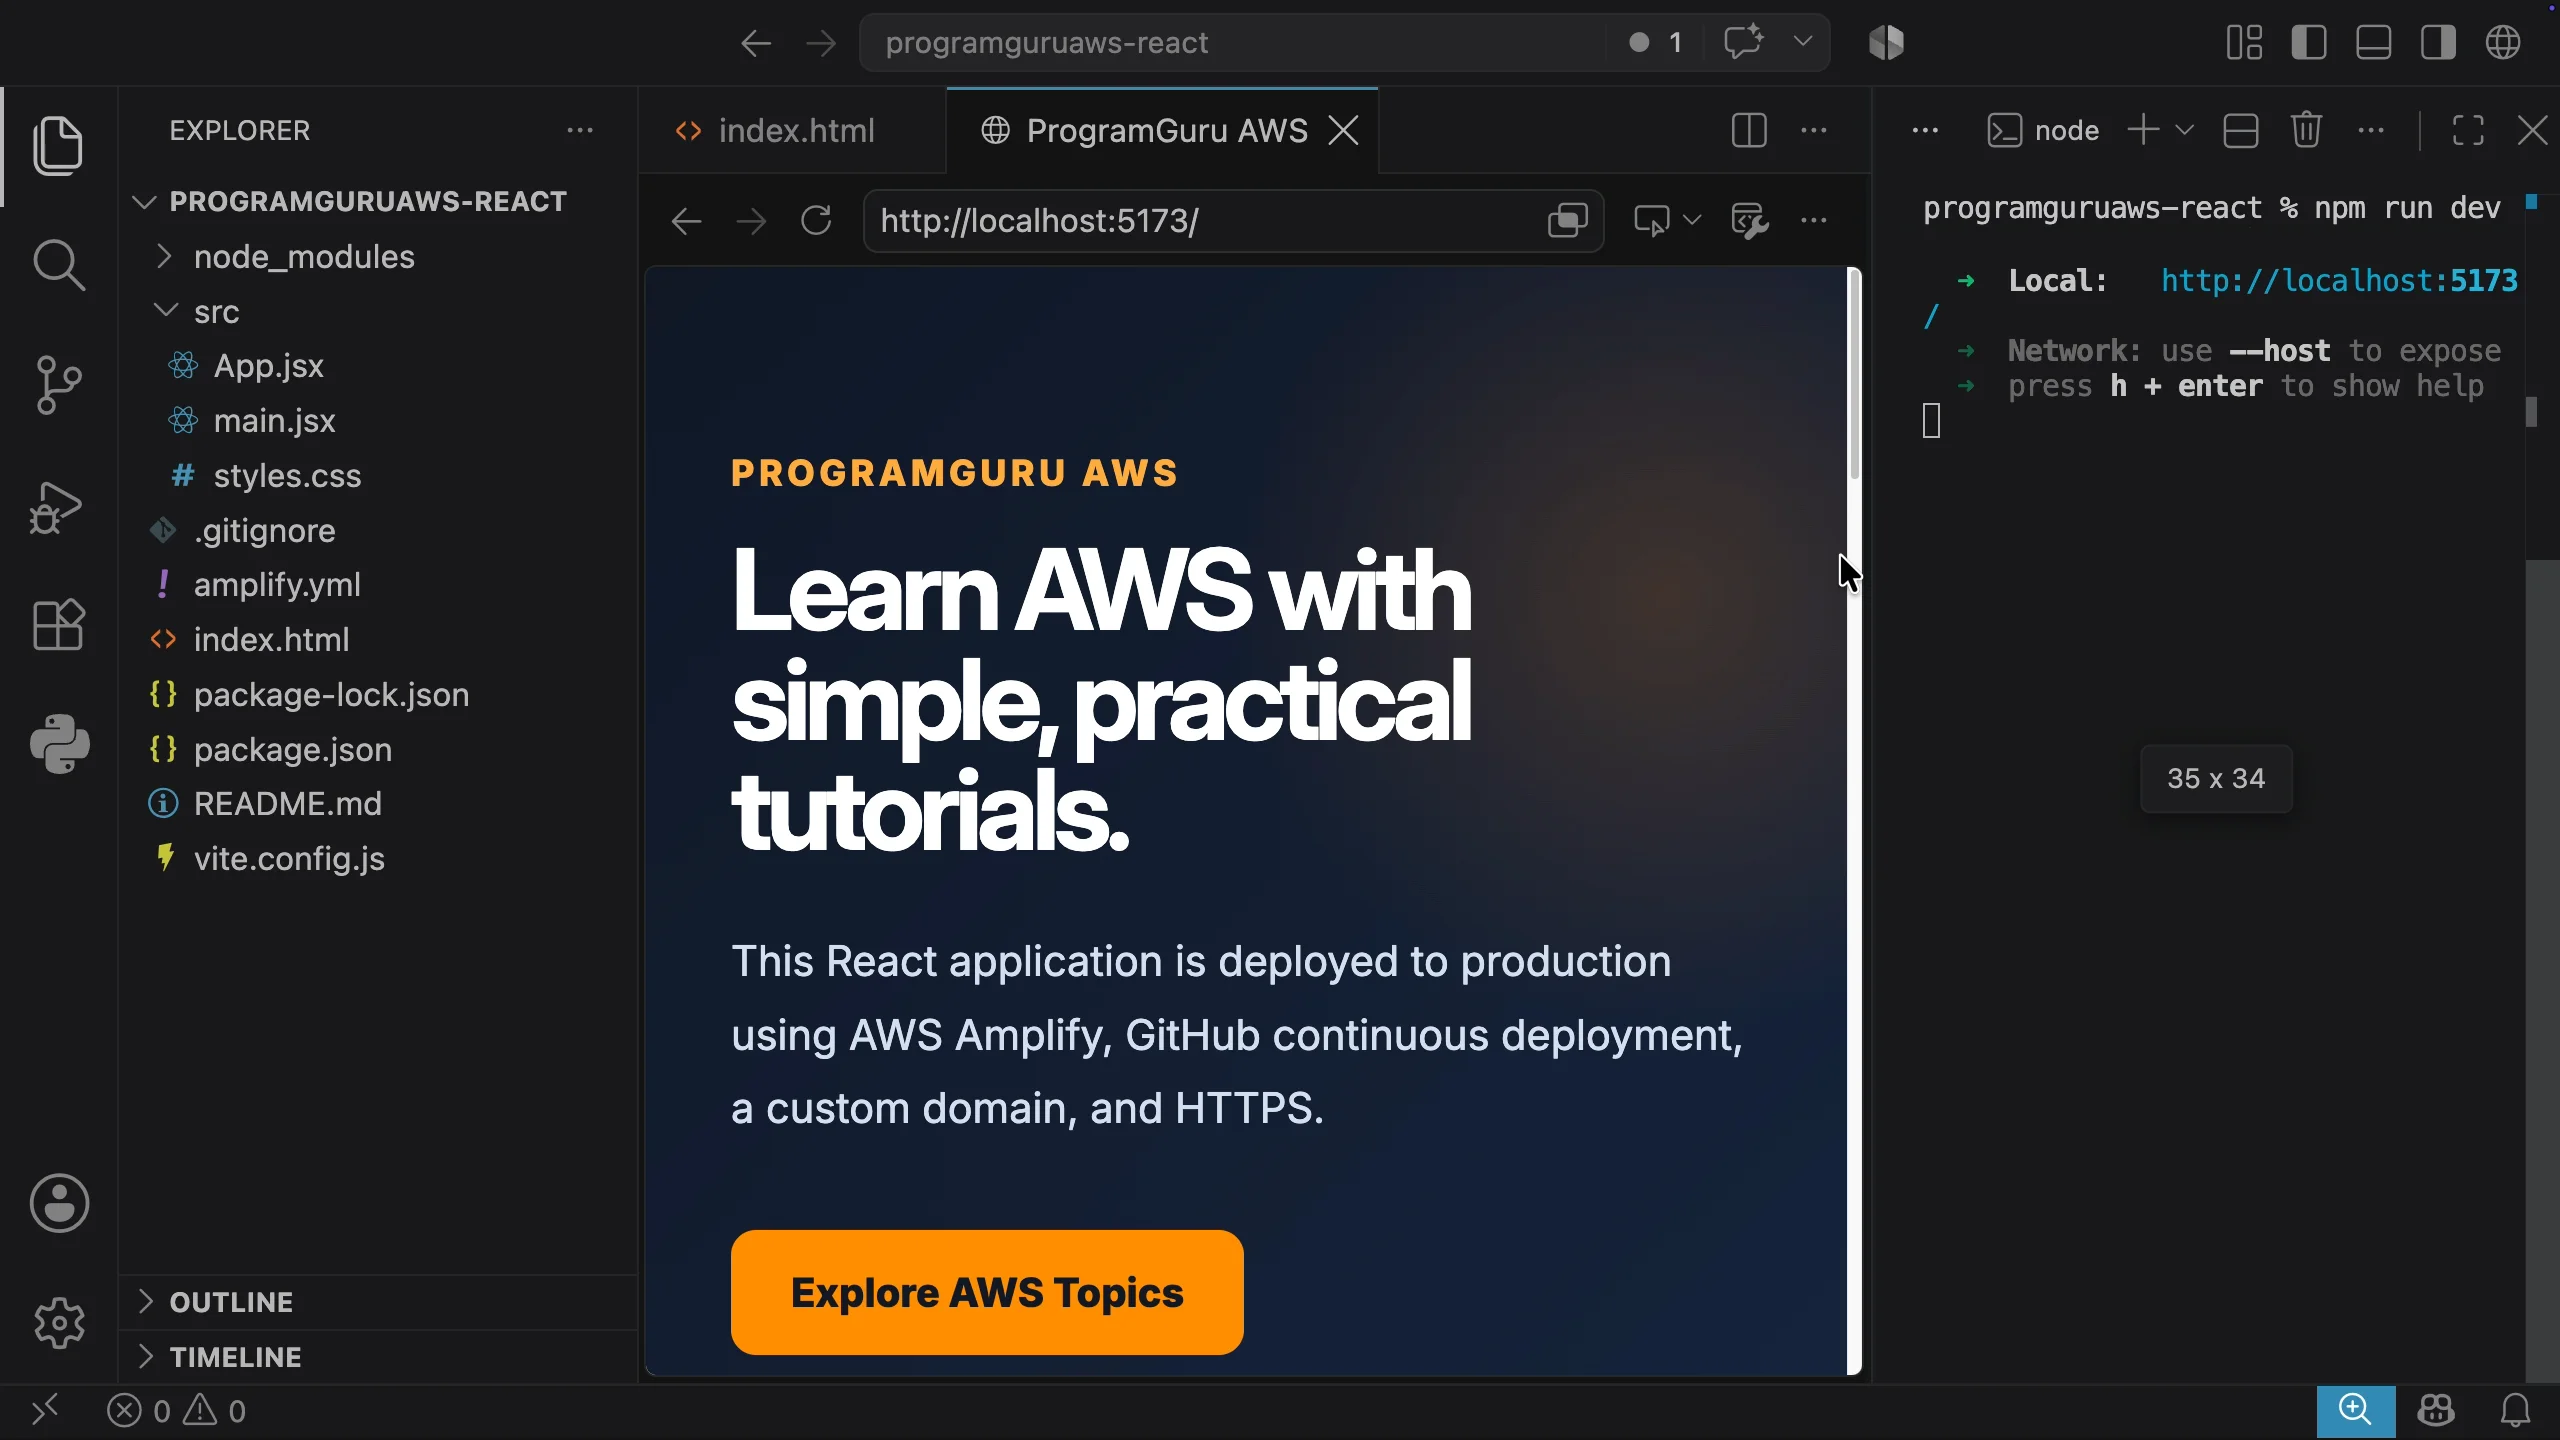
The sample React application is now running locally. At this stage we only need to confirm that the page loads and the application behaves as expected.
Step 3: Test the Production Build
The development server is not what Amplify publishes to production. Amplify runs the application’s build process and hosts the generated production files.
Before moving further, run the production build locally.
npm run build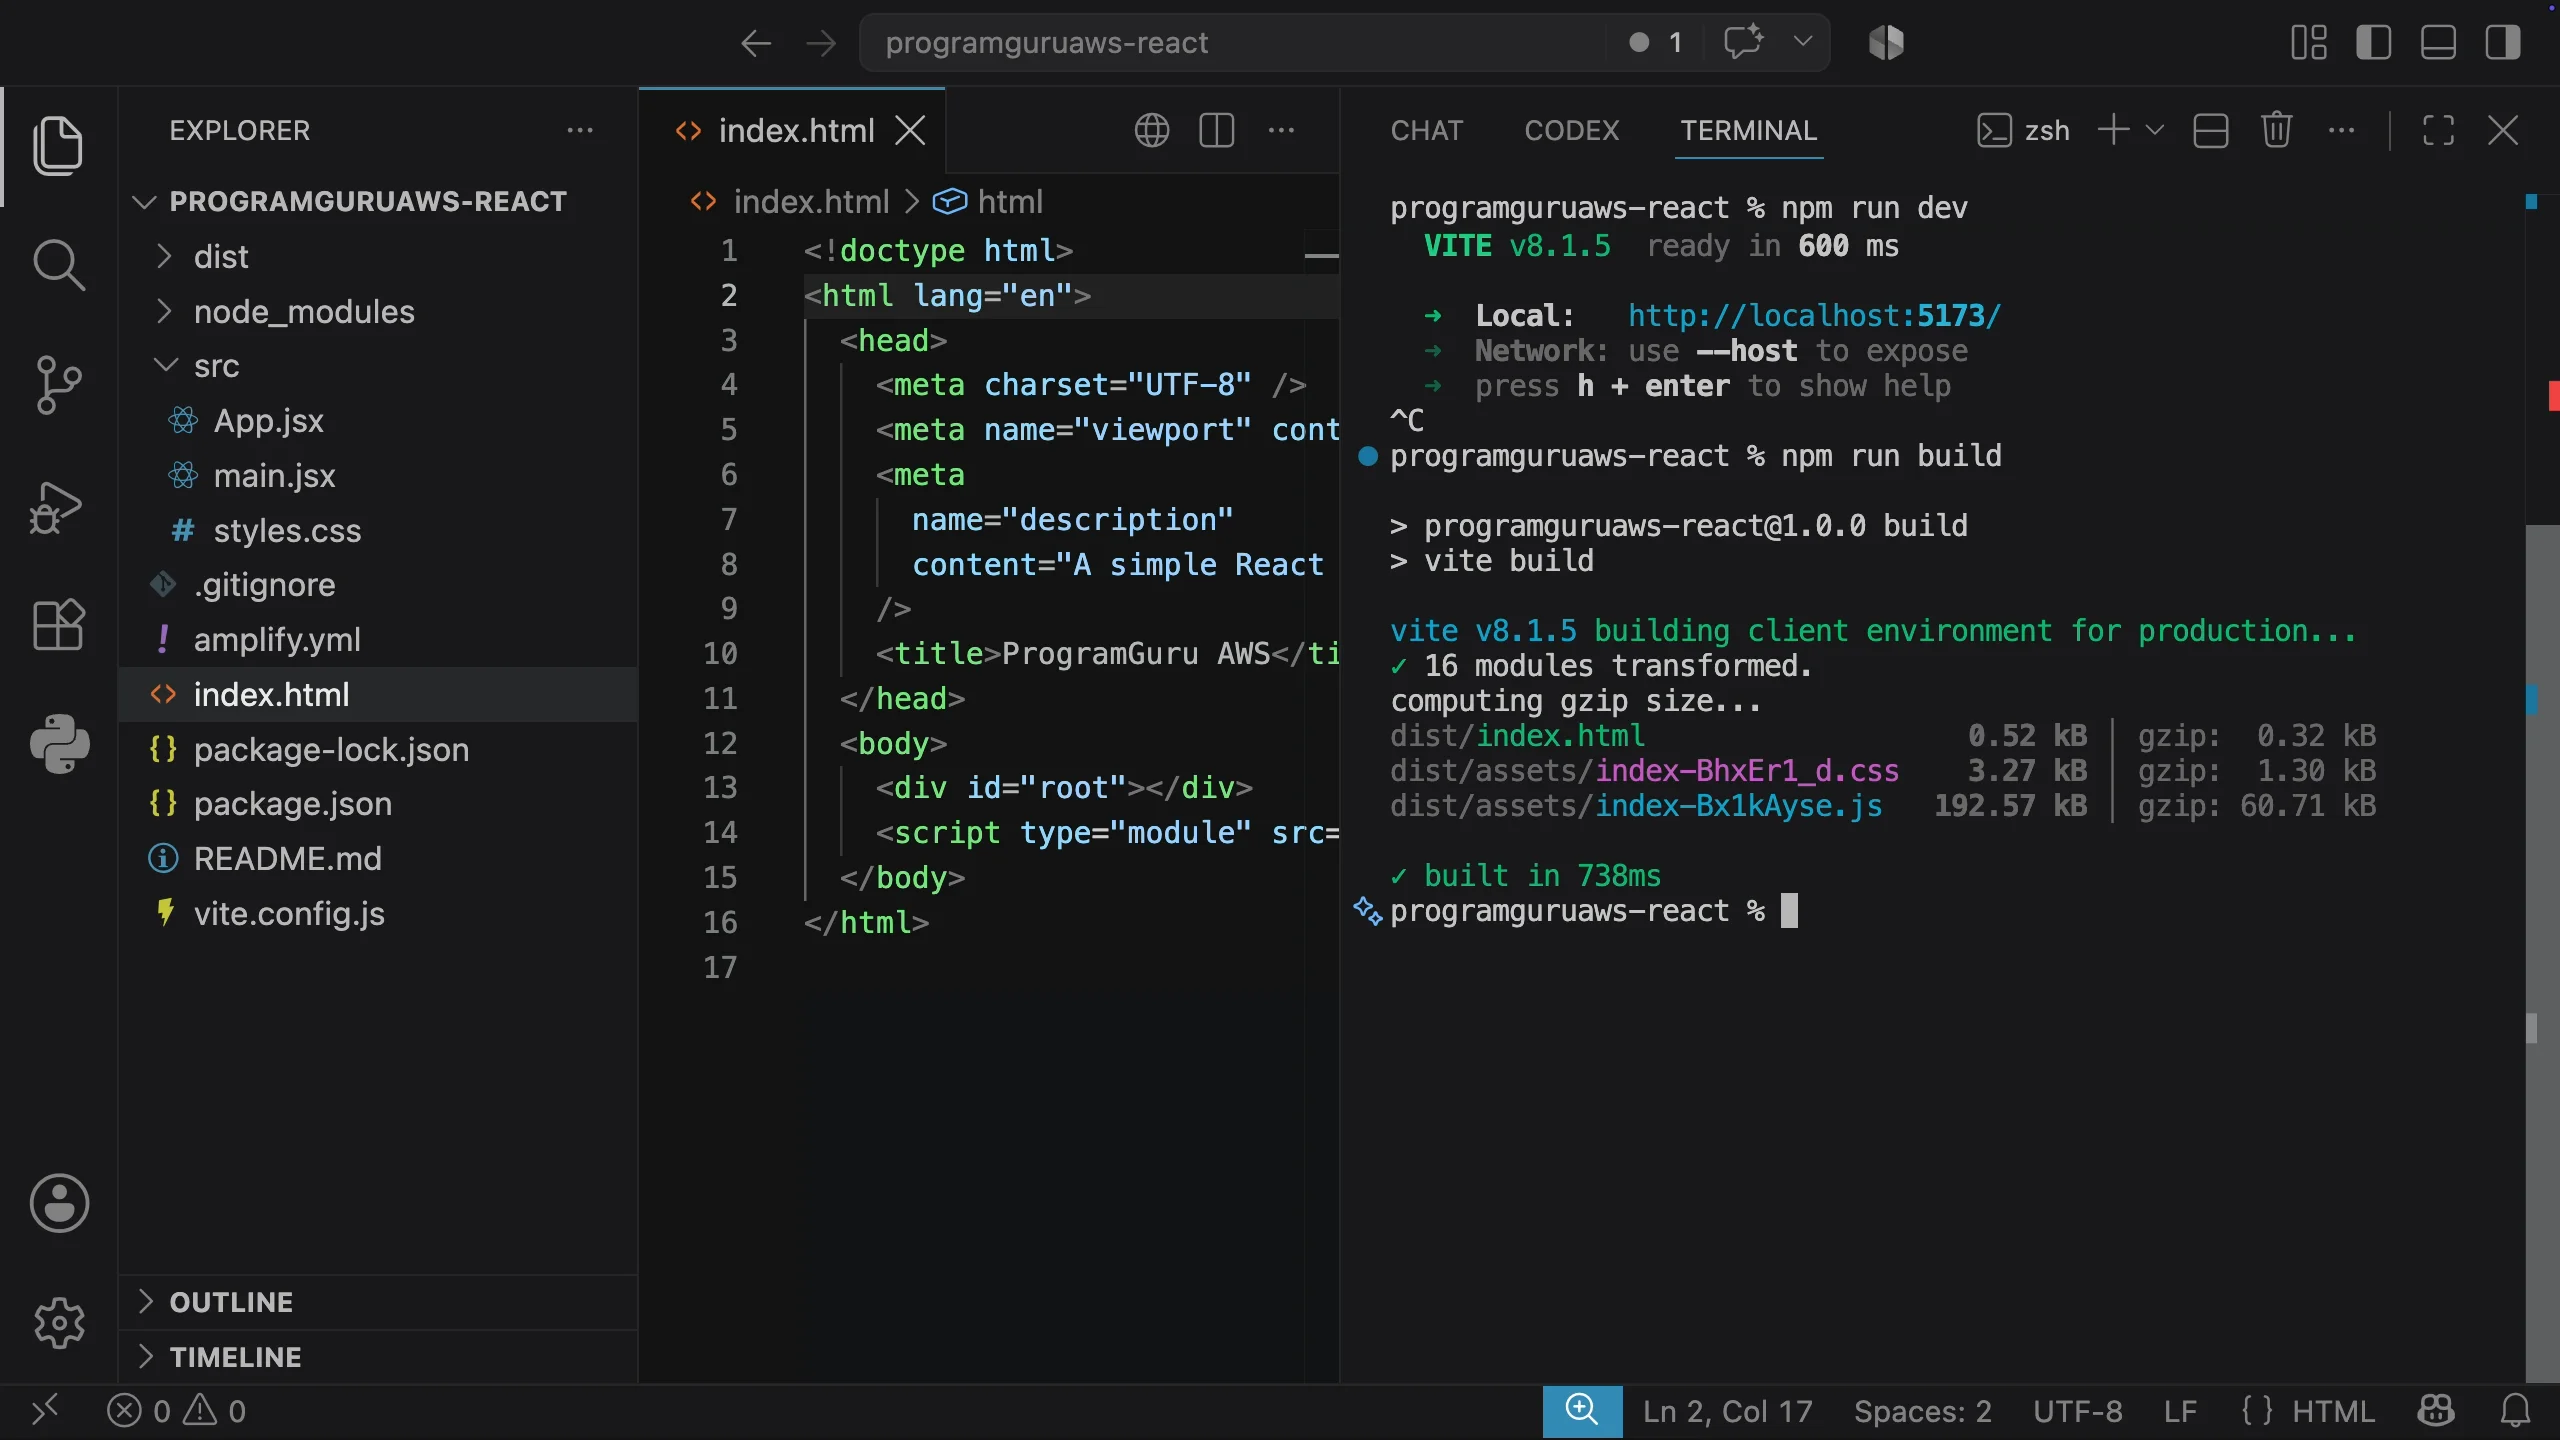
For this Vite application, the generated production files are placed in the dist directory.
These two values will be important later when we configure Amplify:
Build command: npm run build
Output directory: dist
If the production build fails locally, fix the build problem before continuing.
Step 4: Create a GitHub Repository
AWS Amplify will get the application source code from GitHub, so the next step is to create a repository for the project.
Sign in to GitHub and open the repositories page.
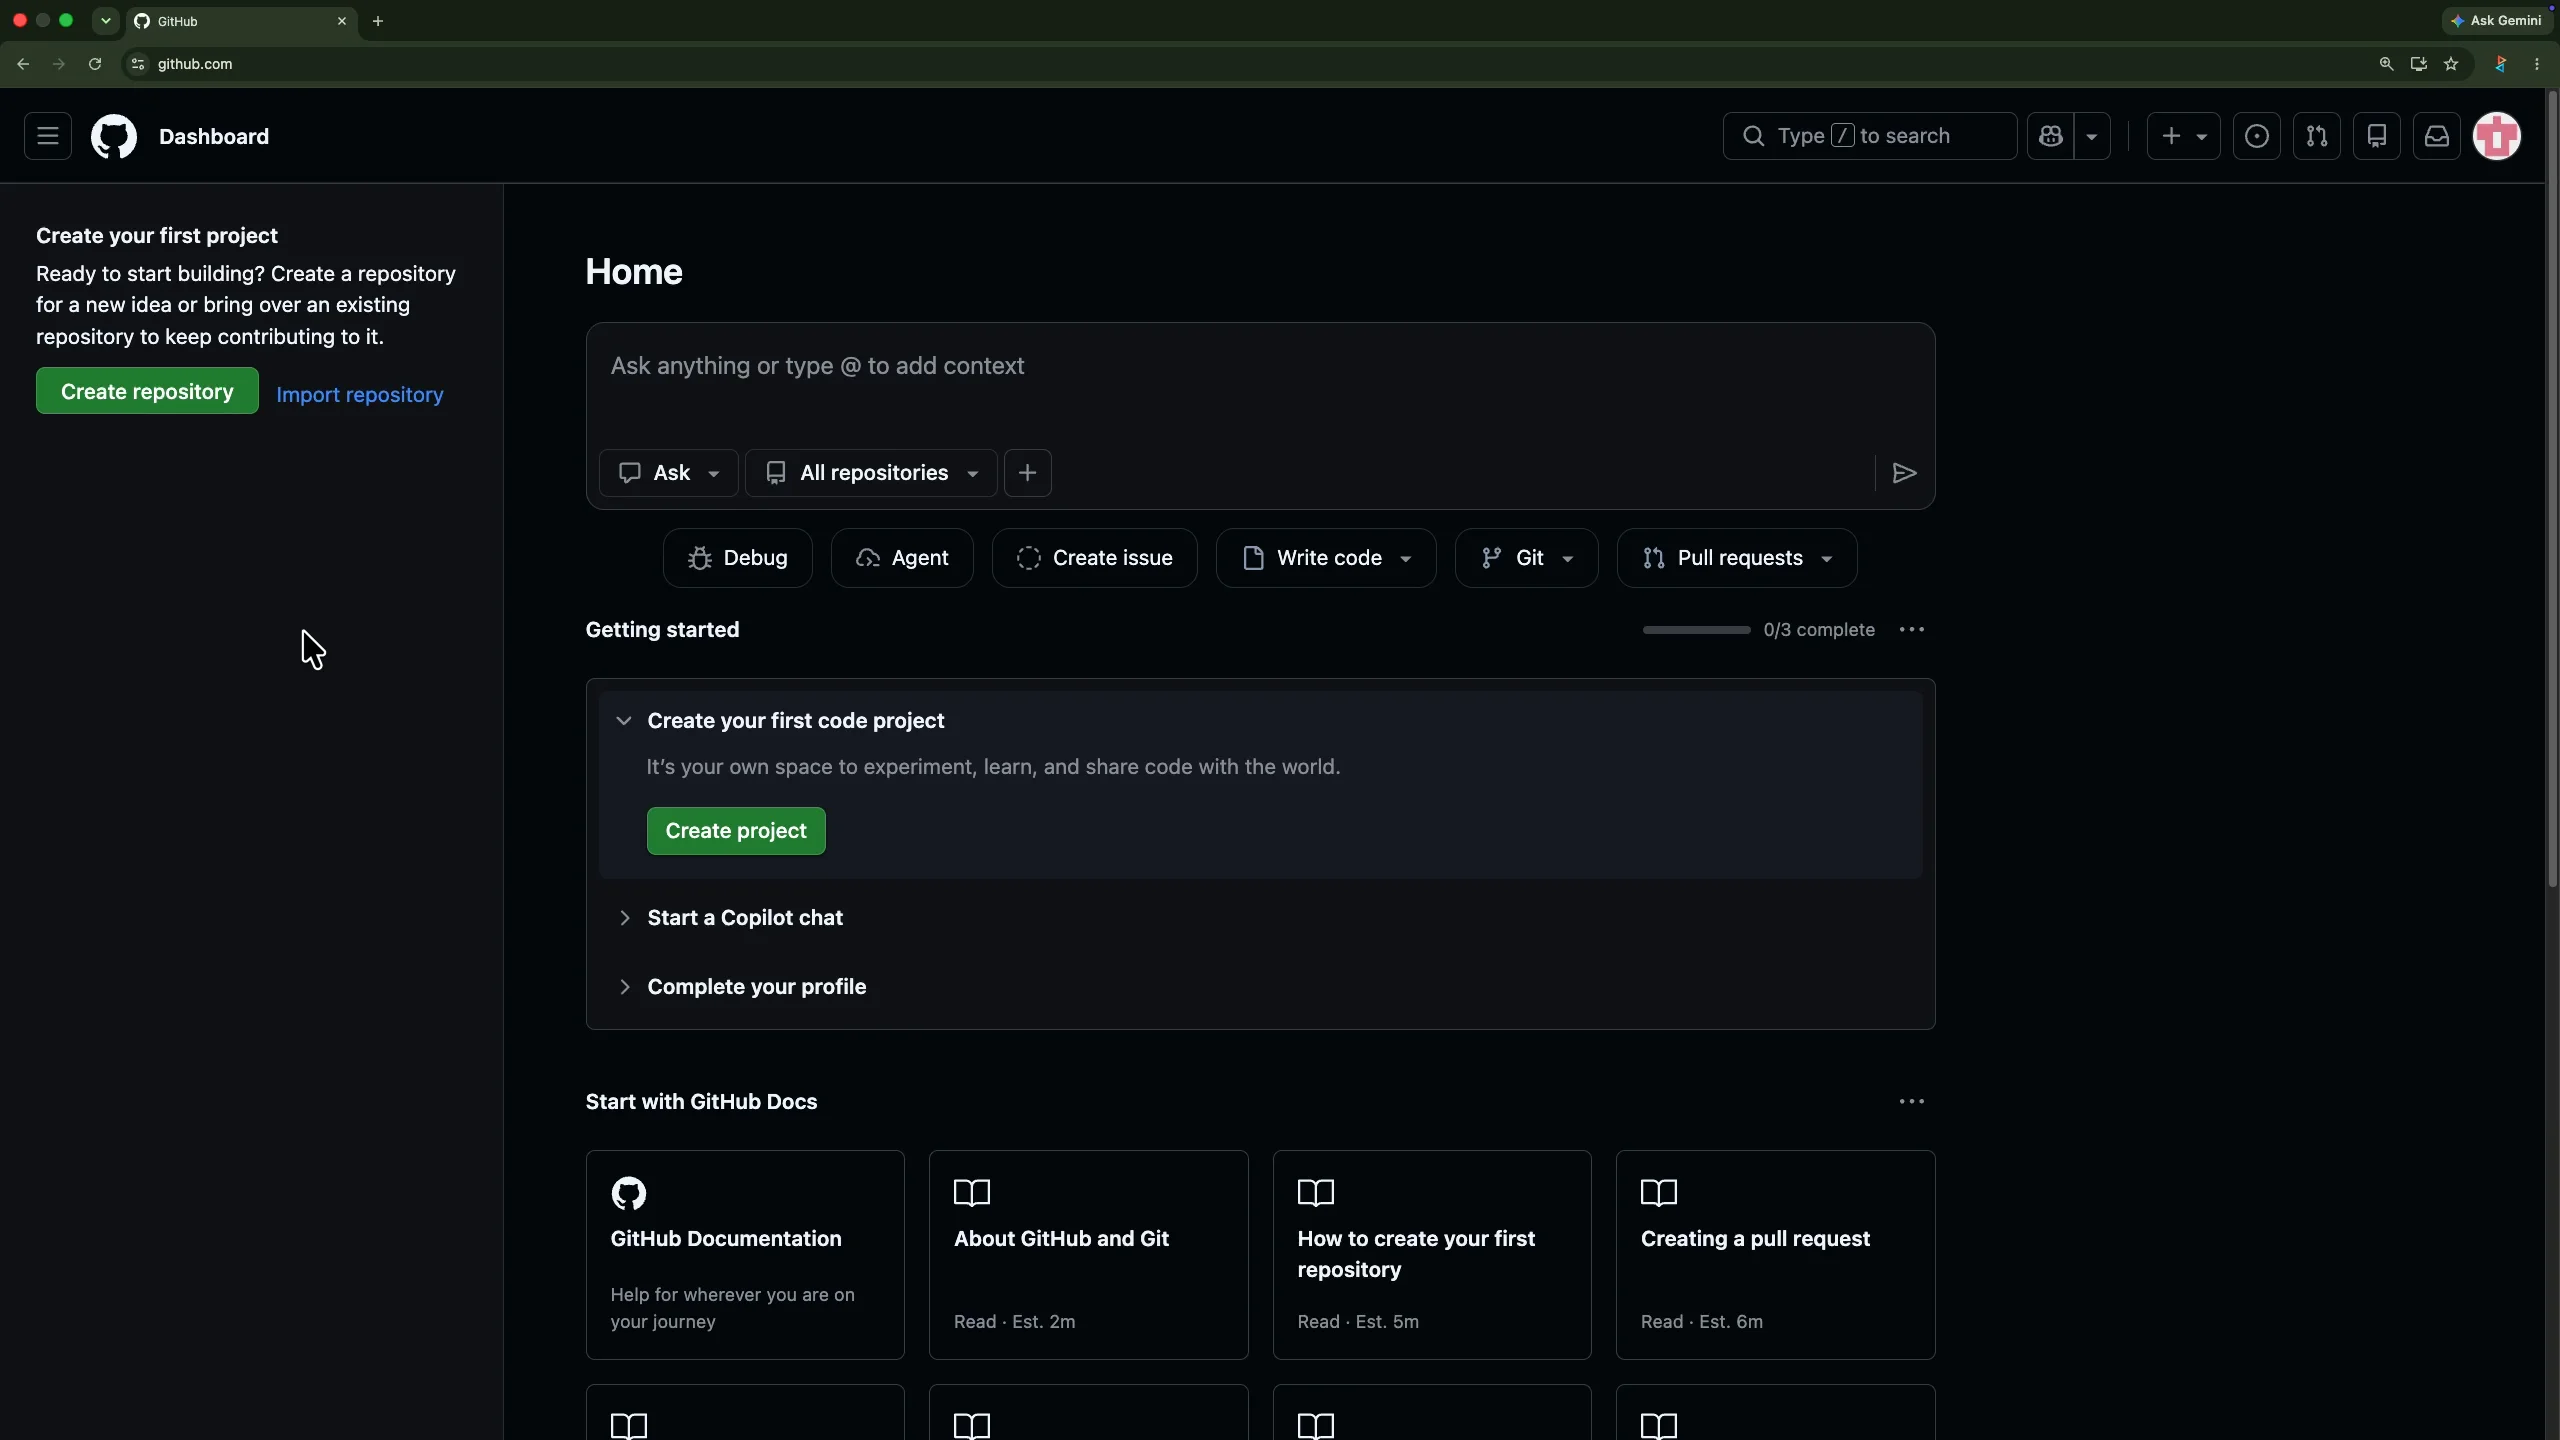
Choose New repository.
For this tutorial, the repository name is:
programguruaws-react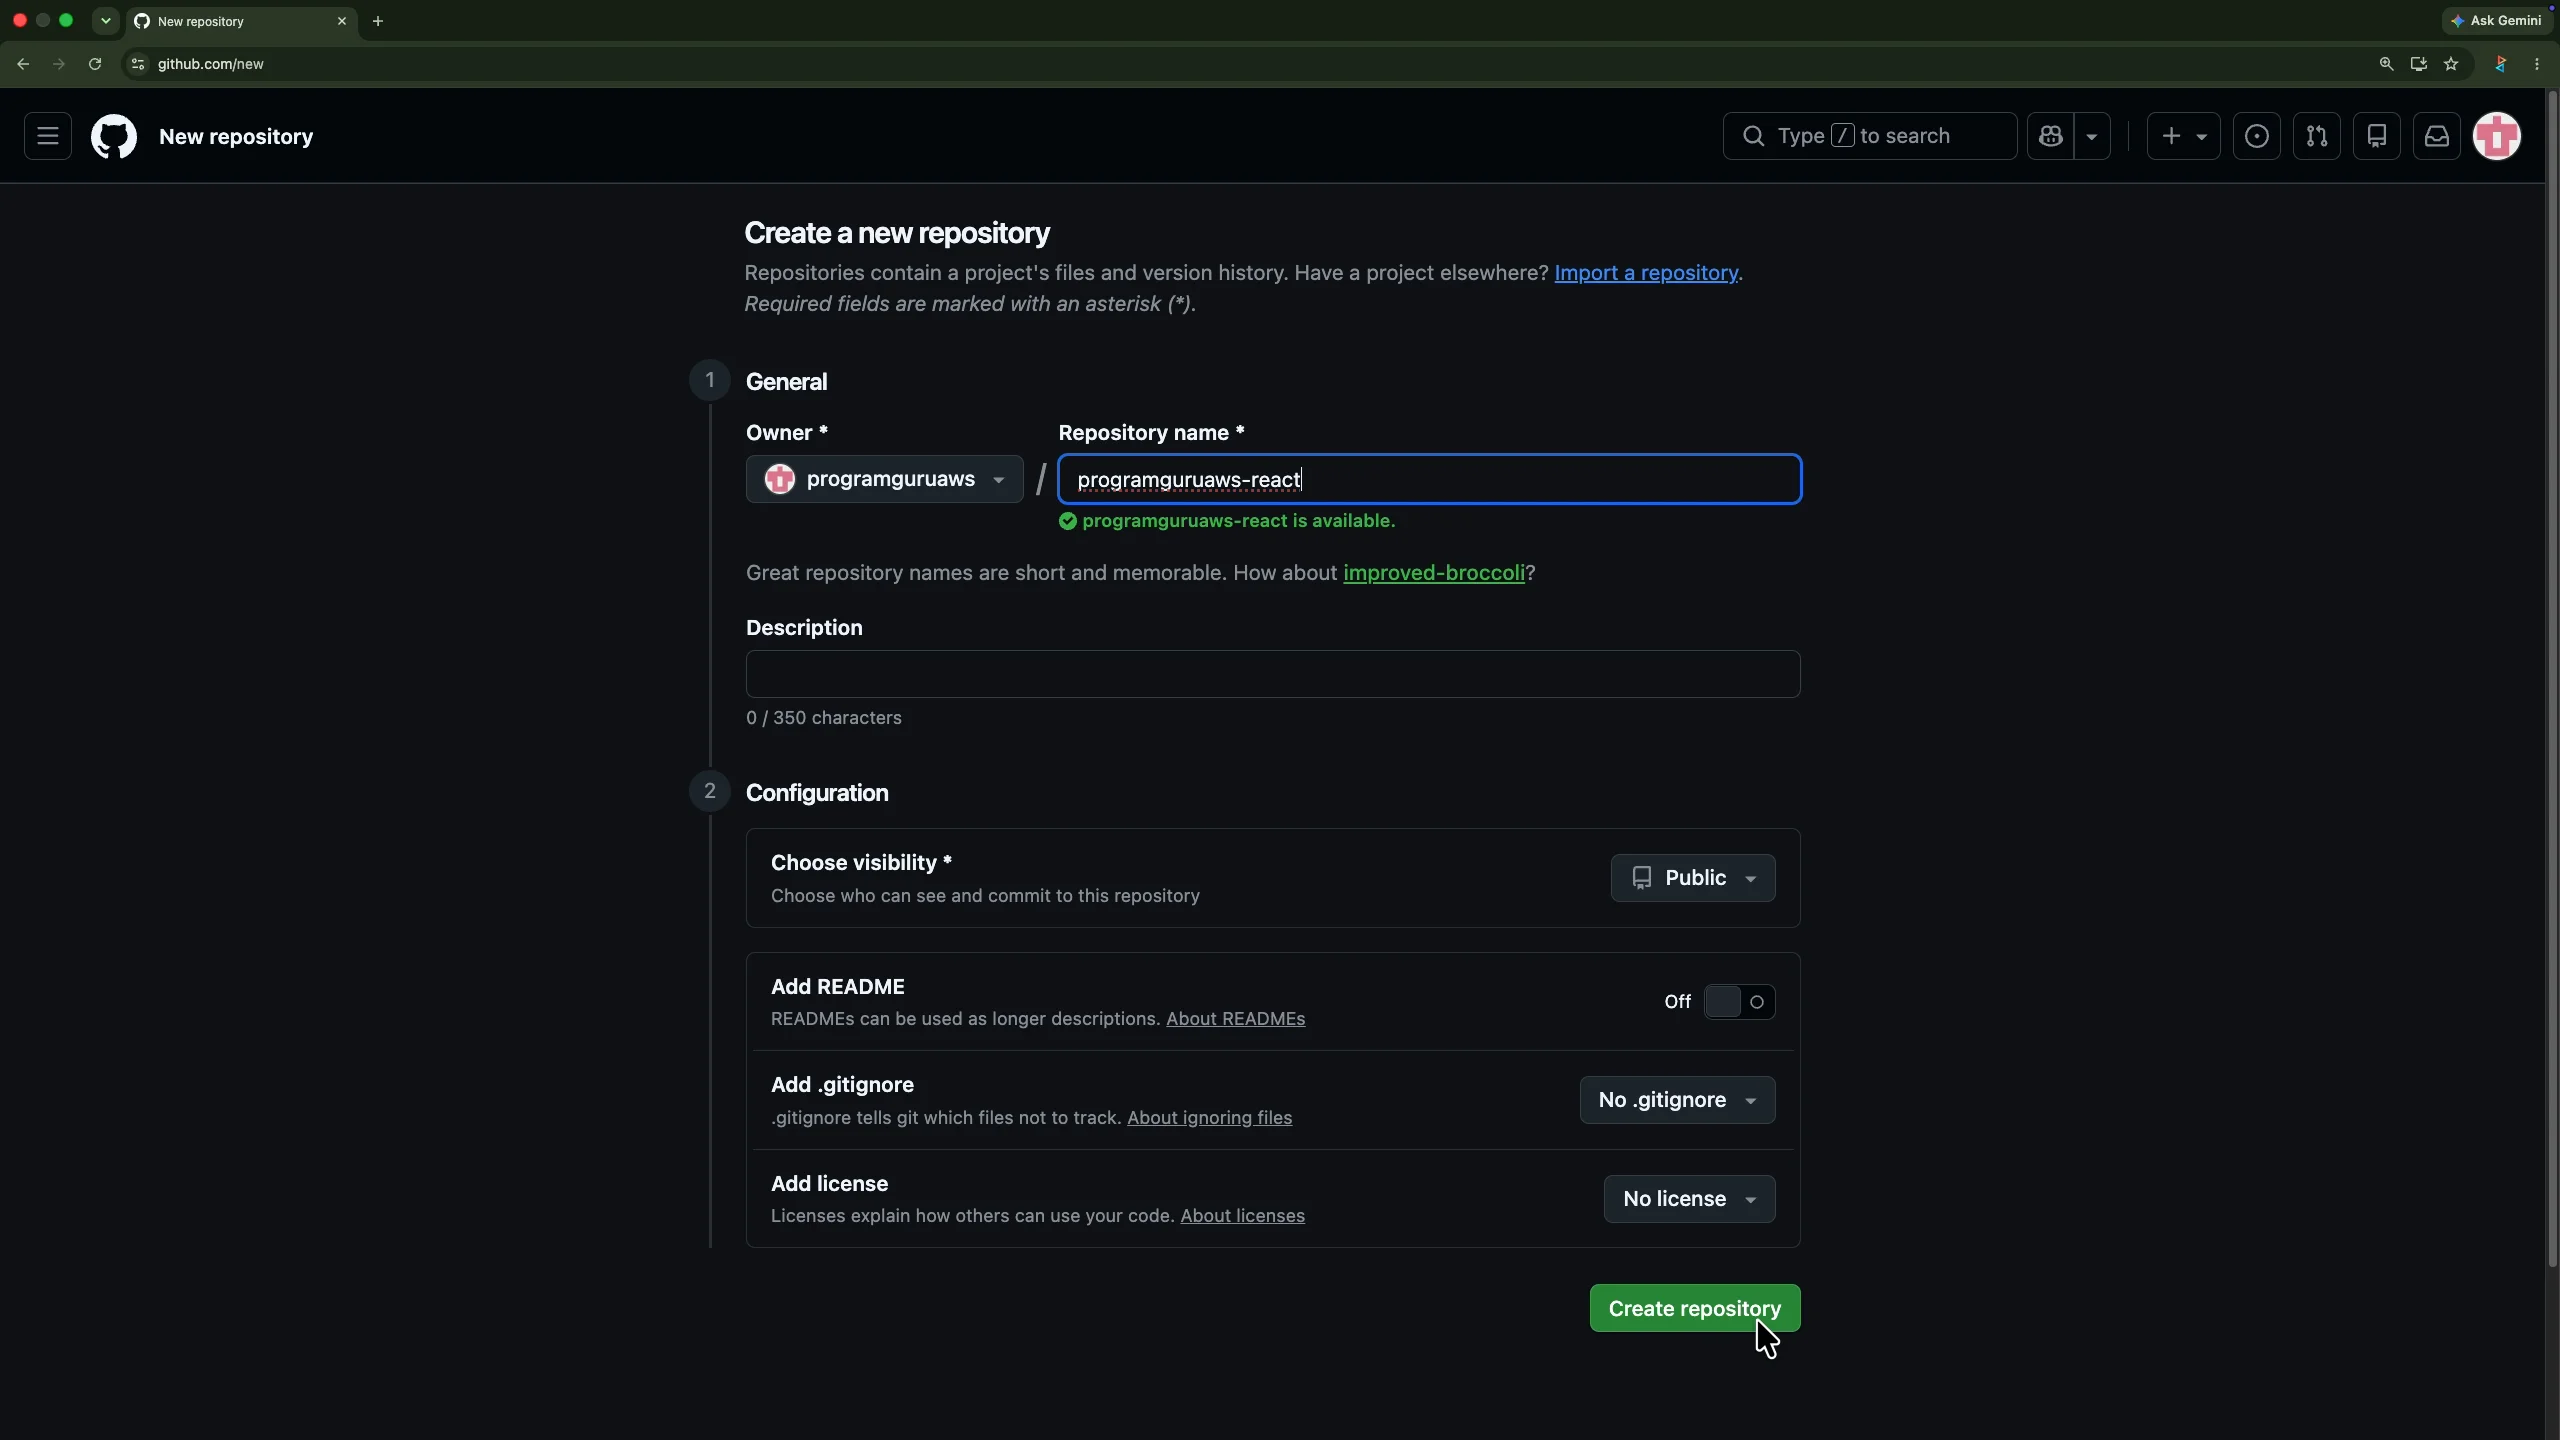
Since the React project already exists locally, there is no need to ask GitHub to create another README file, .gitignore, or license.
Create the repository.
Step 5: Connect the Local React Project to GitHub
After the repository is created, GitHub displays the commands that can be used to connect an existing local project.
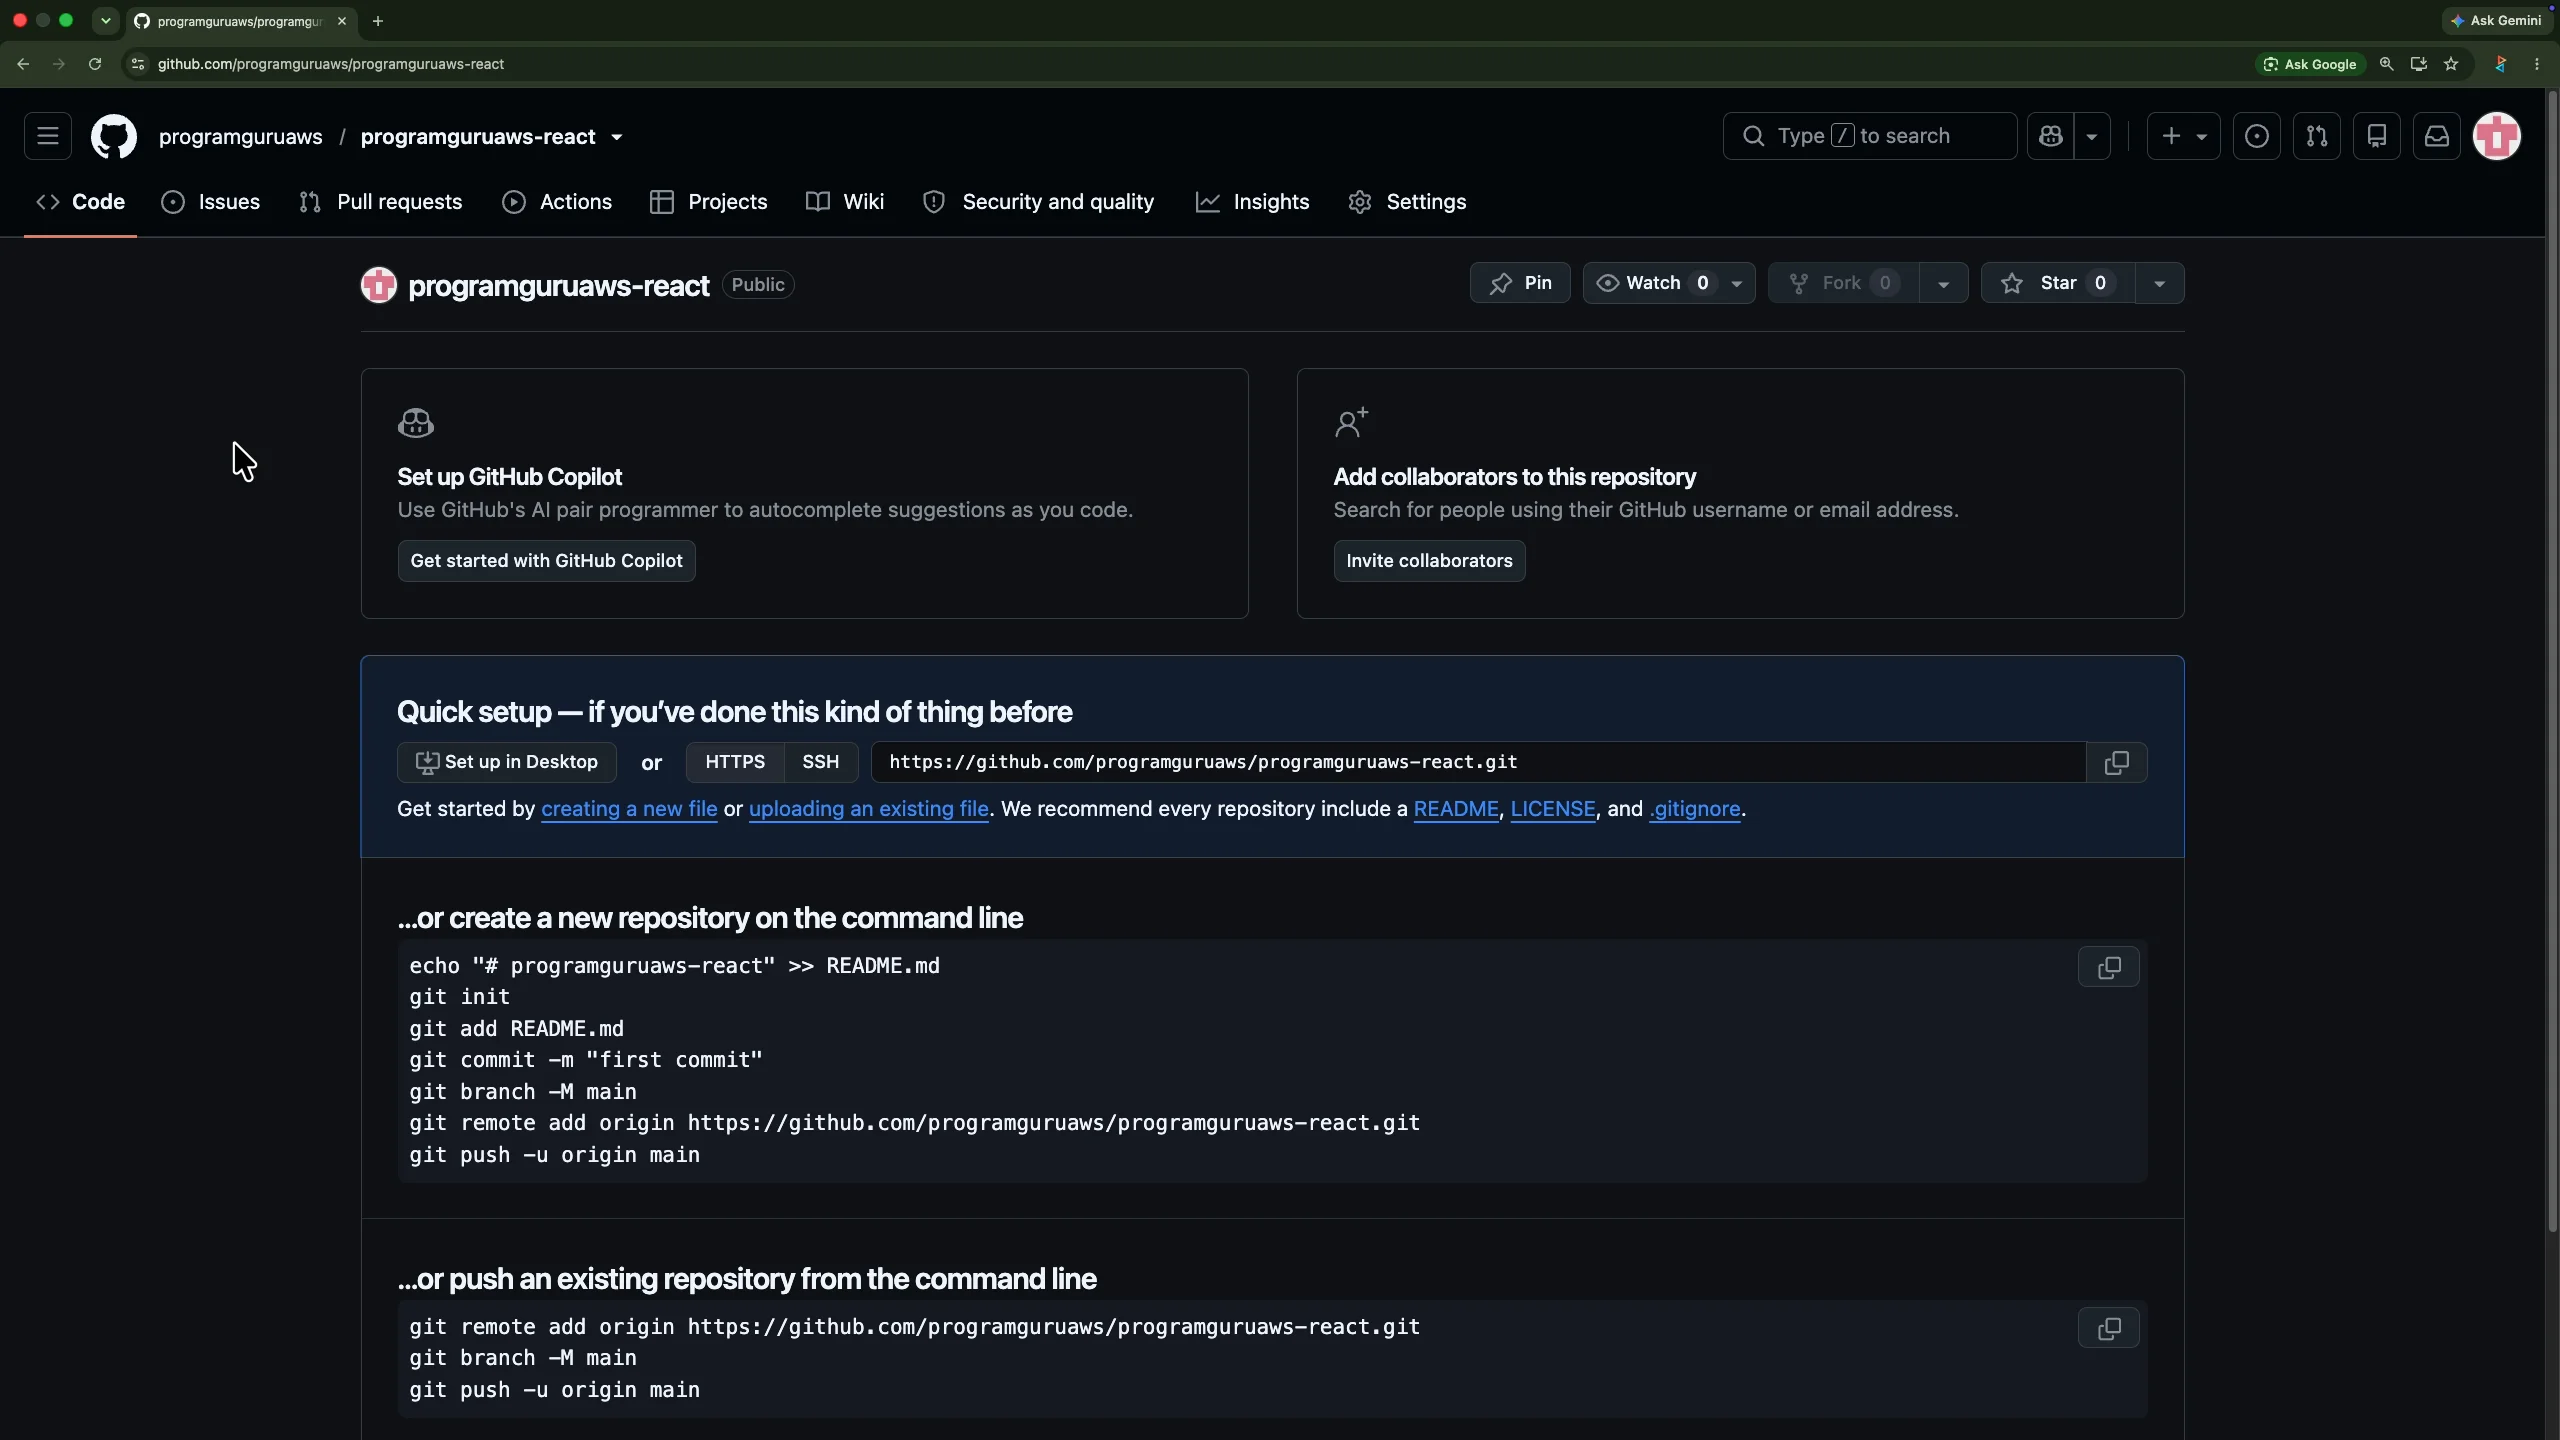
Return to the terminal inside the React project.
Initialize a Git repository:
git initAdd the project files:
git add .Create the first commit:
git commit -m "Initial React application"Make sure the main branch is named main:
git branch -M mainNow add the GitHub repository as the remote origin. Replace the URL below with the URL of your own repository if necessary.
git remote add origin https://github.com/programguruaws/programguruaws-reactPush the project to GitHub:
git push -u origin main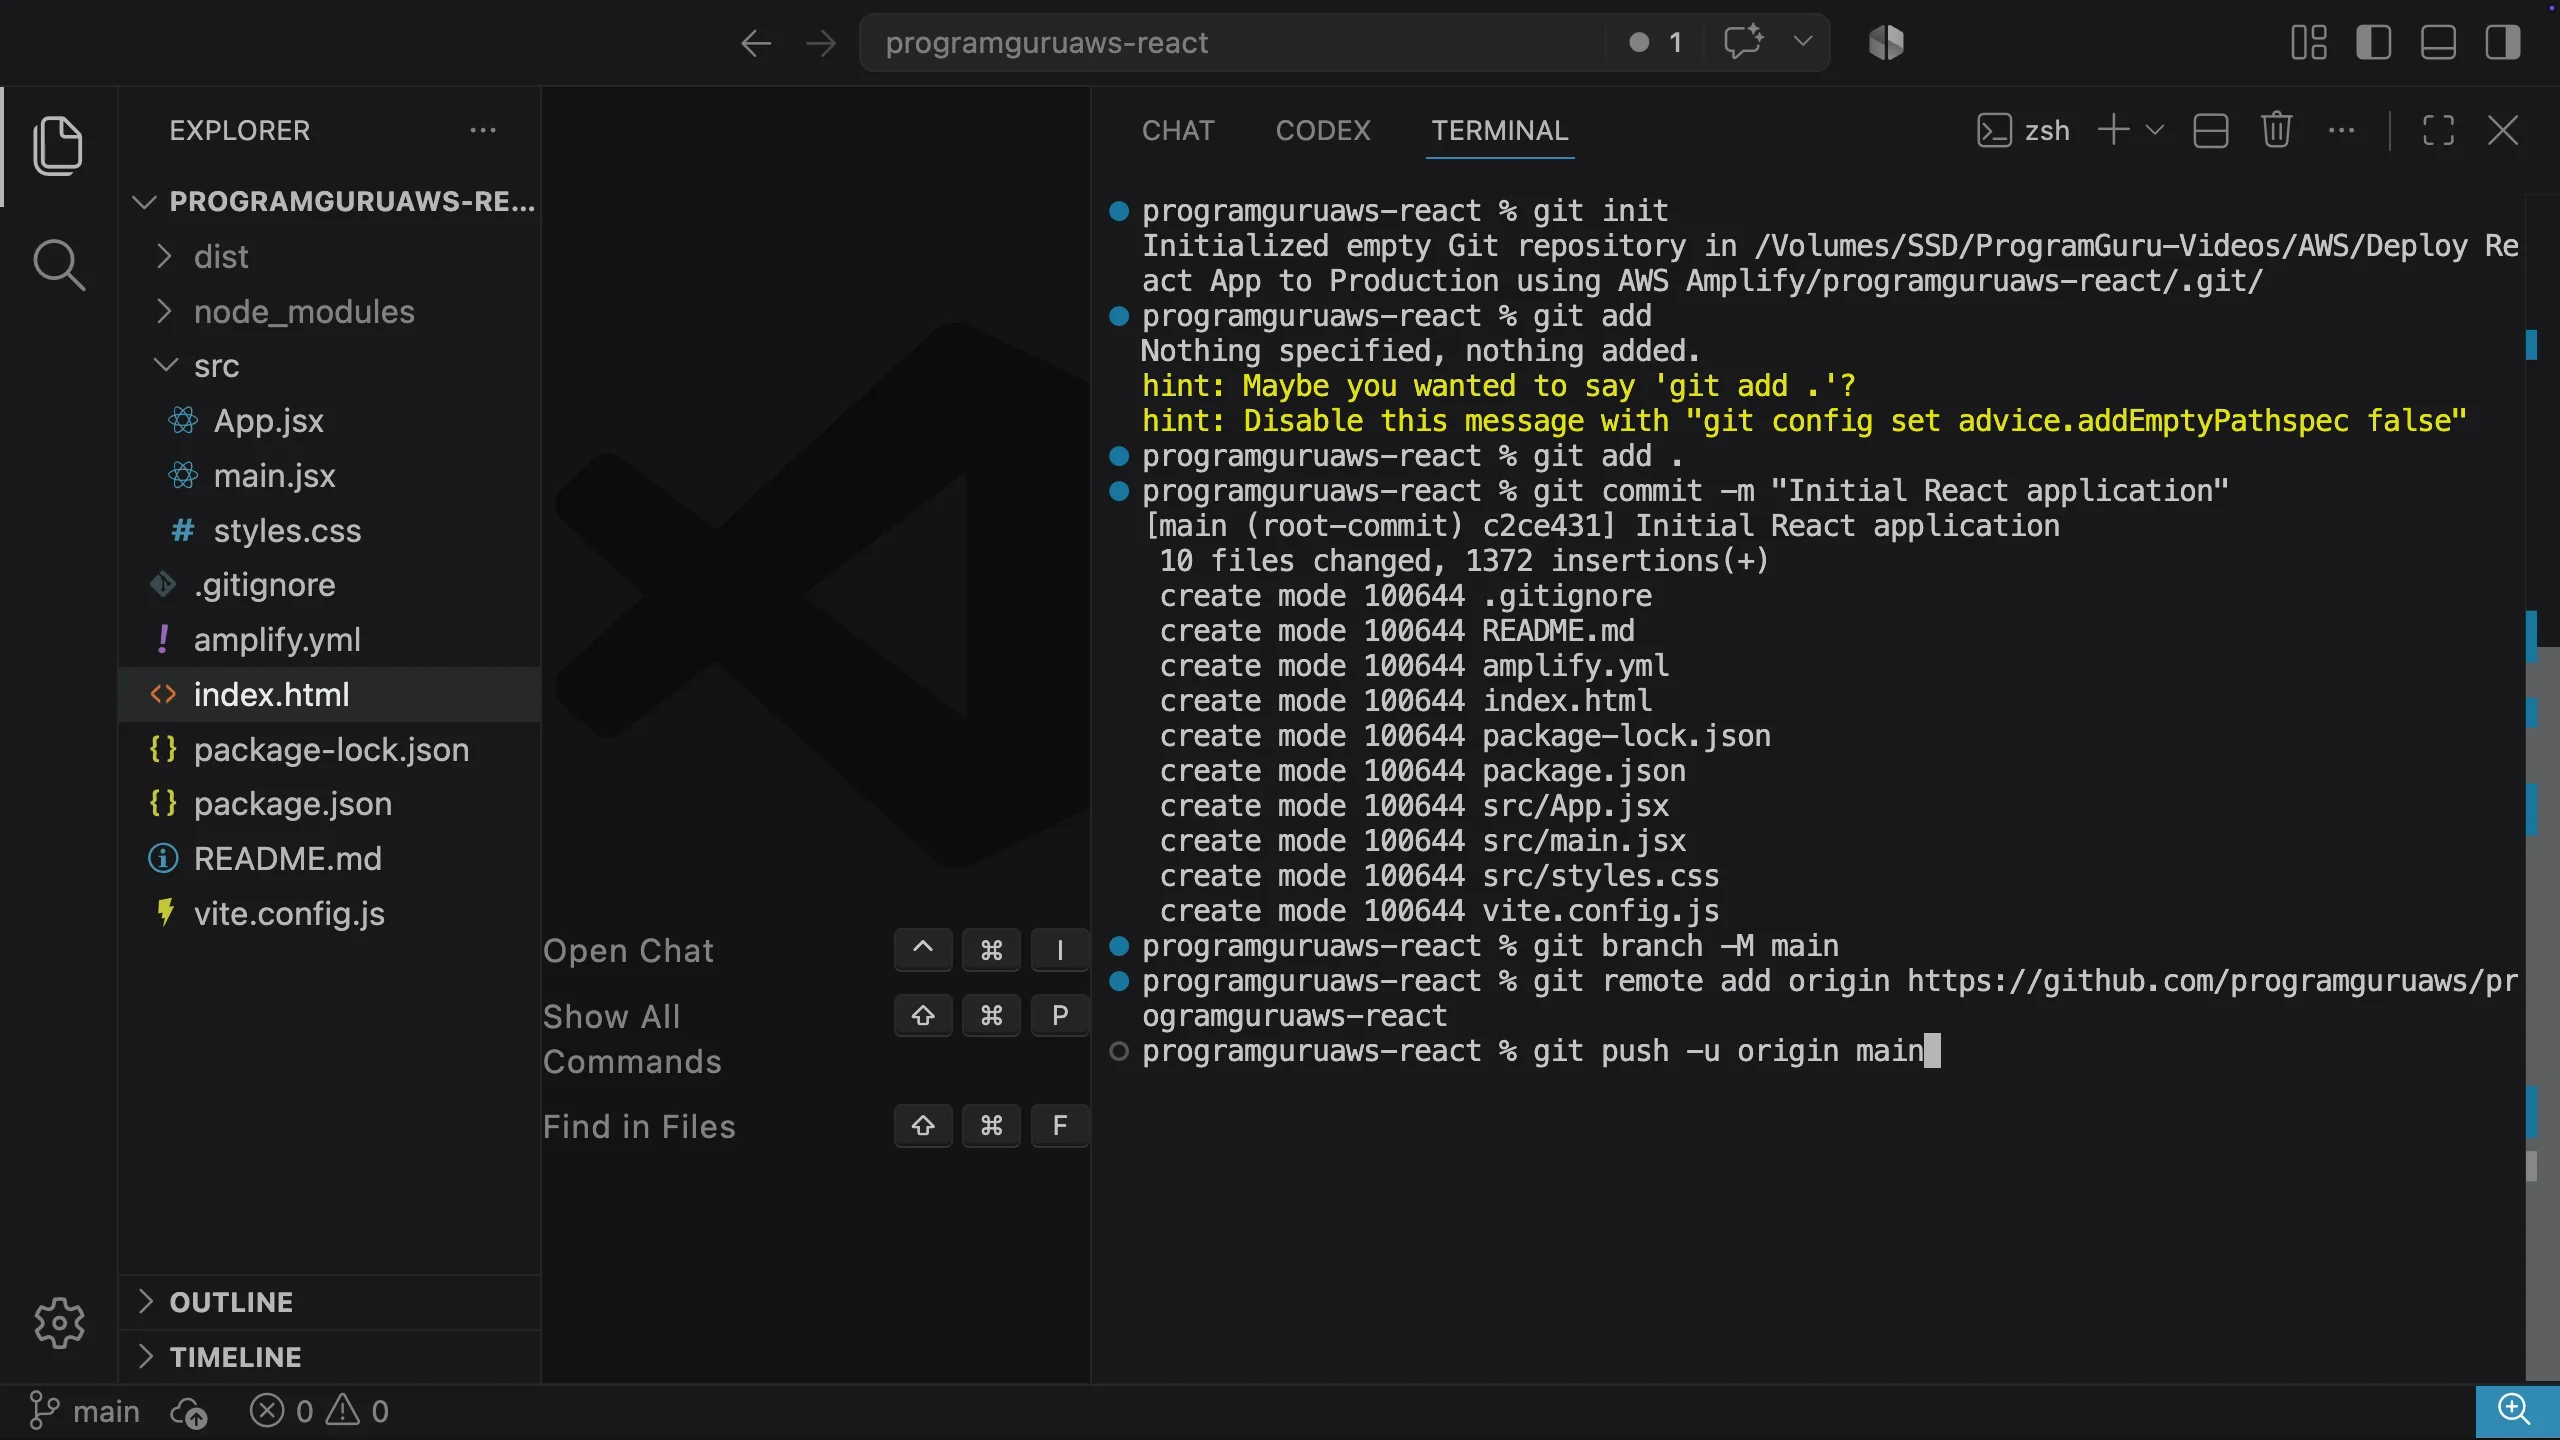
Step 6: Authorize Visual Studio Code with GitHub if Required
If GitHub authentication has not already been configured on your computer, Visual Studio Code may ask permission to sign in to GitHub when you push the repository.
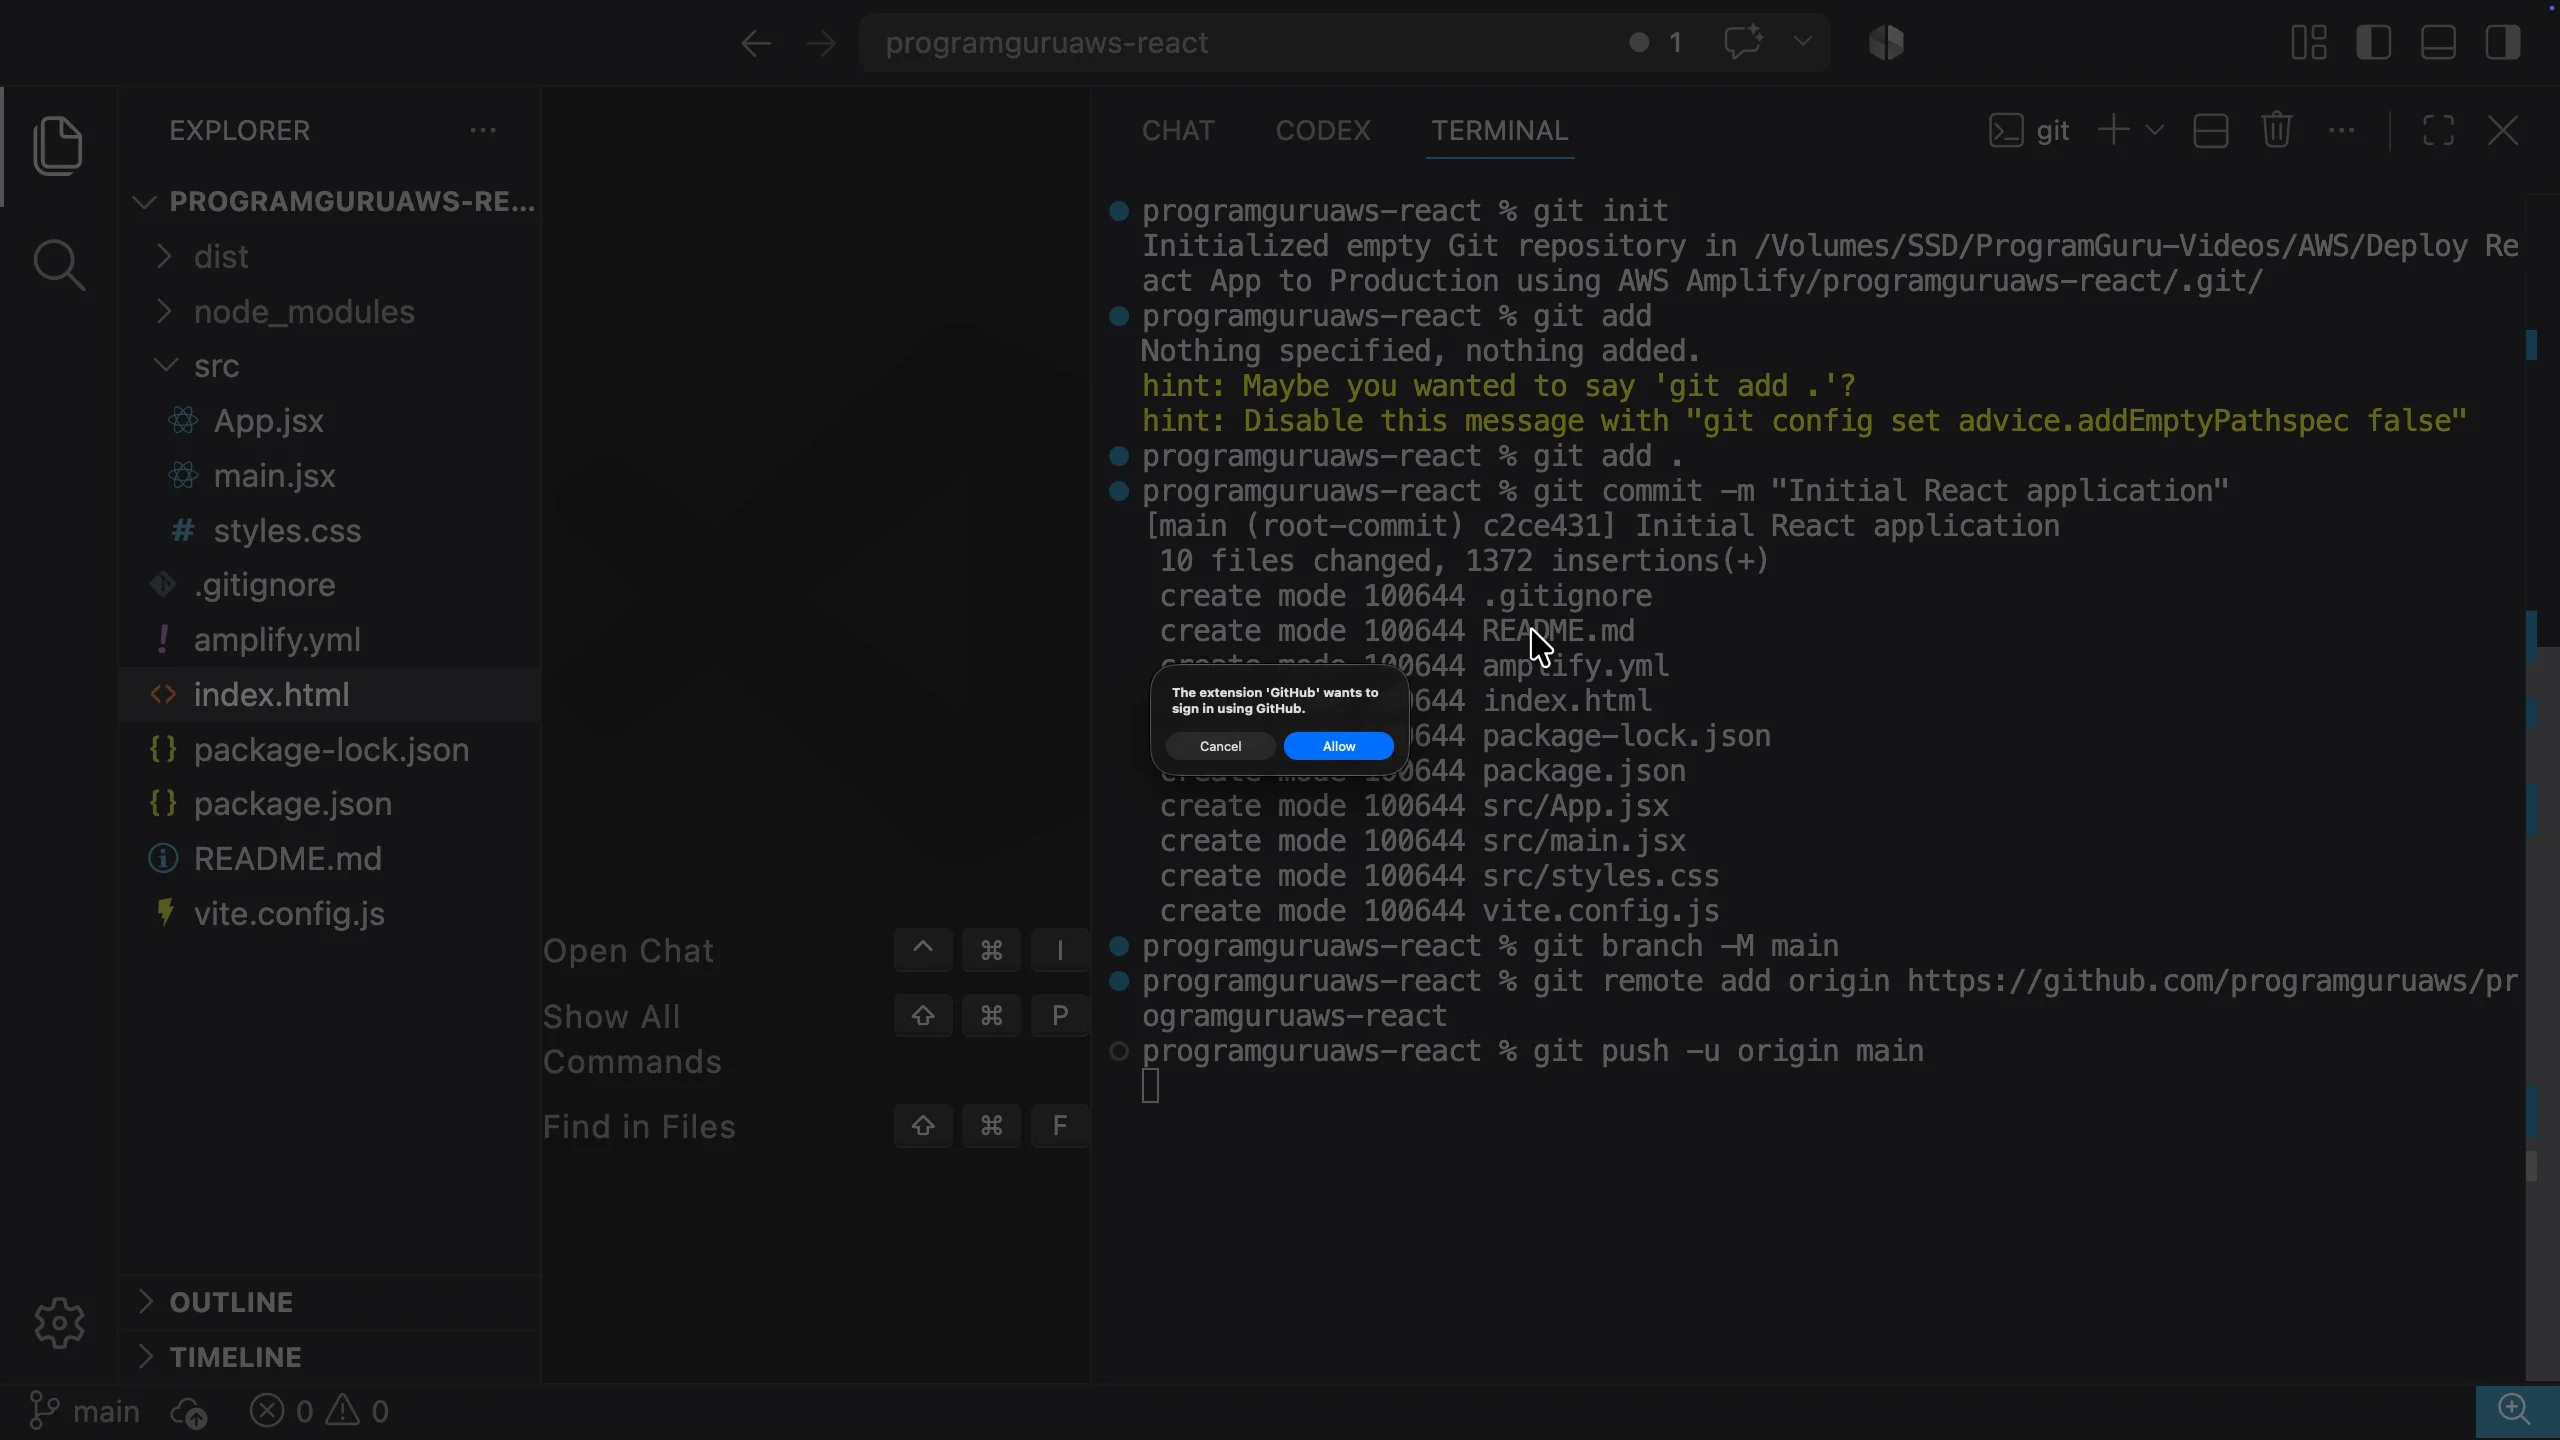
Allow the request. GitHub opens in the browser and asks which account should be used.
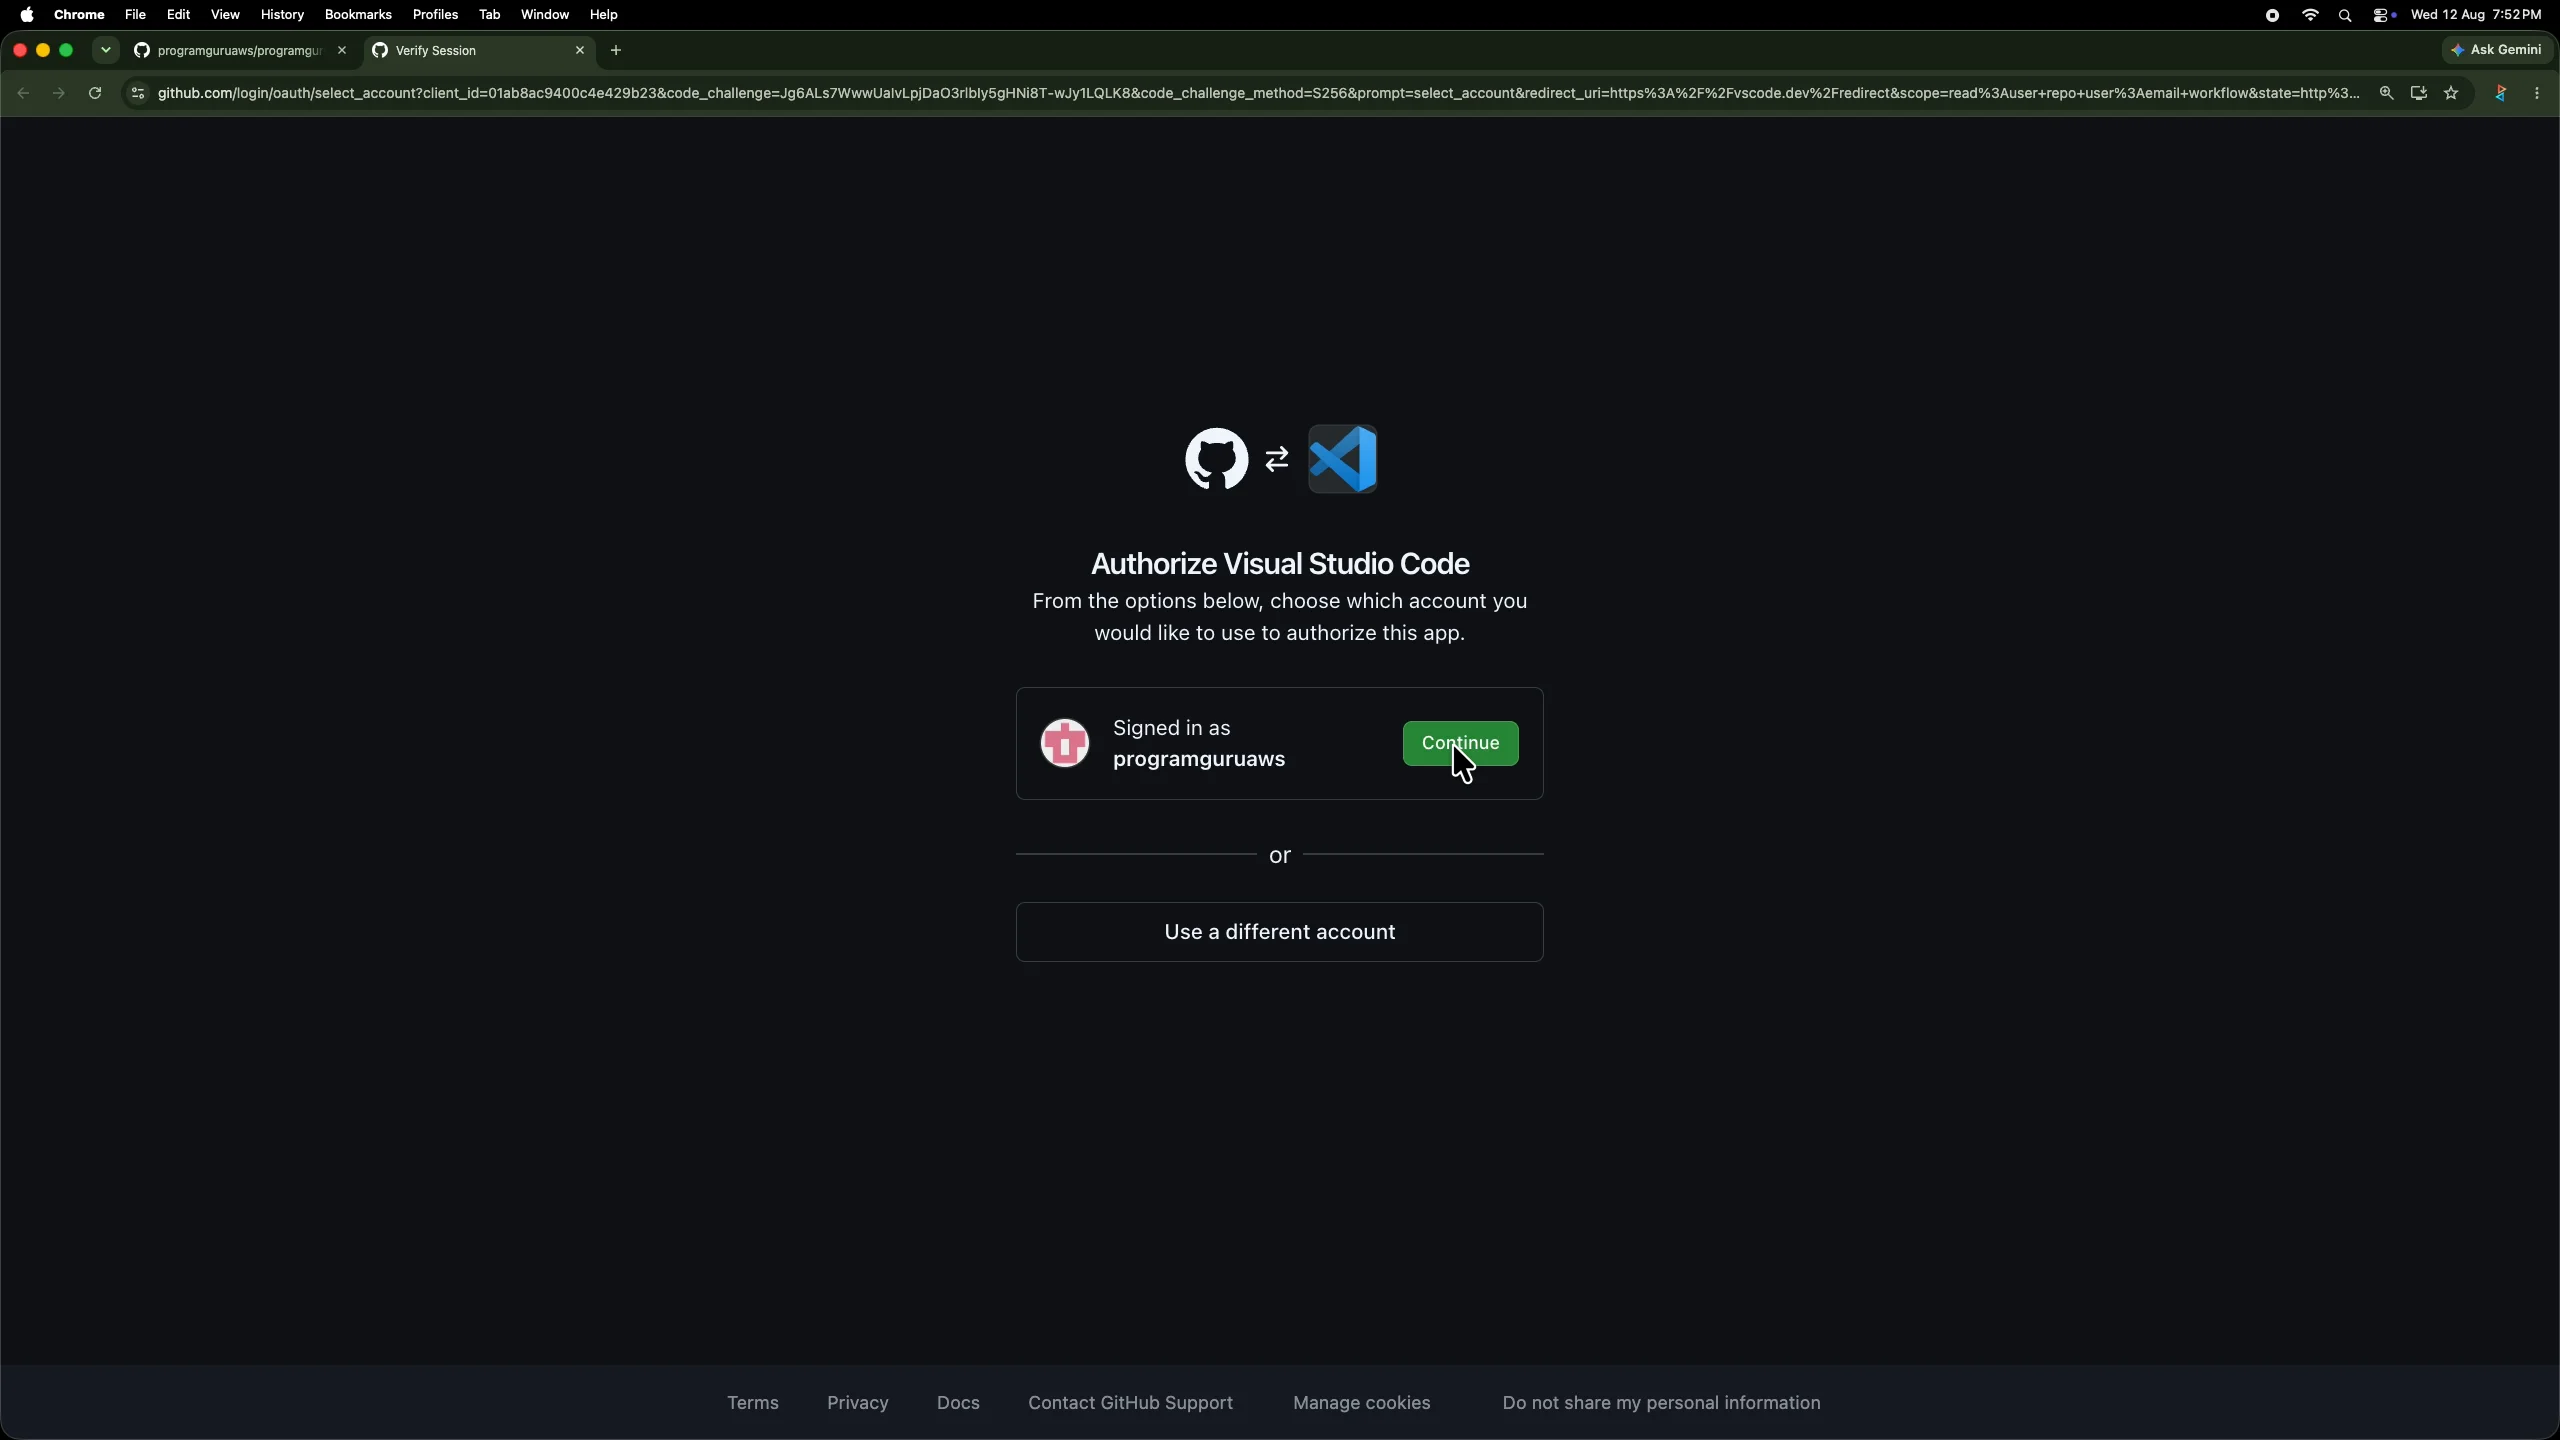
Review the access request and authorize Visual Studio Code.
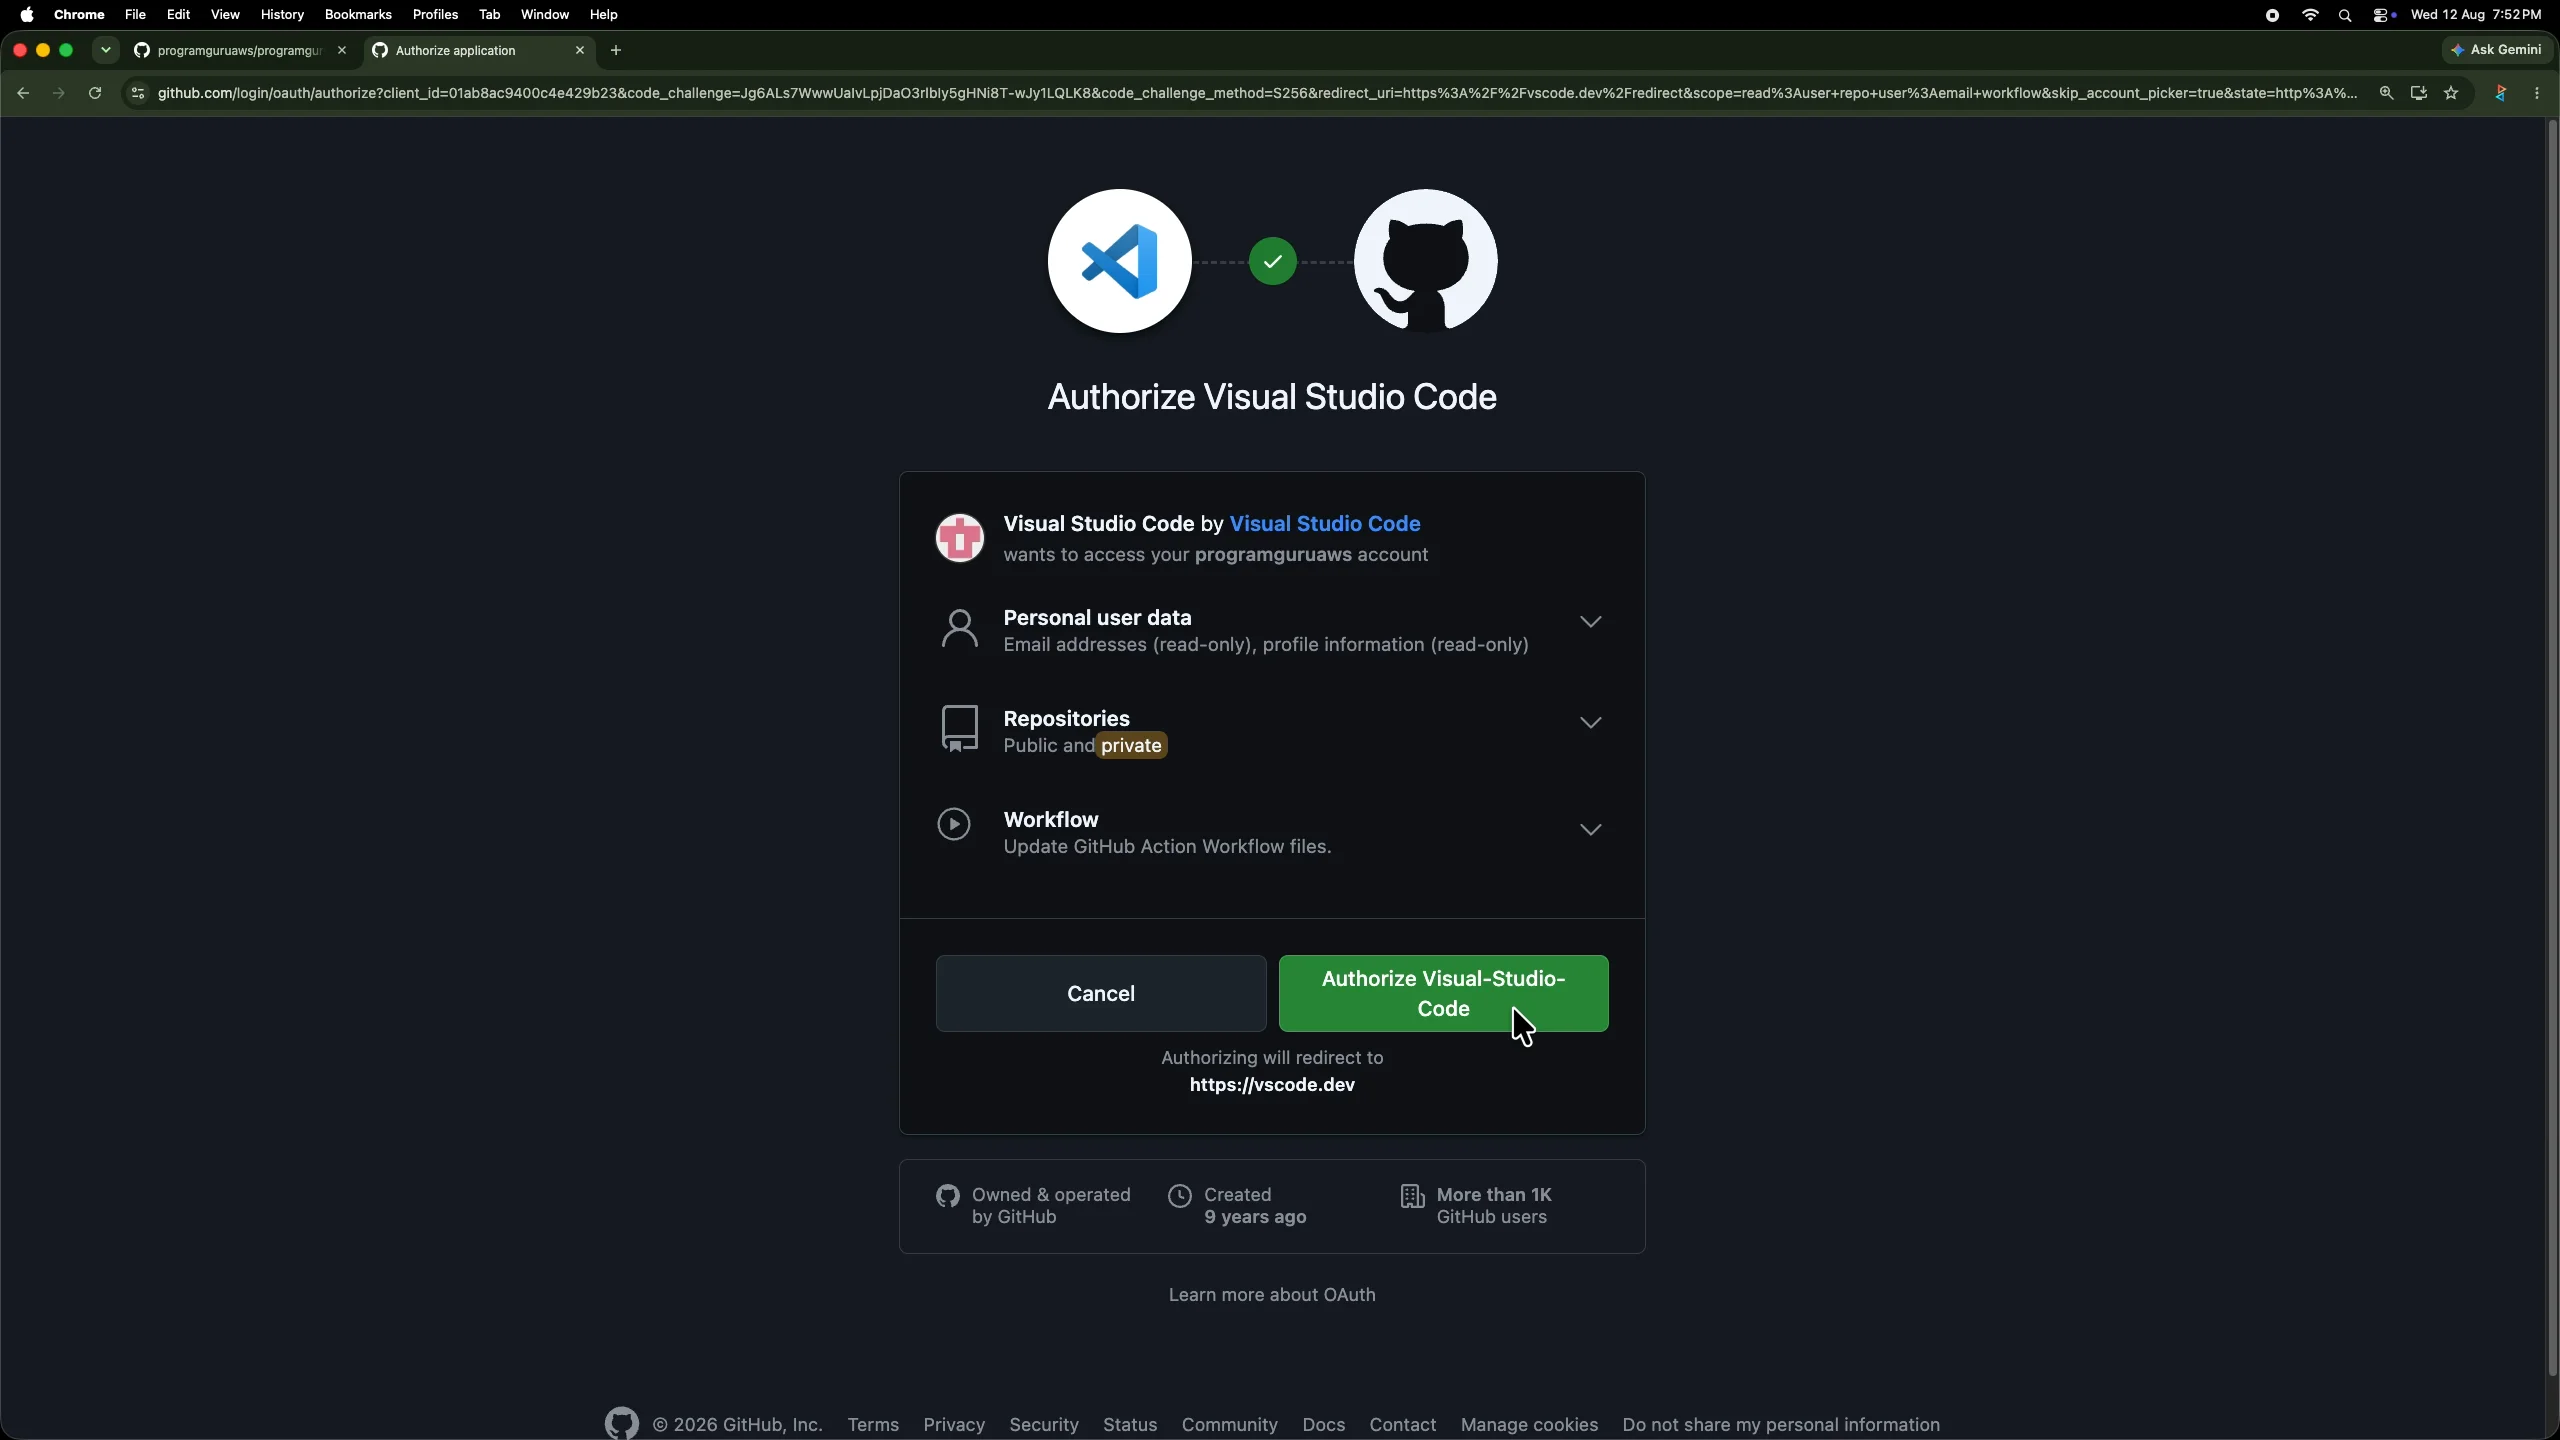
This authorization is related to pushing the local source code from Visual Studio Code to GitHub. Later, AWS Amplify will have its own separate GitHub authorization.
Once the GitHub authentication completes, the push should finish successfully.
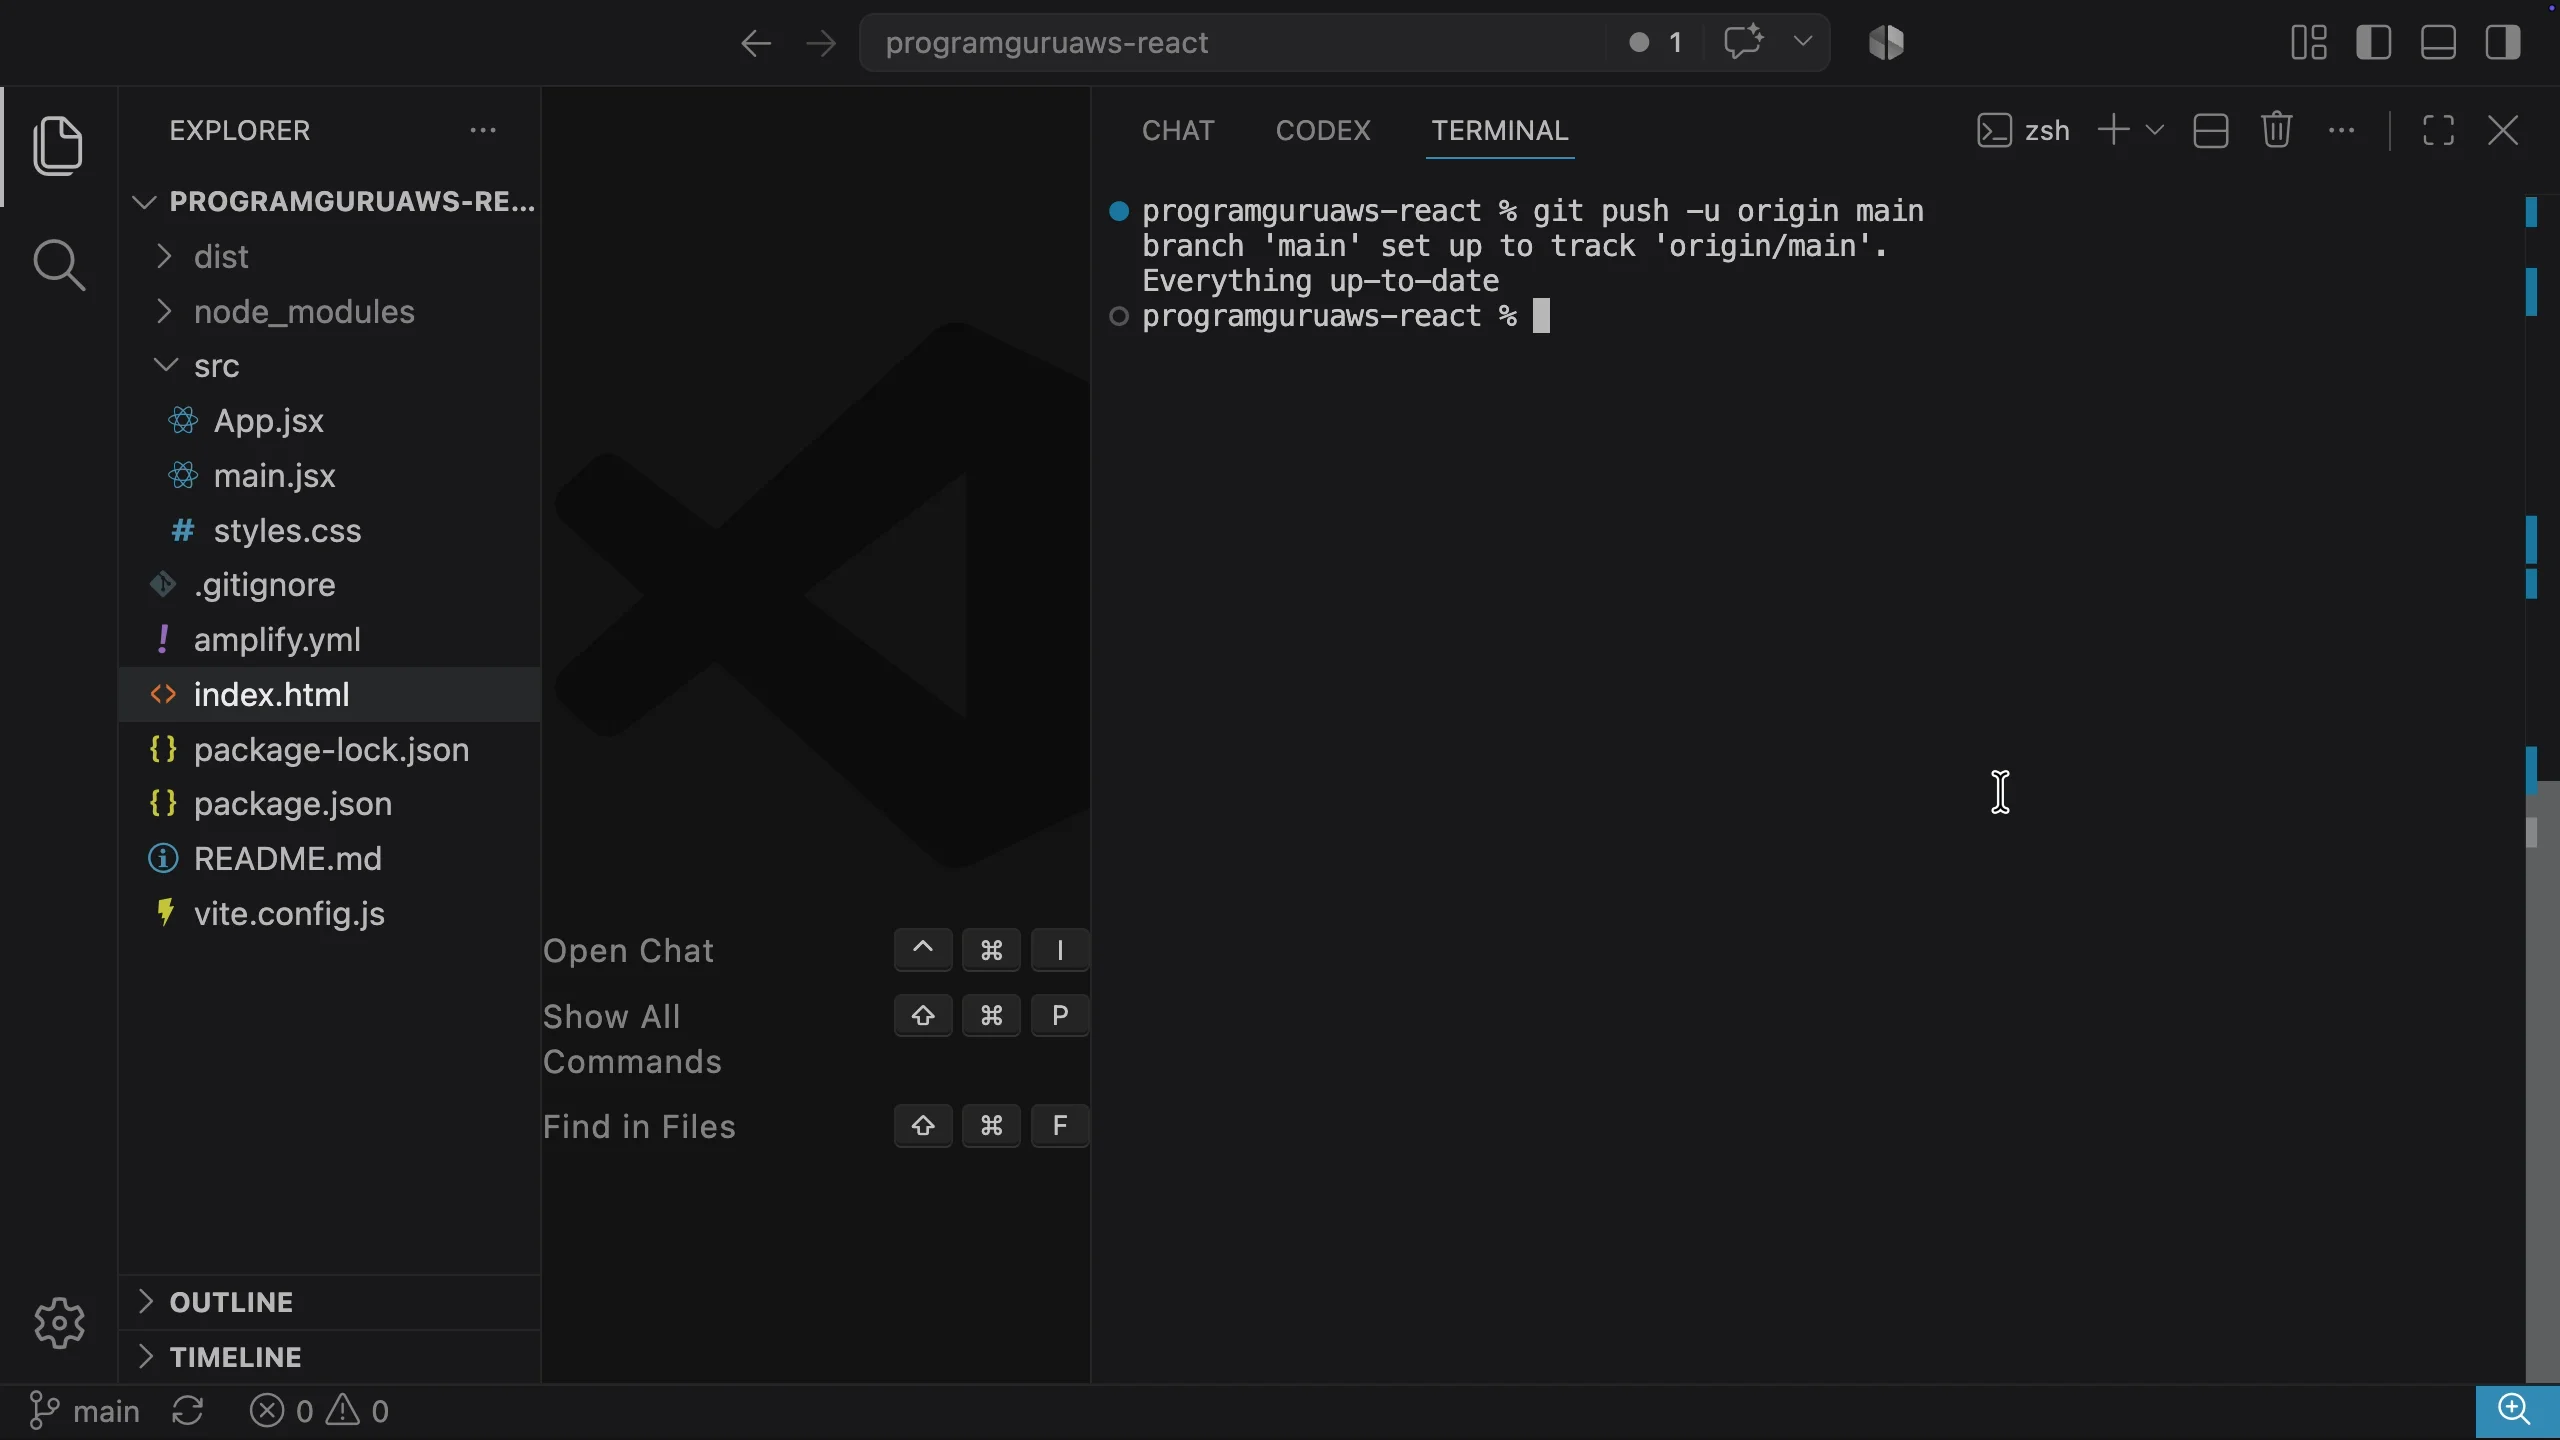
Step 7: Verify the Files in GitHub
Return to the GitHub repository and refresh the page.
You should now see the React project files in the main branch.
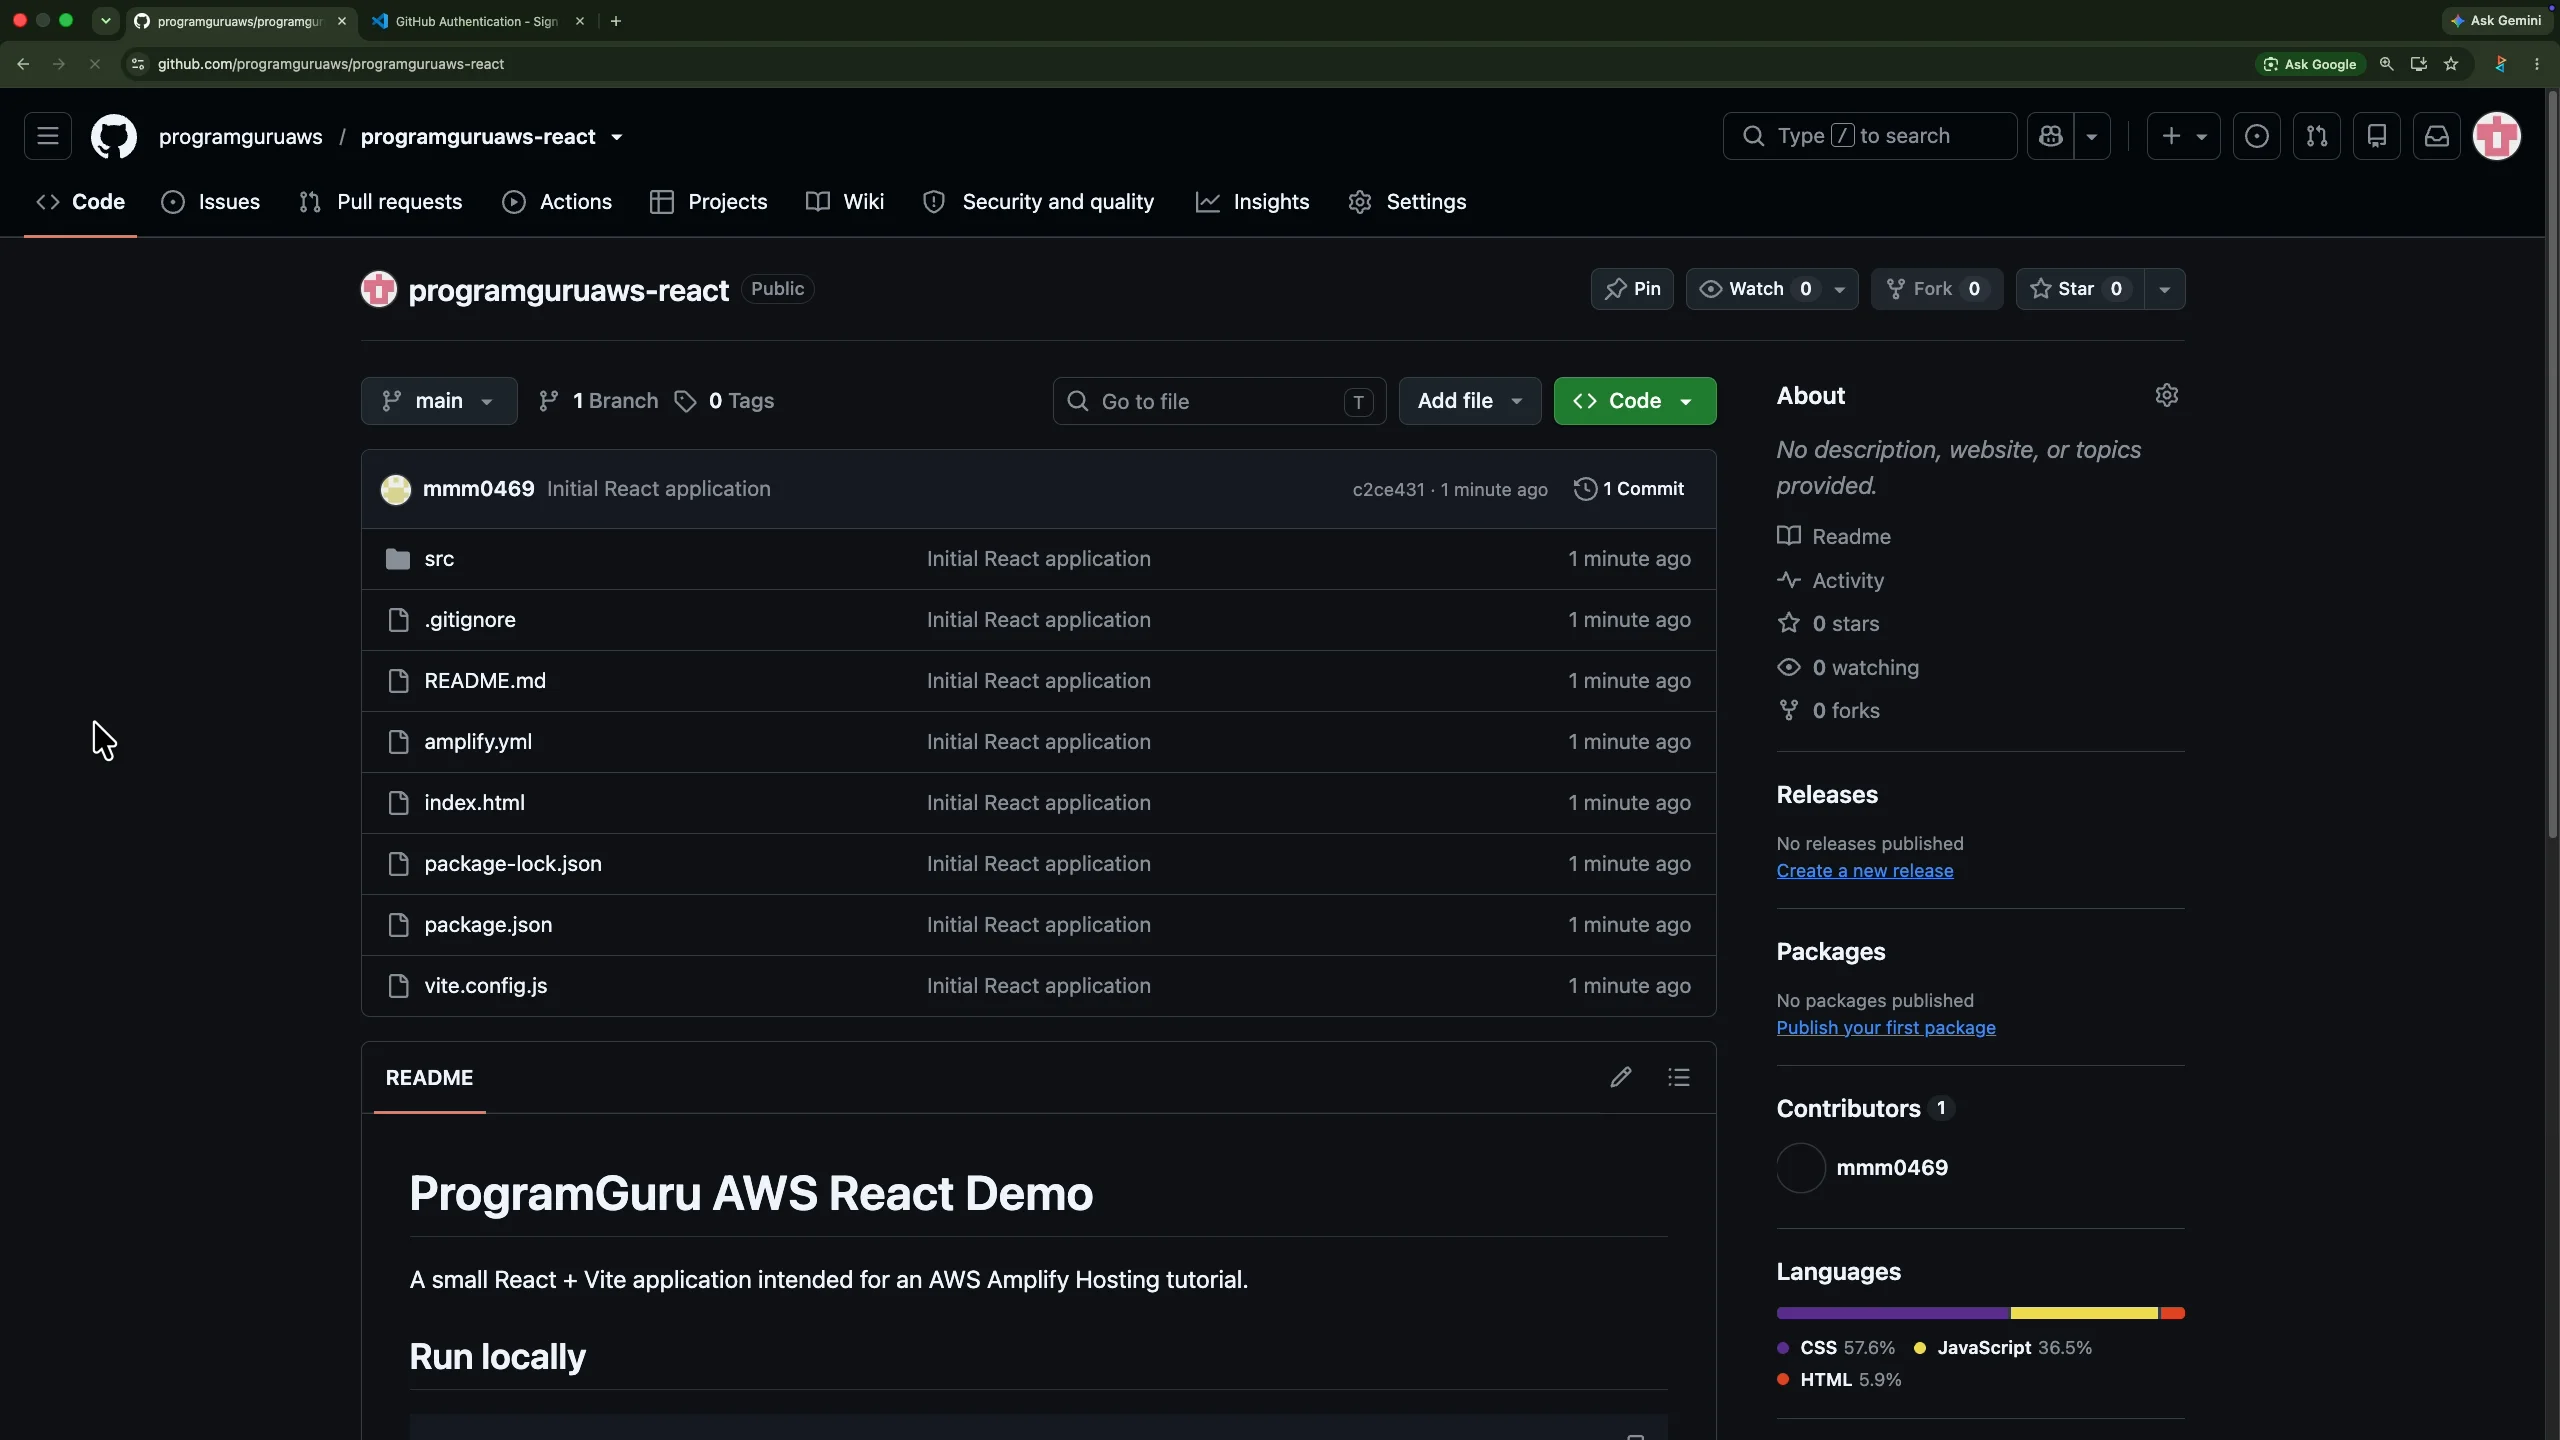
The source code is now ready for AWS Amplify.
Step 8: Open AWS Amplify
Sign in to the AWS Management Console.
Use the search box at the top of the console and search for Amplify.
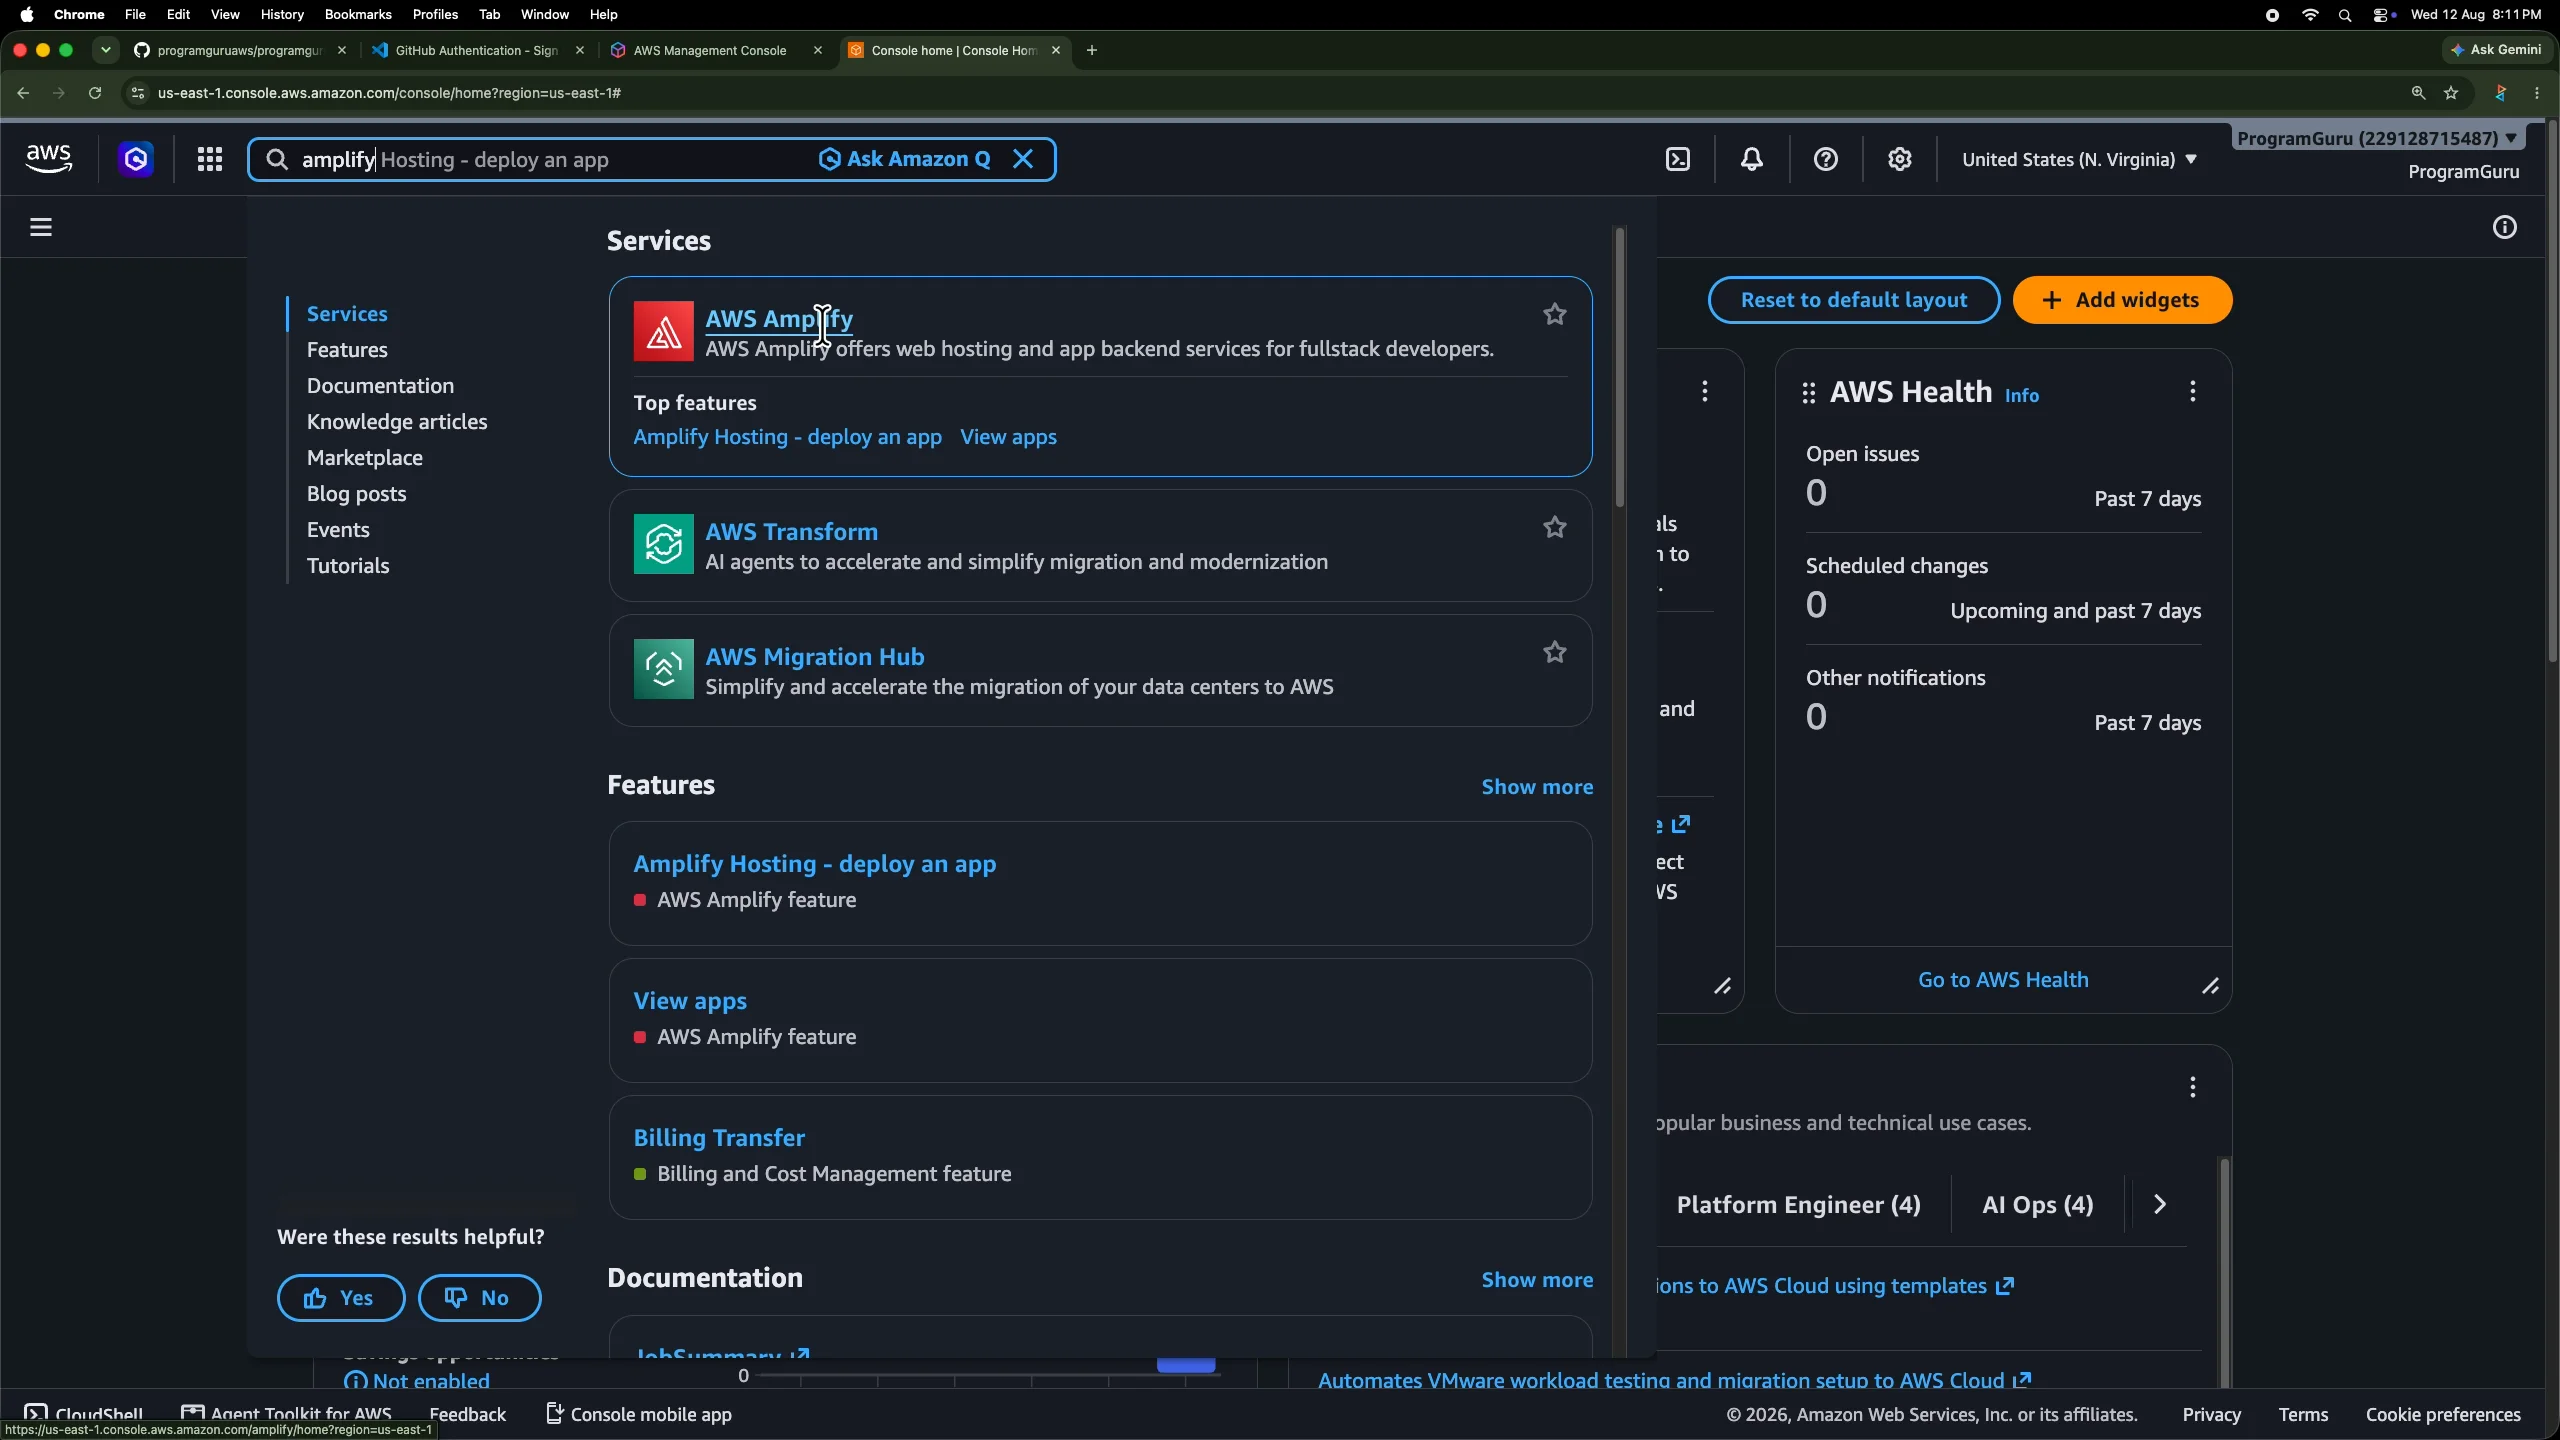
Open AWS Amplify.
In this example, the AWS console is using the US East (N. Virginia) Region.
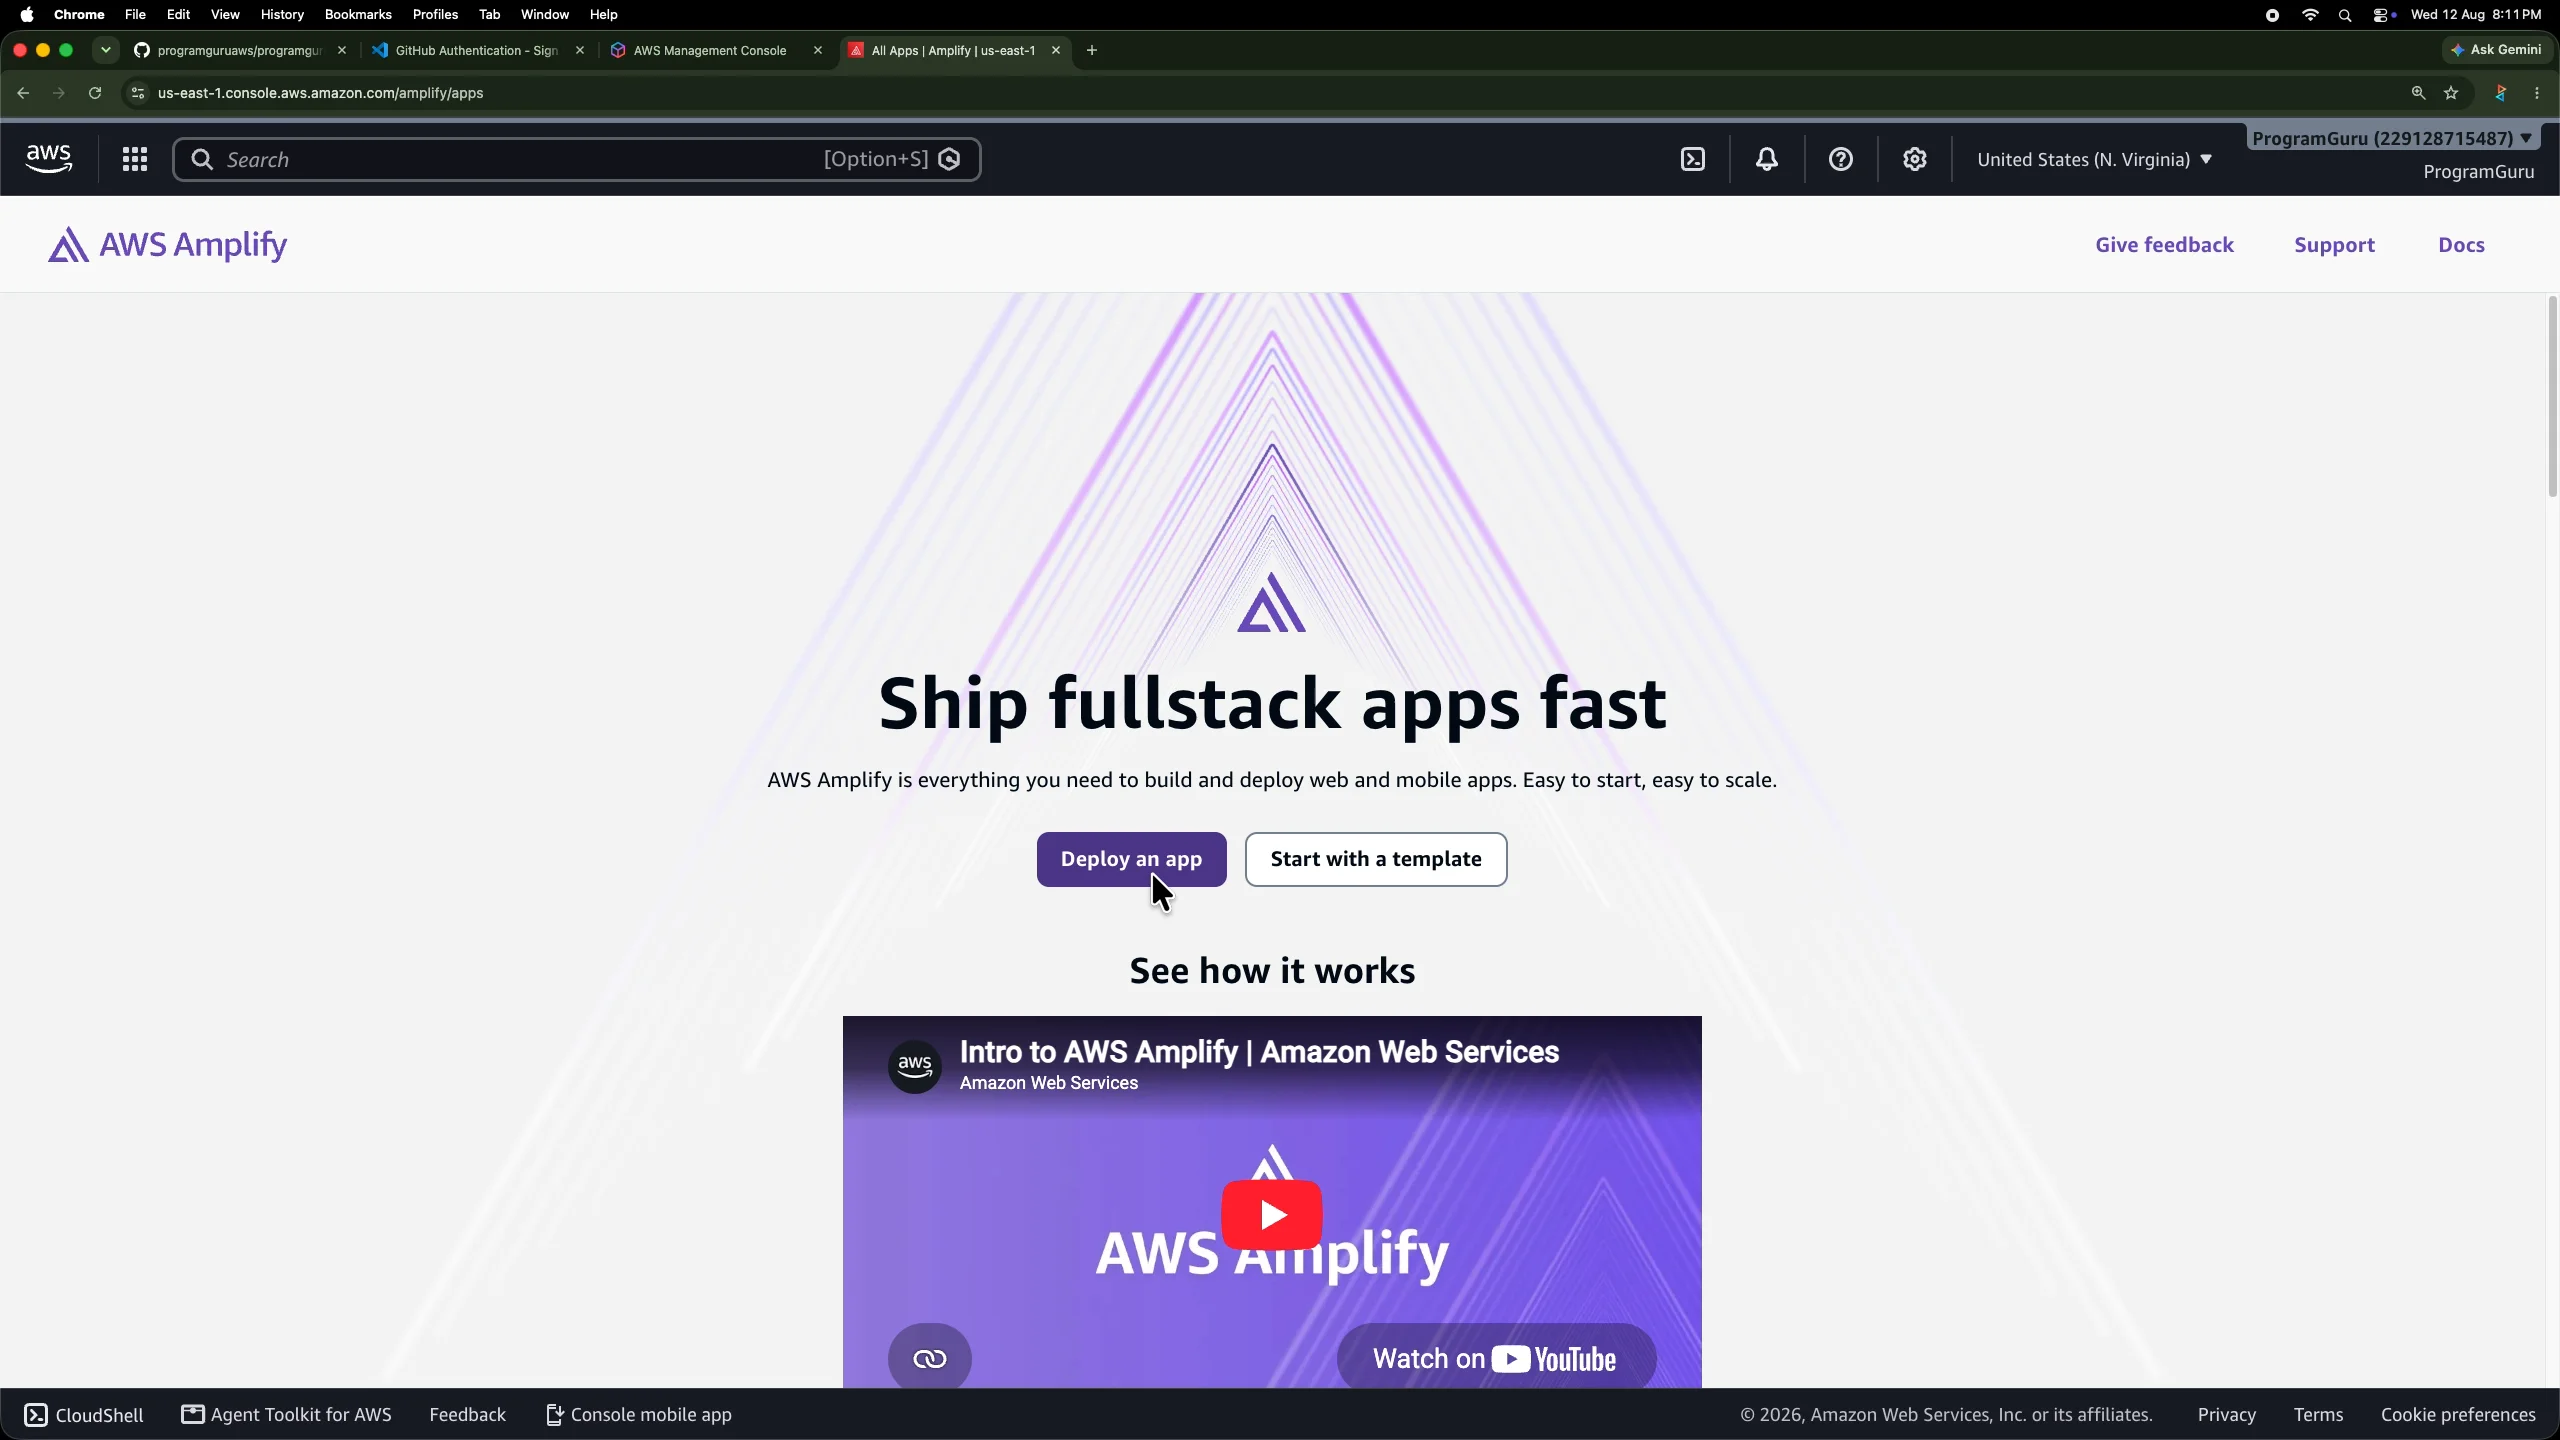
Choose Deploy an app.
Step 9: Select GitHub as the Source Code Provider
Amplify can deploy source code from supported Git providers. Our React application is in GitHub, so select GitHub.
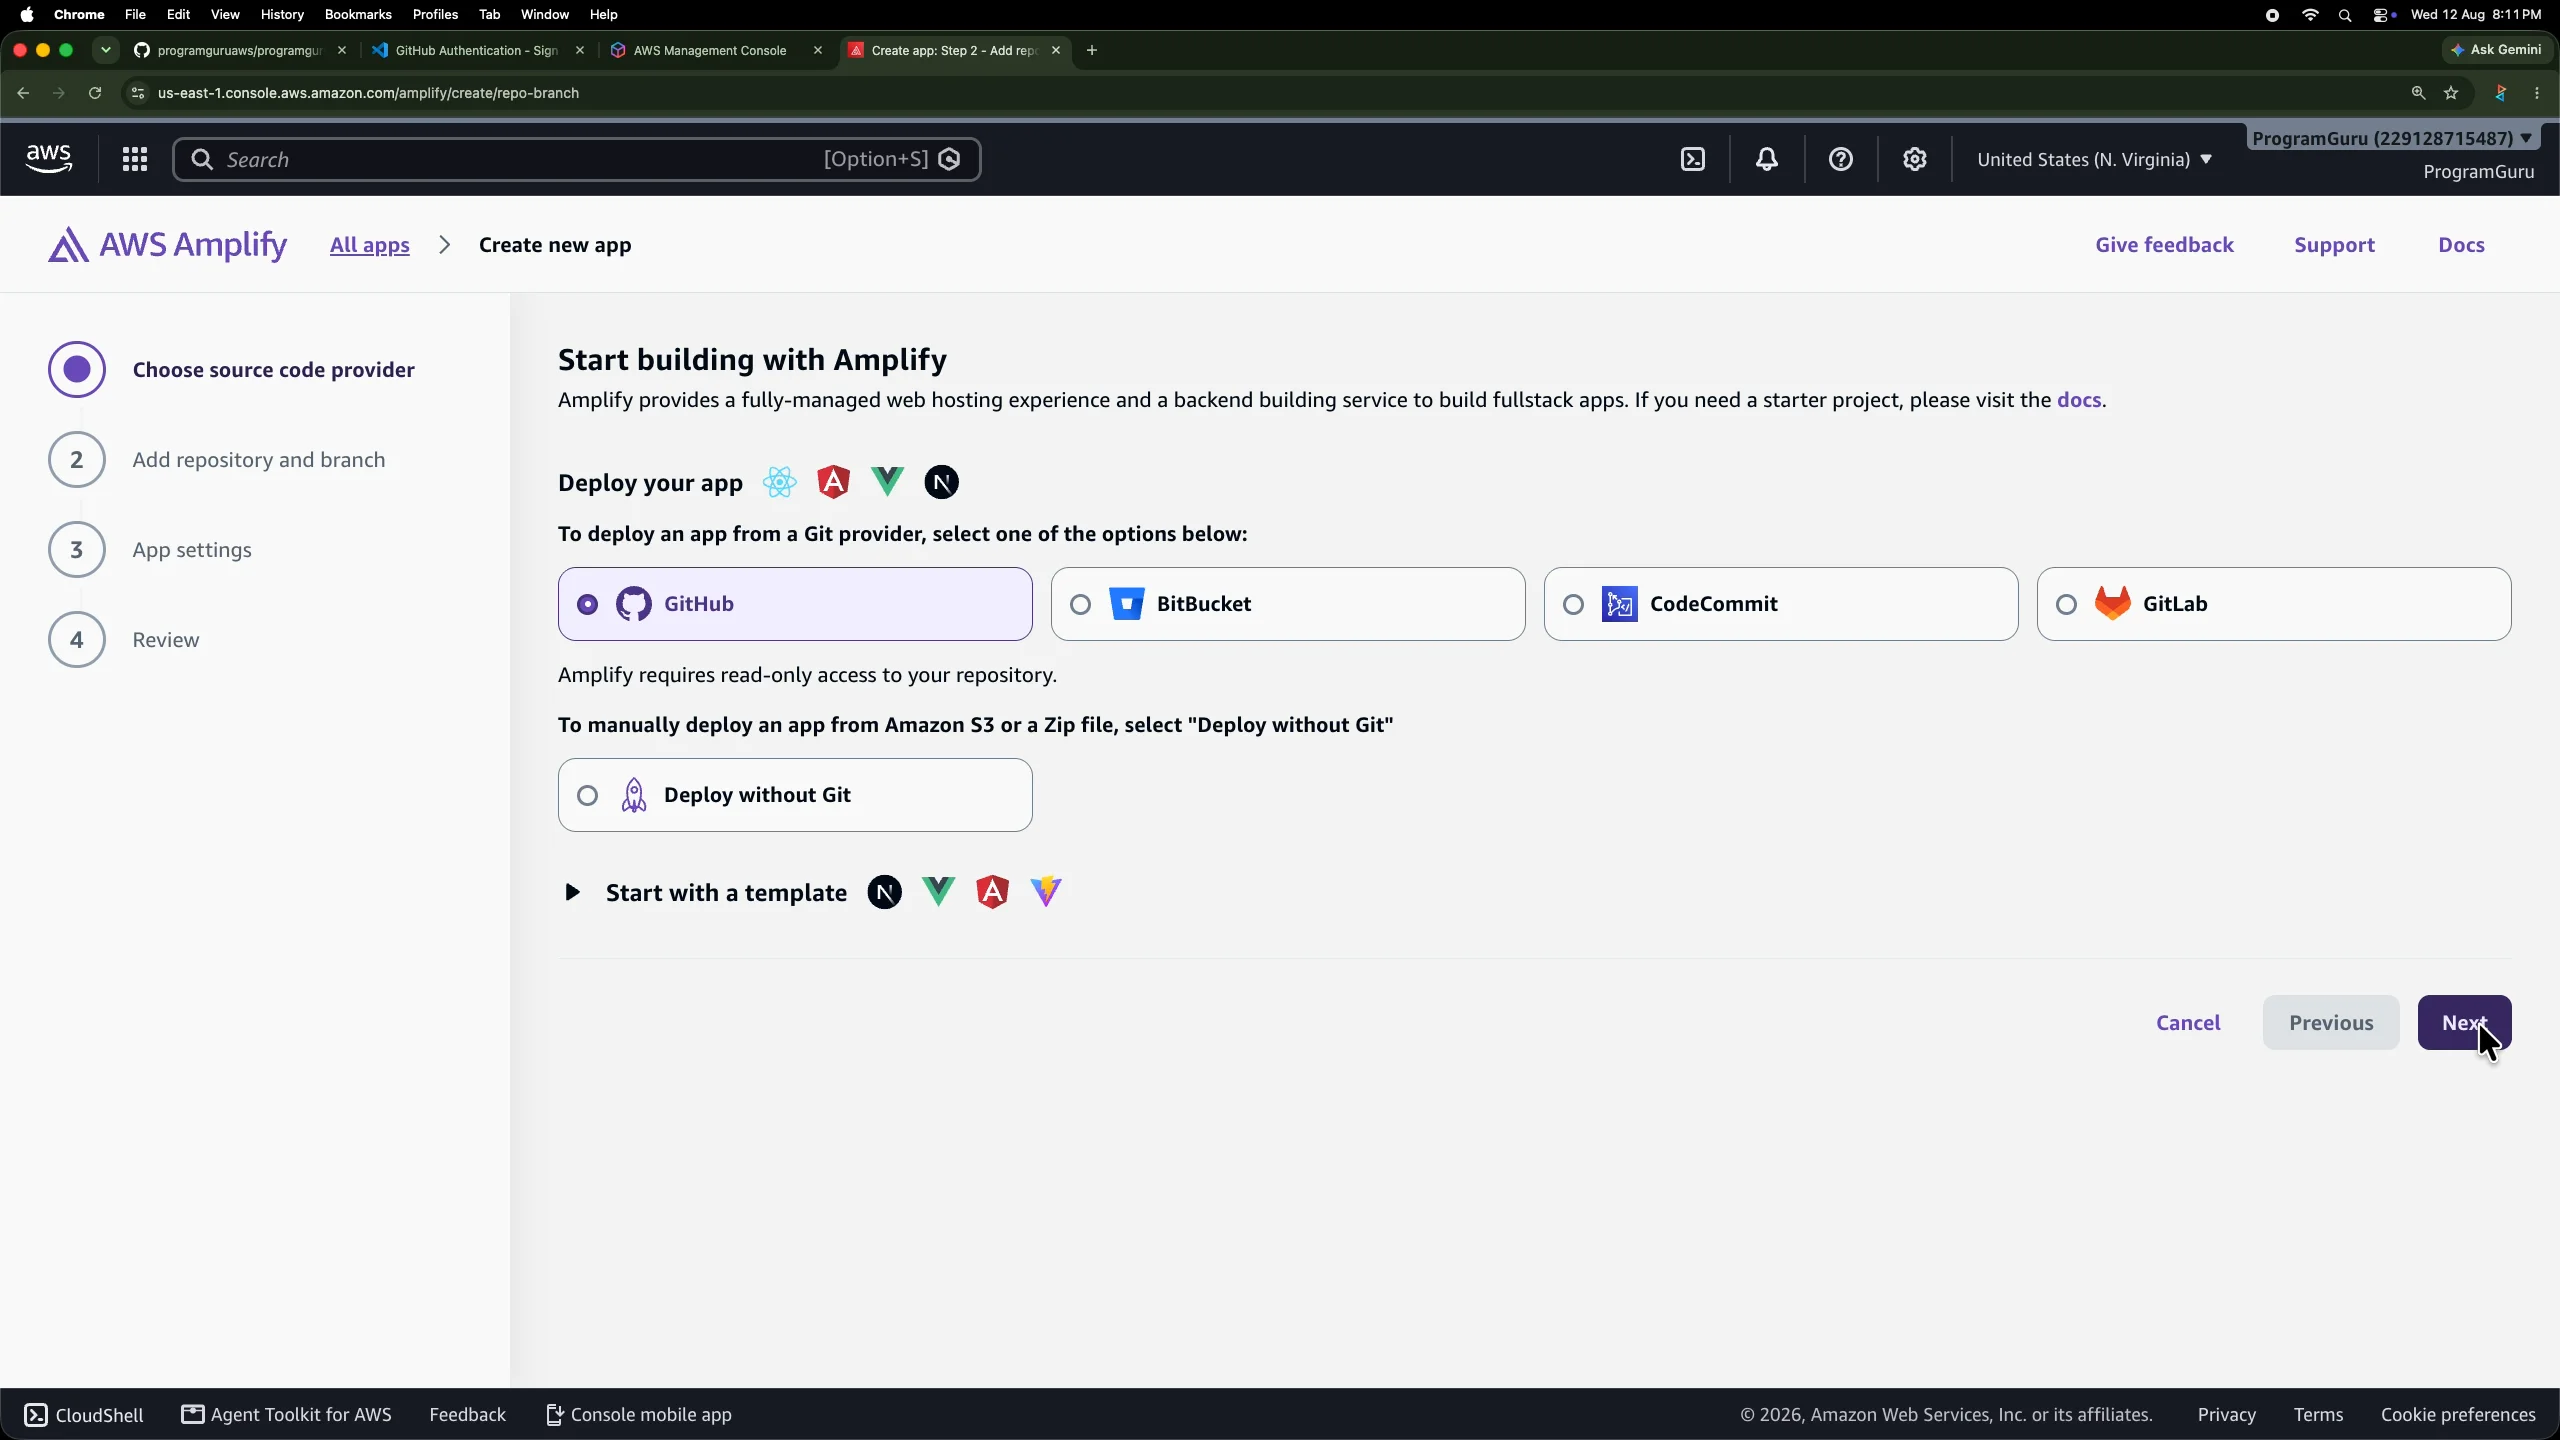
Continue to the next step.
Step 10: Authorize AWS Amplify to Access GitHub
The first time this AWS account is connected to GitHub, GitHub asks you to authorize AWS Amplify.
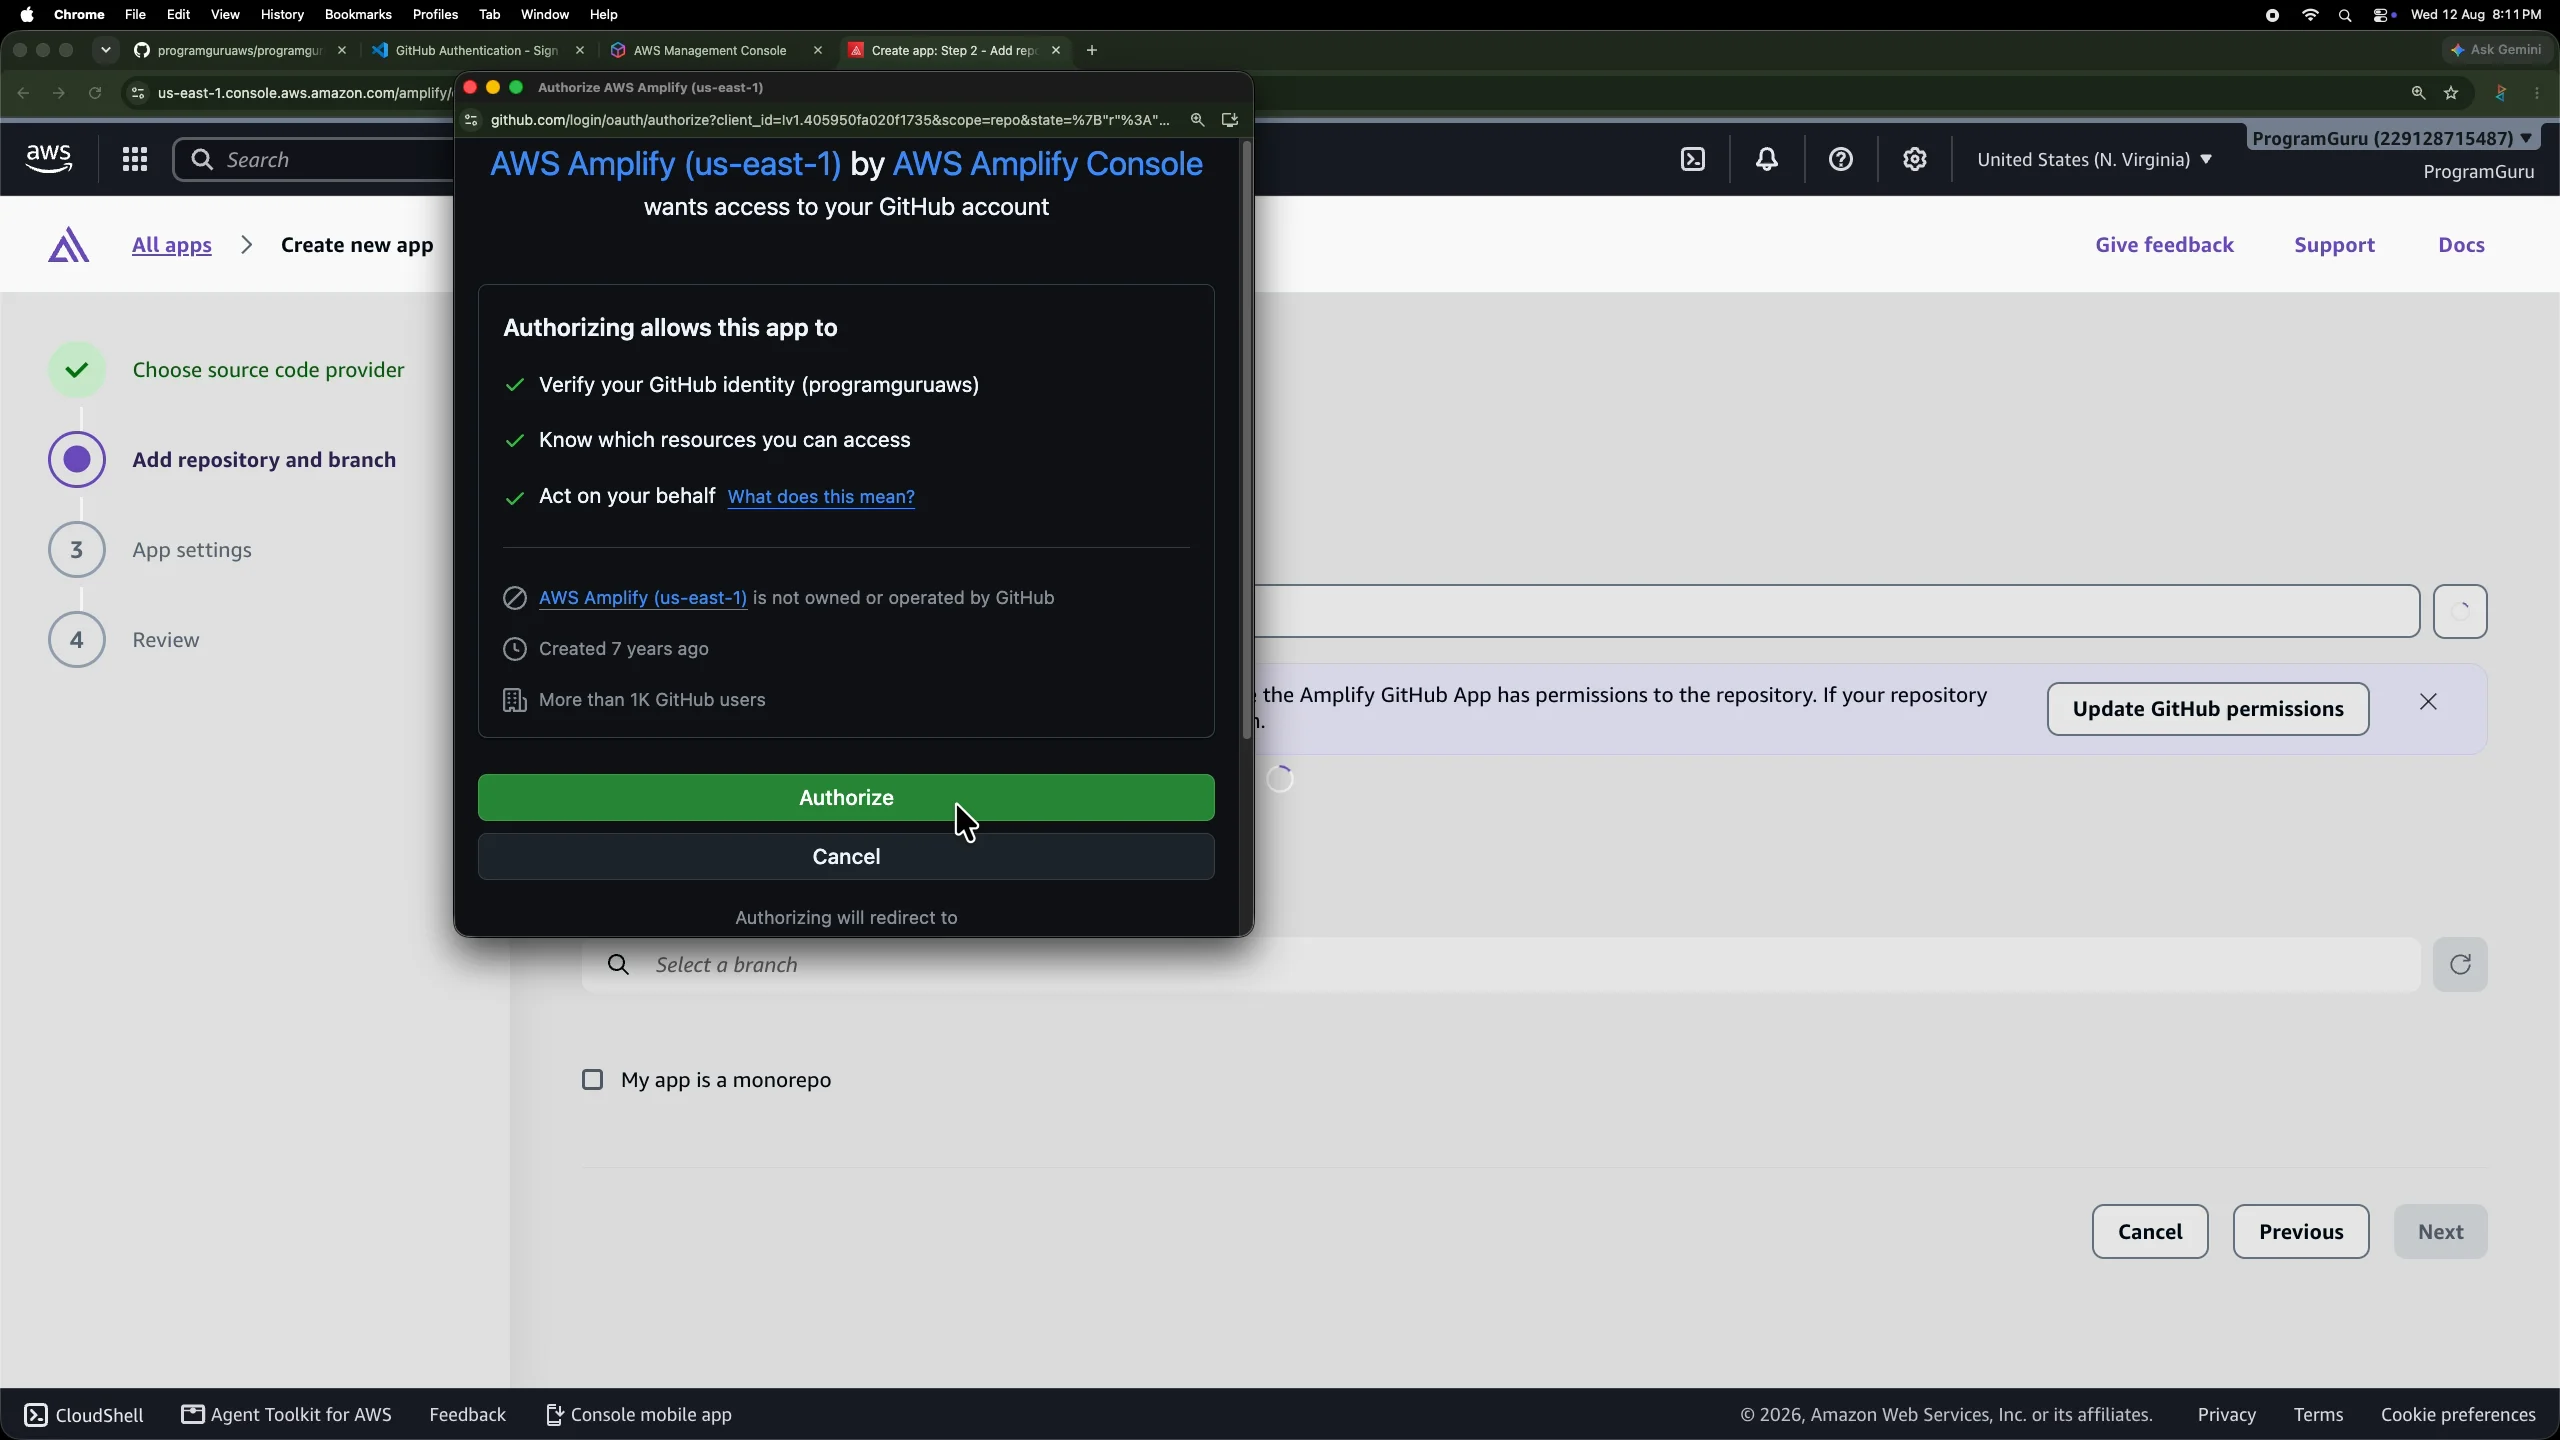
Authorize the application.
GitHub may then ask you to install the AWS Amplify GitHub application and choose which repositories Amplify can access.
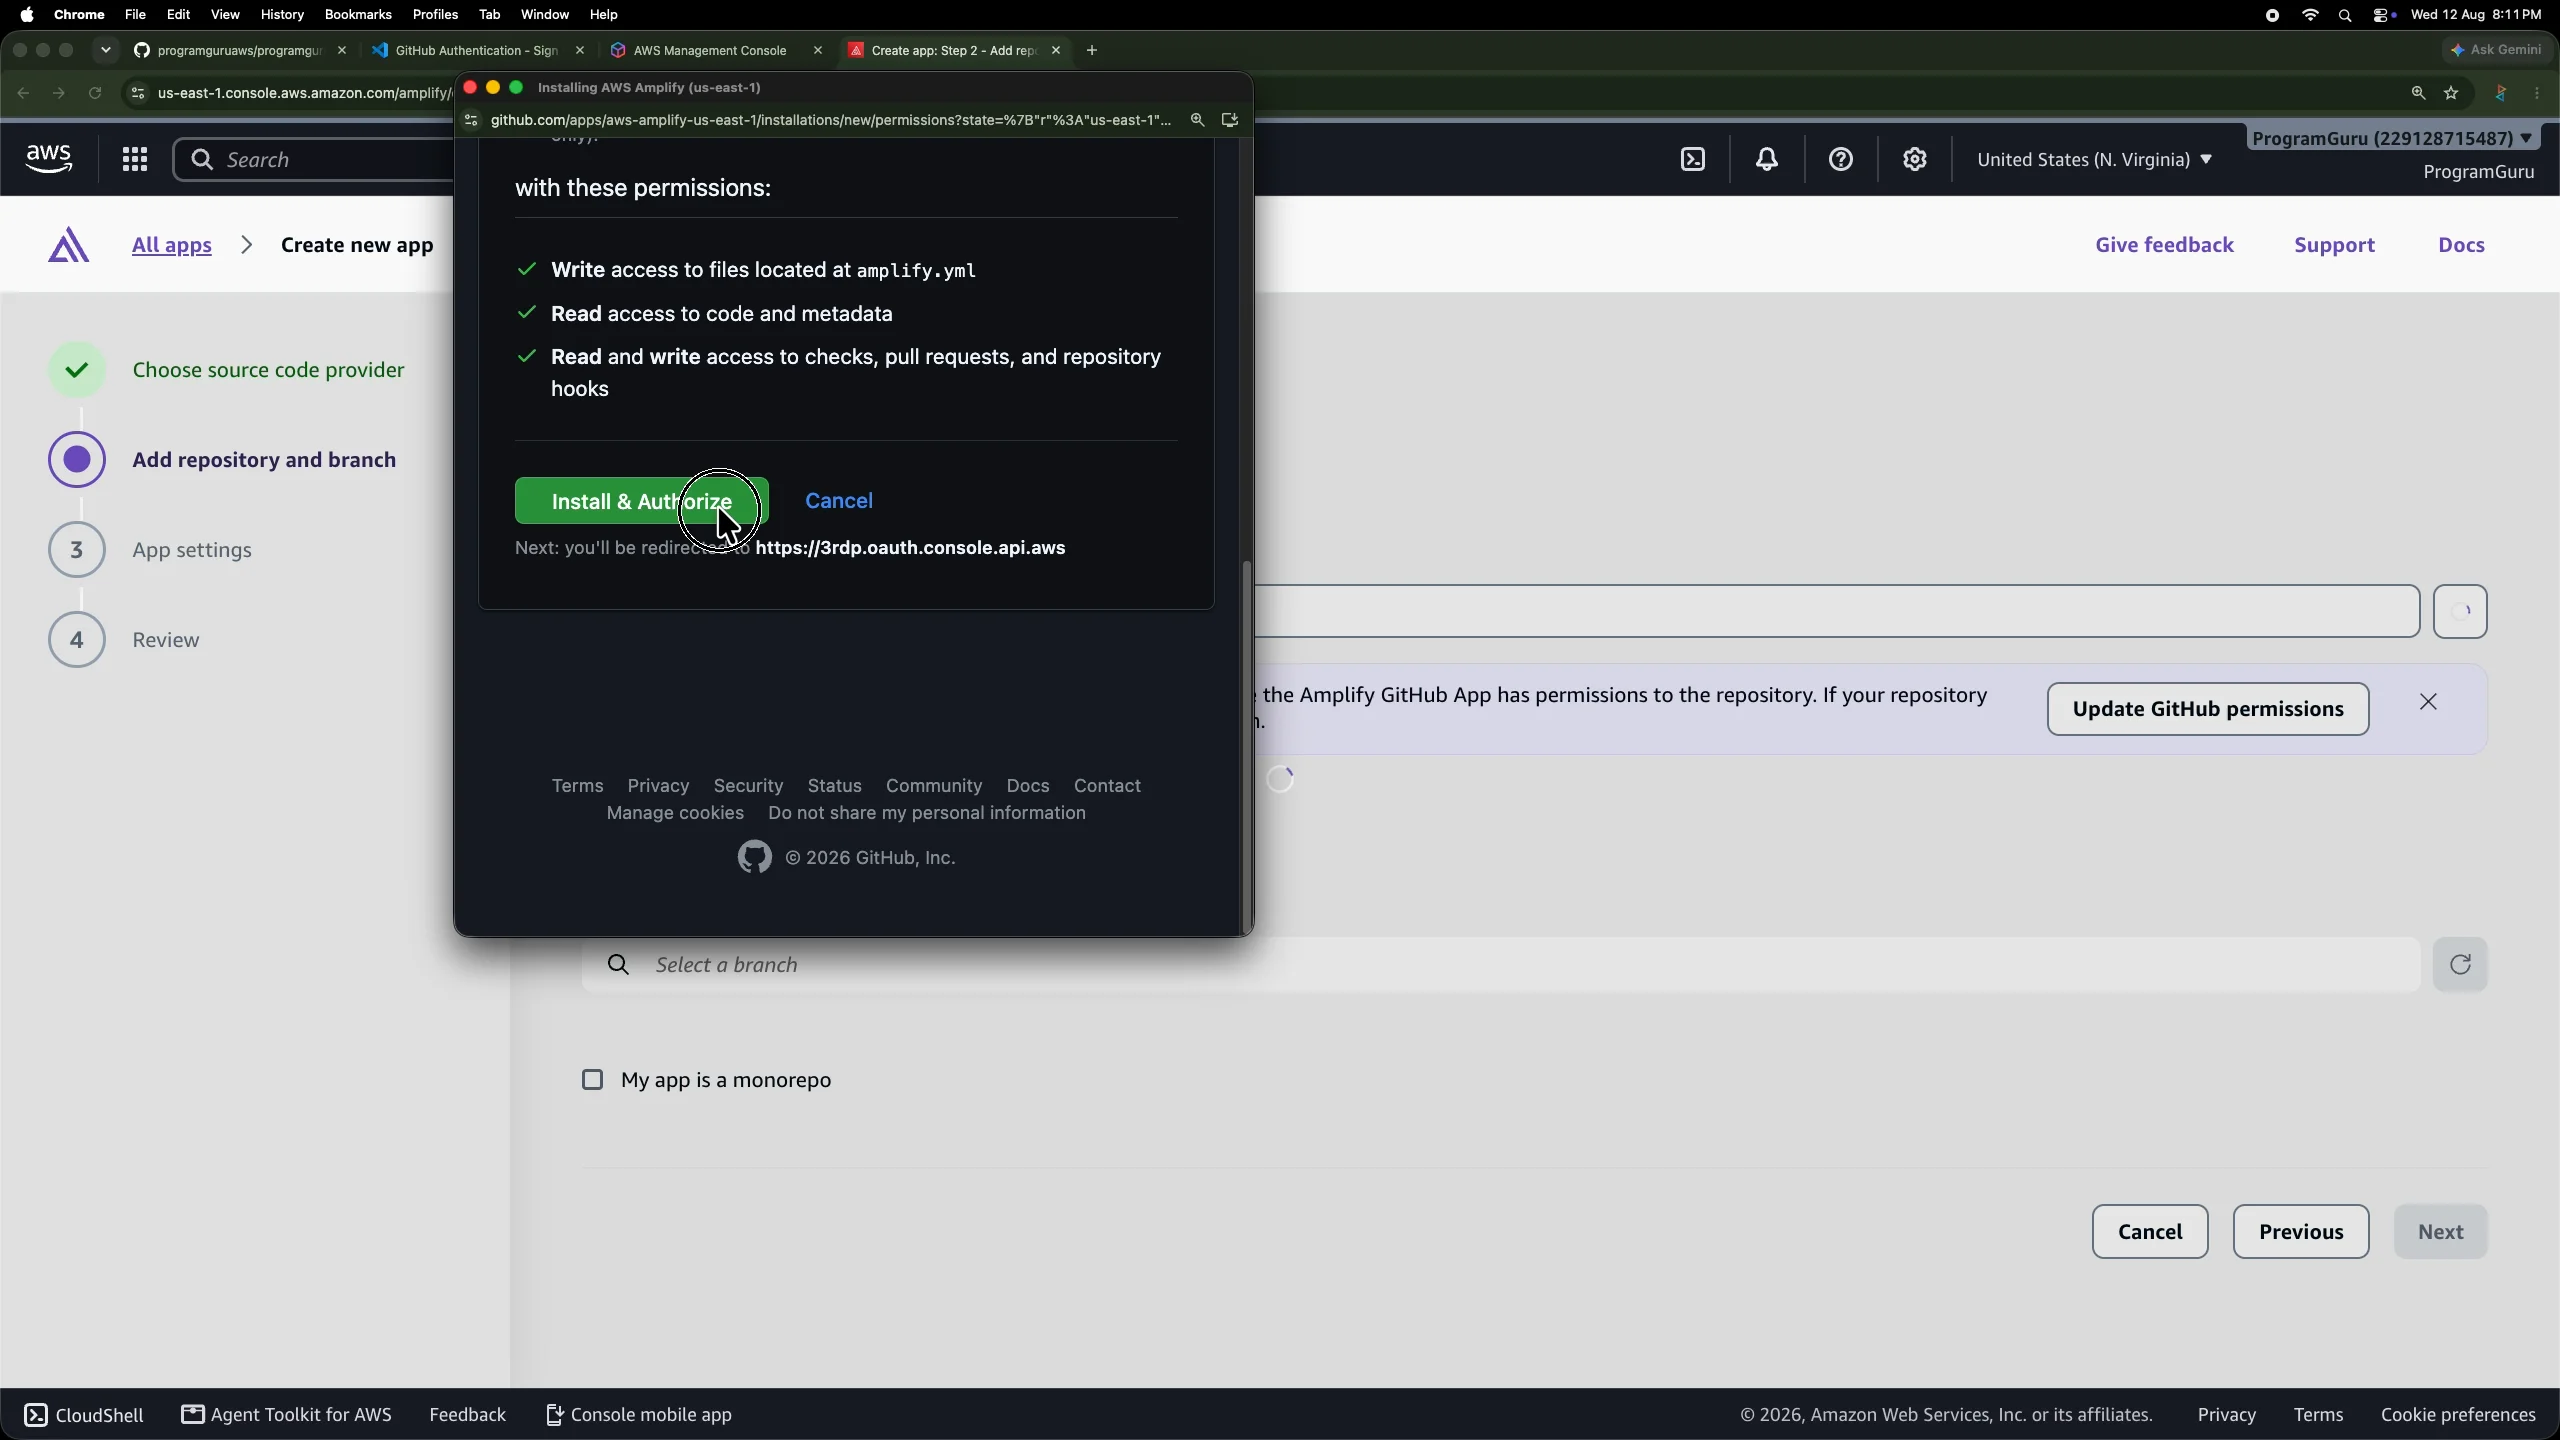
You can grant access to the repository that you want Amplify to deploy.
This GitHub connection is important for continuous deployment. Amplify needs permission to read the repository and detect new commits that are pushed later.
Step 11: Select the Repository and Branch
After GitHub authorization is complete, return to Amplify.
Select the repository:
programguruaws-reactThen select the branch:
main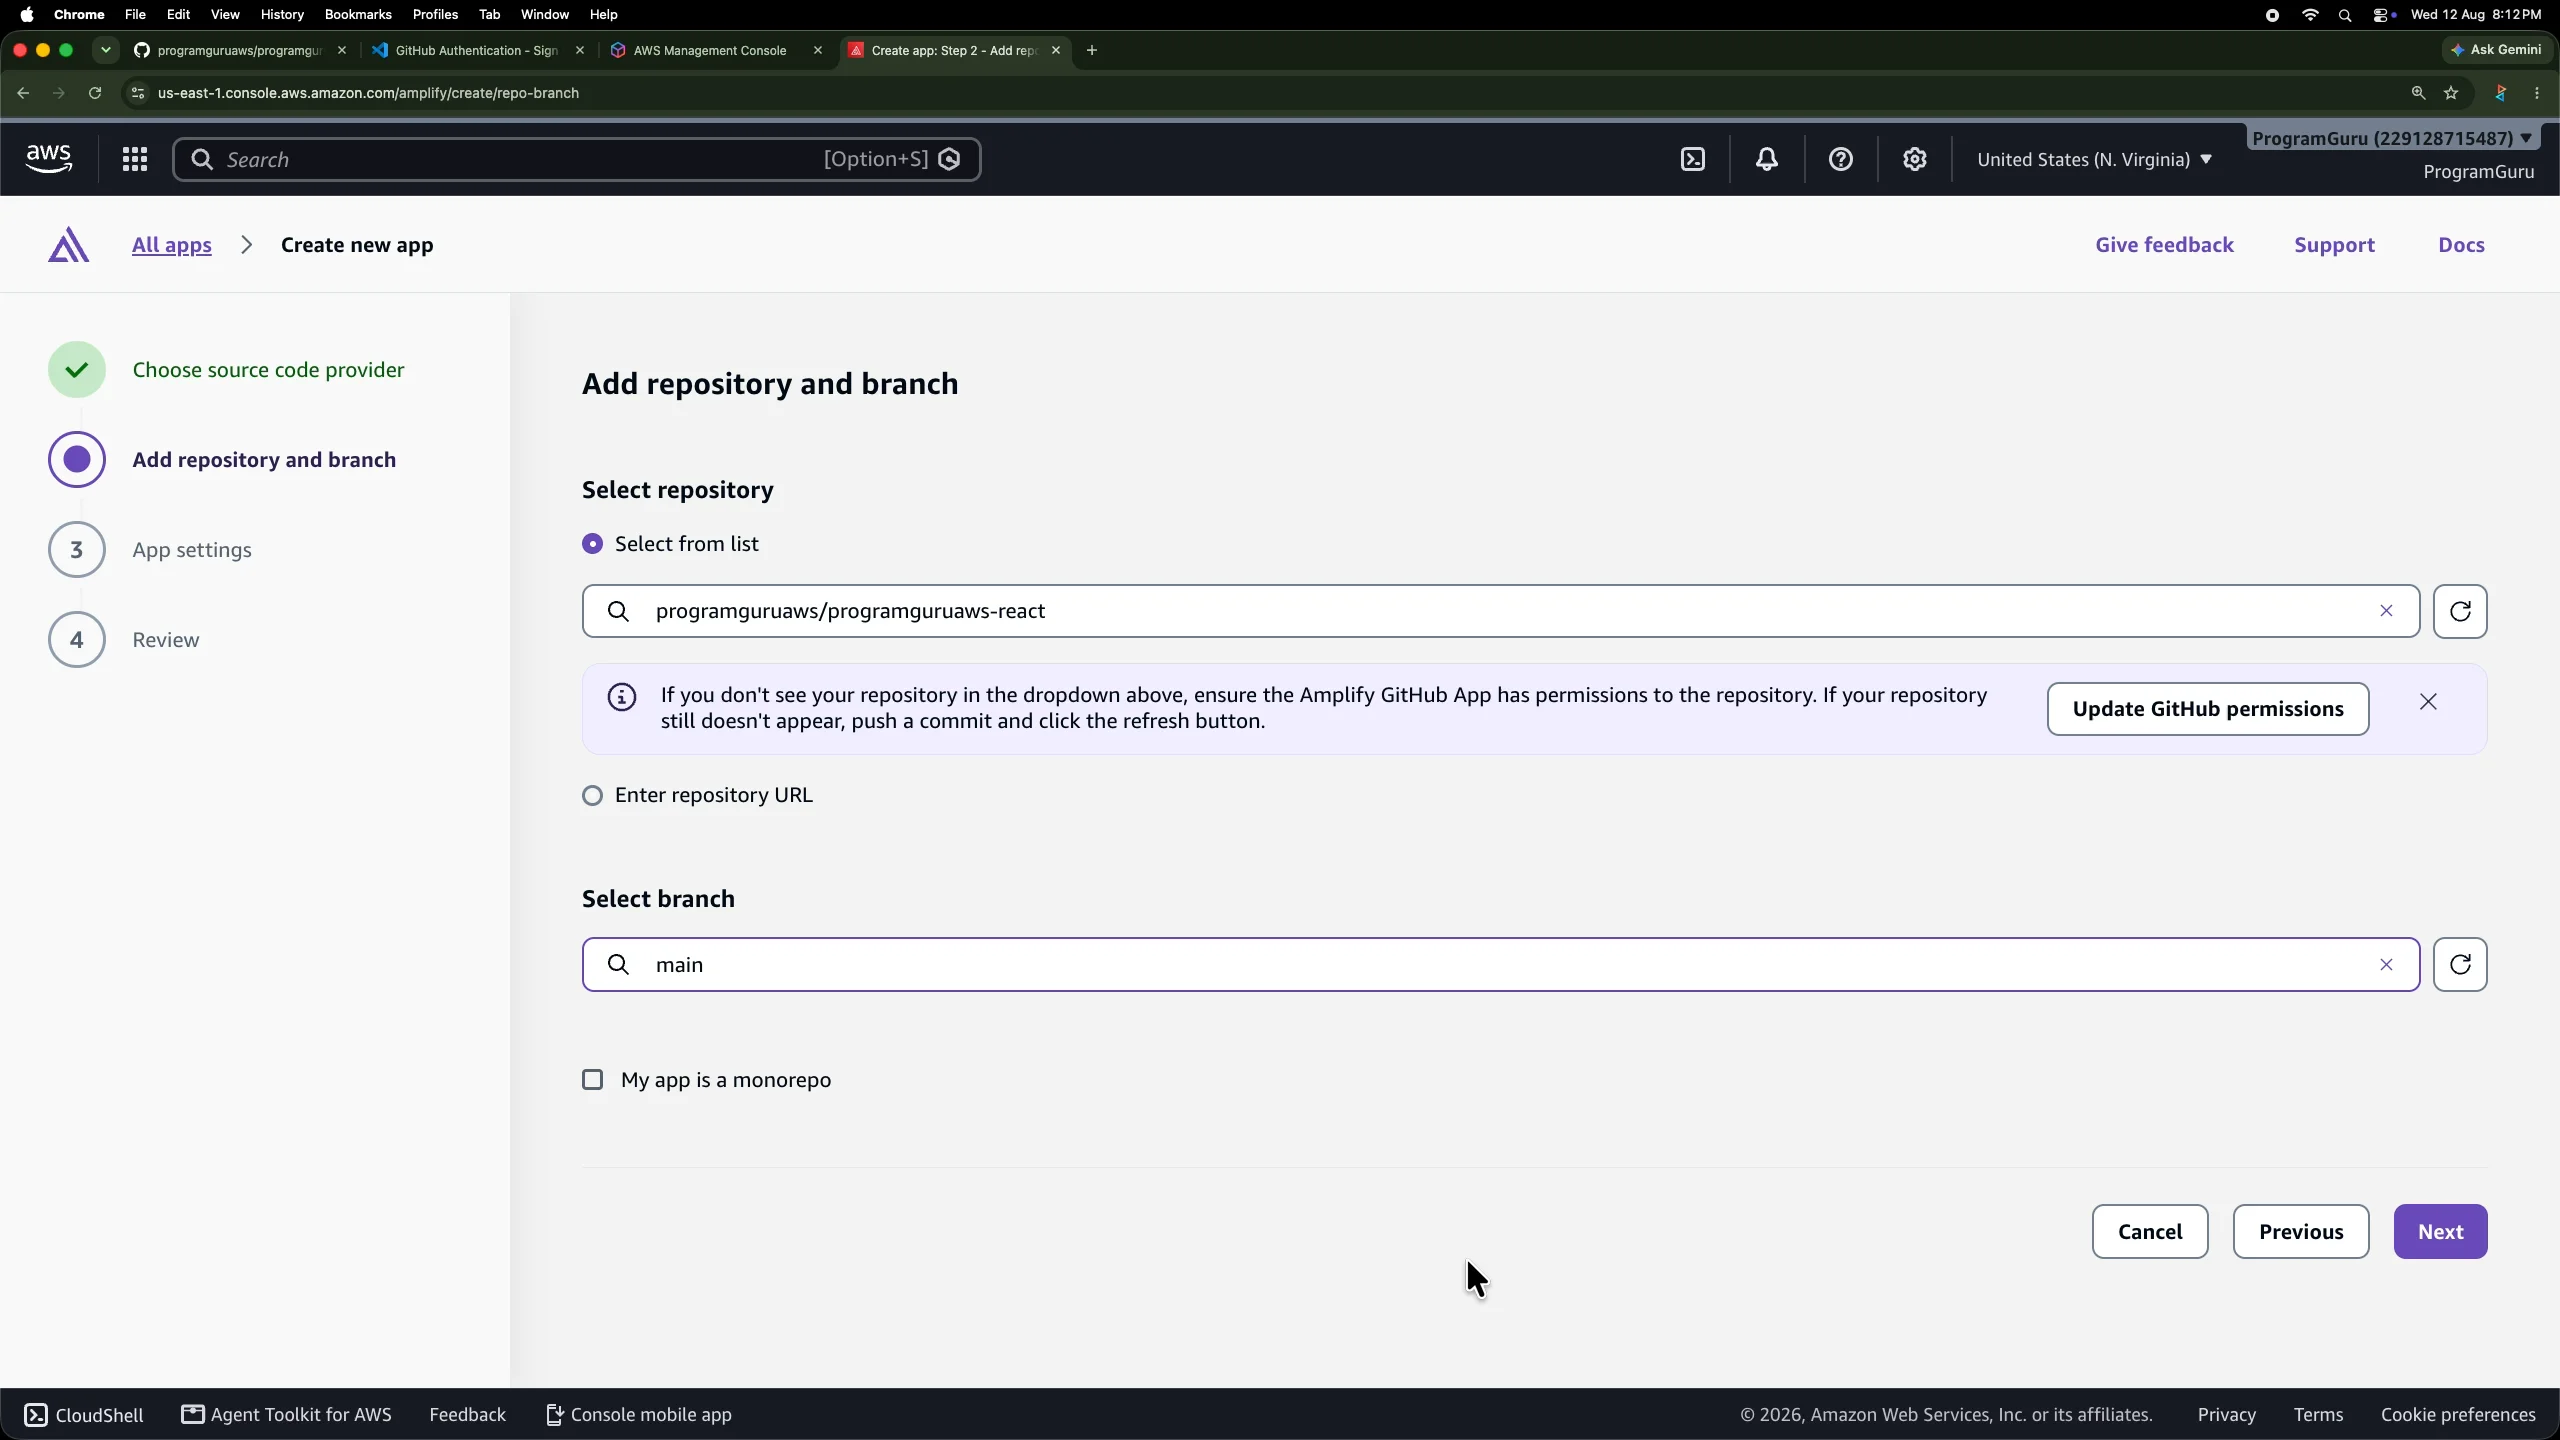
This is a normal single React application, so the monorepo option is not required.
Continue to the application settings.
Step 12: Verify the Amplify Build Settings
Amplify examines the repository and detects the frontend build configuration.
For our Vite project, the important values are:
Frontend build command: npm run build
Build output directory: dist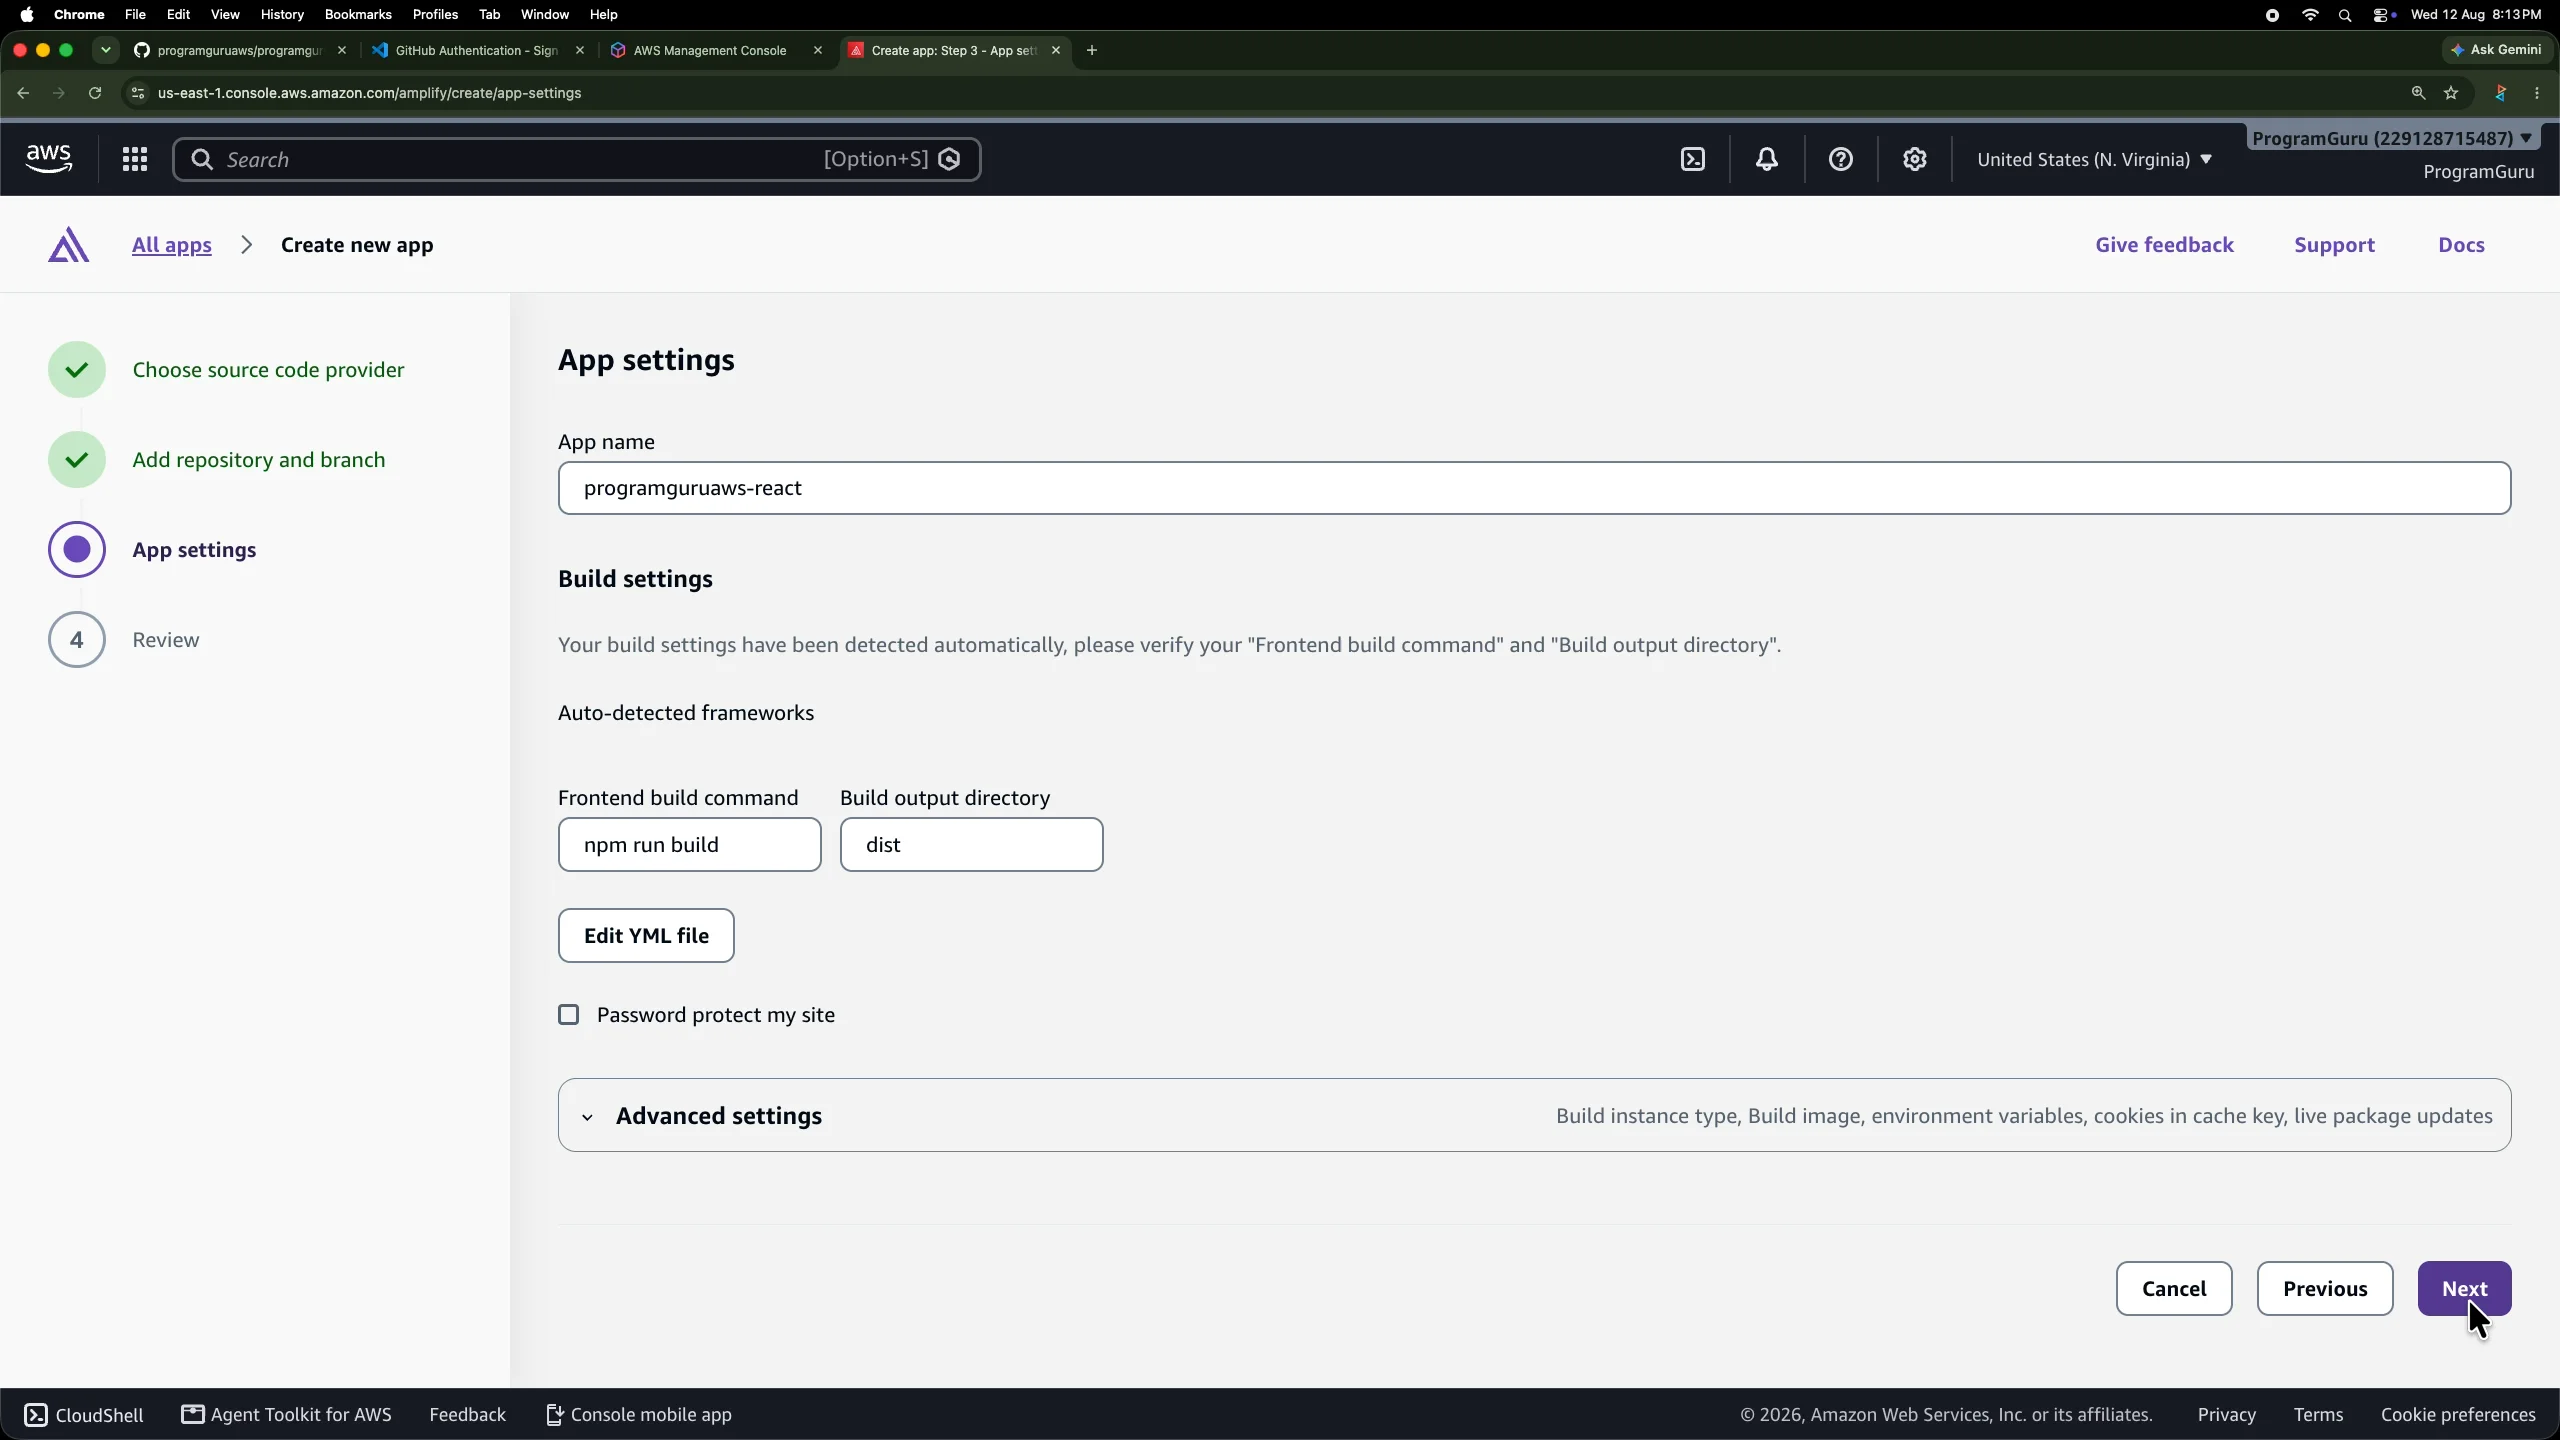
The build command tells Amplify how to generate the production version of the application.
The output directory tells Amplify where those generated files will be available after the build finishes.
For Vite, dist is the normal production output directory.
There is no need to enable password protection for this public website.
The advanced settings can also remain at their defaults for this example.
Step 13: Review the Amplify Configuration
Amplify displays a review page before creating the application.
Check the repository and branch first.
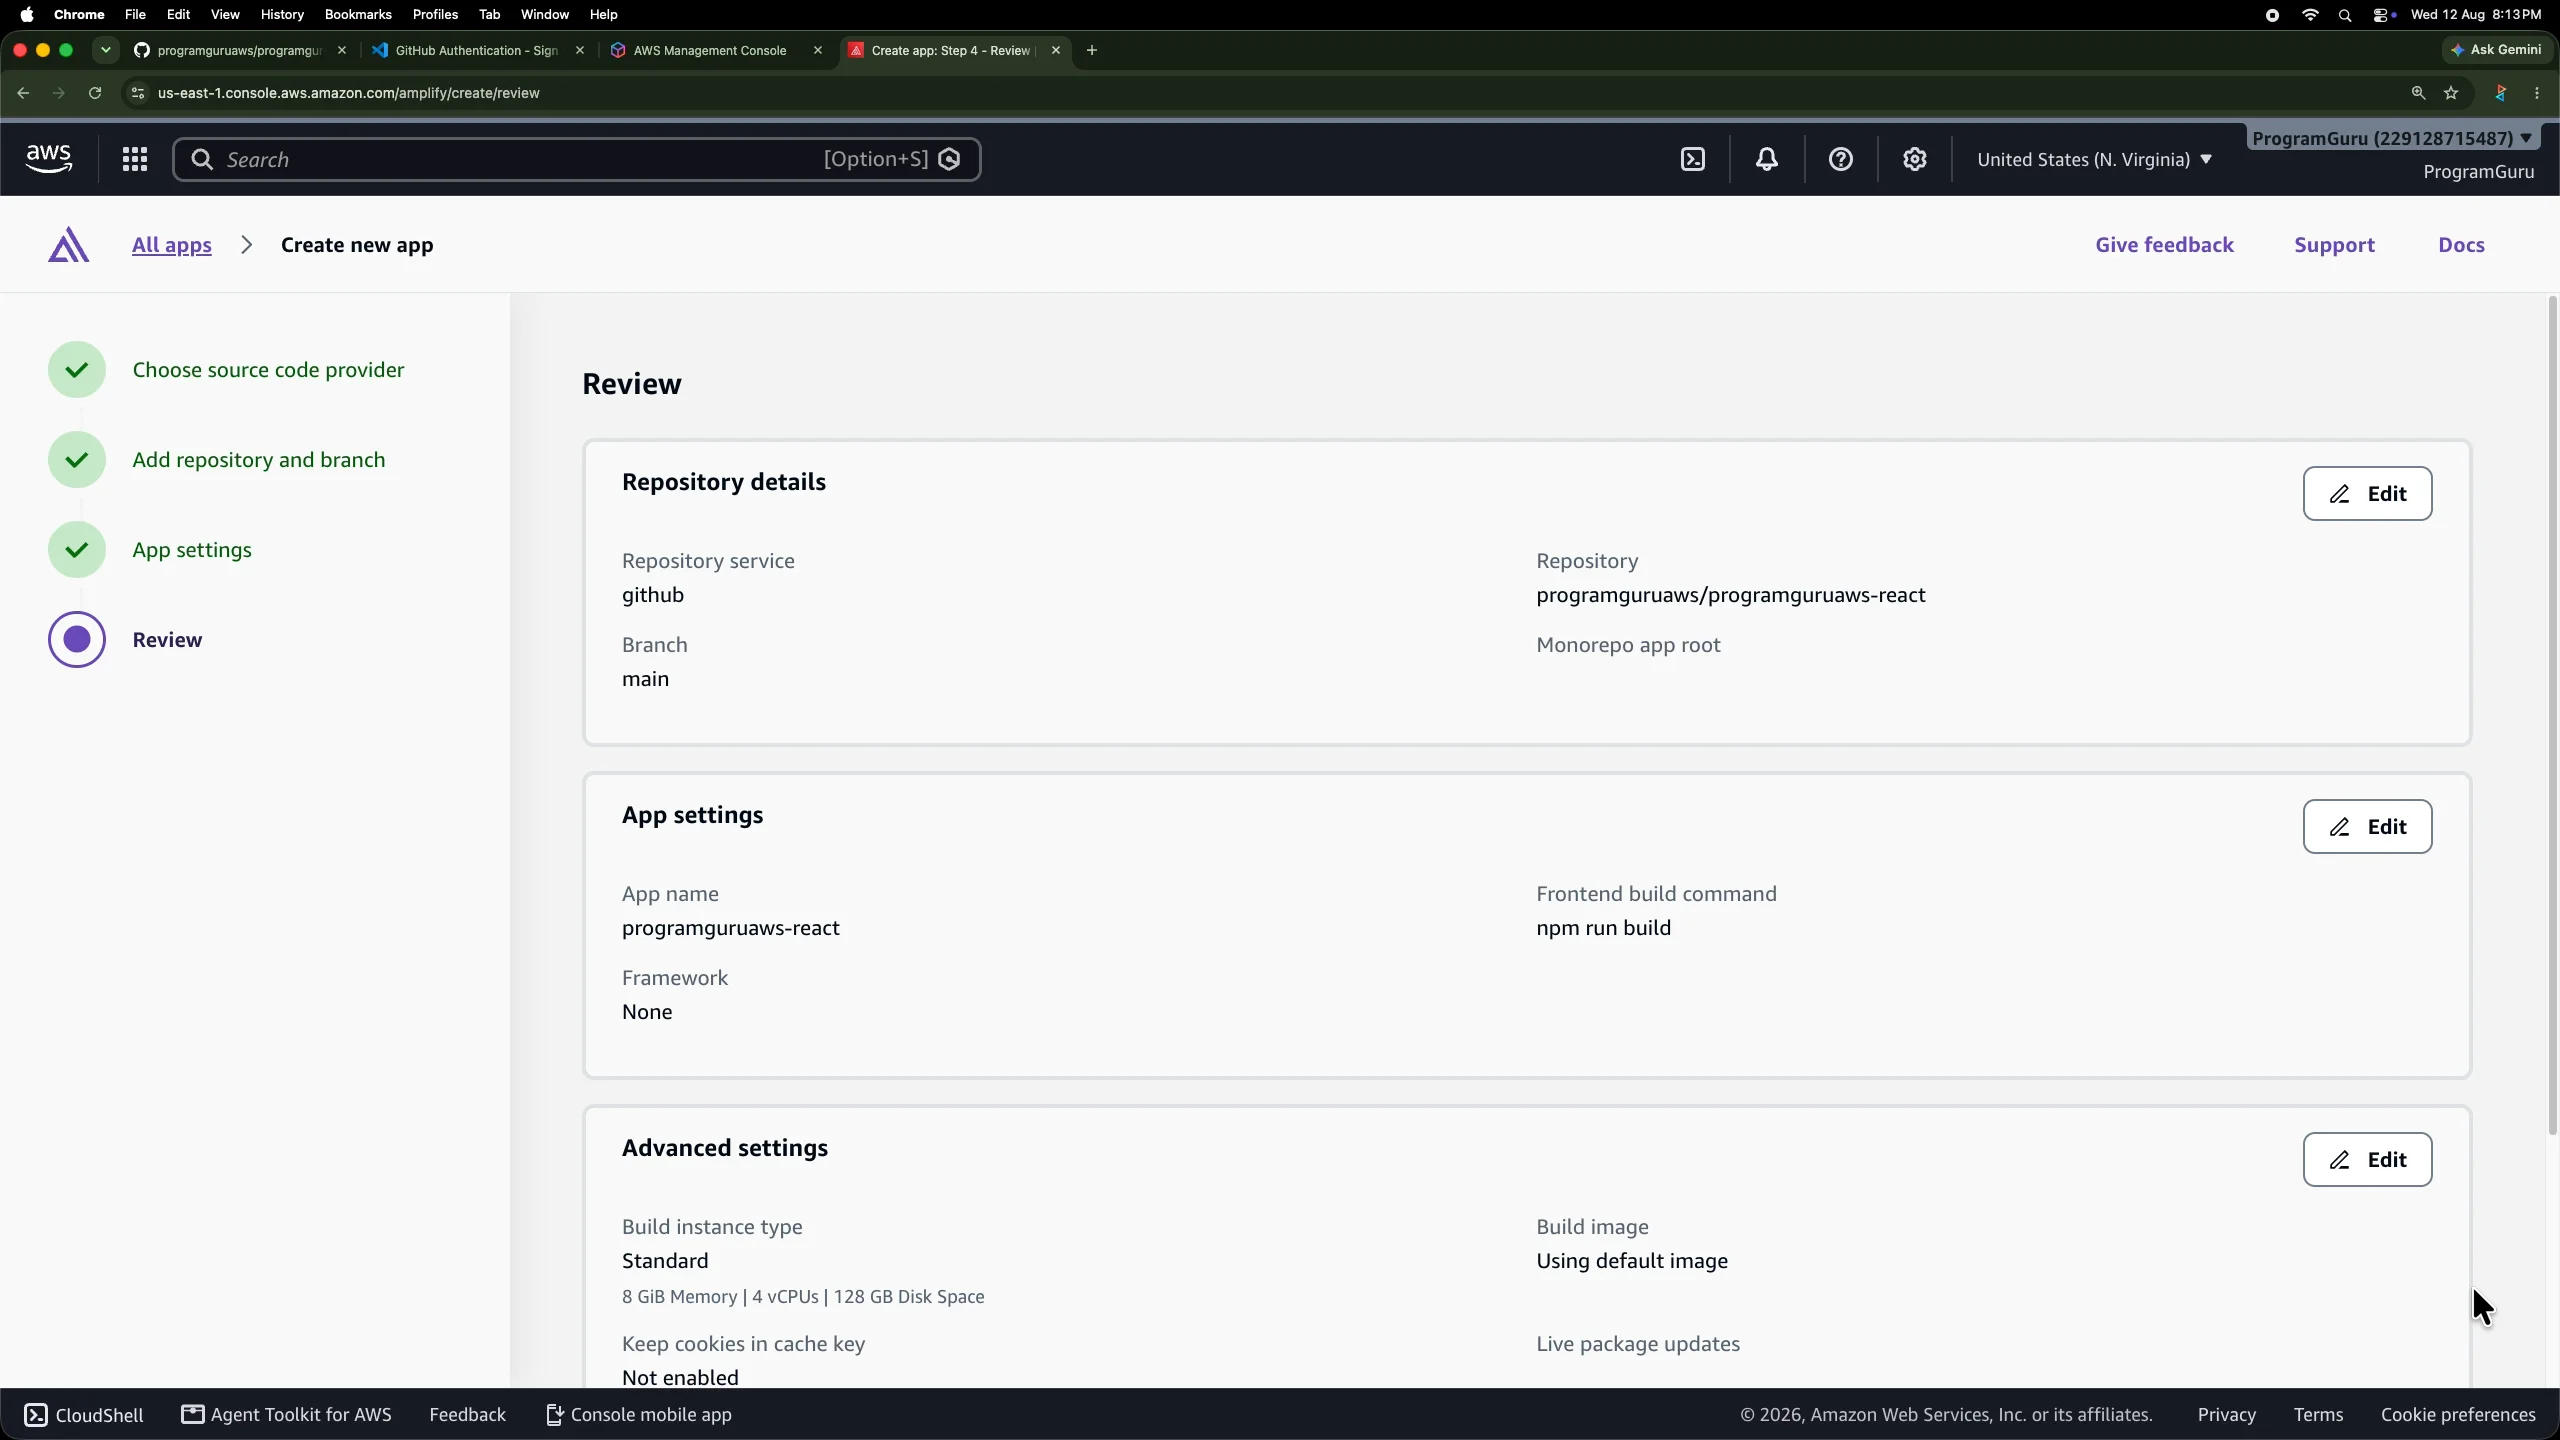
Also confirm that the frontend build command is npm run build.
You may notice that the Framework field is shown as None in this example. That does not prevent this Vite application from being deployed. The important part for this static frontend deployment is that Amplify has the correct build command and build output directory.
The remaining build environment options can stay at their defaults for this tutorial.
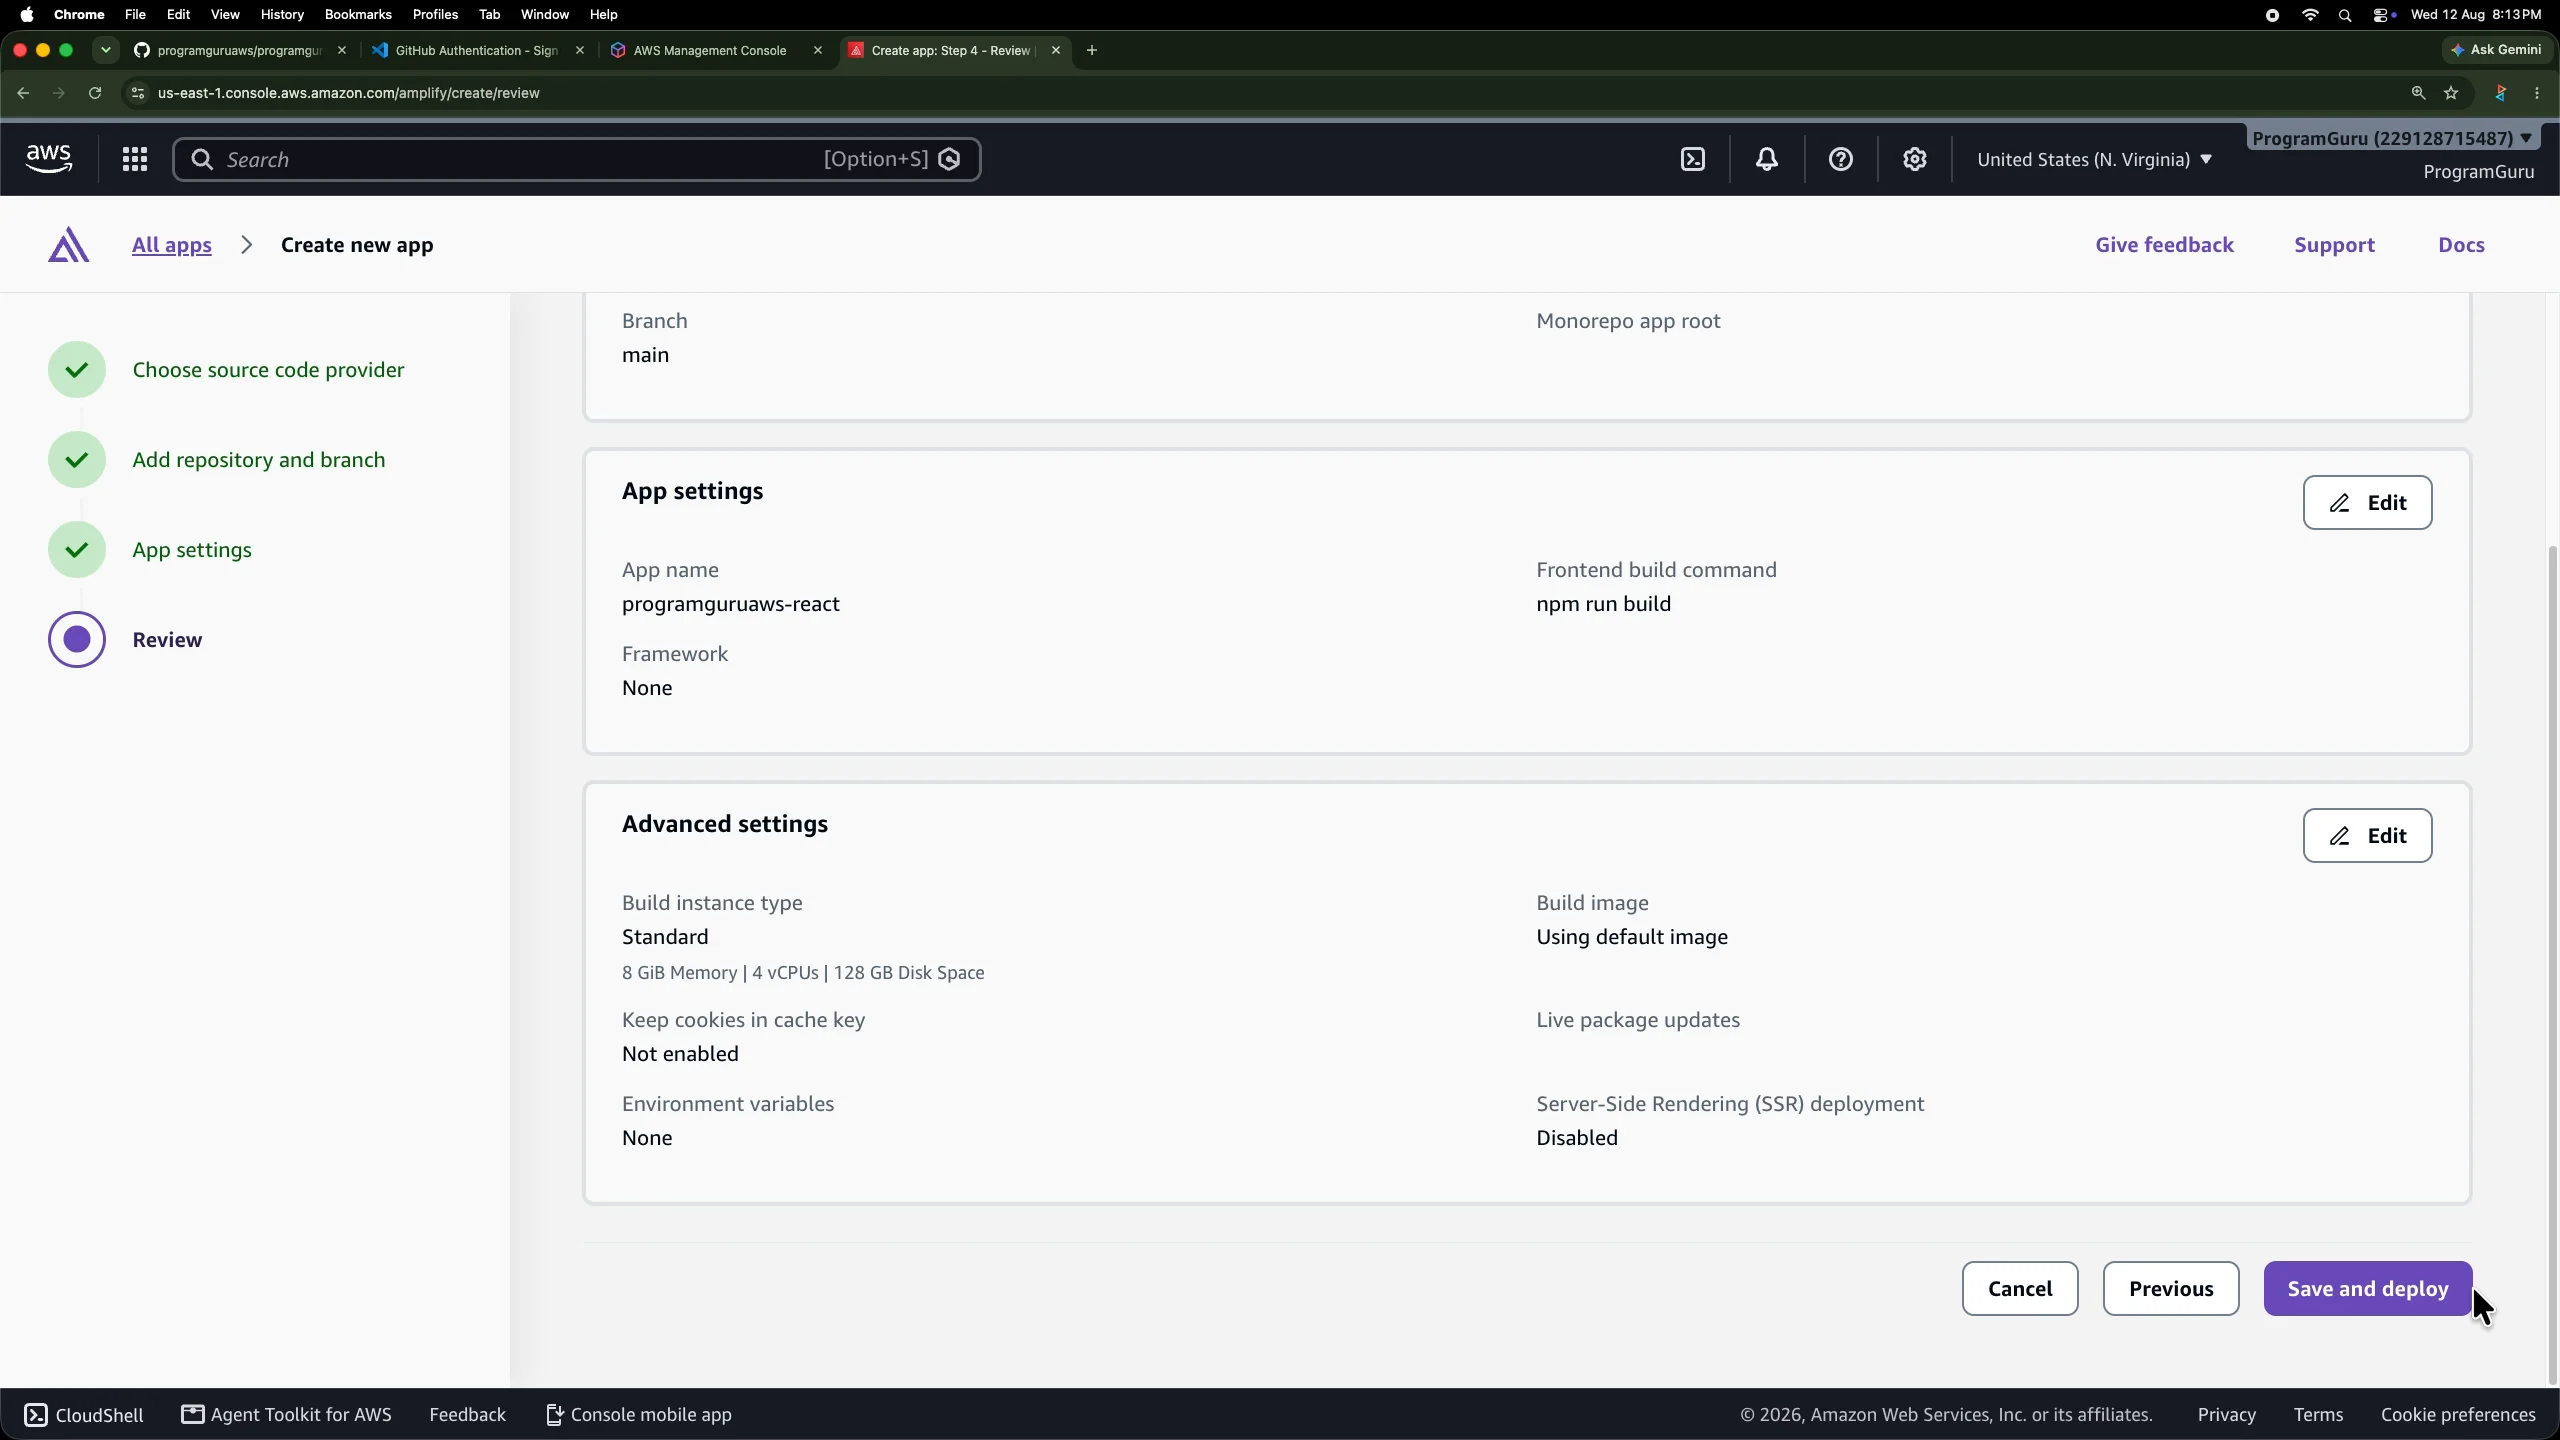
Choose Save and deploy.
Step 14: Wait for the First Amplify Deployment
Amplify now creates the application and starts the first deployment from the main branch.
During this process, Amplify retrieves the source code from GitHub, prepares a build environment, runs the frontend build, and publishes the generated files.
This is different from manually running npm run build and uploading the dist directory yourself. Once GitHub is connected, Amplify can perform the build directly from the source repository.
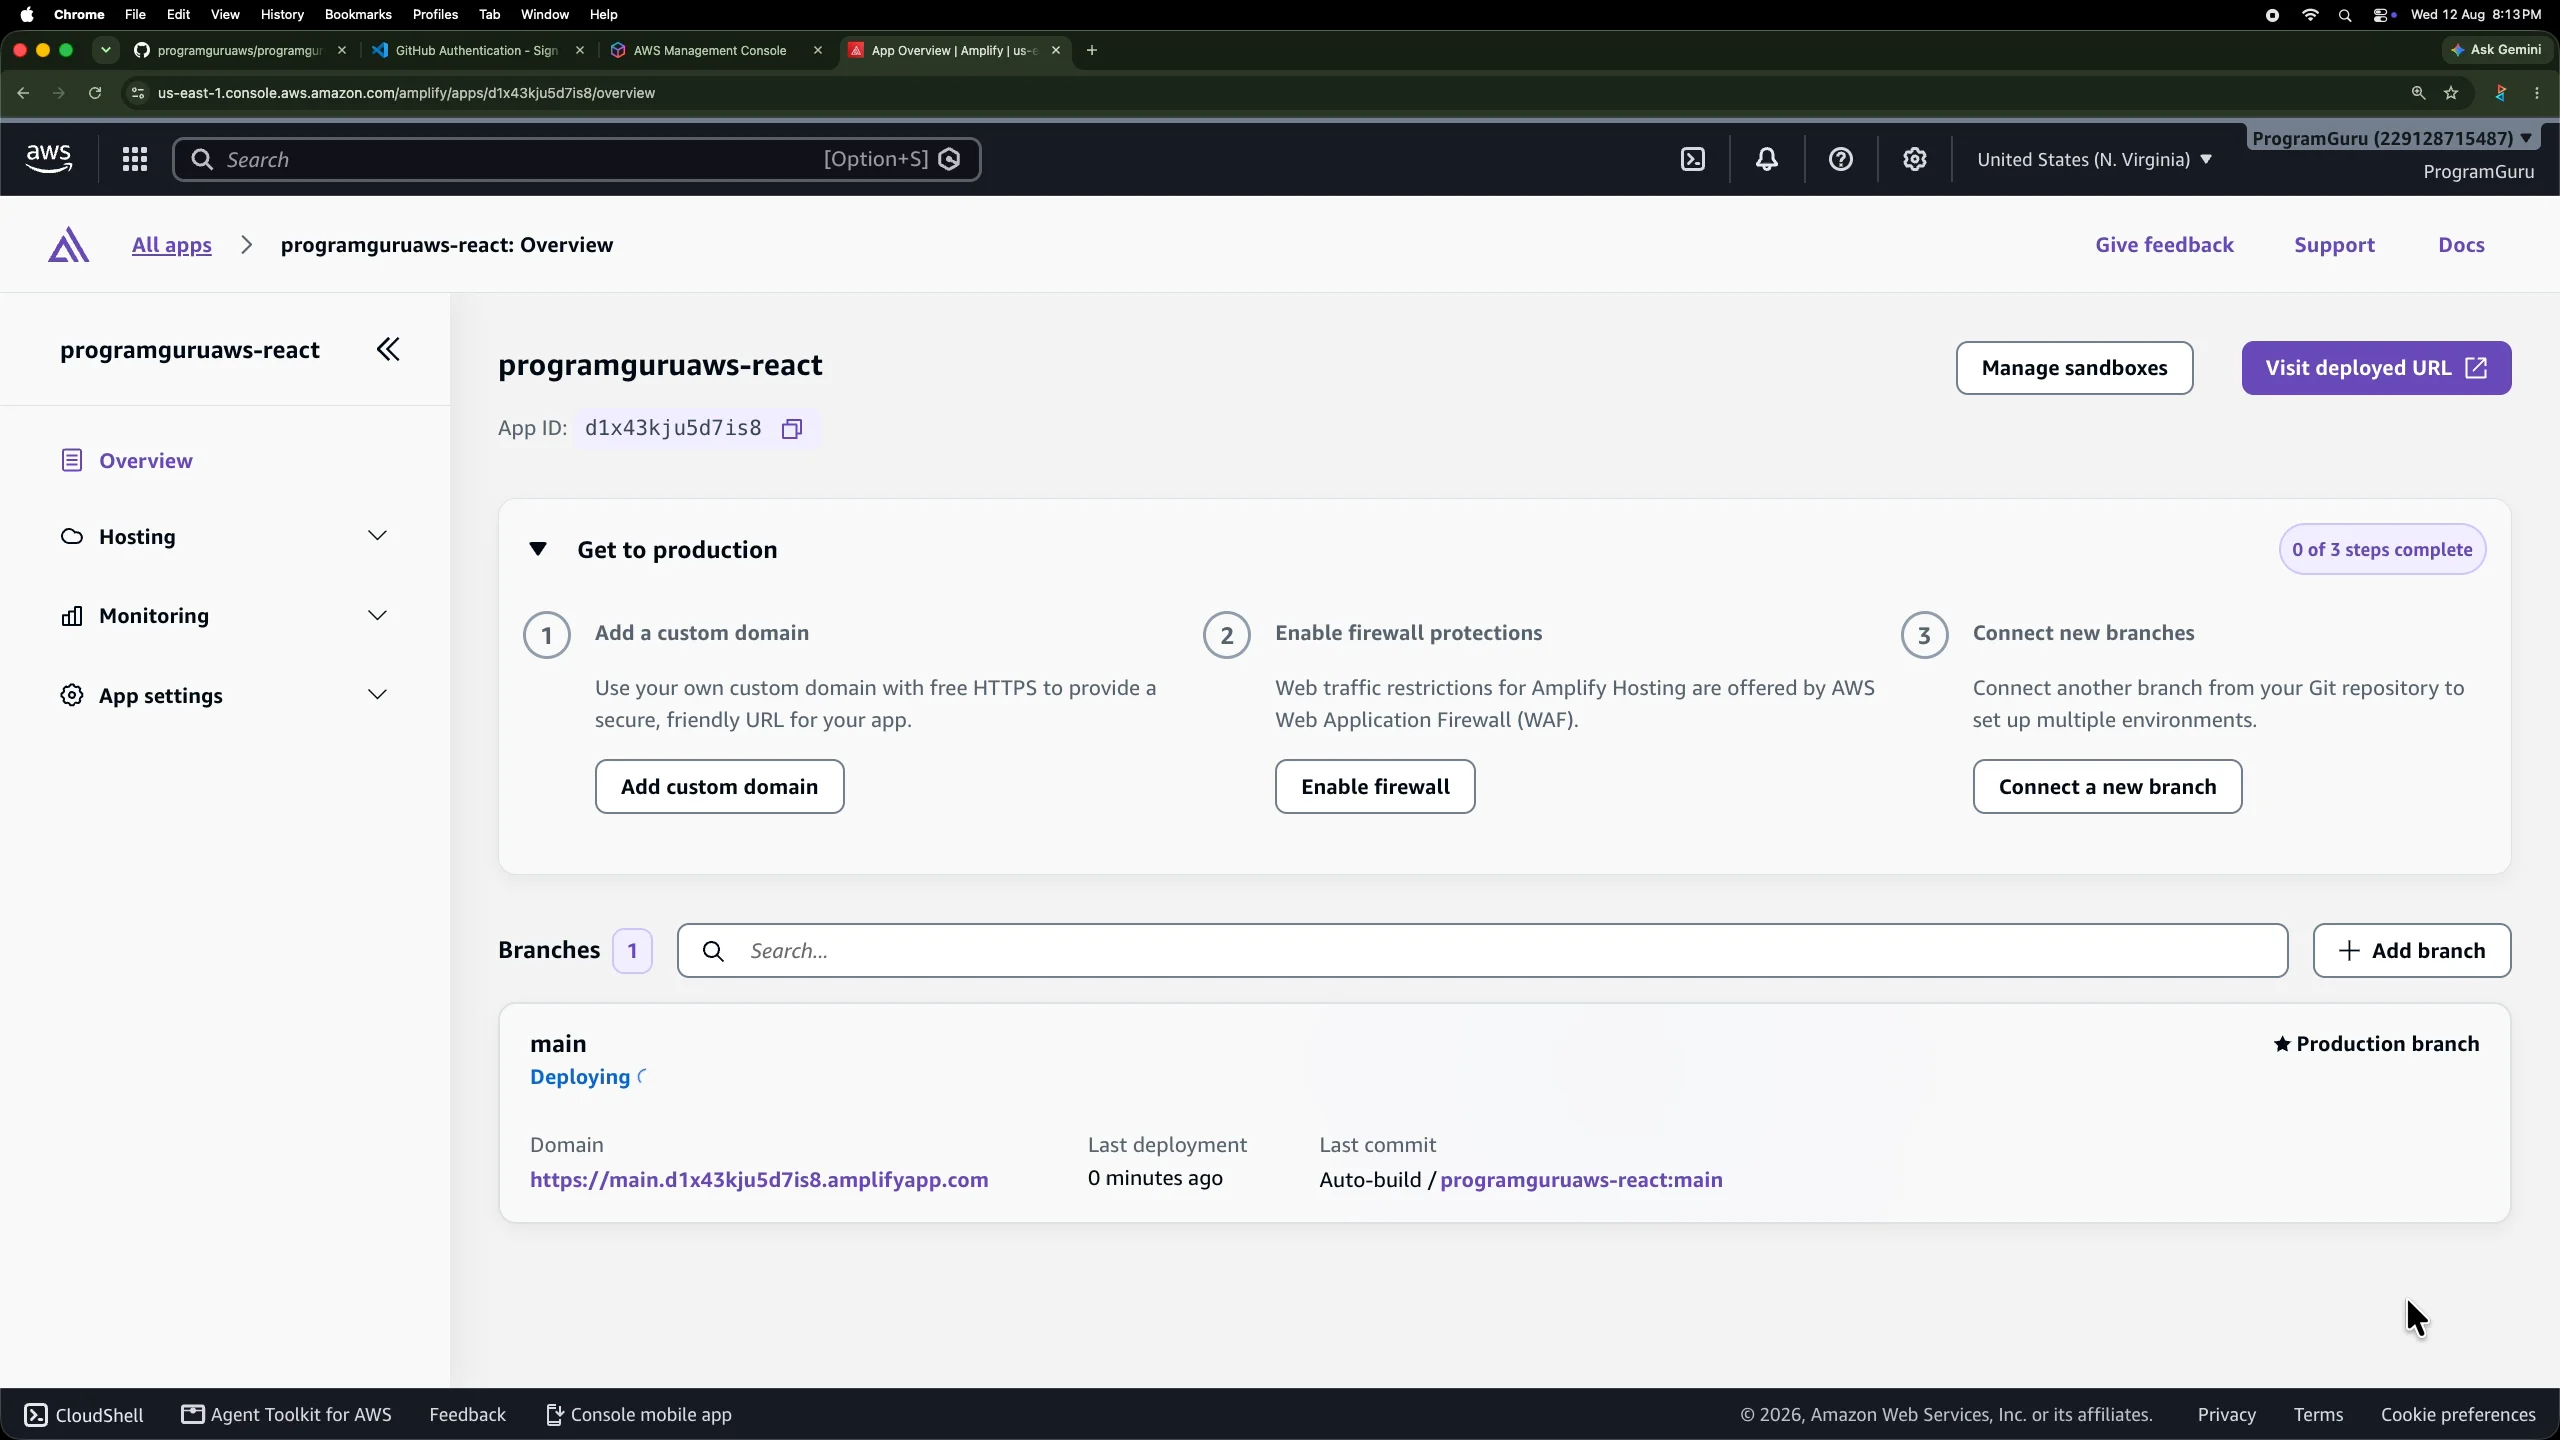
Amplify also provides an automatically generated amplifyapp.com address for the deployed branch.
You can use that address to verify that the application has deployed successfully before configuring your own domain.
Step 15: Open Custom Domains
Our application is now hosted by Amplify, but we want visitors to access it using a custom domain. For example, in this tutorial, we have used the following custom domain.
https://programguruaws.comFrom the Amplify application, open:
Hosting → Custom domains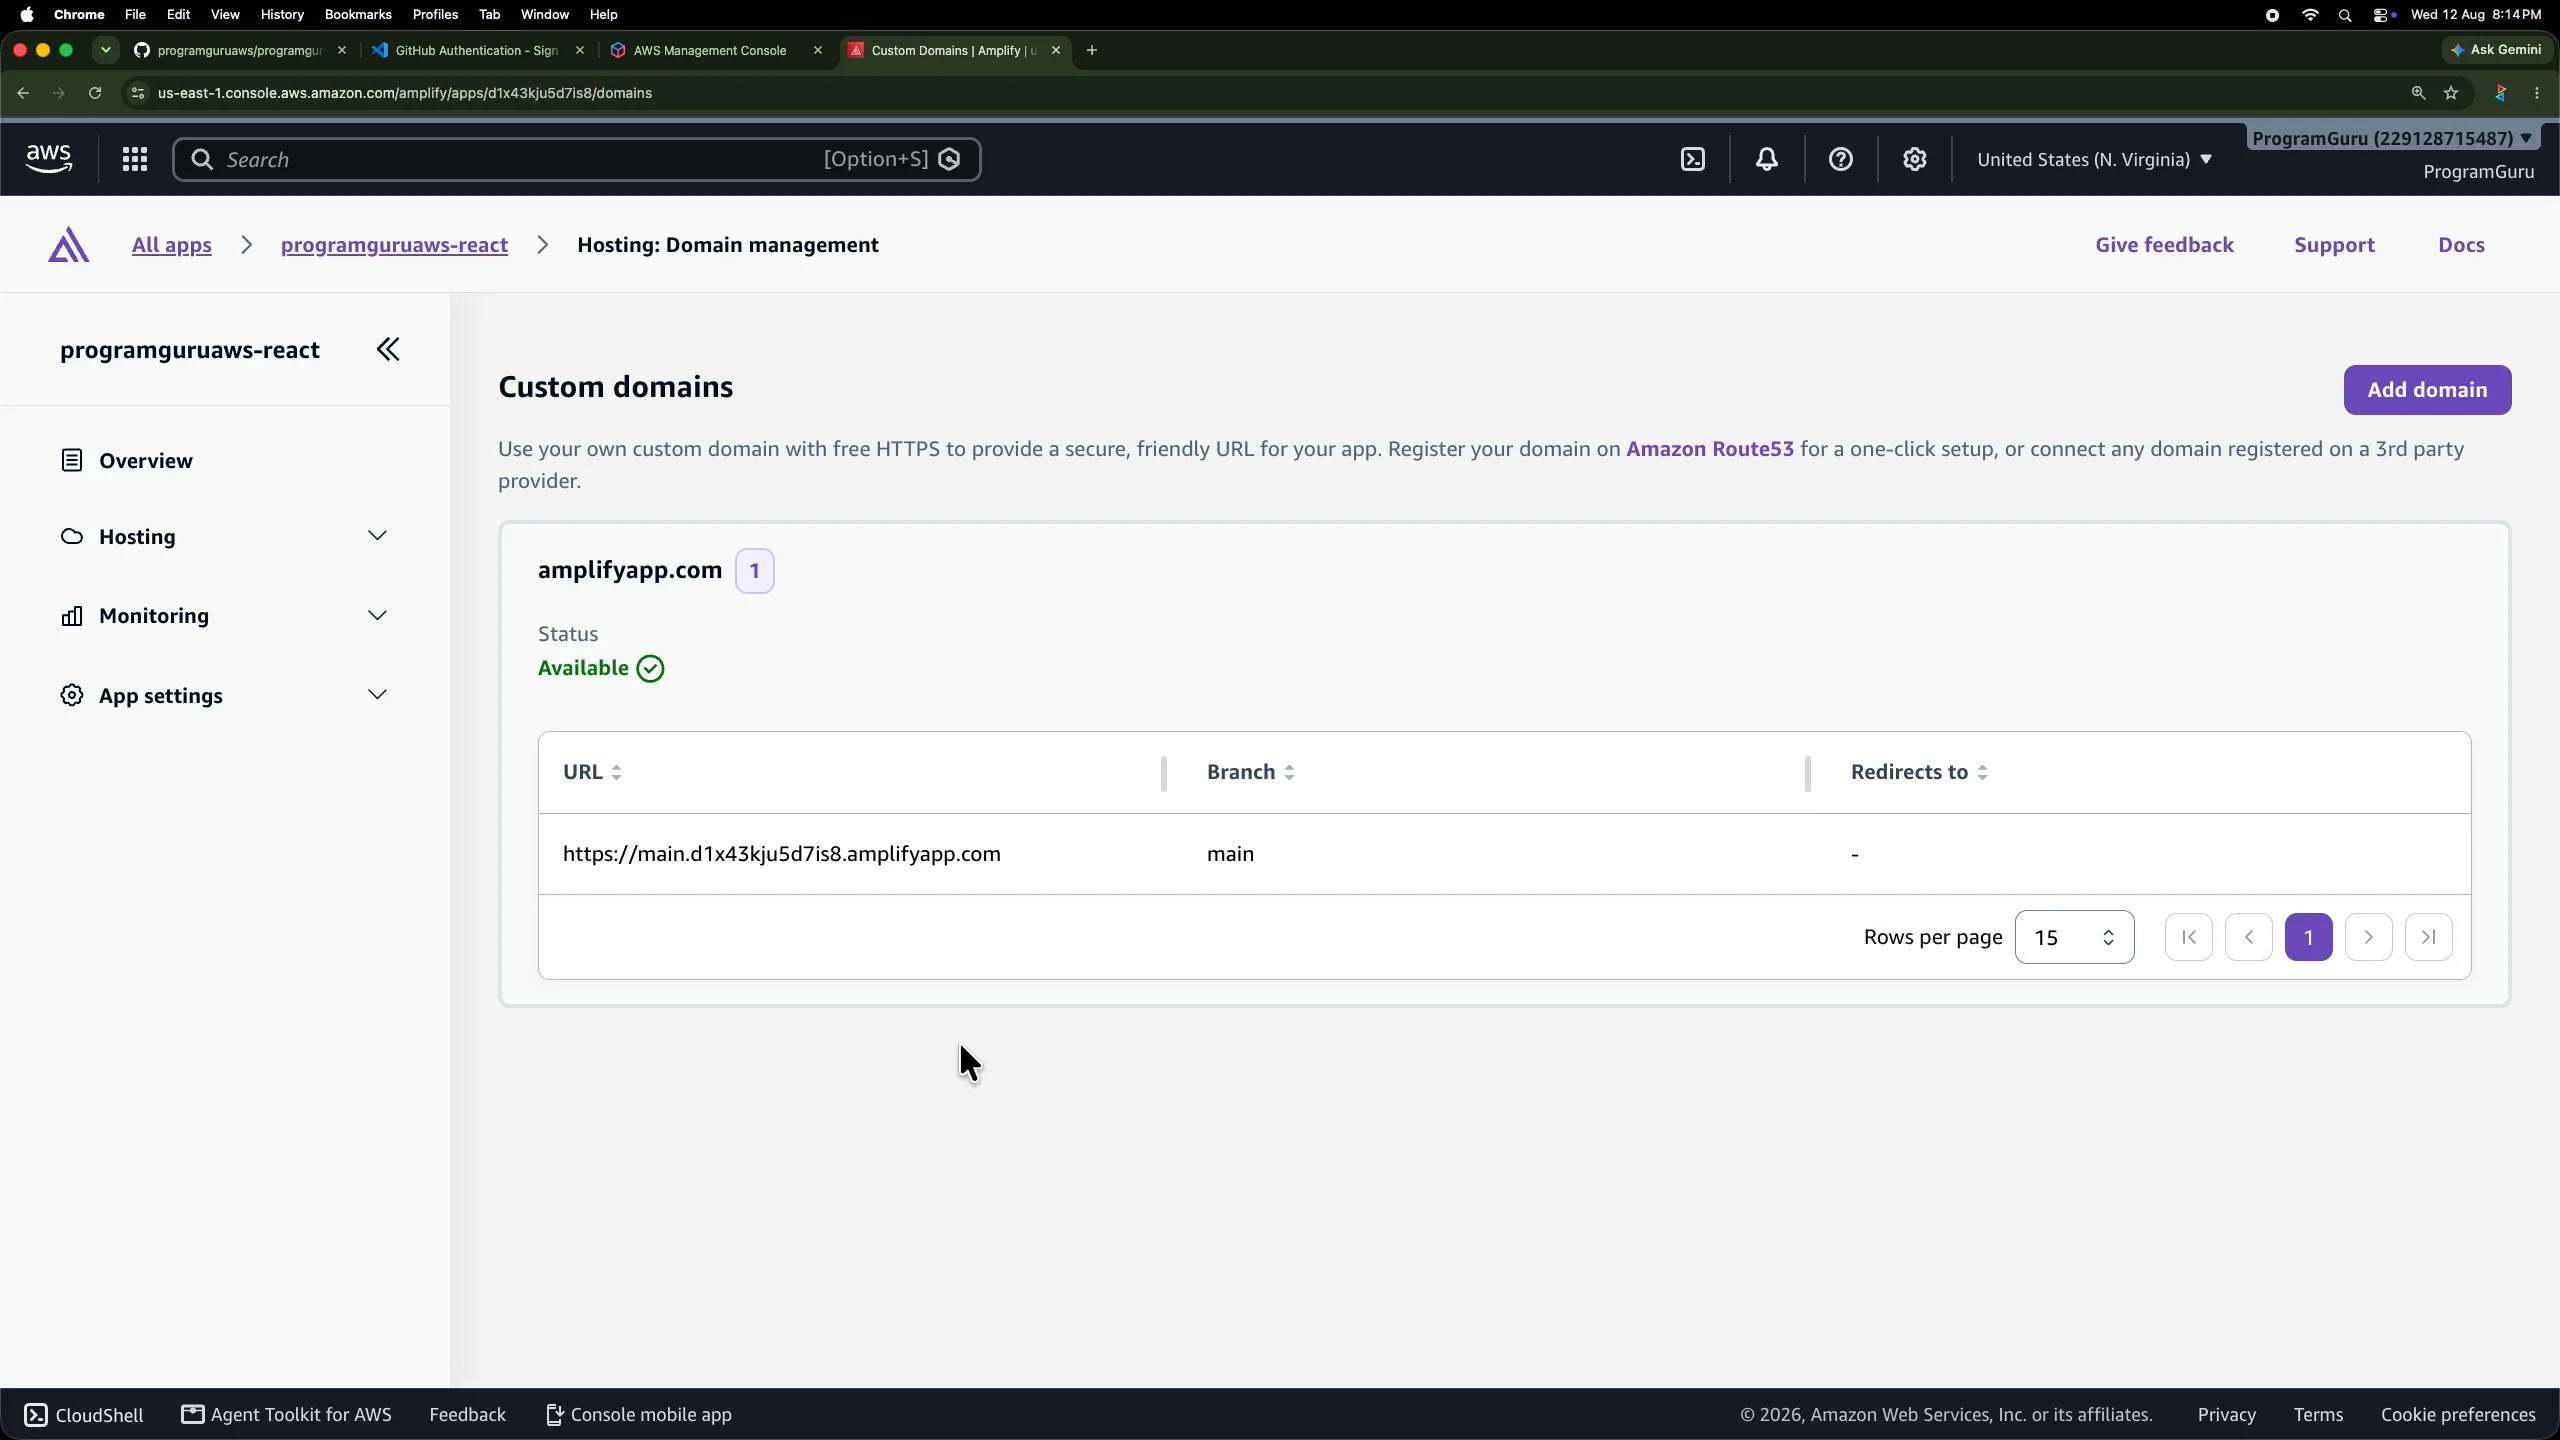
Choose Add domain.
Step 16: Add programguruaws.com
Enter the custom domain.
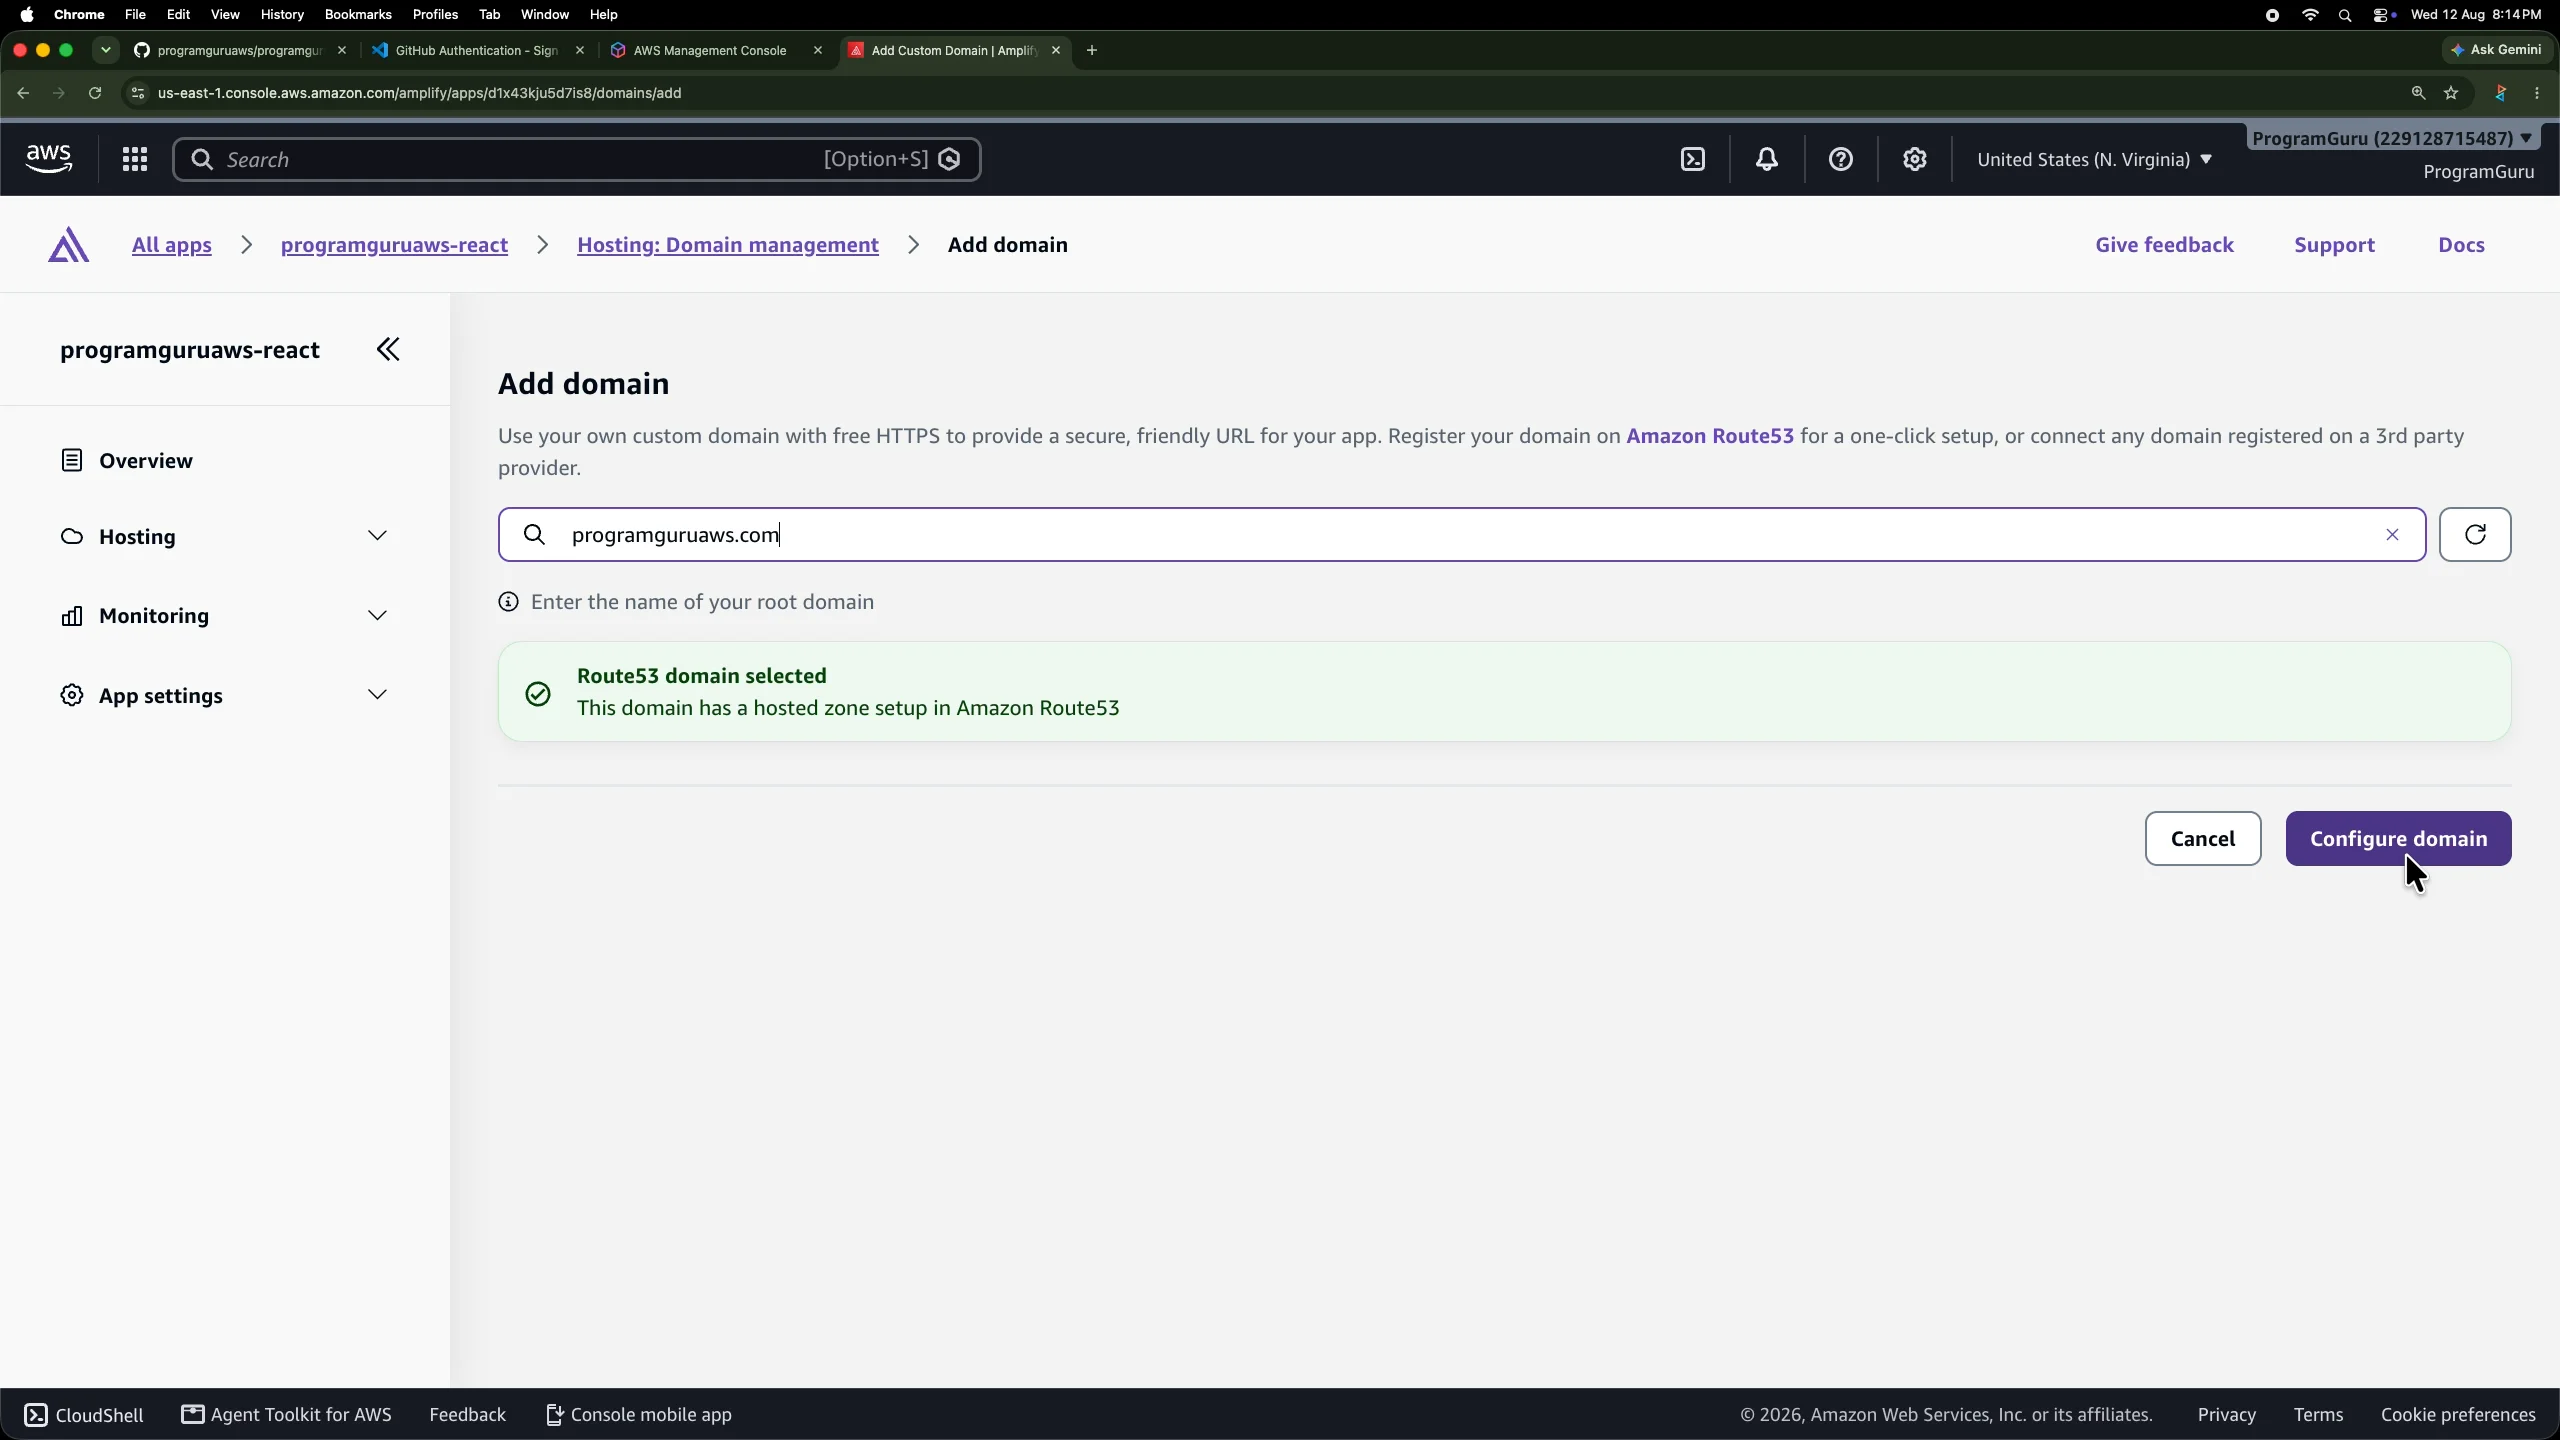
Amplify detects the Route 53 hosted zone associated with the domain.
Because the domain is already managed in Route 53, Amplify can perform the DNS configuration as part of the custom-domain setup.
Choose Configure domain.
Step 17: Configure the Root Domain and WWW Subdomain
On the domain configuration page, connect the root domain to the main branch.
Also configure the www subdomain to use the same main branch.
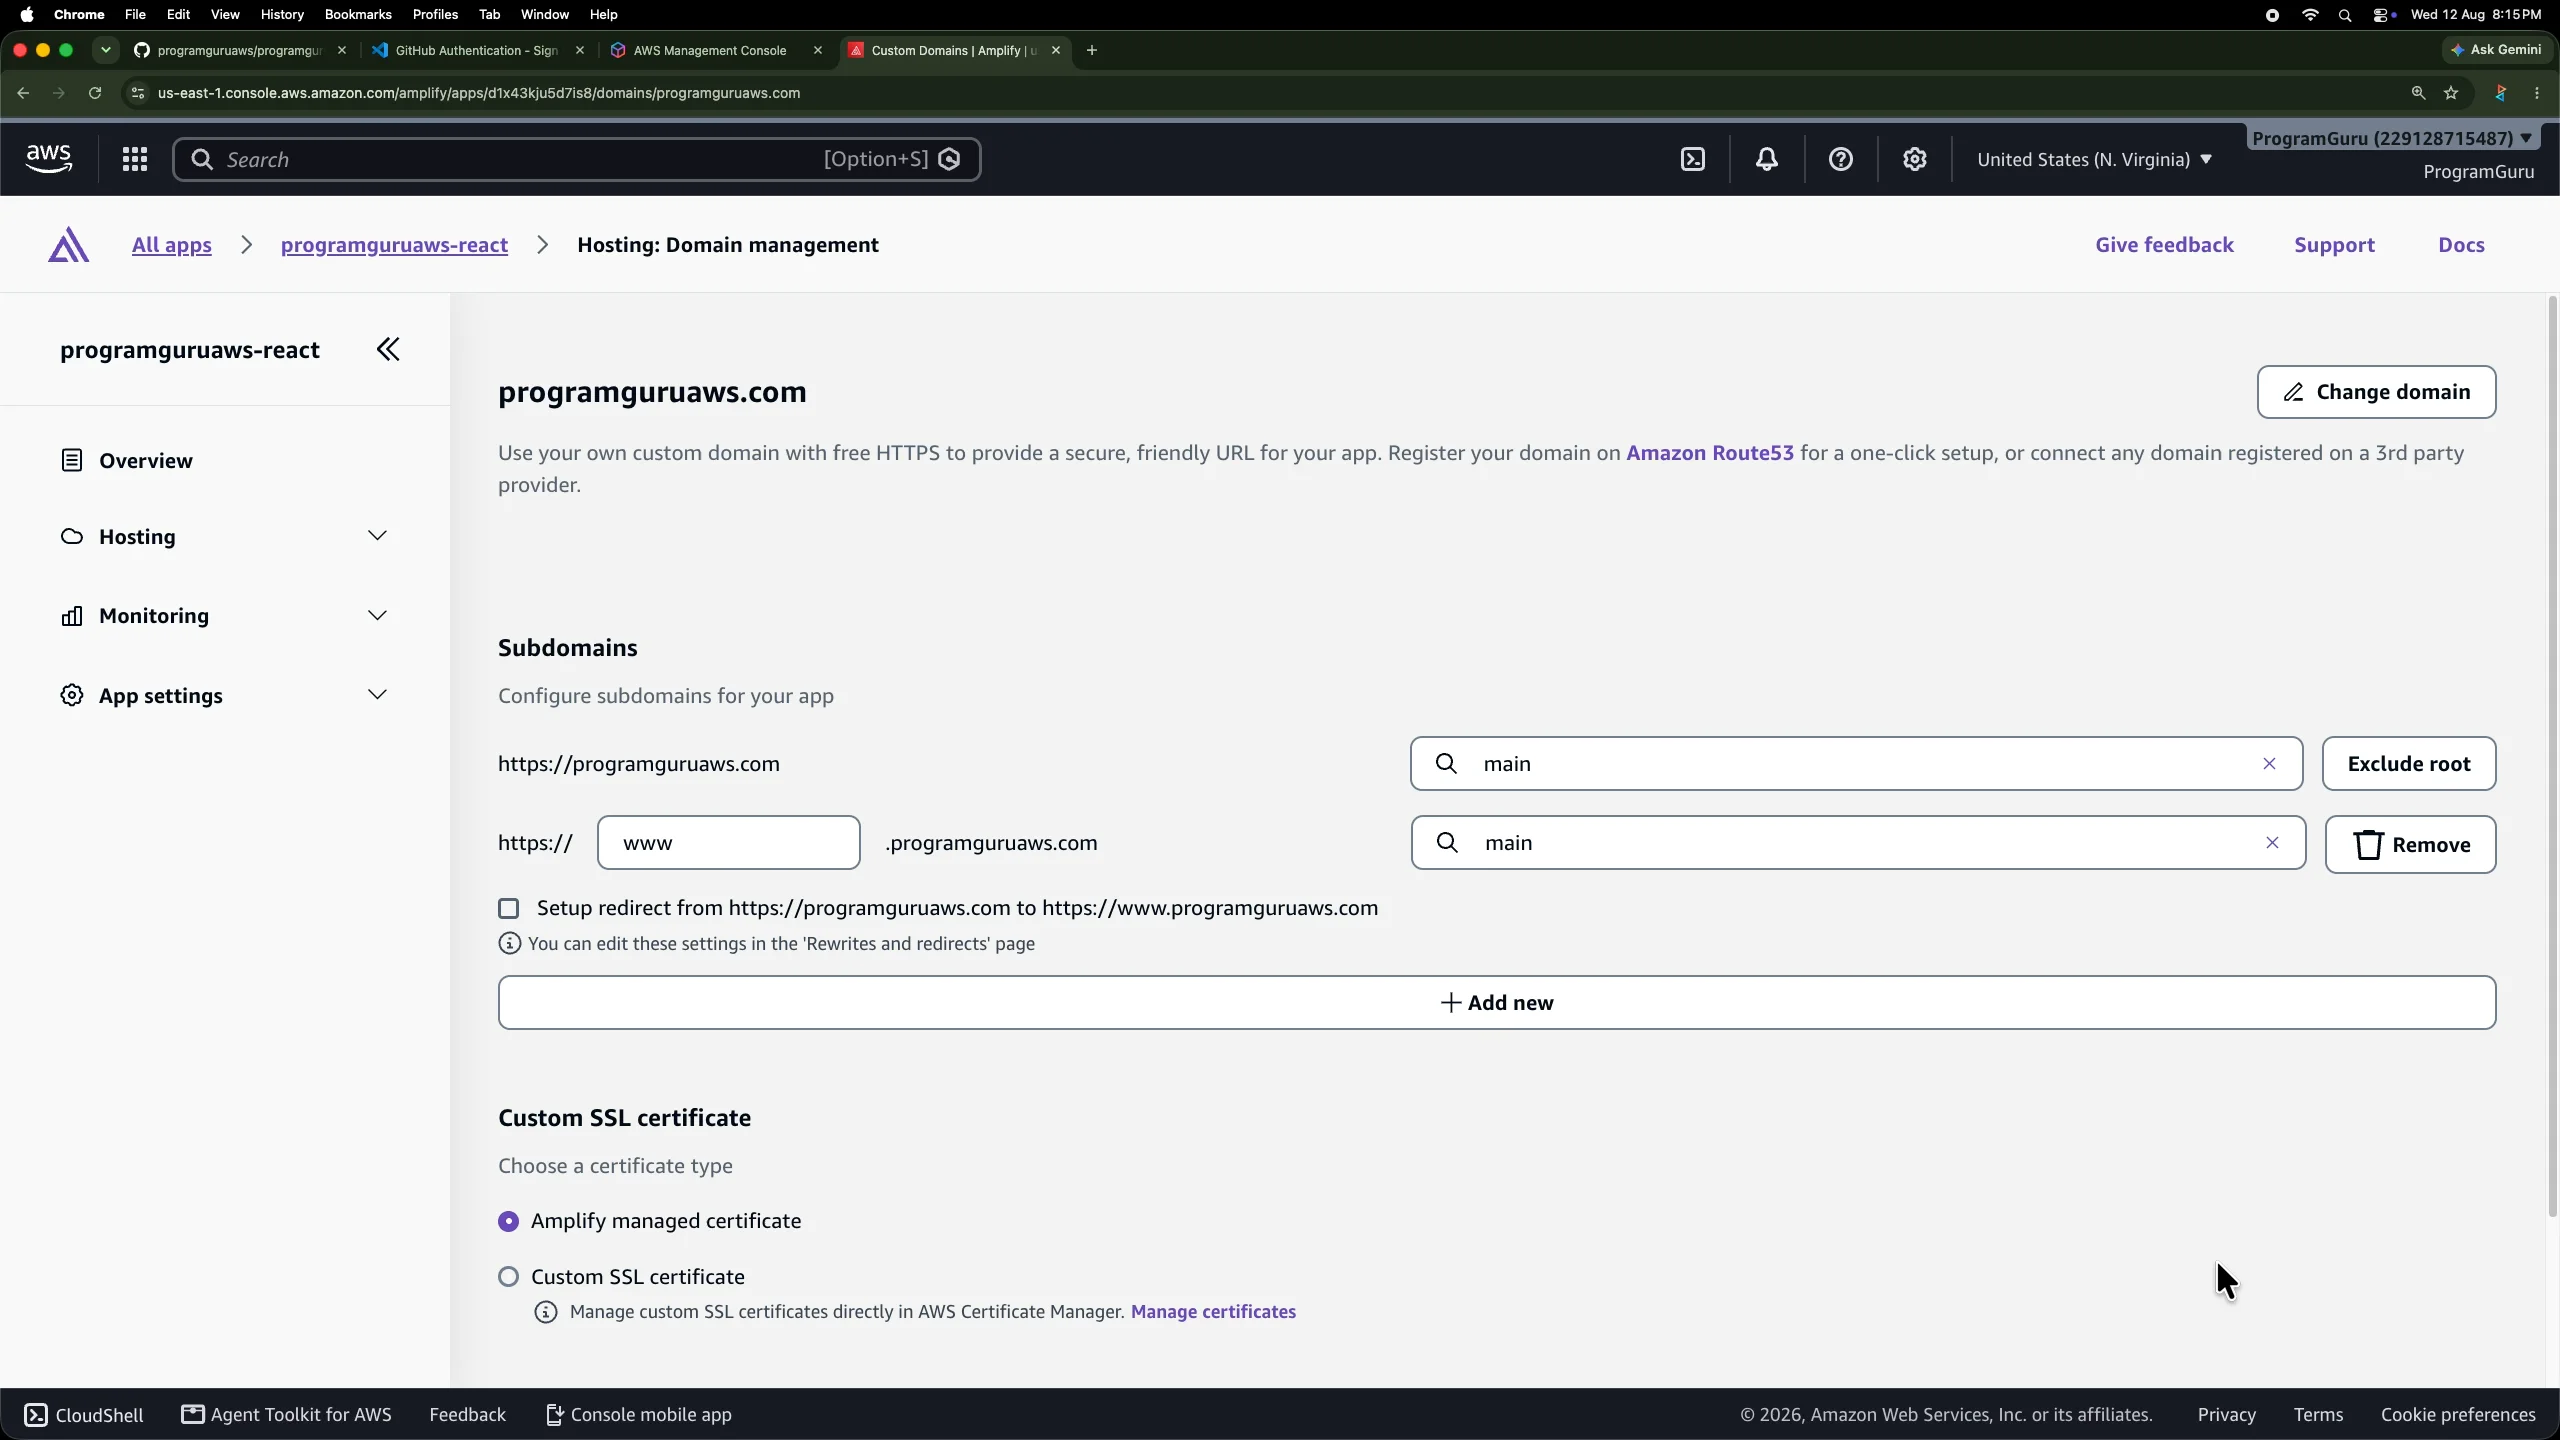
In this example, both addresses are mapped directly to the application.
The option to redirect the root domain to the www domain is left disabled.
If you prefer to use only one version of your domain as the main address, you can configure a redirect instead. For this tutorial, we will keep both addresses connected directly.
Choose the SSL Certificate
Under Custom SSL certificate, keep:
Amplify managed certificateselected.
This allows Amplify to handle the HTTPS certificate for the domain. We do not need to manually create and attach a separate certificate for this deployment.
Complete the domain configuration.
Step 18: Wait for SSL Configuration
Amplify now starts configuring the custom domain.
The process happens in several stages.
First, the SSL certificate is created.
After certificate creation, Amplify adds the required domain records to the DNS configuration.
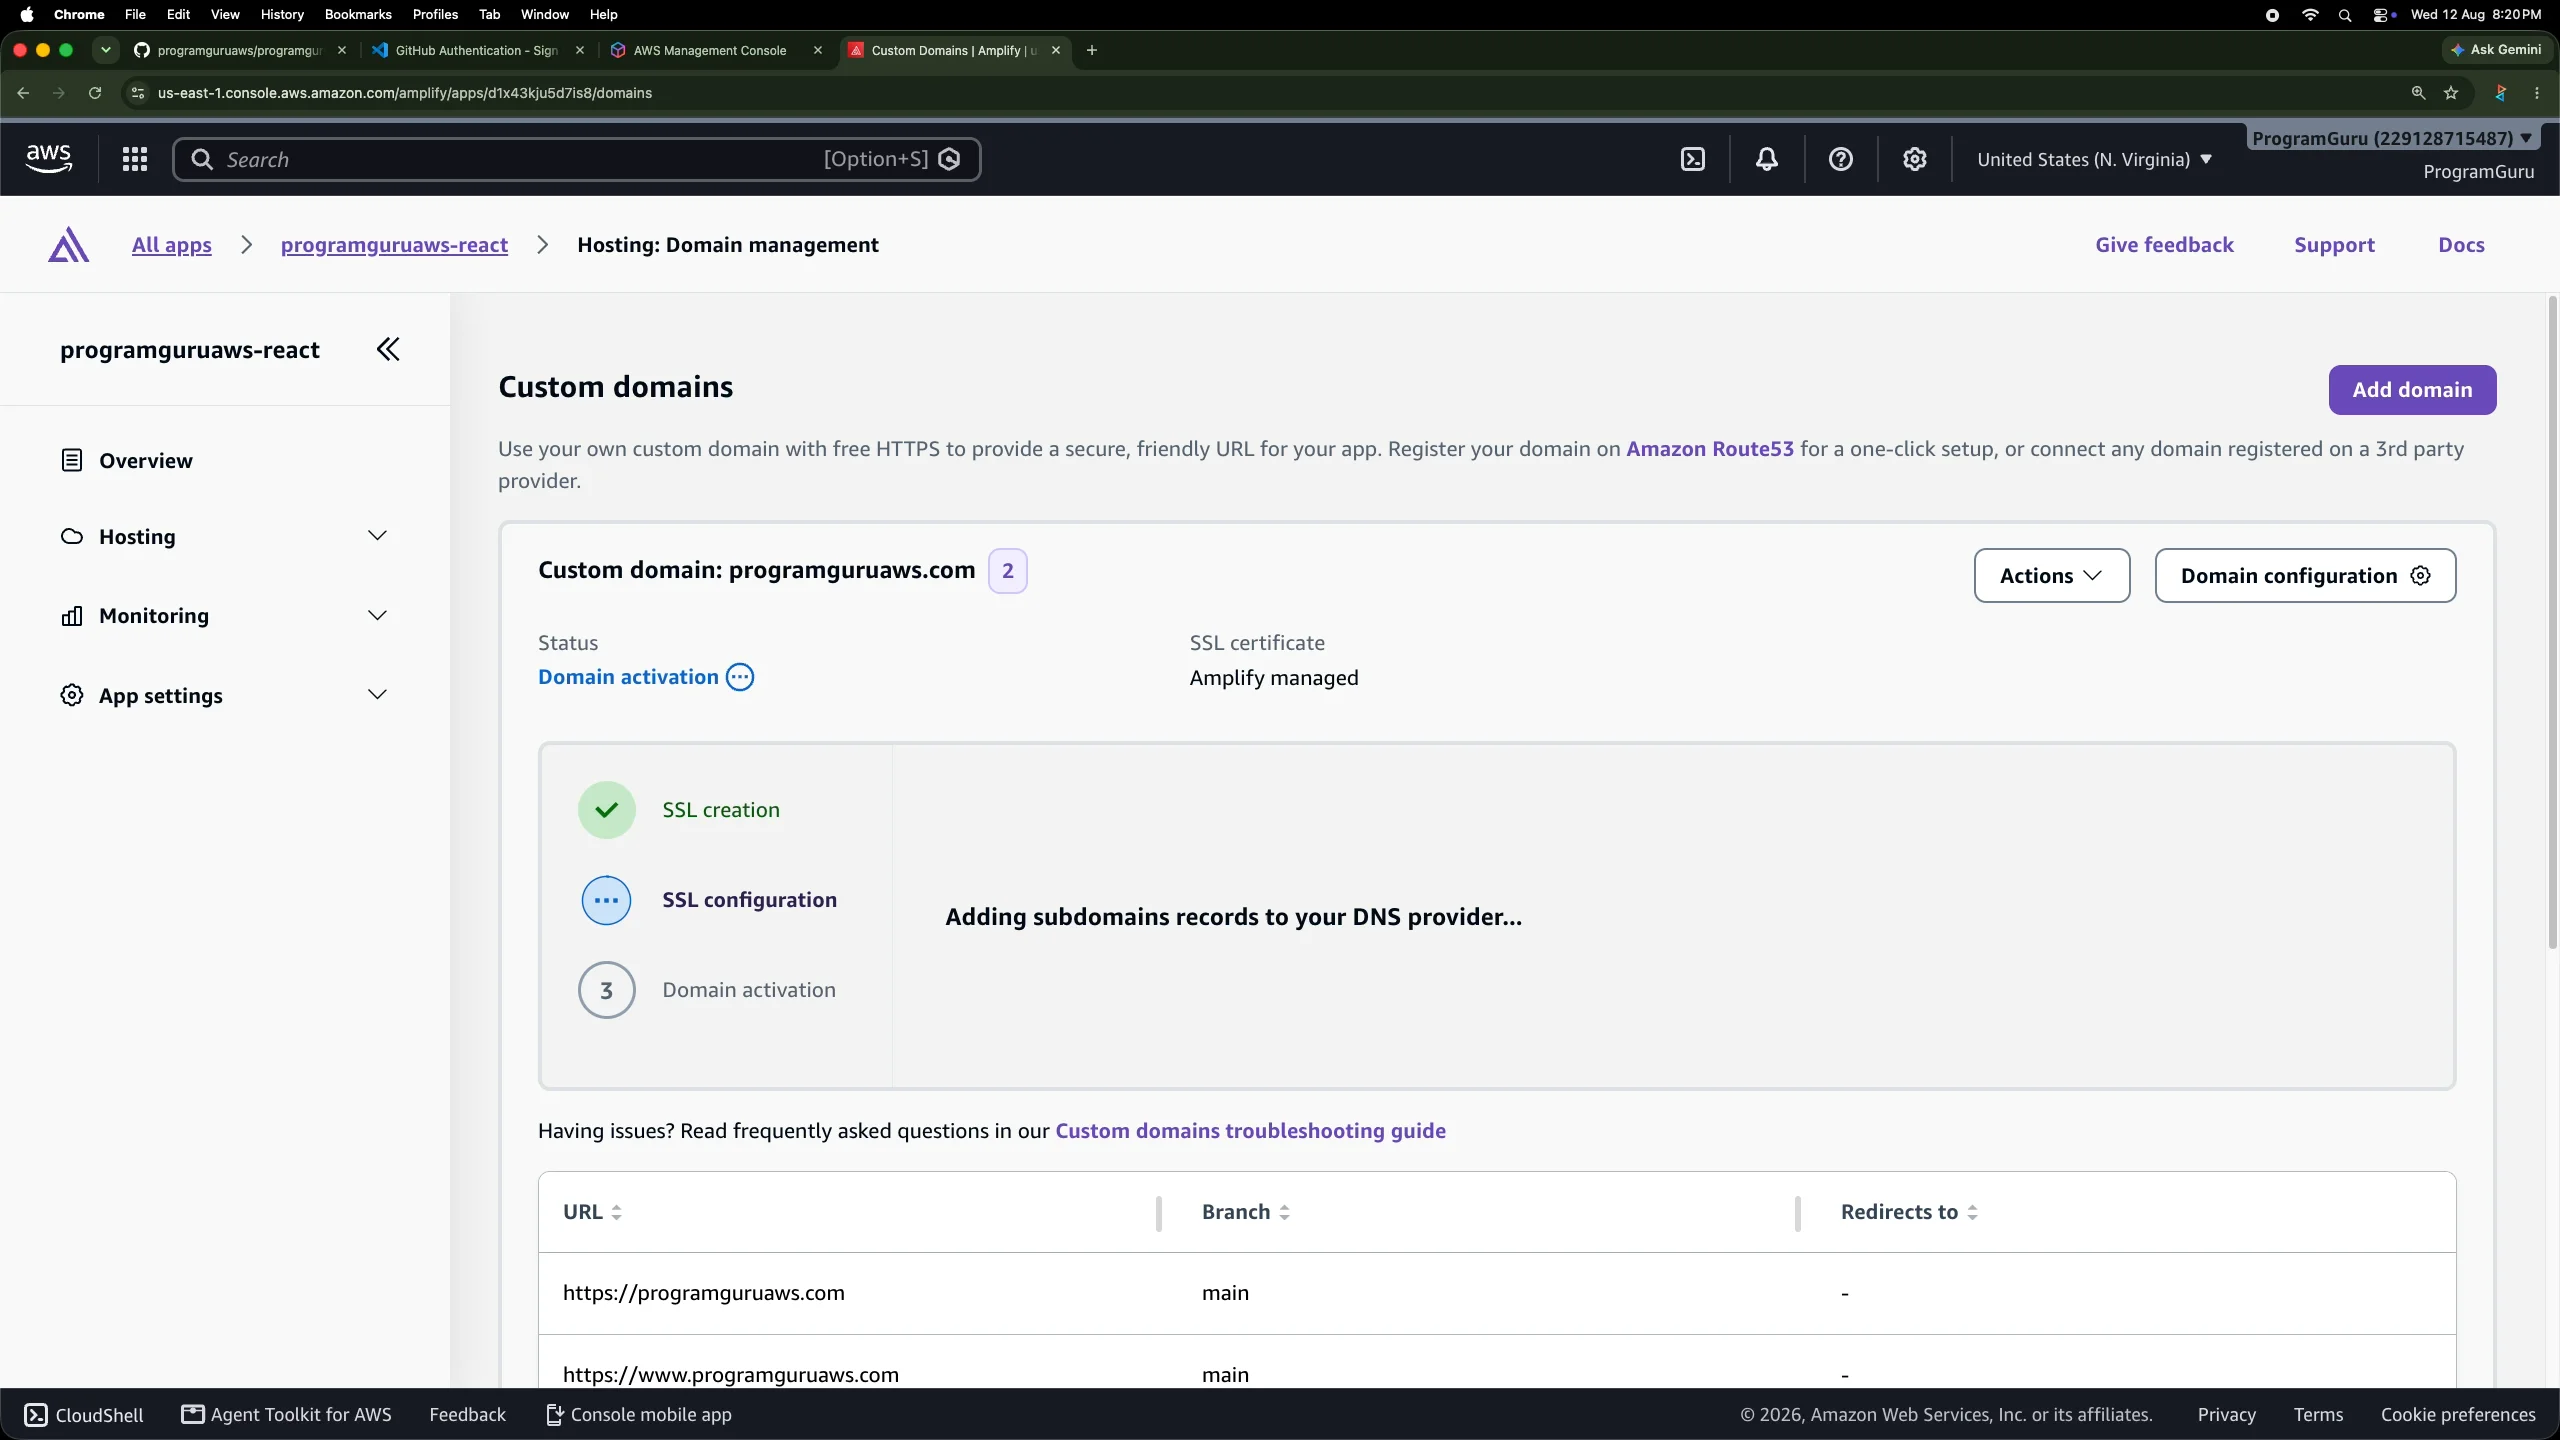
Since this domain is managed by Route 53, Amplify performs the required DNS configuration automatically.
There is normally nothing useful to gain by repeatedly changing settings while this process is running. Allow the domain configuration time to complete.
Step 19: Wait for Domain Activation
After SSL creation and SSL configuration are complete, Amplify moves to the domain activation stage.
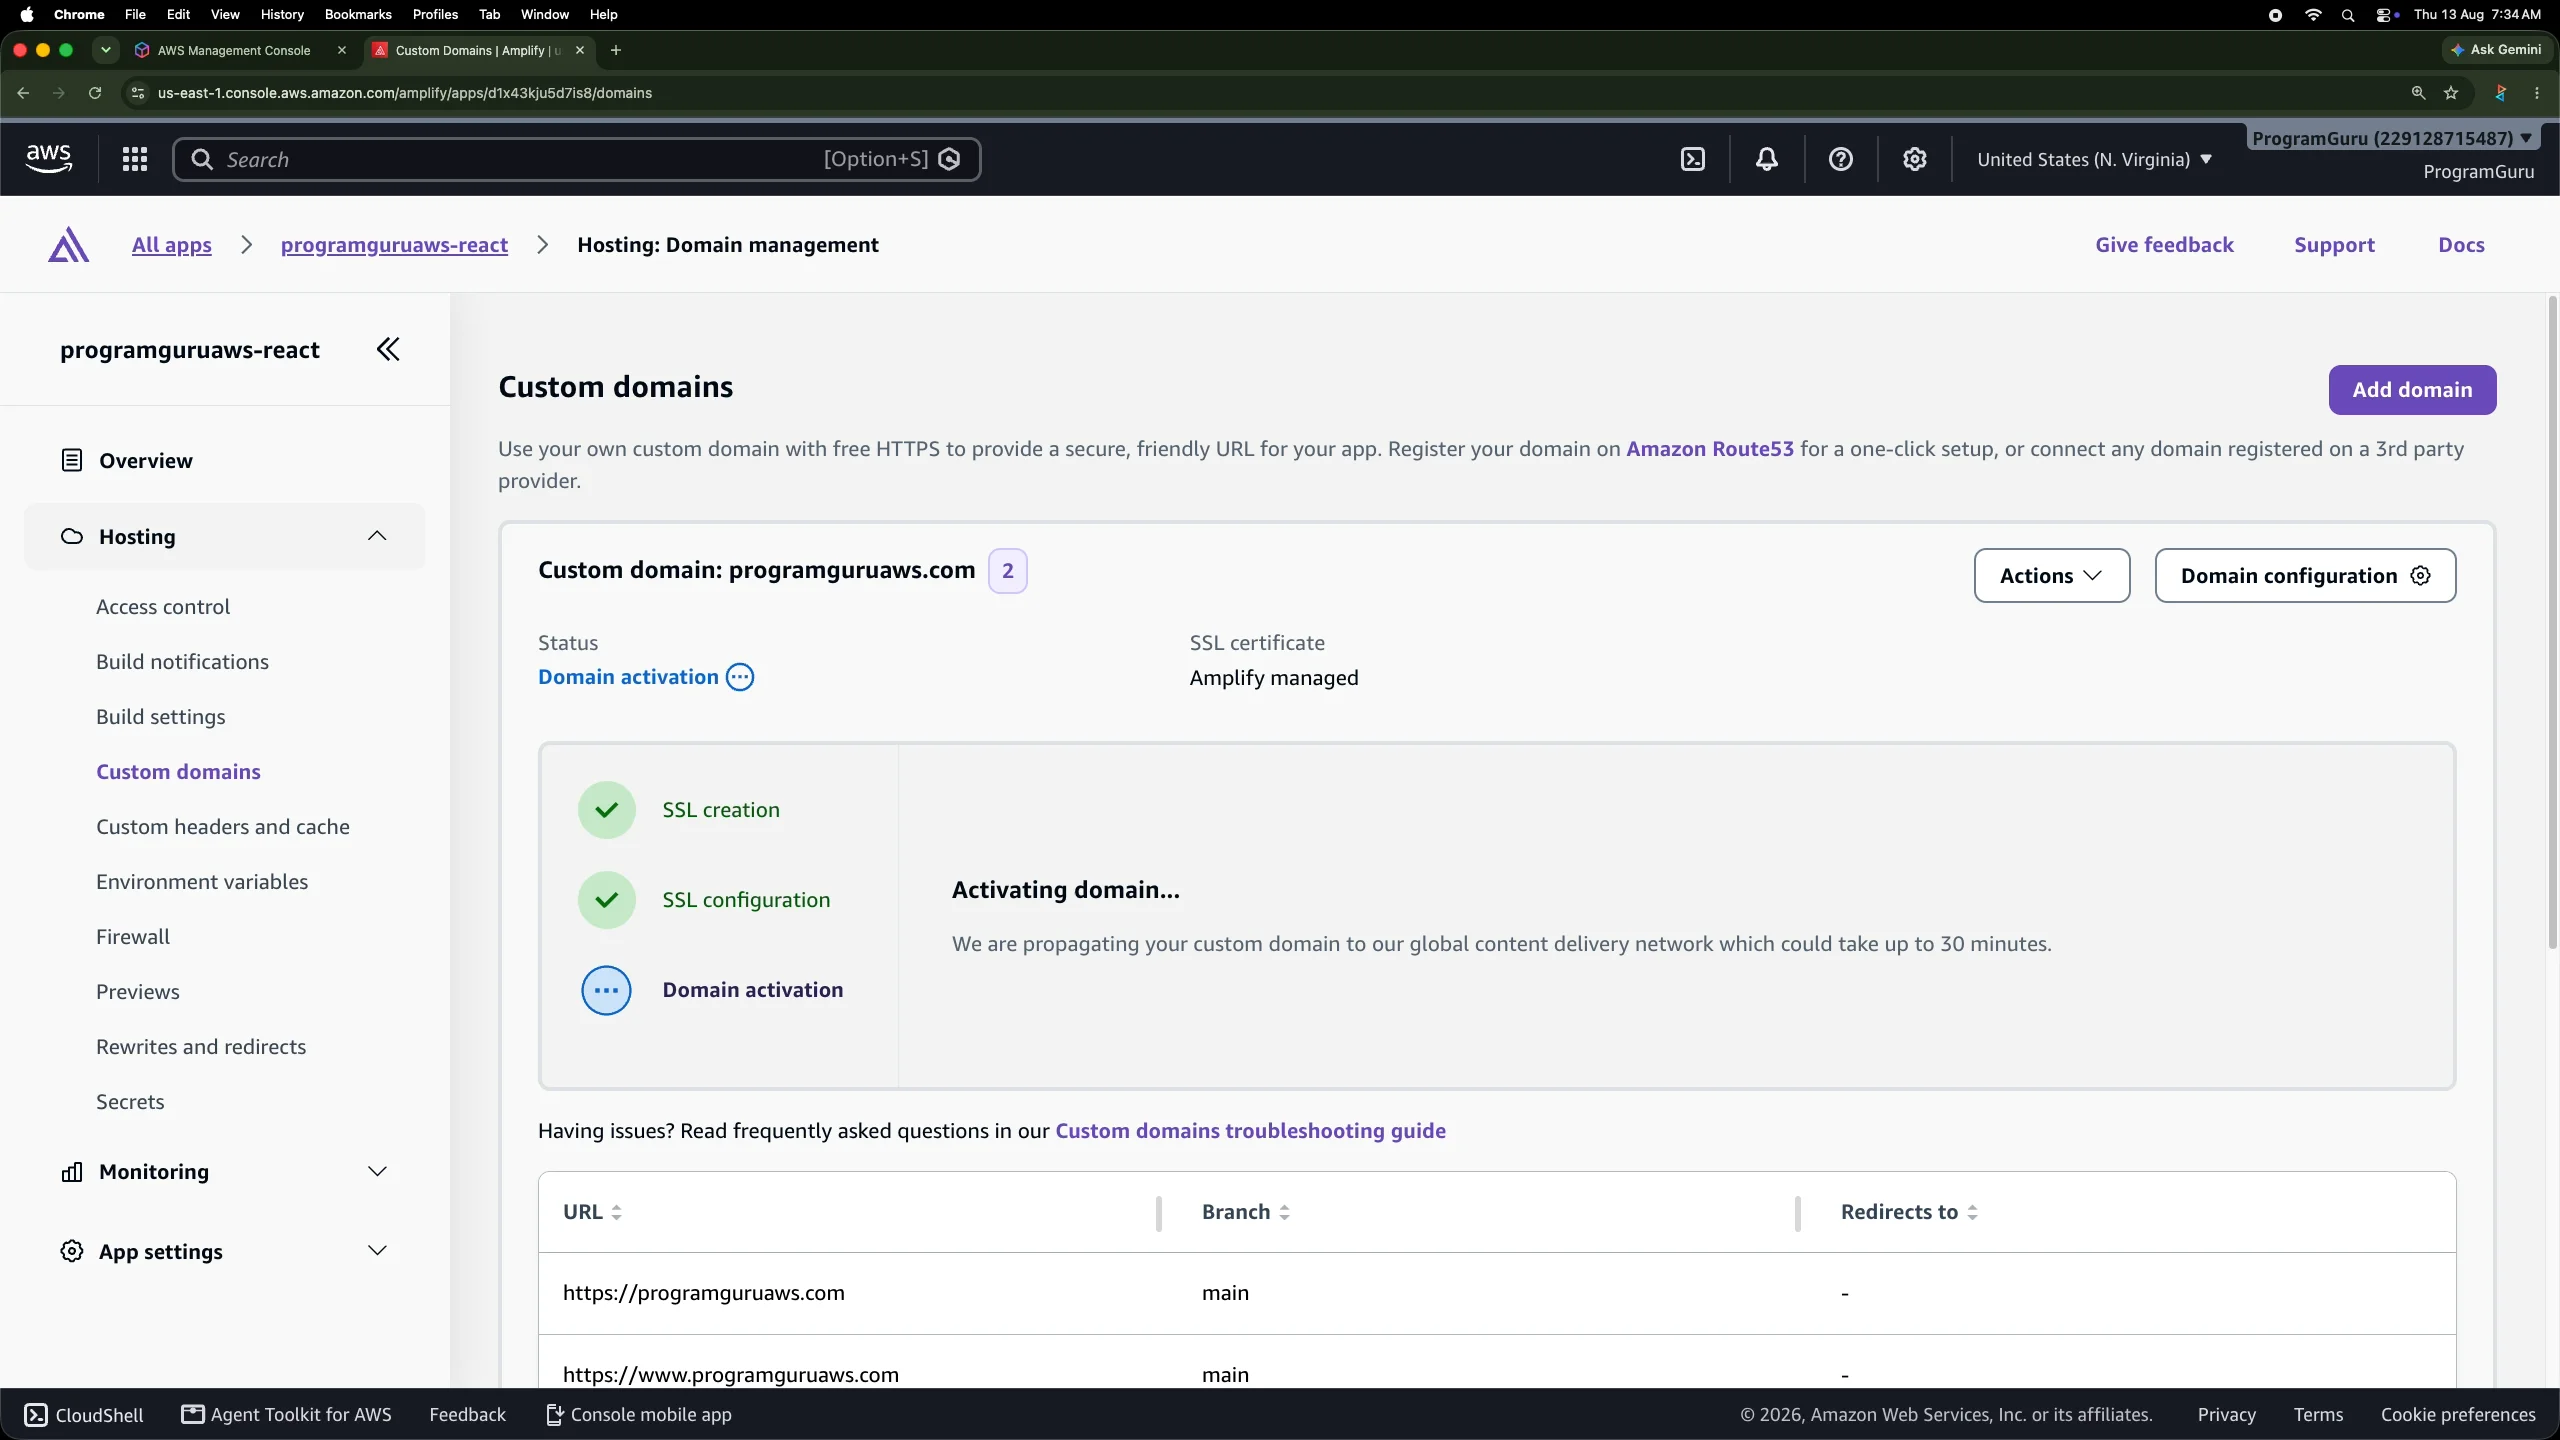
At this stage Amplify is propagating the custom domain through its content delivery network.
The console indicates that this part can take up to approximately 30 minutes.
Wait until the status changes to Available.
Step 20: Verify the Custom Domain
Once domain activation is complete, Amplify shows the custom domain as available.
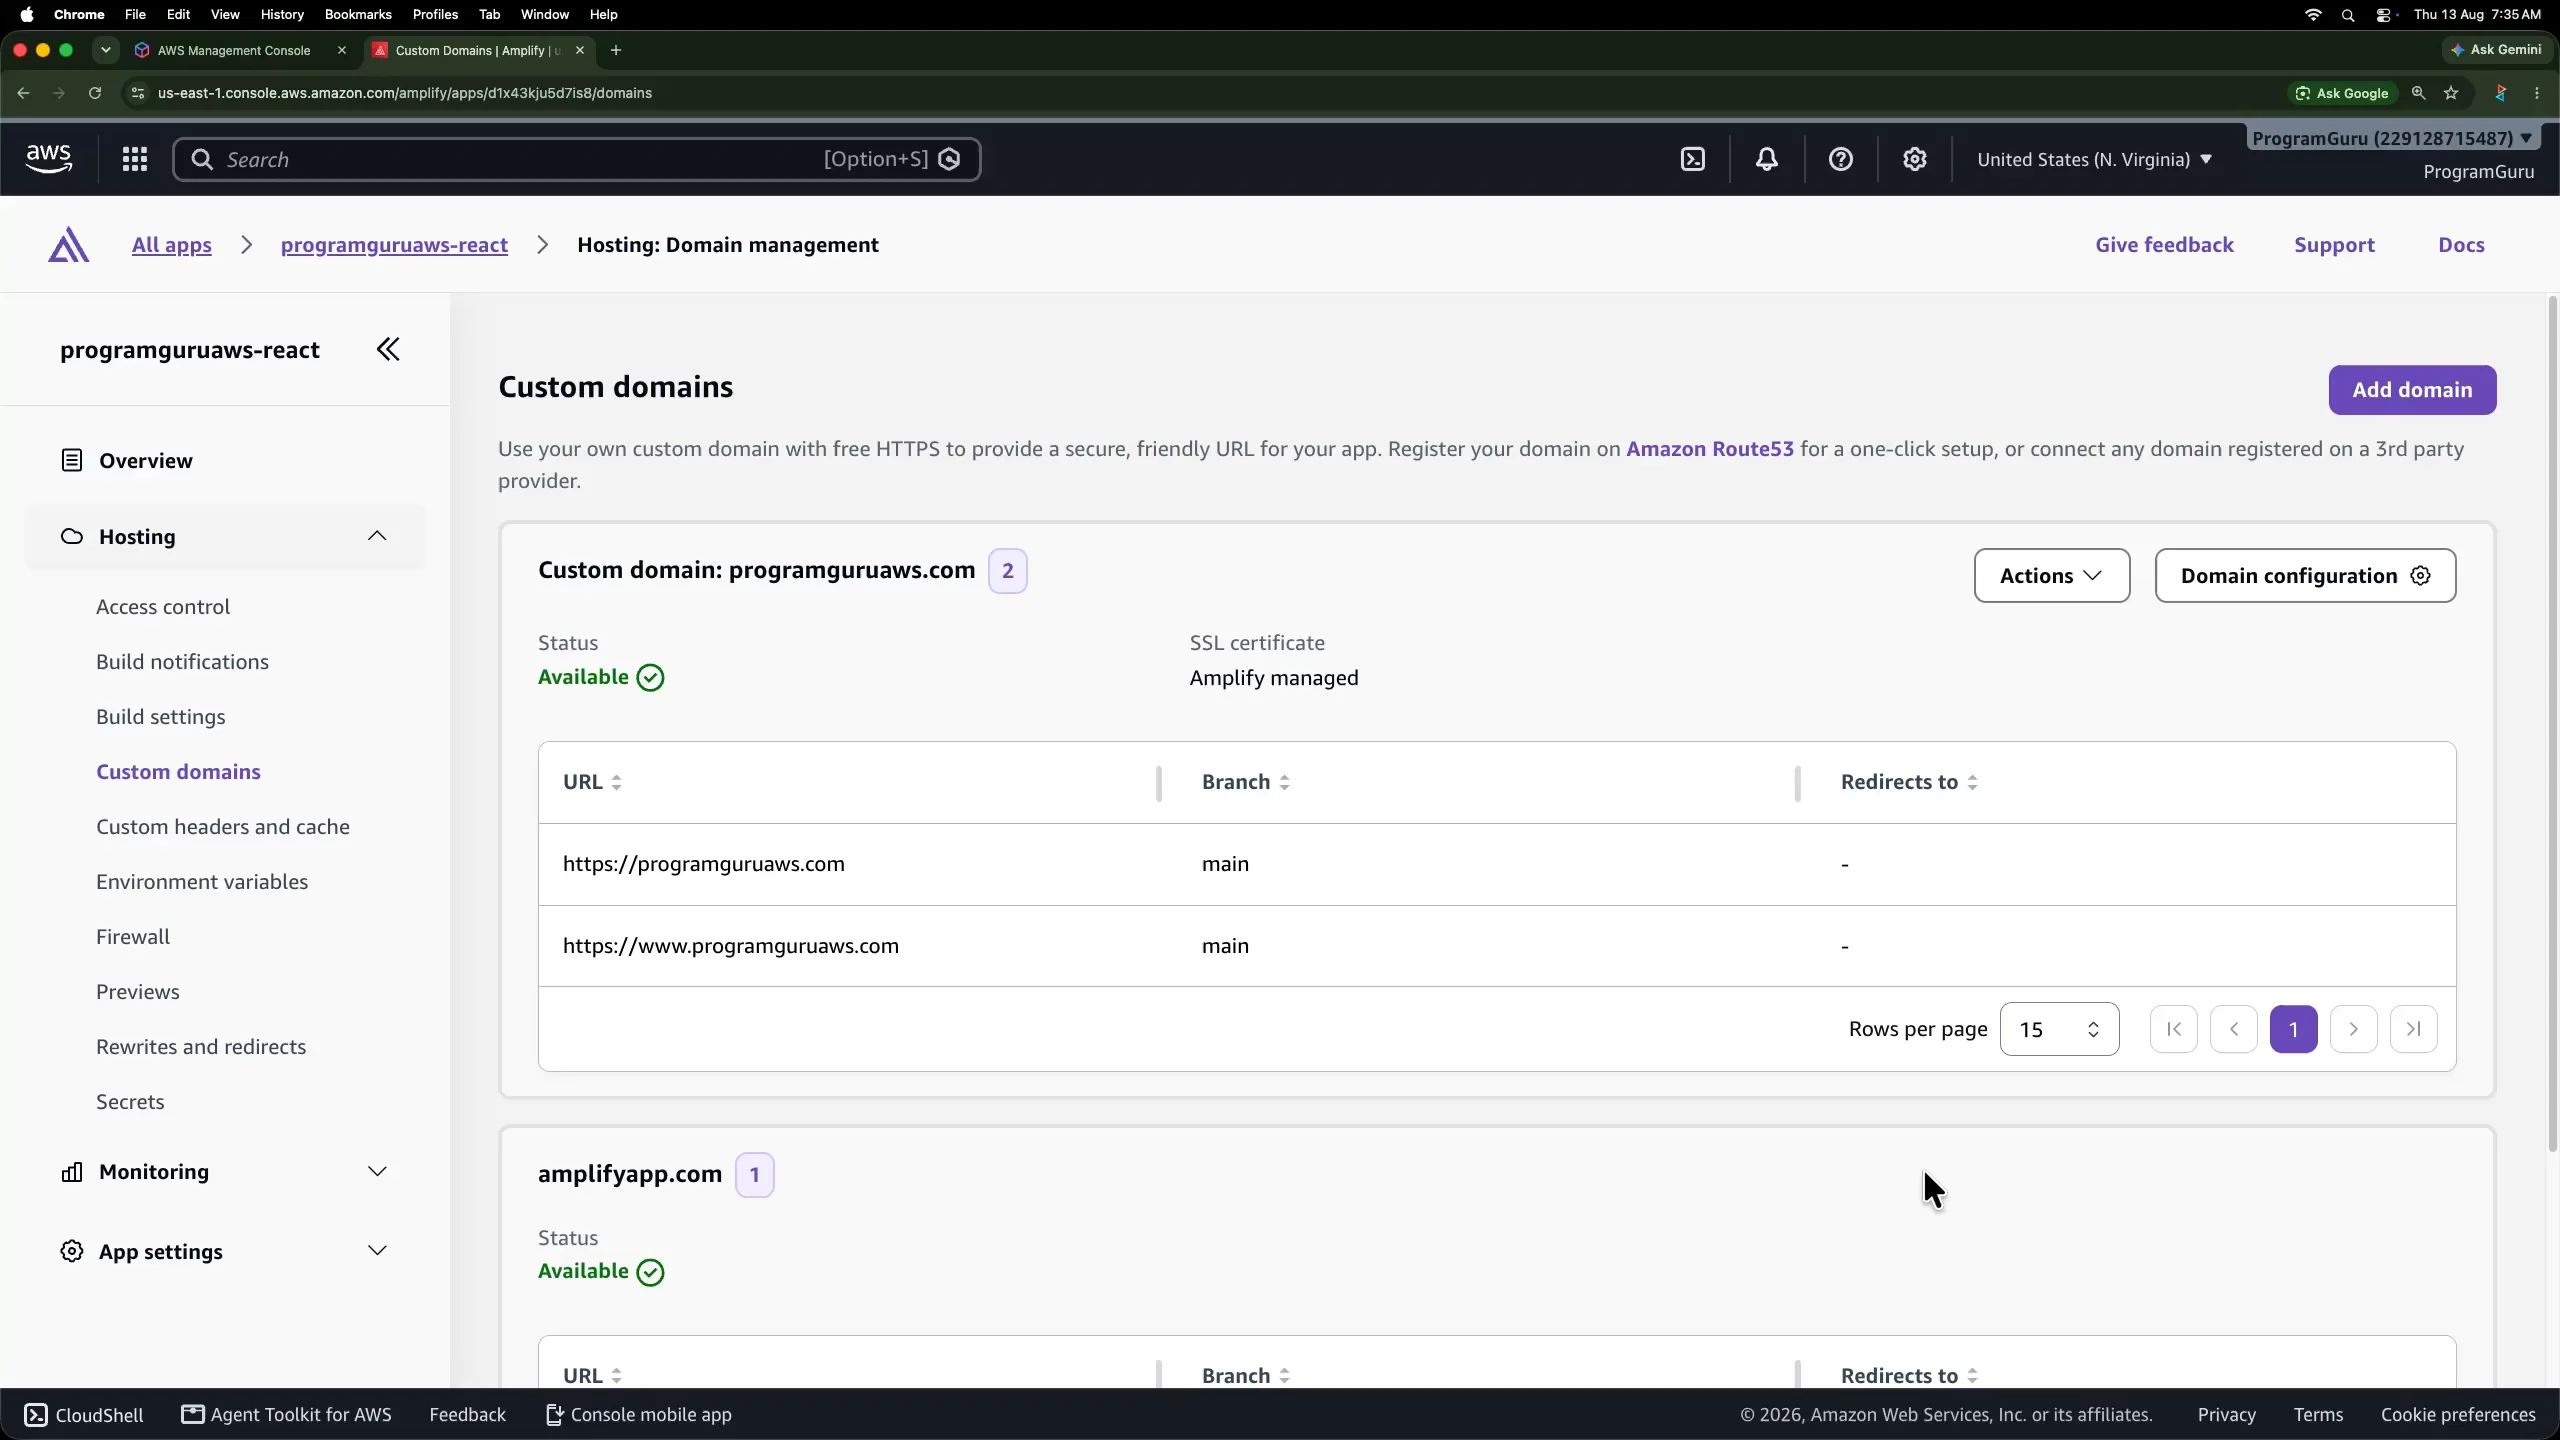
At this point, both addresses are connected to the main branch.
The SSL certificate is managed by Amplify, so visitors can access the application using HTTPS.
Step 21: Open the React Application from the Custom Domain
Open the custom domain address in the browser.
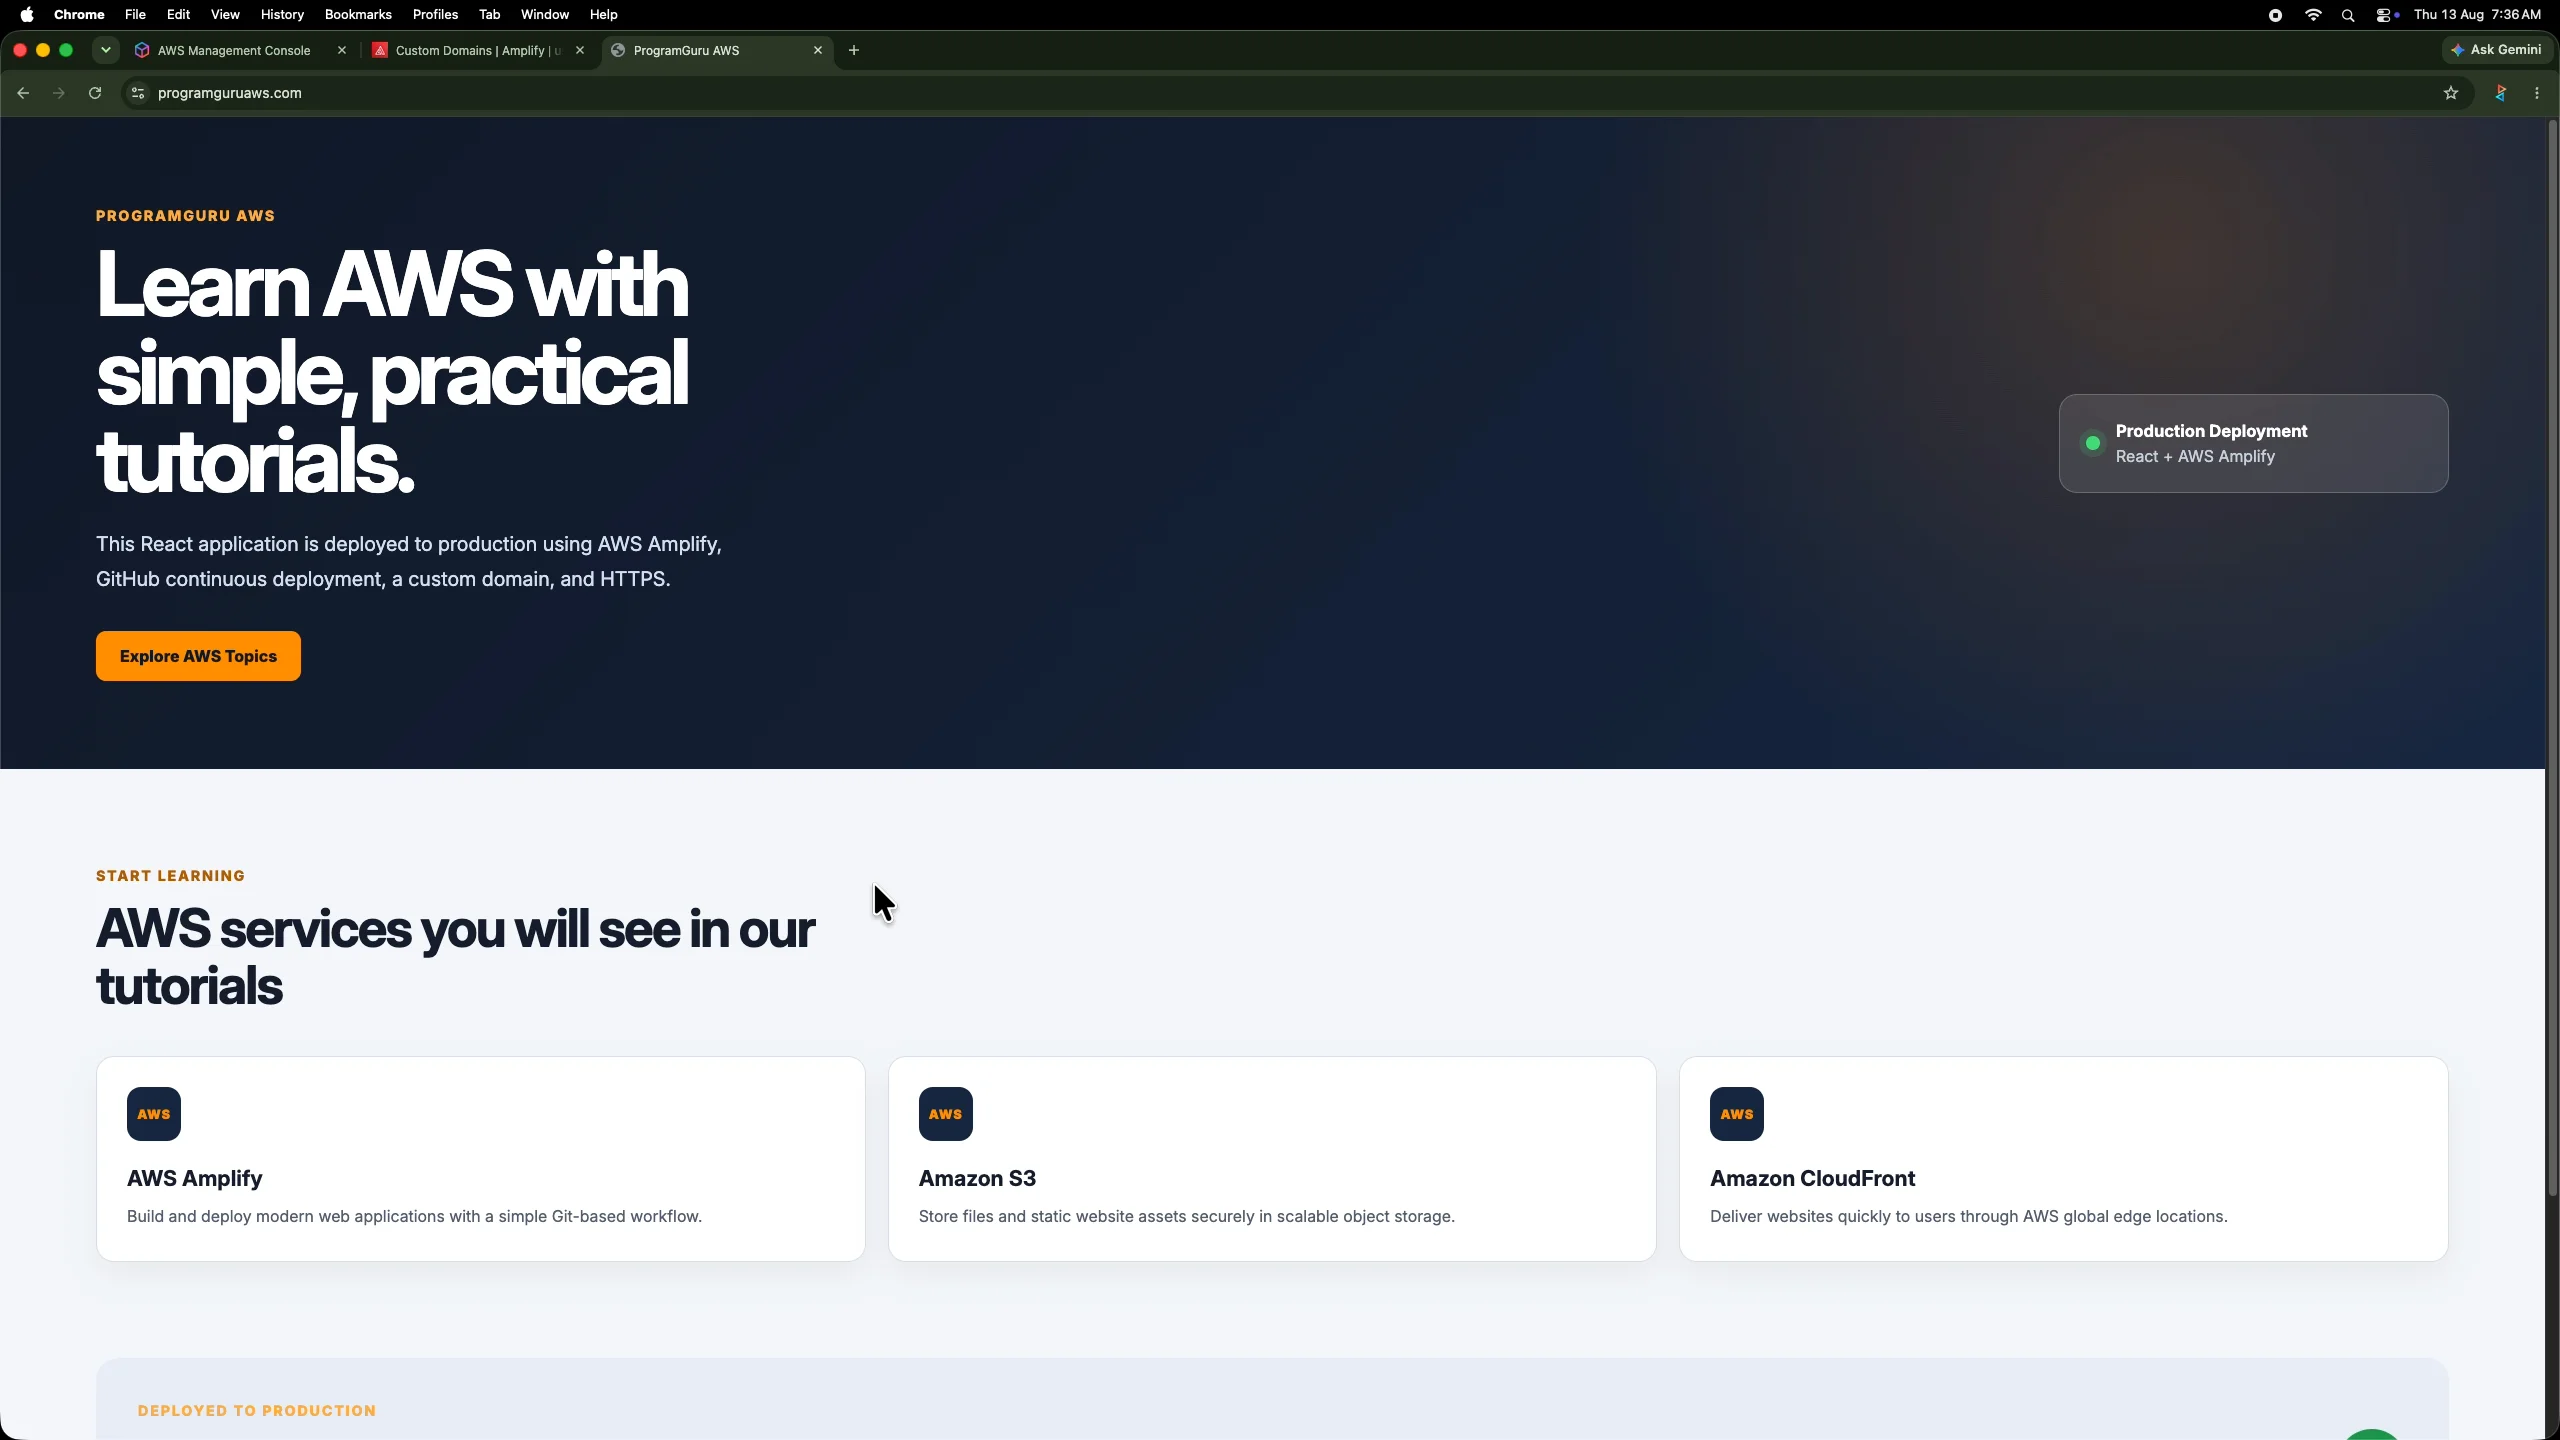
The React application is now running in production using the custom domain.
At this stage, the basic deployment is complete.
The important part of the architecture is now:
Developer
   ↓
GitHub main branch
   ↓
AWS Amplify
   ↓
Build React application
   ↓
Host production files
   ↓
programguruaws.com over HTTPS
Step 22: Test Continuous Deployment
One of the useful parts of connecting Amplify directly to GitHub is that we do not have to repeat the entire deployment process every time the application changes.
Let us verify this by making a small change to the React application.
Return to Visual Studio Code and open:
src/App.jsxIn this example, we change the main heading to:
React deployment updated successfully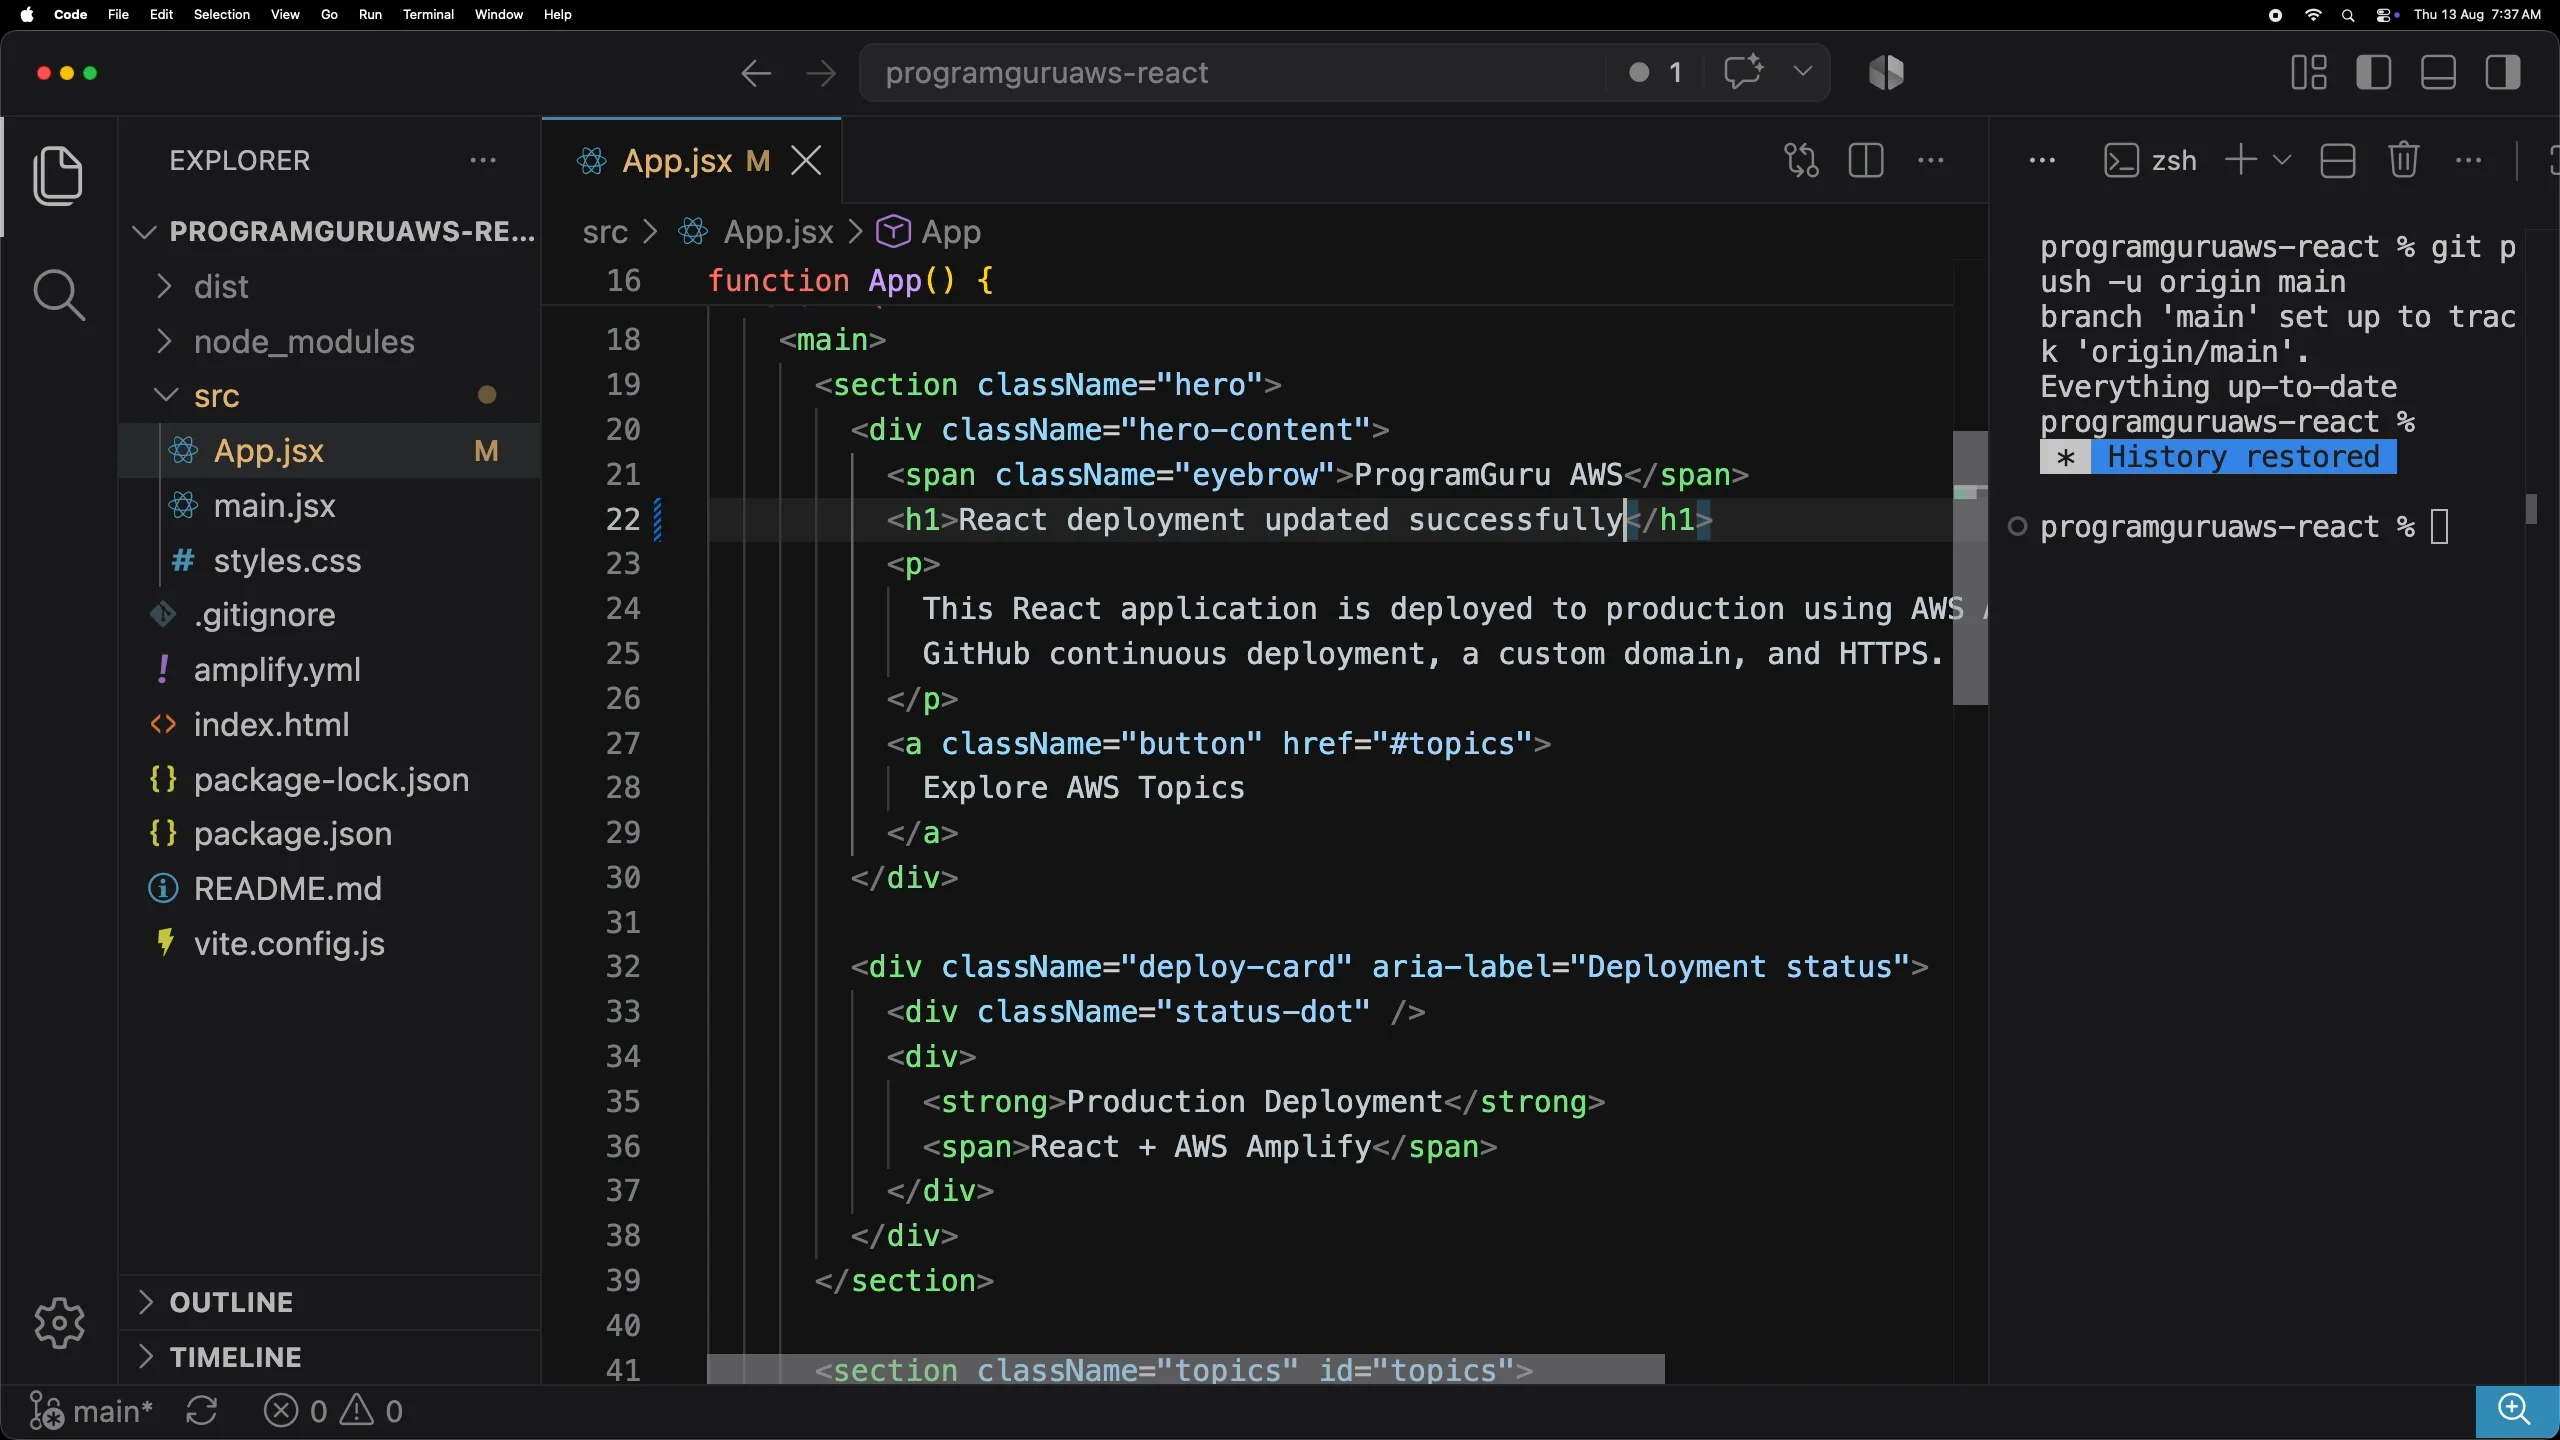
Save the file.
Step 23: Commit and Push the Update
Add the modified file to Git:
git add .Create a new commit:
git commit -m "Update home page"Push the commit to GitHub:
git push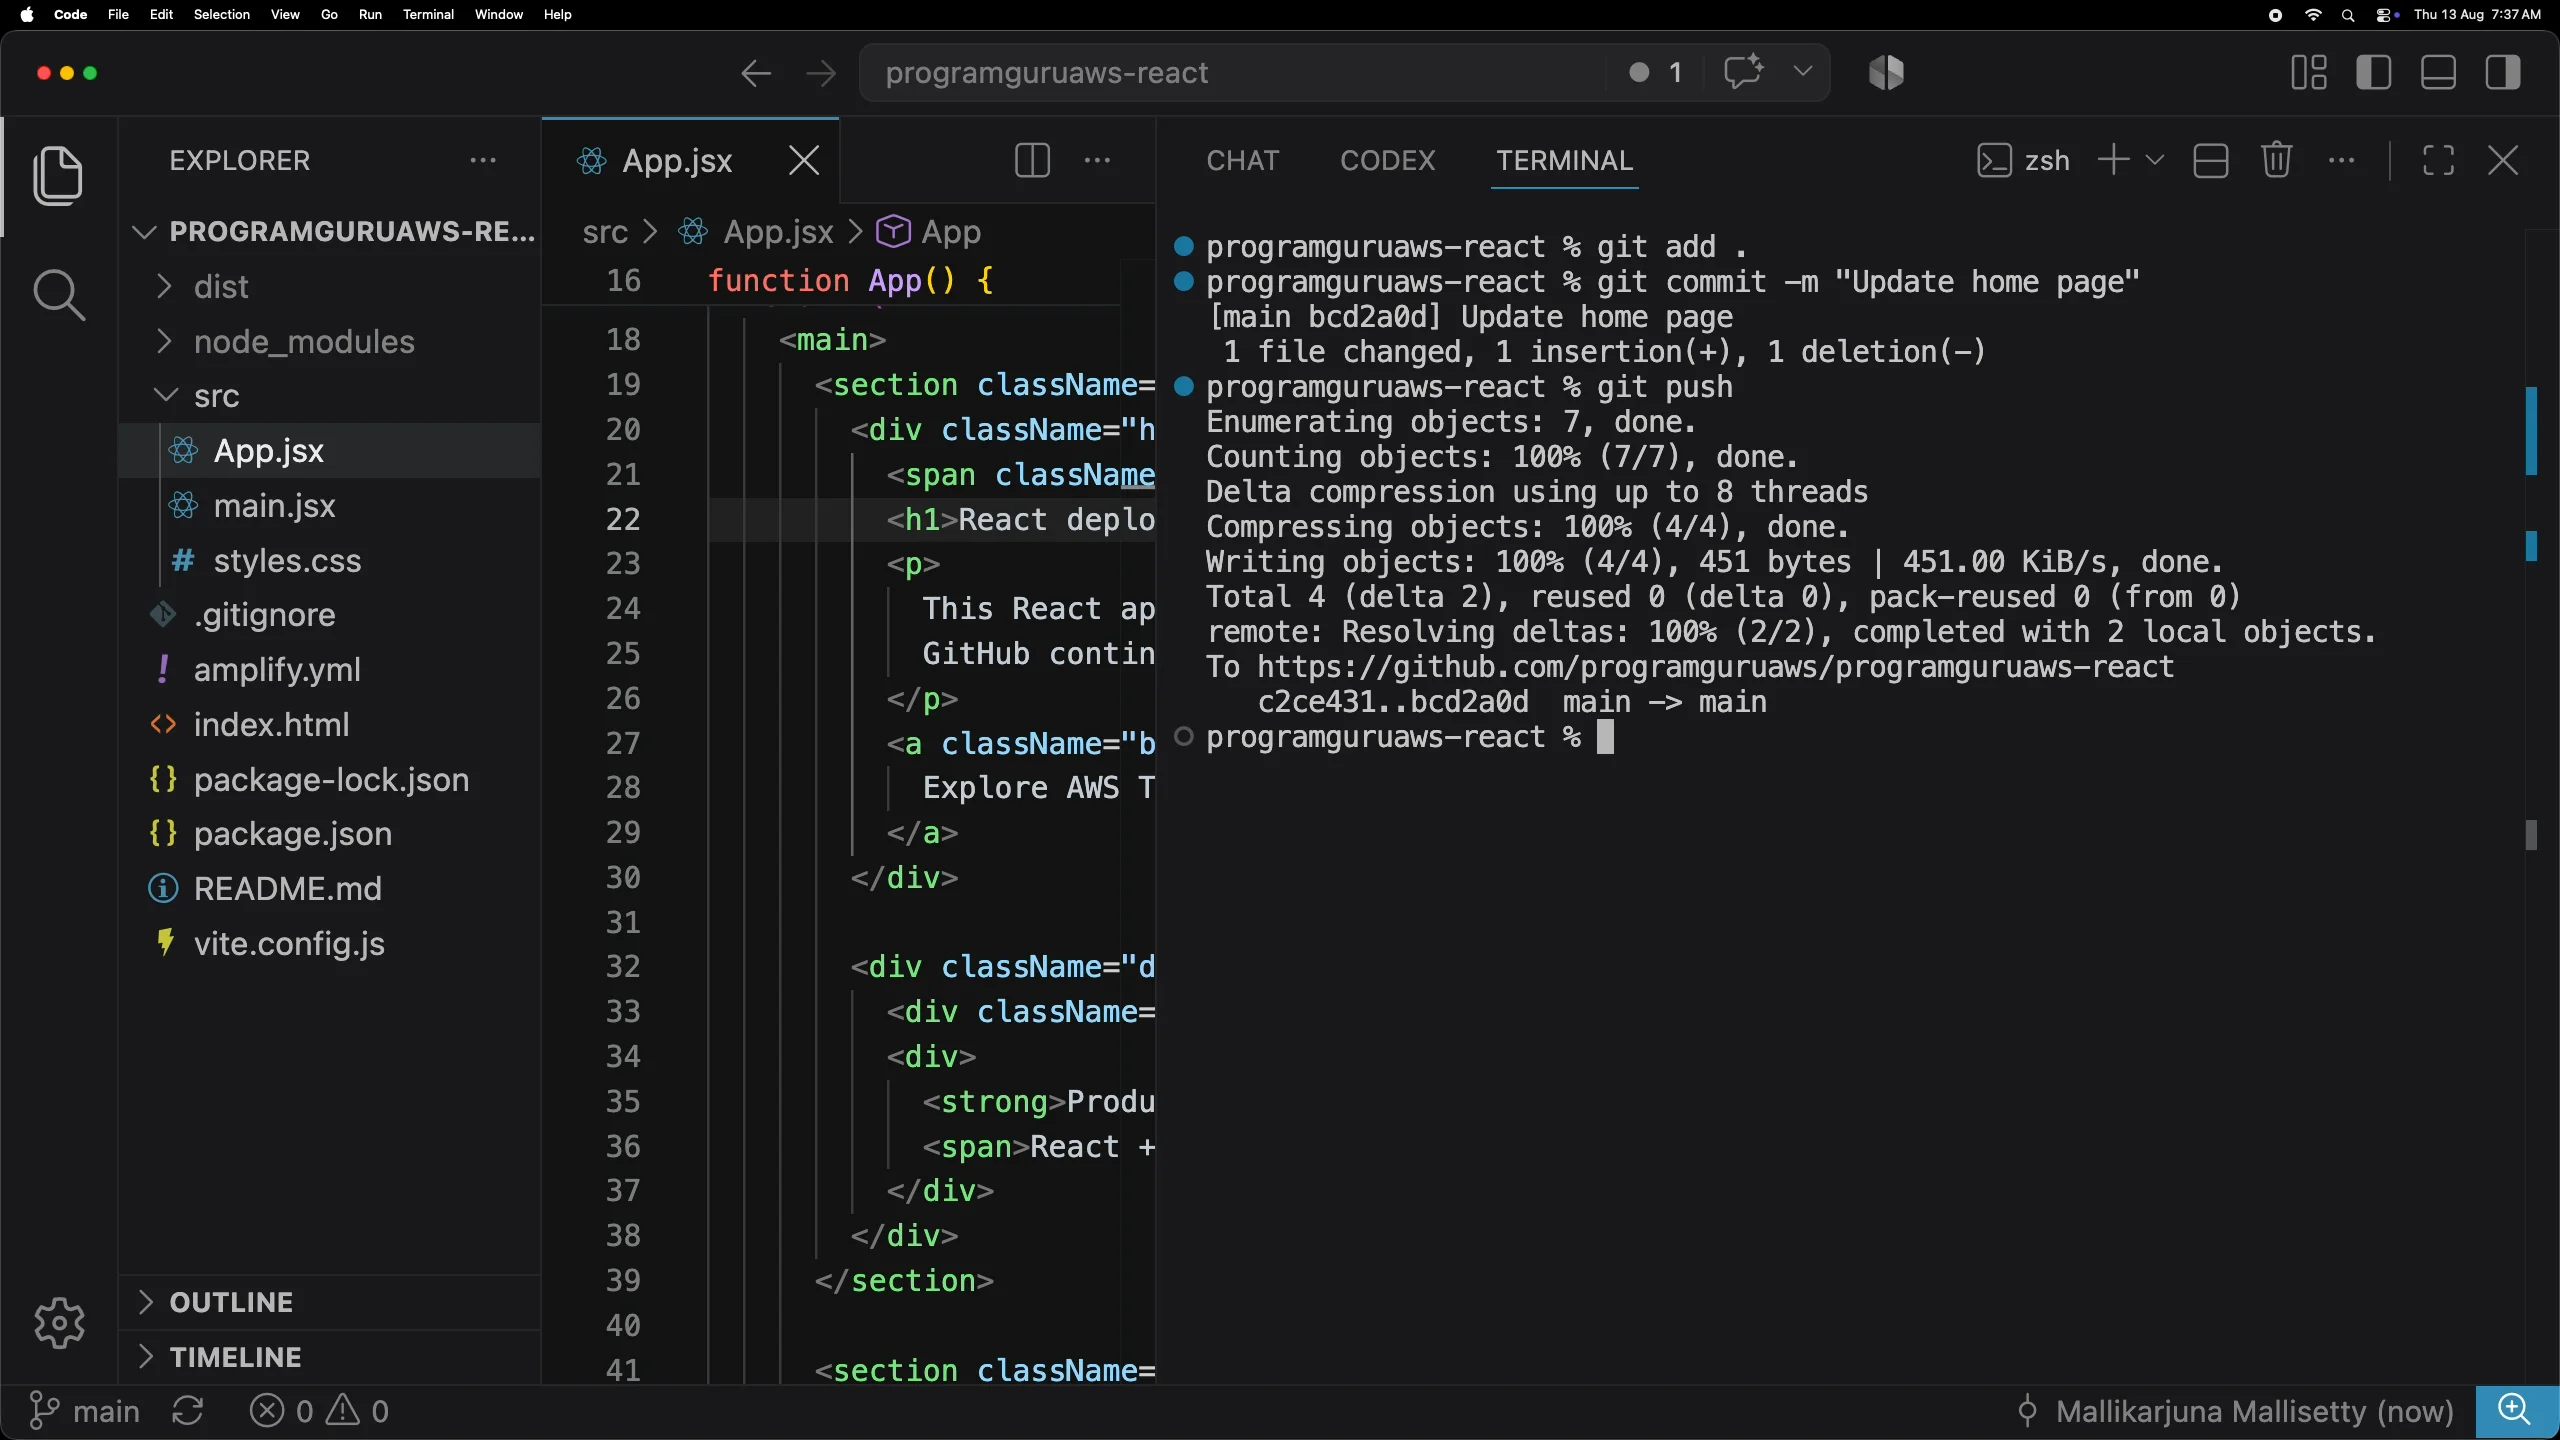
The new commit is now available in the same main branch that Amplify is monitoring.
Step 24: Amplify Automatically Starts Another Deployment
Return to the AWS Amplify console.
Amplify detects the new GitHub commit and automatically starts another deployment.
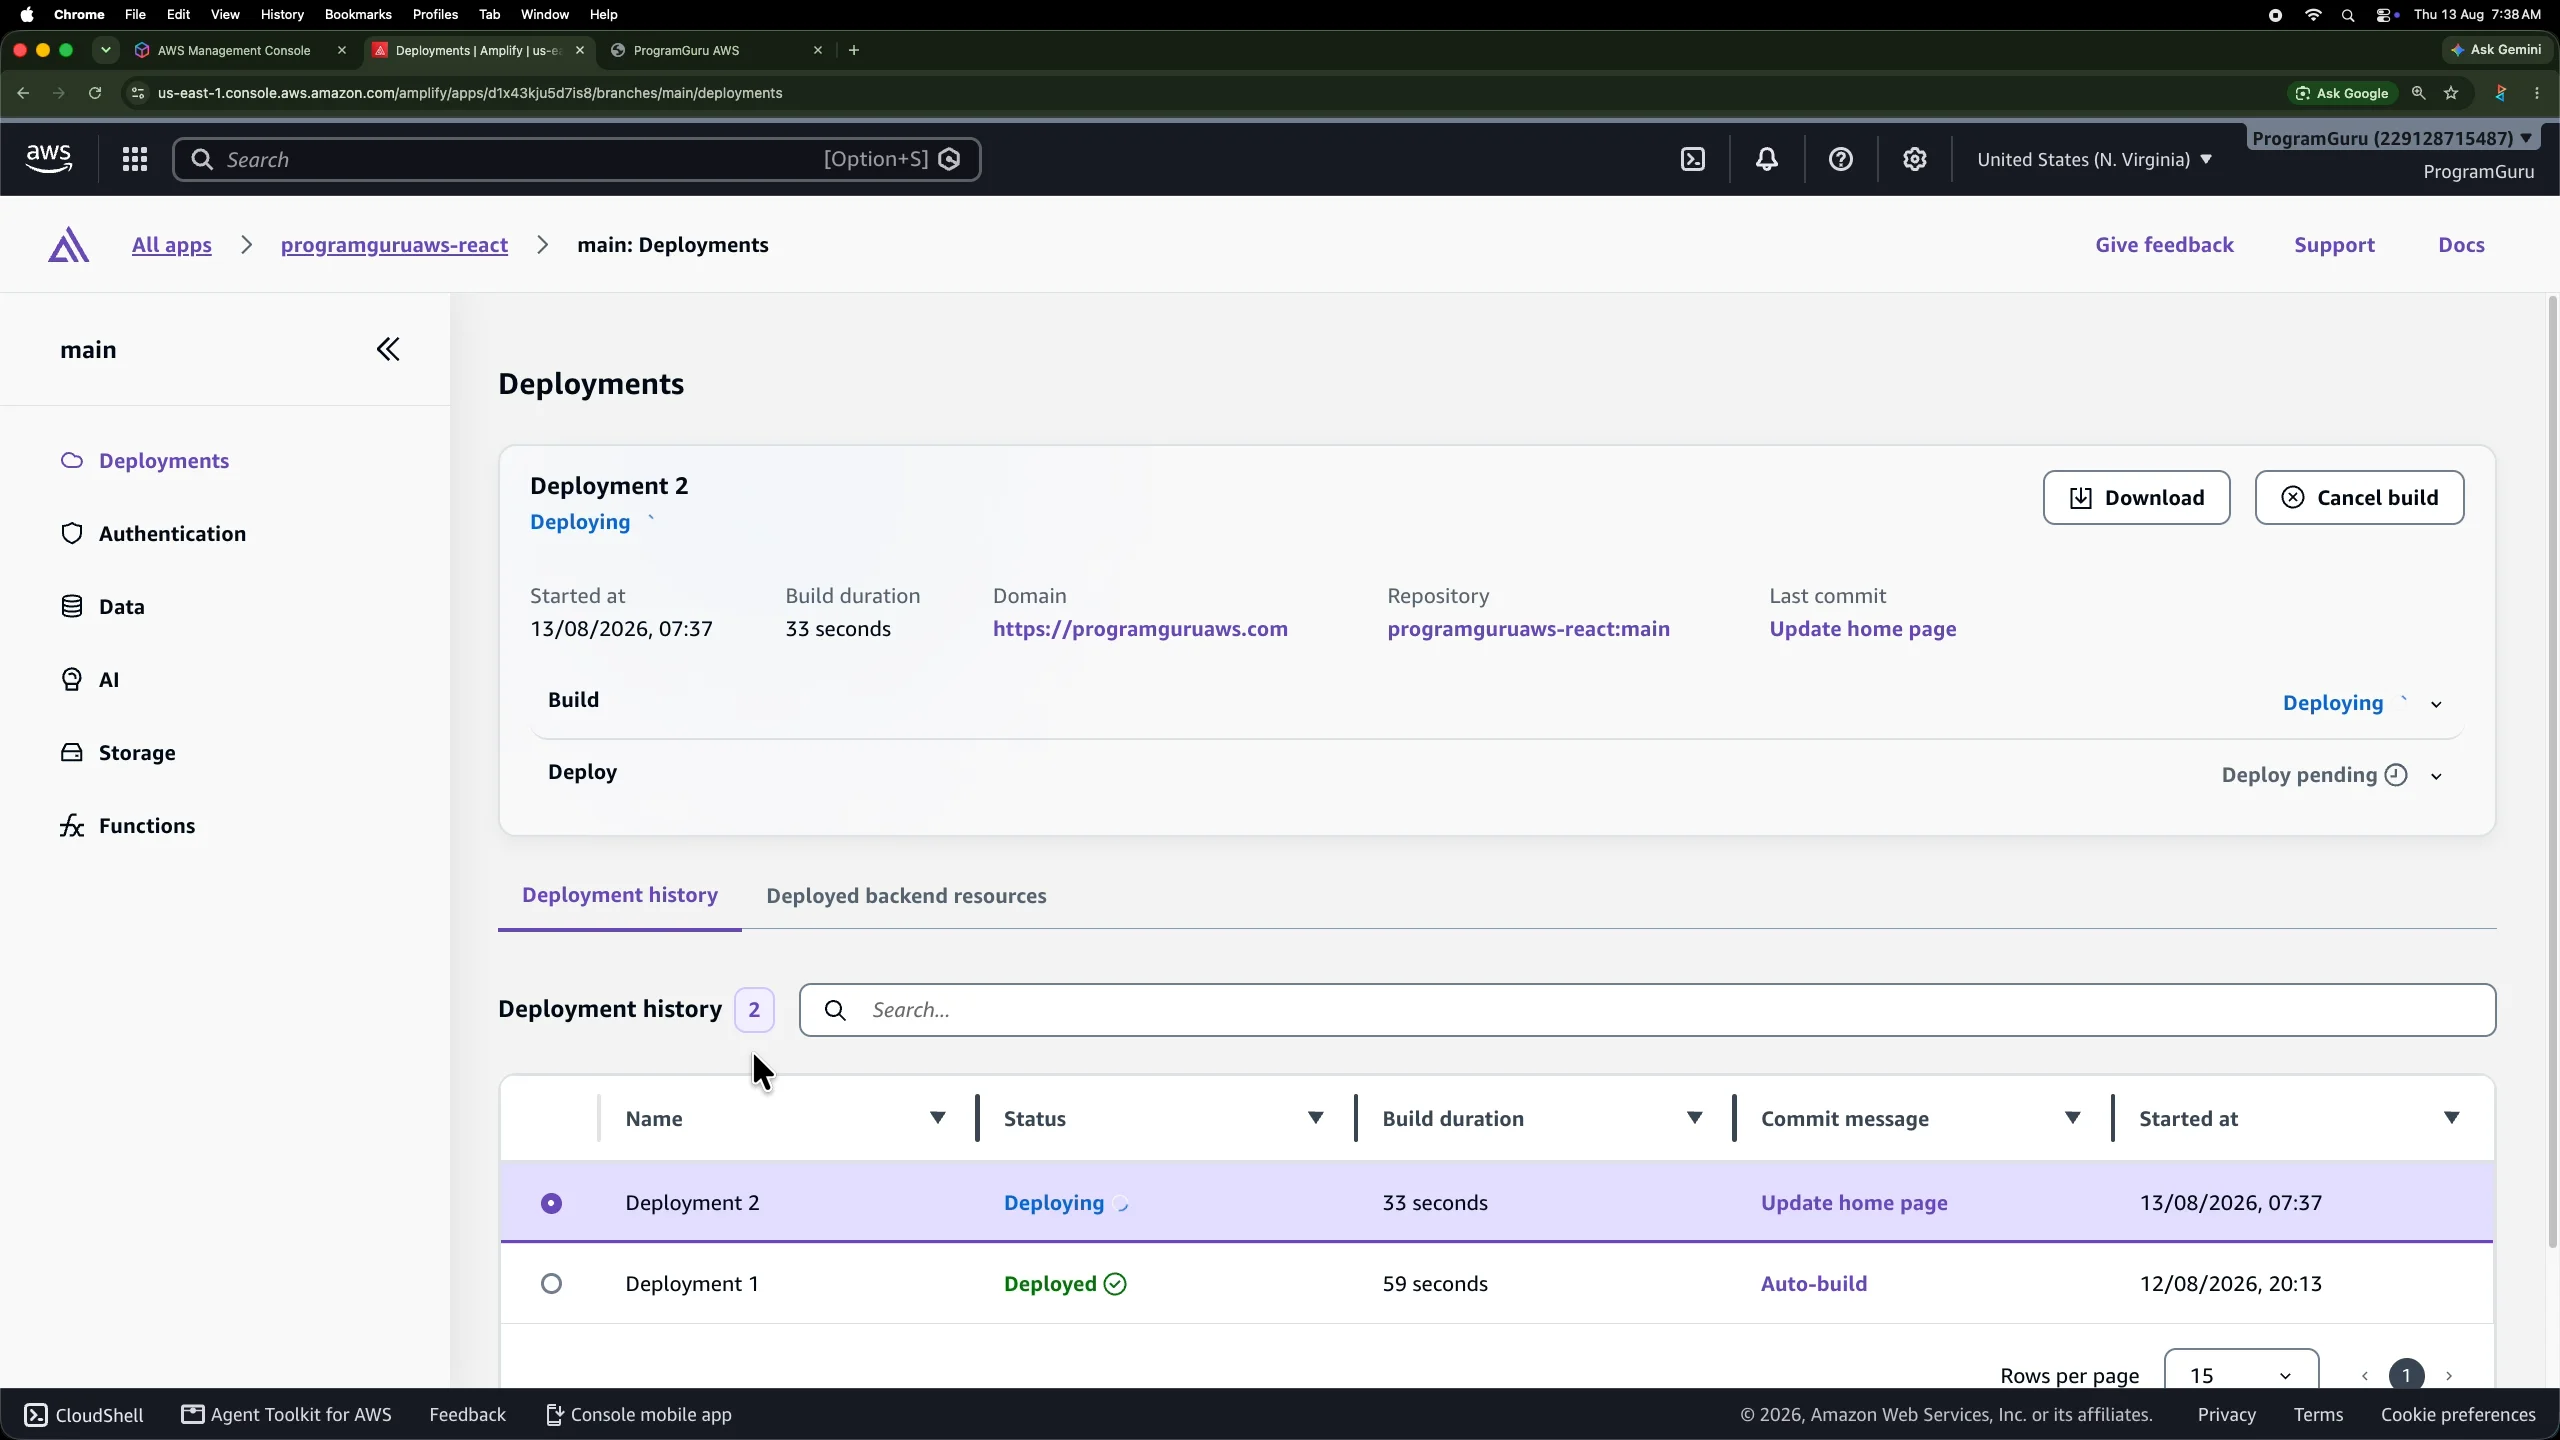
There is no need to upload files manually or create another Amplify application.
The same pipeline runs again:
New Git commit
      ↓
Amplify detects the commit
      ↓
Build starts
      ↓
npm run build
      ↓
New dist files are generated
      ↓
Updated version is deployed
Wait until the deployment completes.
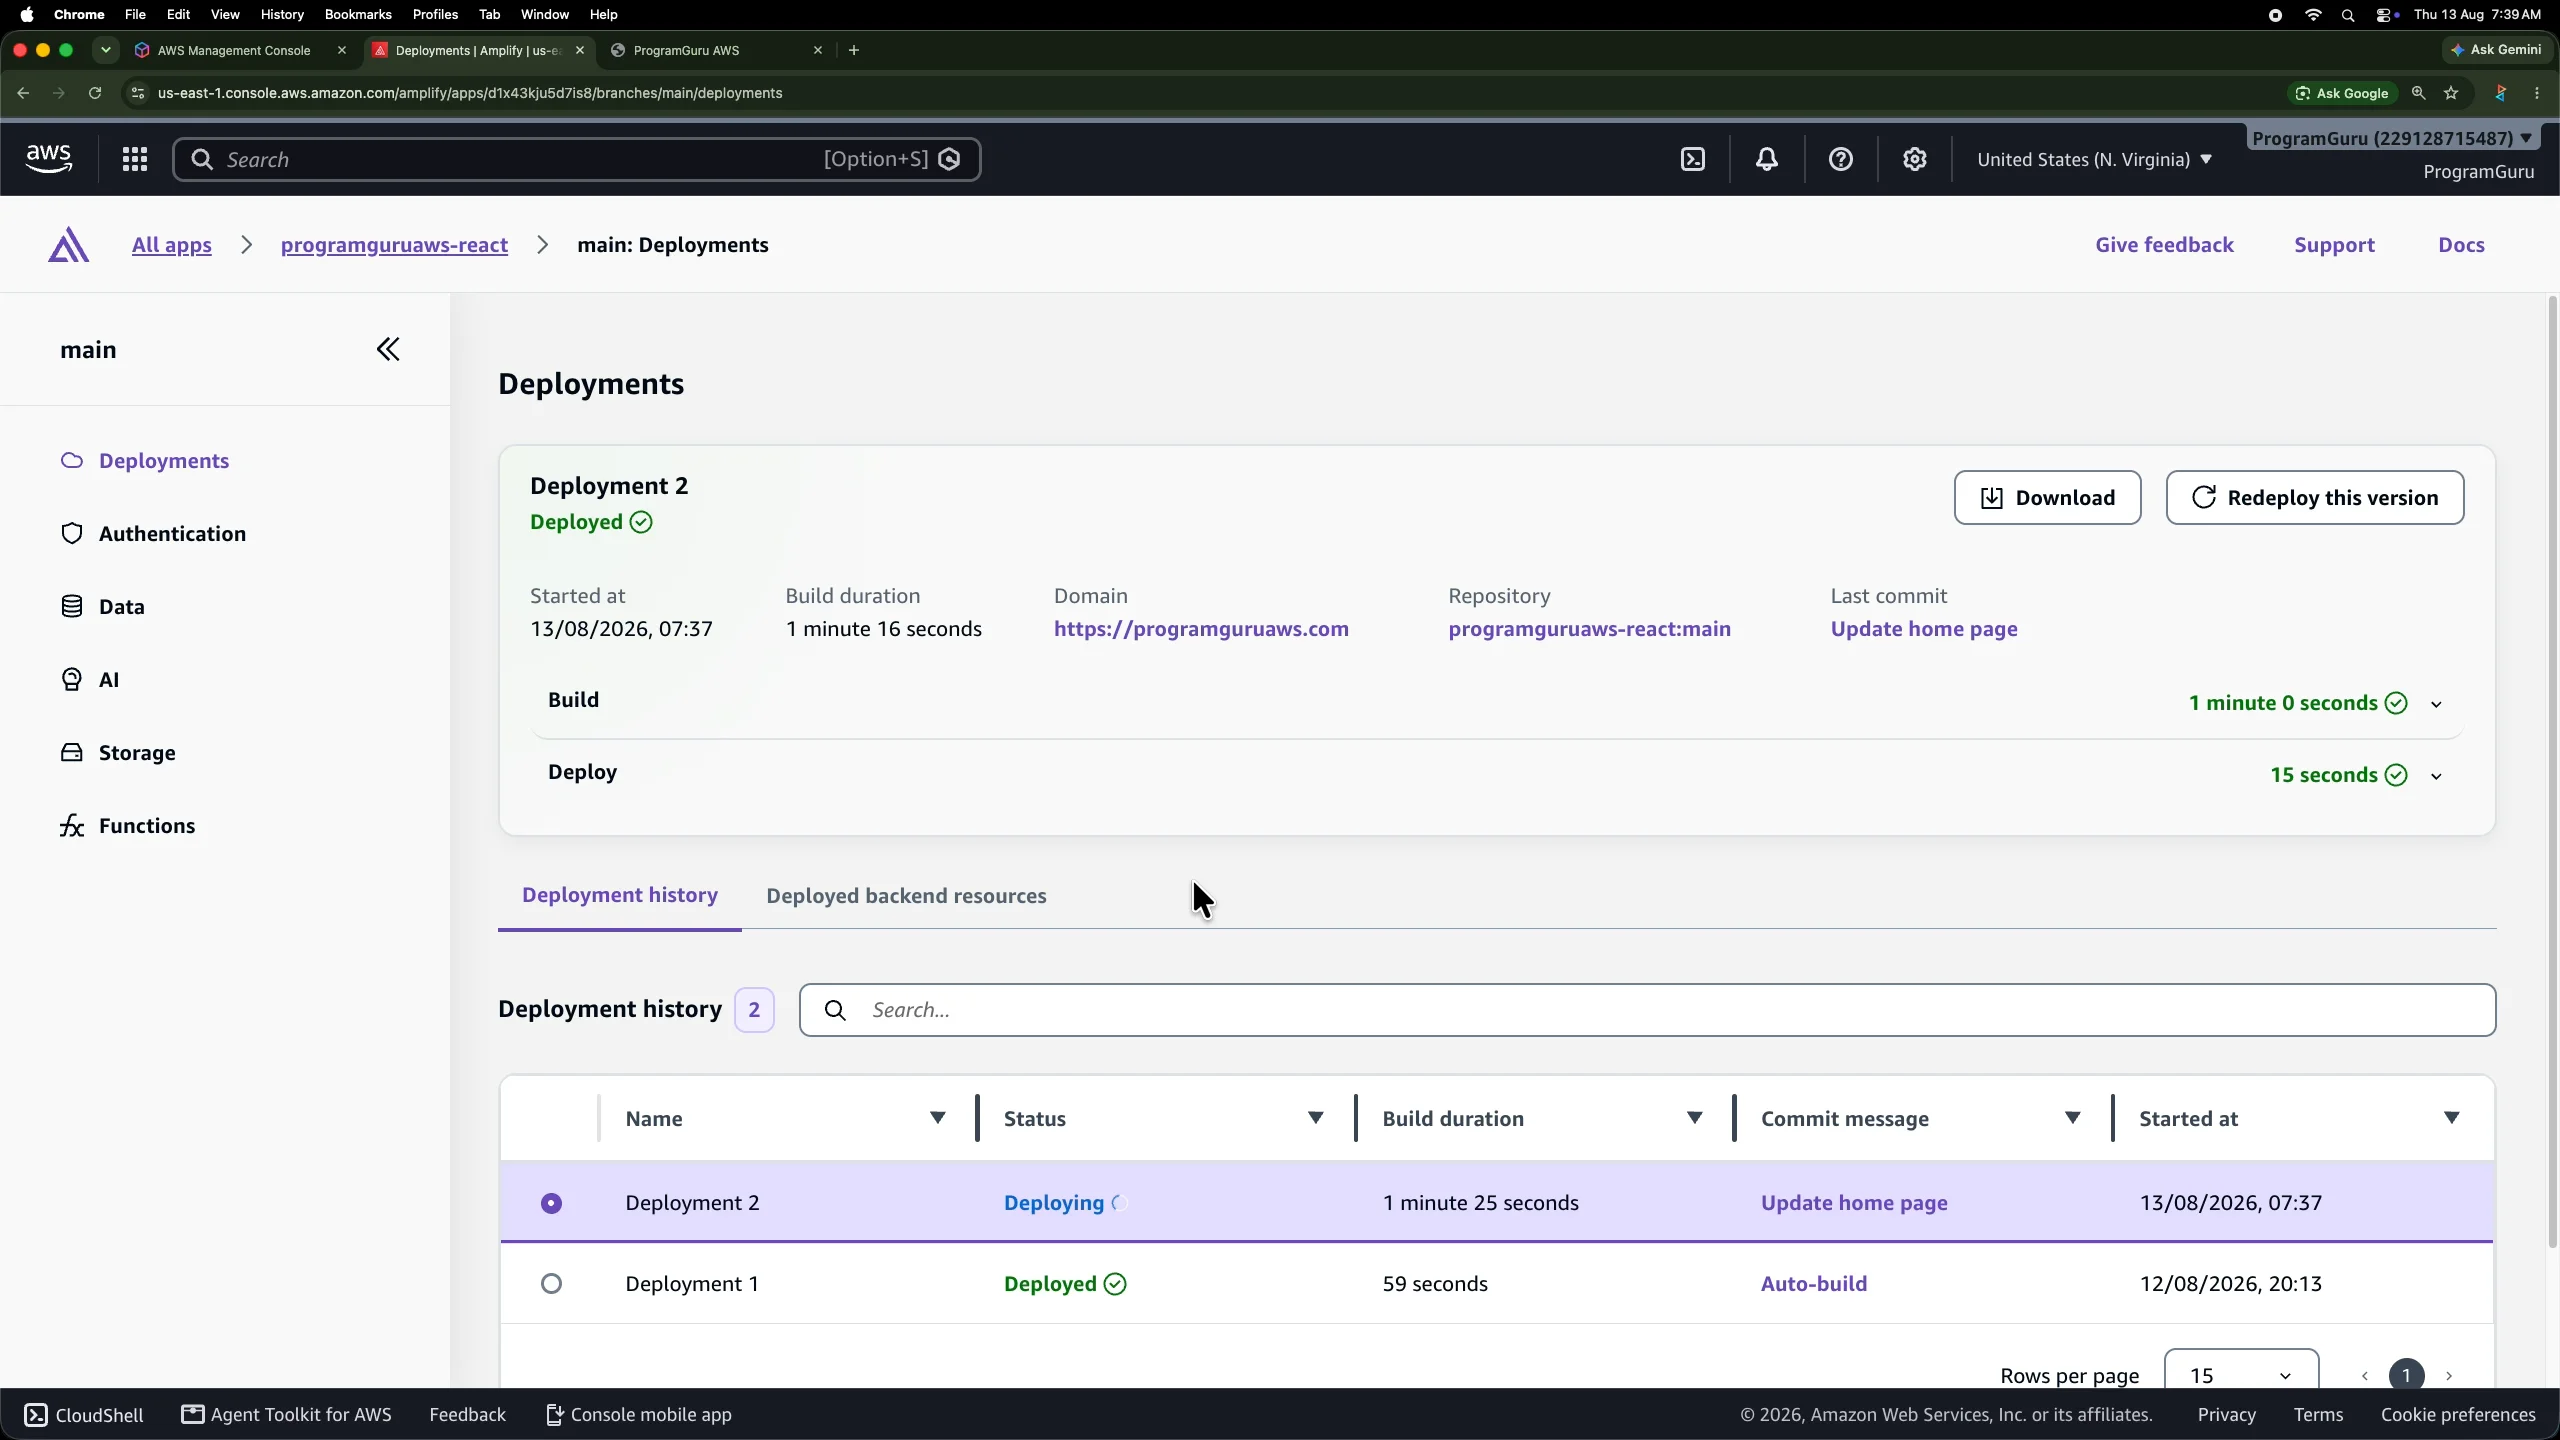
The deployment history now shows the newer deployment associated with the latest commit.
Step 25: Verify the Updated Production Application
Return to:
https://programguruaws.comRefresh the page.
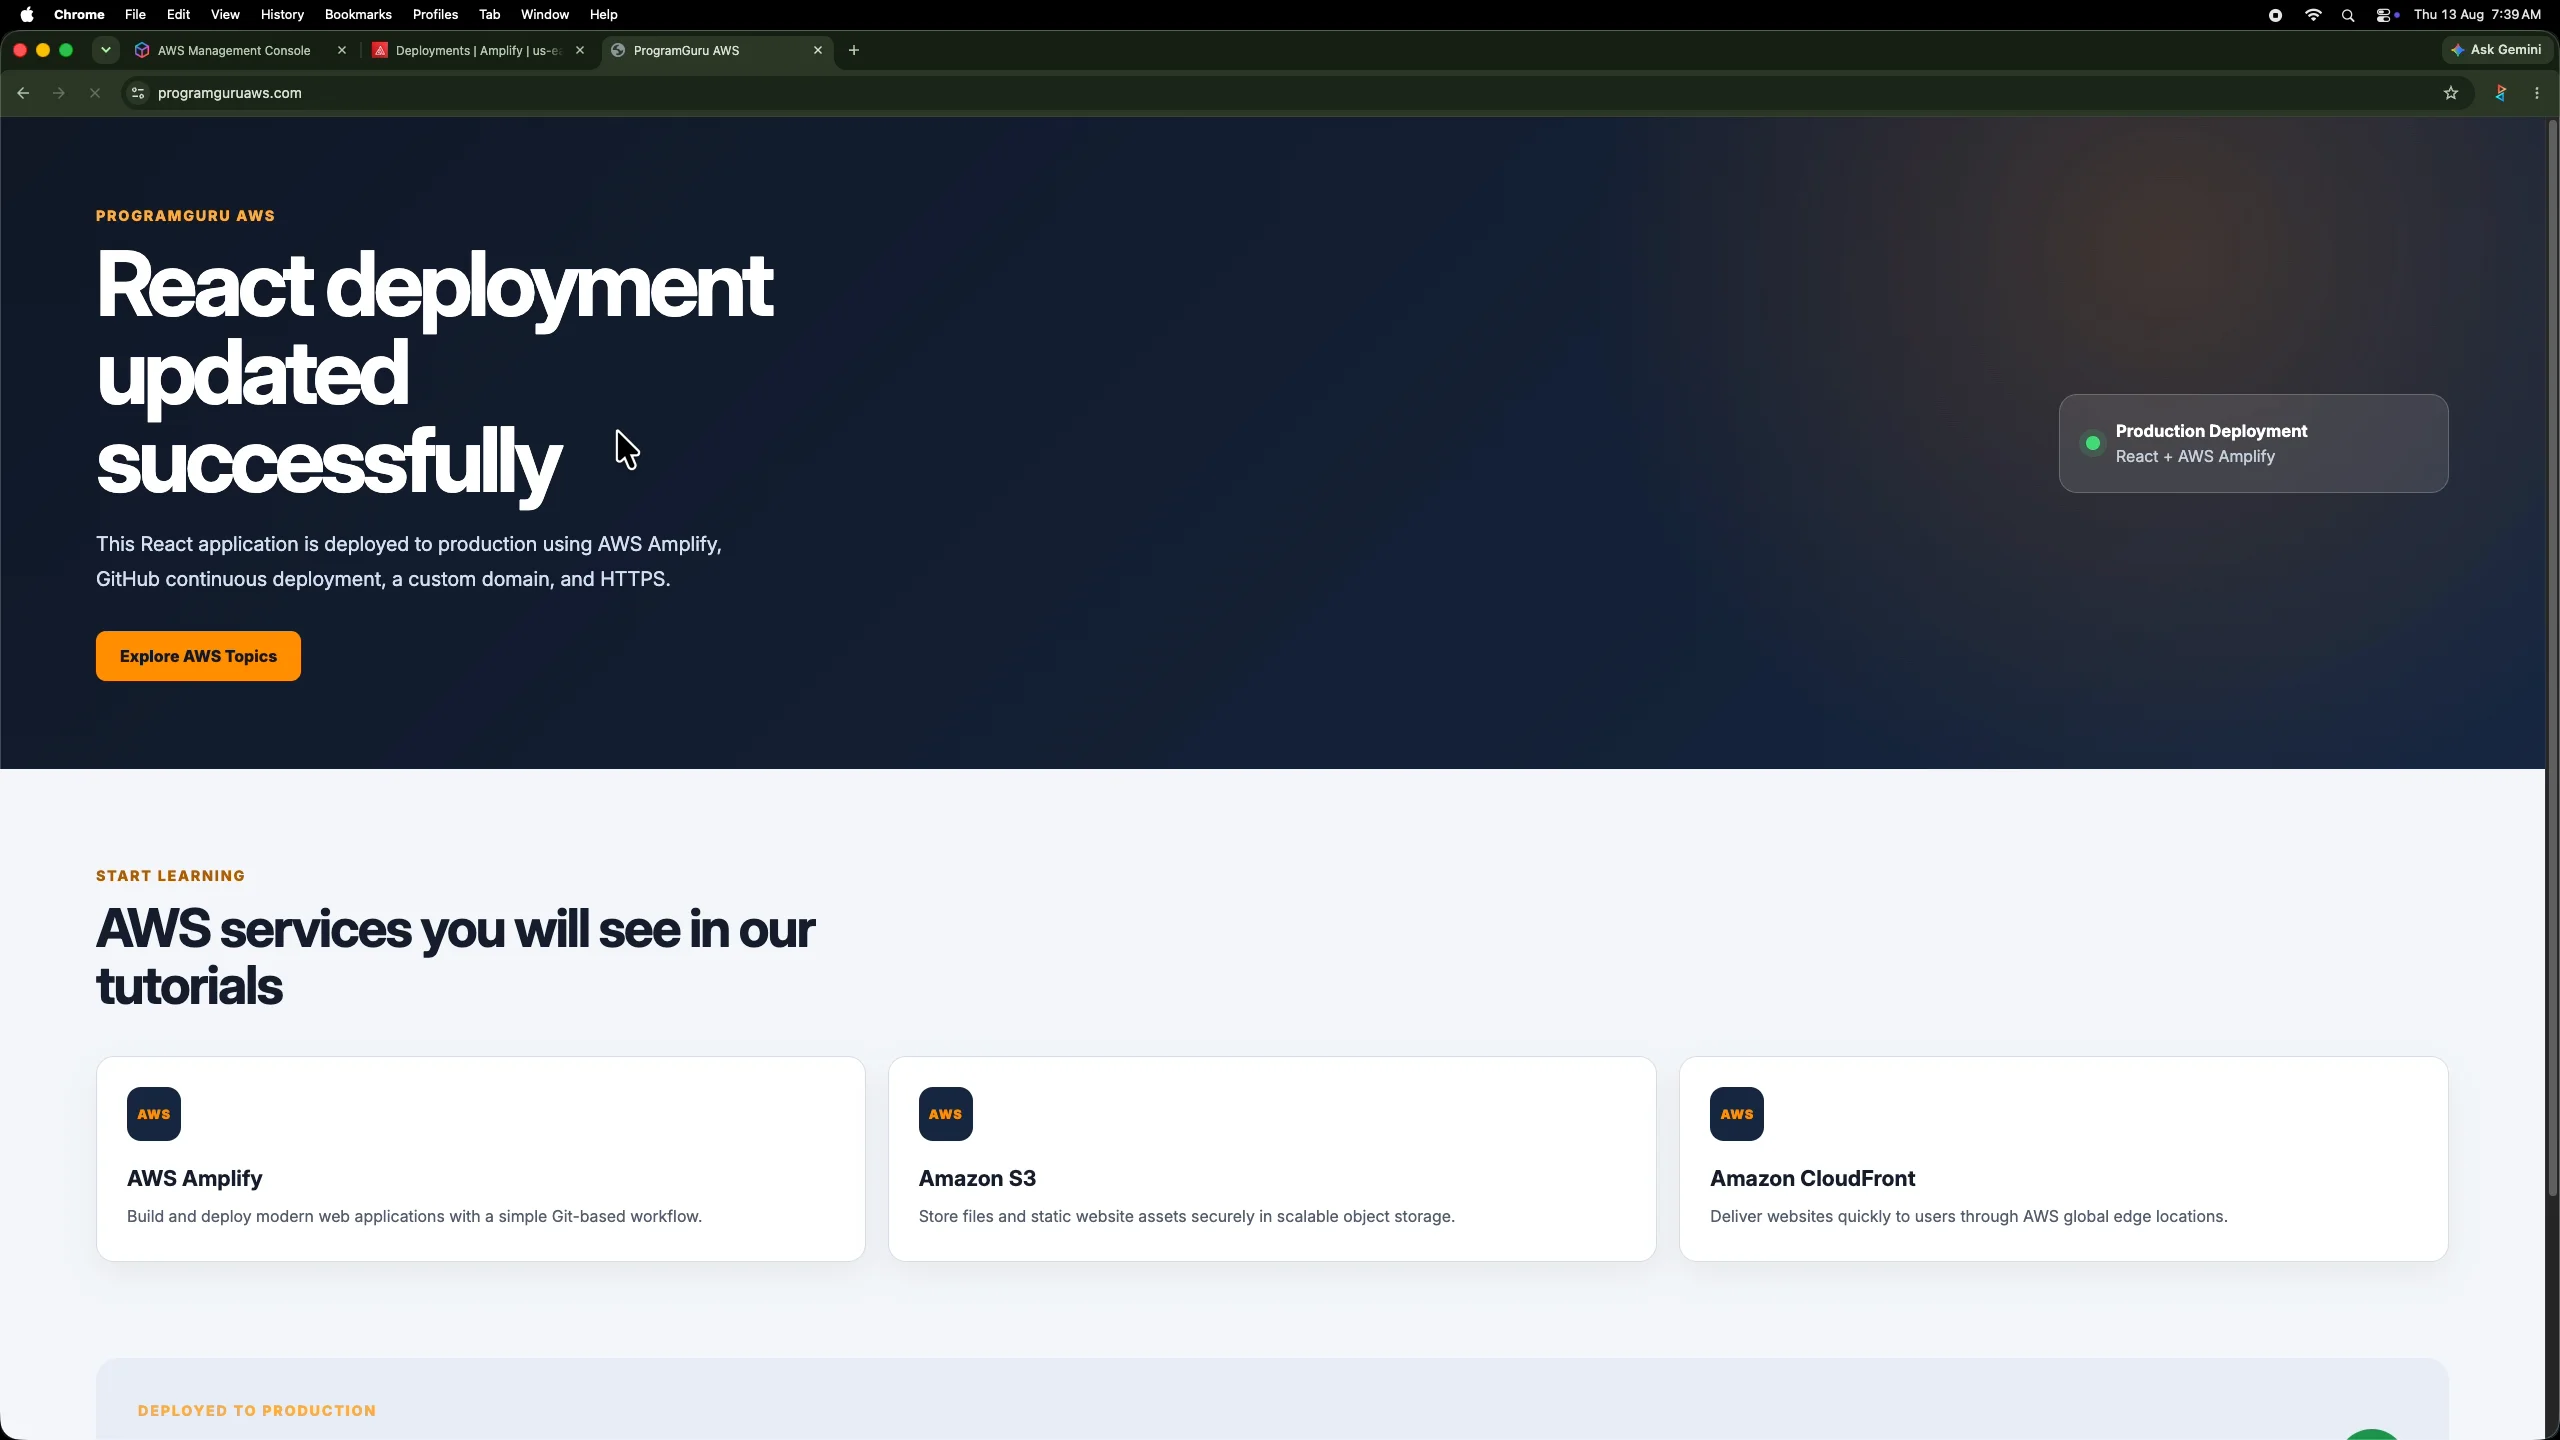
The updated heading is now visible on the production website.
This confirms that continuous deployment is working correctly.
How Future React Deployments Work
From this point onward, the normal workflow is much simpler.
Make the required changes to the application, test them locally, commit the changes, and push them to the connected branch.
Edit React code
      ↓
Test locally
      ↓
git add .
      ↓
git commit
      ↓
git push
      ↓
GitHub main branch
      ↓
AWS Amplify automatically builds
      ↓
AWS Amplify automatically deploys
      ↓
Production website is updated
You do not need to reconnect the repository or reconfigure the custom domain for every release.
What We Completed
In this tutorial, we completed the full React production deployment flow using AWS Amplify.
- We tested the React application locally.
- We verified that the production build completed successfully.
- We created a GitHub repository.
- We pushed the React source code to GitHub.
- We connected GitHub to AWS Amplify.
- We selected the
mainbranch for deployment. - We configured
npm run buildas the frontend build command. - We used
distas the Vite build output directory. - Amplify built and deployed the React application.
- We connected a custom domain.
- We also connected www subdomain.
- We used an Amplify-managed SSL certificate for HTTPS.
- Amplify configured the Route 53 DNS records during the domain setup.
- We pushed another code change to GitHub.
- Amplify detected the commit and deployed the updated application automatically.
Final Deployment Architecture
React source code
       ↓
Local Git repository
       ↓
GitHub
       ↓
main branch
       ↓
AWS Amplify
       ↓
npm run build
       ↓
dist
       ↓
Amplify Hosting
       ↓
HTTPS
       ↓
custom domain
AWS Amplify is useful for this type of frontend deployment because the hosting workflow stays connected to the source repository. After the initial configuration is complete, normal application updates can be deployed simply by pushing commits to the connected branch.
This gives us a straightforward production workflow for a React application without manually rebuilding and uploading the frontend files for every release.