WordPress – Disable Comments for Specific Page
Comments can be a great way to engage with your audience, but sometimes they may not be suitable for certain pages, such as a contact page or a privacy policy. This tutorial will guide you through the steps to disable comments for a specific page in WordPress using the Quick Edit feature.
Step 1 – Log In to Your WordPress Admin Dashboard
Open your web browser and navigate to your site’s login page, usually located at yourwebsite.com/wp-admin. Replace yourwebsite.com with the base url of your website. Enter your username and password to log in.

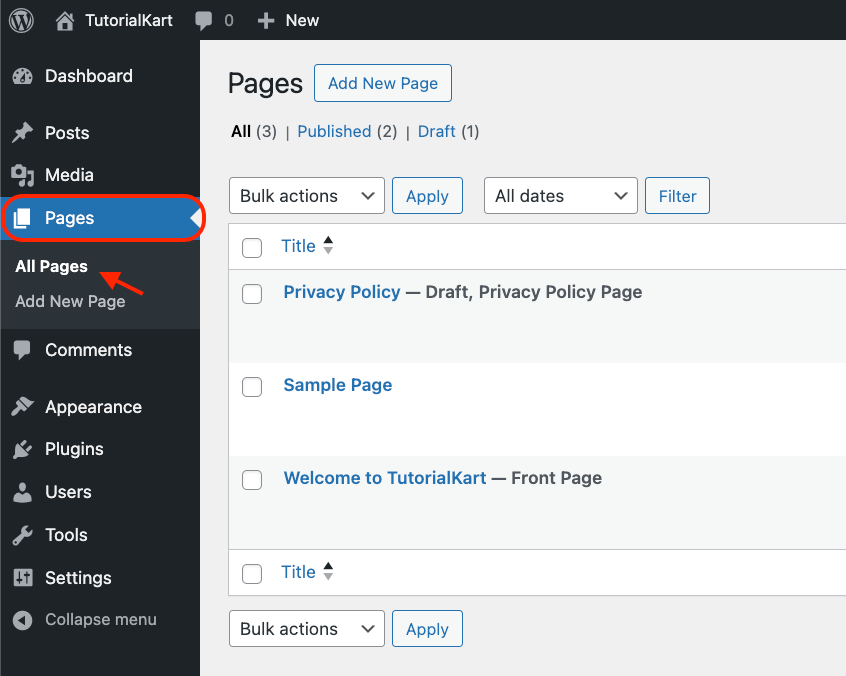
Step 2 – Navigate to the Pages Section
In the WordPress admin menu on the left, click on Pages. This will display a list of all the pages on your website.
Step 3 – Access Quick Edit for the Desired Page
Locate the page for which you want to disable comments. Hover over the page title, and a set of links will appear below it.
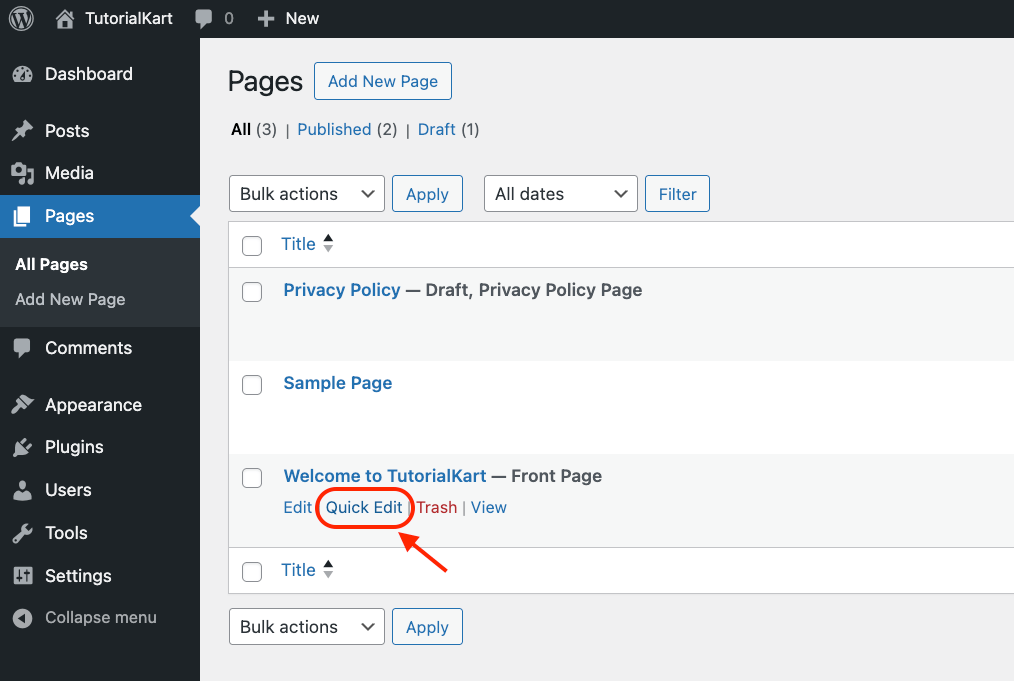
Click on Quick Edit to open the Quick Edit options for that page.
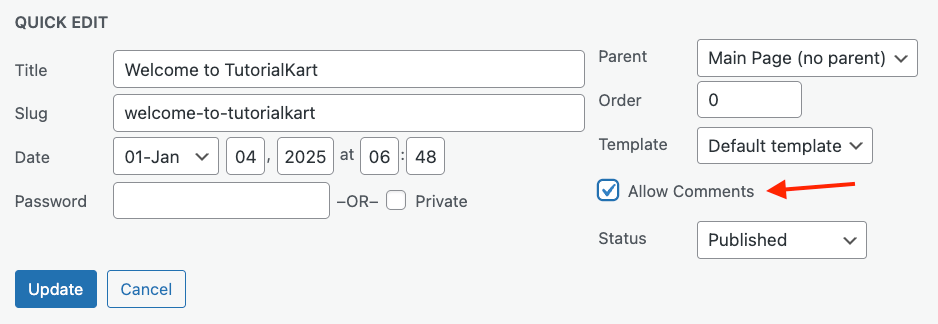
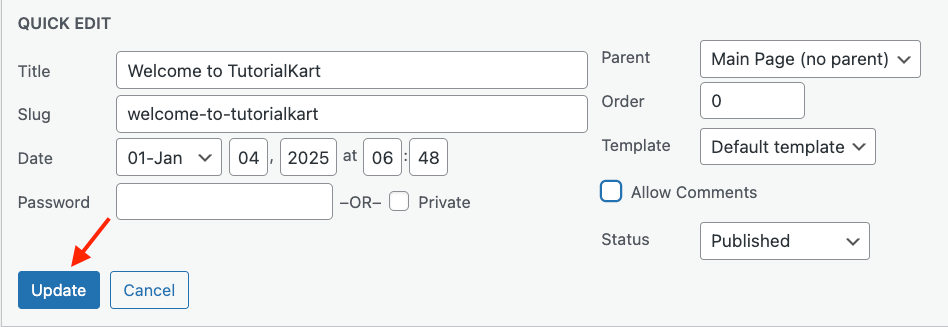
Step 4 – Uncheck the “Allow Comments” Box
In the Quick Edit panel, look for the Allow Comments checkbox. If this box is checked, comments are enabled for the page. Uncheck the box to disable comments.
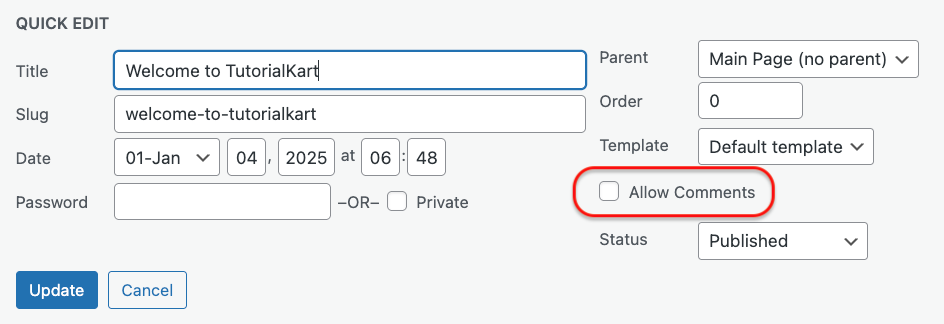
Step 5 – Save Changes
After unchecking the Allow Comments box, click the Update button to save your changes. The comments section will now be disabled for the selected page.
Step 6 – Verify the Update
Visit the page on your website to ensure that the comments section is no longer visible. If the comments section is still displayed, clear your browser cache or refresh the page to see the changes.
Conclusion
By following these steps, you can easily disable comments for specific pages in WordPress using the Quick Edit feature. This method is straightforward and requires no additional plugins or coding, making it a convenient option for managing your page settings.