 TutorialKart.com
Angular Tutorial – Learn Angular with Example Applications
Angular is a TypeScript-based framework for building browser applications. It provides components, templates, routing, forms, dependency injection, HTTP utilities, testing support, and build tools within one development platform. This tutorial explains the core Angular concepts, prepares the development environment, and creates a small example application.
This page was originally written for Angular 6. The fundamental ideas introduced in Angular 6—components, templates, directives, services, dependency injection, and modules—remain useful. However, current Angular projects may use standalone components and newer build tooling. Sections below identify the differences that matter when following an older Angular 6 project.
What Angular is used for
Angular is commonly used to build client-side applications whose interface changes without reloading the entire document. Typical examples include administration panels, account portals, inventory systems, reporting applications, and other applications containing multiple forms and views.
Angular is well suited to a project when the development team needs a consistent application structure and built-in solutions for routing, form handling, validation, HTTP communication, and dependency management. A small static page may not require a full application framework, so the project requirements should determine whether Angular is appropriate.
Angular single-page application behavior
A single-page application, or SPA, loads an application shell and updates selected parts of the page as the user navigates. Angular Router can associate URL paths with components, while services can request data from a server without requiring a complete page reload.
An Angular application can still use multiple URLs, browser history, and server-side APIs. “Single page” describes how the browser updates the interface; it does not mean that the application has only one screen or one route.
Angular prerequisites for beginners
Before learning Angular, become familiar with HTML, CSS, and basic JavaScript. You should understand variables, functions, arrays, objects, classes, modules, promises, and browser events.
Angular applications are normally written in TypeScript. Knowledge of interfaces, classes, access modifiers, decorators, typed function parameters, and imports makes Angular code easier to read and maintain.
Angular framework features and project structure
- Components: Divide the interface into reusable sections with their own behavior and templates.
- Templates: Use HTML with Angular expressions, property binding, event binding, and directives.
- Services: Place shared logic, state management, and API access outside presentation components.
- Dependency injection: Supplies services and other dependencies where they are required.
- Router: Maps browser URLs to application views and supports route parameters and nested routes.
- Forms: Supports template-driven and reactive approaches to input handling and validation.
- Angular CLI: Creates projects, generates files, runs development builds, and executes tests.
AngularJS, Angular 2, Angular 4, and Angular 6 differences
AngularJS is the original JavaScript framework released as the 1.x product line. Angular 2 introduced a rewritten, component-based framework that uses TypeScript as its primary development language. Later major releases—including Angular 4, Angular 5, and Angular 6—belong to this newer Angular framework rather than AngularJS.
Angular 6 tutorials remain useful when maintaining an application created with that release, but commands and package requirements from 2018 may not work with a current Node.js installation. For a new application, follow the currently supported Angular documentation and use package versions that are compatible with one another. Do not upgrade a legacy application by changing every version number at once; use Angular’s documented update path and test each migration.
Install Node.js, npm, and Angular CLI
Angular development requires Node.js and npm. npm is distributed with Node.js and manages the packages listed in an Angular project’s package.json file. Check the version compatibility table in the official Angular version reference before selecting Node.js for a particular Angular release.
Based on your OS, download the latest Node.js version from https://nodejs.org/en/ and follow the simple steps with the installer. If you are using Ubuntu, refer this step by step tutorial to install NodeJS.
Open a terminal or command prompt and check both installed programs:
node --version
npm --version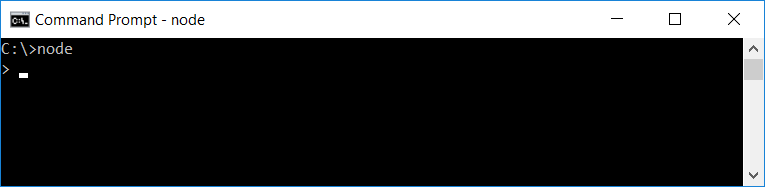
Angular CLI is the command-line tool used to create, develop, build, and test Angular applications. Install it globally if you want the ng command to be available from any project directory.
npm install -g @angular/cli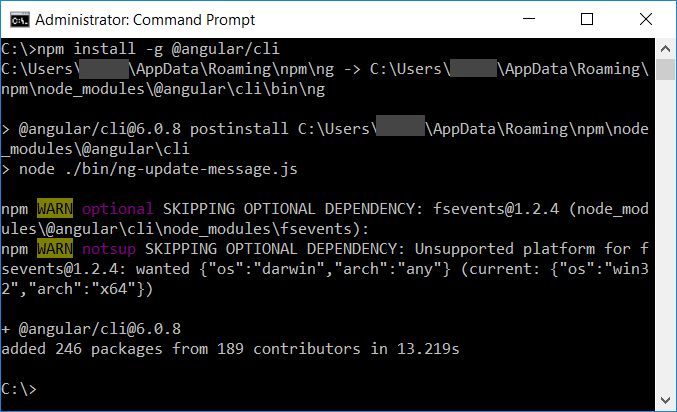
The -g option installs the Angular CLI globally. Confirm that the command is available:
ng versionThe command reports the Angular CLI, Node.js, package manager, and operating-system versions. When it is run inside an Angular project, it also reports the framework package versions used by that project.
Create and run the first Angular application
Use Angular CLI to create a project named angular-example. The CLI may ask questions about stylesheet format, routing, rendering, or other features depending on the installed version. Beginners can accept the defaults unless the project has specific requirements.
ng new angular-example
cd angular-example
ng serve --open
ng new creates the workspace and installs its dependencies. ng serve builds the application, starts a local development server, and watches source files for changes. The --open option opens the application in the default browser. The terminal displays the local URL and compilation status.
The development server is intended for local development. Create a production build with the build command and deploy the generated files through a properly configured web server or hosting platform.
ng buildBuild an Angular counter component example
An Angular component combines a TypeScript class with an HTML template and optional styles. The class holds the state and methods, while the template displays that state and responds to user actions.
Replace the generated root component class with the following example. This current standalone-component form may include a different generated selector or file naming style depending on the installed CLI version.
import { Component } from '@angular/core';

@Component({
  selector: 'app-root',
  standalone: true,
  templateUrl: './app.component.html',
  styleUrl: './app.component.css'
})
export class AppComponent {
  count = 0;

  increment(): void {
    this.count += 1;
  }

  reset(): void {
    this.count = 0;
  }
}
Use this markup in the component template:
<main>
  <h1>Angular Counter</h1>
  <p>Current count: {{ count }}</p>
  <button type="button" (click)="increment()">Add one</button>
  <button type="button" (click)="reset()">Reset</button>
</main>
The {{ count }} expression uses interpolation to display a class property. The (click) syntax uses event binding to call a component method. When a method changes count, Angular updates the displayed value.
Angular 6 module-based equivalent
Angular 6 does not support standalone components. In an Angular 6 project, omit standalone: true, use the older styleUrls: ['./app.component.css'] array property, and declare the component in an NgModule such as AppModule. The component’s properties, methods, interpolation, and event bindings work in the same general way.
import { BrowserModule } from '@angular/platform-browser';
import { NgModule } from '@angular/core';
import { AppComponent } from './app.component';

@NgModule({
  declarations: [AppComponent],
  imports: [BrowserModule],
  providers: [],
  bootstrap: [AppComponent]
})
export class AppModule {}
Angular component data-binding patterns
Angular templates use several binding forms. Recognizing their direction makes templates easier to understand.
- Interpolation:
{{ value }}renders a component value as text. - Property binding:
[disabled]="isSaving"assigns a component expression to an element or directive property. - Event binding:
(click)="save()"runs a component statement when an event occurs. - Two-way binding:
[(ngModel)]="name"combines input and output binding; it requires the appropriate forms import.
Keep complex calculations in the component or a service instead of repeating them in the template. Templates are easier to test and review when expressions remain short.
Angular services and dependency injection
A service is a TypeScript class used for logic that should not be tied to one interface component. Examples include retrieving records from an API, storing user preferences, logging events, and sharing state between components.
ng generate service dataAngular’s dependency-injection system creates or supplies service instances to their consumers. A service configured with providedIn: 'root' is normally available through the application’s root injector. Components can request it through constructor injection or the current inject() API, depending on the project style and Angular version.
Angular development editor and useful commands
Any editor that supports TypeScript can be used for Angular development. Visual Studio Code is a common choice because it provides TypeScript language support, integrated terminal access, debugging, and extensions. The editor does not determine which Angular features are available; those are controlled by the packages installed in the project.
Run Angular CLI commands from the workspace directory containing angular.json. Common commands include:
ng generate component user-card
ng generate service user
ng serve
ng build
ng test
The exact test command and generated file set can differ between Angular CLI releases and project configurations. Check the scripts in package.json and the workspace settings before assuming that a legacy tutorial uses the same tools as a newly generated project.
Troubleshooting Angular installation and build errors
ngis not recognized: Restart the terminal after installing the CLI and confirm that npm’s global executable directory is on the system path.- Unsupported Node.js version: Compare the project’s Angular version with the official compatibility table and install a compatible Node.js release.
- Dependency resolution failure: Check
package.jsonbefore upgrading individual packages. Angular packages in one project generally need compatible versions. - Port already in use: Stop the process using the development port or run
ng serve --port 4300. - Command runs outside a workspace: Change to the directory containing the project’s
angular.jsonfile. - Legacy Angular 6 project fails on a modern machine: Reproduce the original compatible Node.js and package environment before changing application code.
Angular tutorial learning path after the first application
After the counter example works, continue with component inputs and outputs, template control flow, reactive forms, services, HTTP requests, routing, route guards, error handling, and automated tests. Build one small application that uses these features together rather than learning each API only as an isolated snippet.
For a current project, compare examples with the official Angular learning tutorial. For an Angular 6 codebase, retain the versions recorded in its lock file and use documentation matching that release while planning any upgrade.
Angular tutorial frequently asked questions
Can I still learn Angular from an Angular 6 tutorial?
Yes, for foundational concepts such as components, templates, services, dependency injection, routing, and forms. Use current documentation for installation, supported Node.js versions, standalone components, build configuration, and recently introduced template syntax.
Is Angular the same as AngularJS?
No. AngularJS refers to the original 1.x JavaScript framework. Angular 2 and later releases use a different component-based architecture and are normally written in TypeScript.
Do I need to install Angular globally?
A global CLI installation is convenient but not mandatory. A team can use a project-specific or temporary CLI invocation to control the version used for commands. Whichever method is chosen, keep the CLI and framework versions compatible.
Why does an Angular 6 project fail with the latest Node.js?
Angular 6 tooling was built for Node.js and package versions available during that release period. A current Node.js runtime can be outside its supported range. Use a compatible isolated environment for maintenance, then follow a staged Angular upgrade process if the application must be modernized.
Angular tutorial editorial QA checklist
- Confirm that every CLI command is tested with the Angular and Node.js versions named in the surrounding section.
- Keep AngularJS examples separate from Angular 2-and-later examples.
- Label standalone-component examples so Angular 6 readers do not place them directly in an NgModule-based project.
- Verify that template bindings match properties and methods declared by the component.
- Check that new code blocks use the correct TypeScript, HTML, Bash, or output formatting class.
- Review official Angular compatibility information before recommending a Node.js version or upgrade path.