Docker with WordPress
Docker is an excellent tool for containerizing applications. In this tutorial, we will walk you through the steps to set up a WordPress website using Docker.
Prerequisites
Before starting, ensure you have the following:
- Basic knowledge of WordPress is required.
- Ensure Docker is installed on your machine. Install Docker if you haven’t already.
- An IDE like Visual Studio Code will be helpful.
Steps to Set Up WordPress with Docker
Step 1: Create a Project Directory
Create a new directory for your WordPress project and navigate to it:
mkdir wordpress-docker-example && cd wordpress-docker-exampleOr you can create the directory, and open the directory in Visual Studio Code.
Step 2: Create a docker-compose.yml File
Create a file named docker-compose.yml in your project directory.
And add the following content to the file:
docker-compose.yml
version: '3.8'

services:
  wordpress:
    depends_on:
     - db
    image: wordpress:latest
    ports:
      - "8080:80"
    environment:
      WORDPRESS_DB_HOST: db:3306
      WORDPRESS_DB_USER: user
      WORDPRESS_DB_PASSWORD: password123
      WORDPRESS_DB_NAME: wordpress
    volumes:
      - ./wordpress:/var/www/html

  db:
    image: mariadb:10.5
    environment:
      MYSQL_DATABASE: wordpress
      MYSQL_USER: user
      MYSQL_PASSWORD: password123
      MYSQL_ROOT_PASSWORD: rootpassword123
    volumes:
      - db_data:/var/lib/mysql
    restart: always

volumes:
  db_data:
Explanation of the docker-compose.yml File
version: ‘3.8’: Specifies the version of the Docker Compose file format being used. While this is optional, it provides clarity about compatibility.
services: Defines the services that make up your application, in this case, WordPress and the database (MariaDB).
wordpress: This service runs the WordPress container:
- depends_on: Ensures the database service starts before WordPress.
- image: Specifies the WordPress Docker image to use.
- ports: Maps port 8080 on your host machine to port 80 in the container, allowing you to access WordPress at
http://localhost:8080. - environment: Sets environment variables for WordPress to connect to the database.
- volumes: Mounts a local directory to persist WordPress files across container restarts.
db: This service runs the MariaDB container:
- image: Specifies the MariaDB Docker image to use.
- environment: Sets environment variables to configure the database.
- volumes: Mounts a volume to persist database data across container restarts.
- restart: Ensures the database container automatically restarts if it stops.
volumes: Defines named volumes for data persistence. Here, db_data is used to persist MariaDB data.
Why Use a Compose File Over a Dockerfile?
A Compose file simplifies the management of multi-container applications. Instead of manually starting and linking containers with individual docker run commands, you define everything in one file. This improves readability, consistency, and portability of your application setup.
Need for Data Persistence in WordPress
WordPress stores critical data such as site content, configurations, and user information in the database. Without data persistence, this information would be lost if the container restarts or is removed. Persistent volumes ensure your WordPress site remains intact even when containers are stopped or recreated.
Why Use MariaDB?
MariaDB is a community-developed fork of MySQL. It offers better performance, open-source support, and compatibility with ARM architectures (e.g., Apple M1/M2). Using MariaDB ensures stability and compatibility, especially in environments where MySQL may face platform-related issues.
Step 3: Start the Containers
Use Docker Compose to start the WordPress and MariaDB containers:
docker-compose up -dThis command will download the required images and start the containers in detached mode.
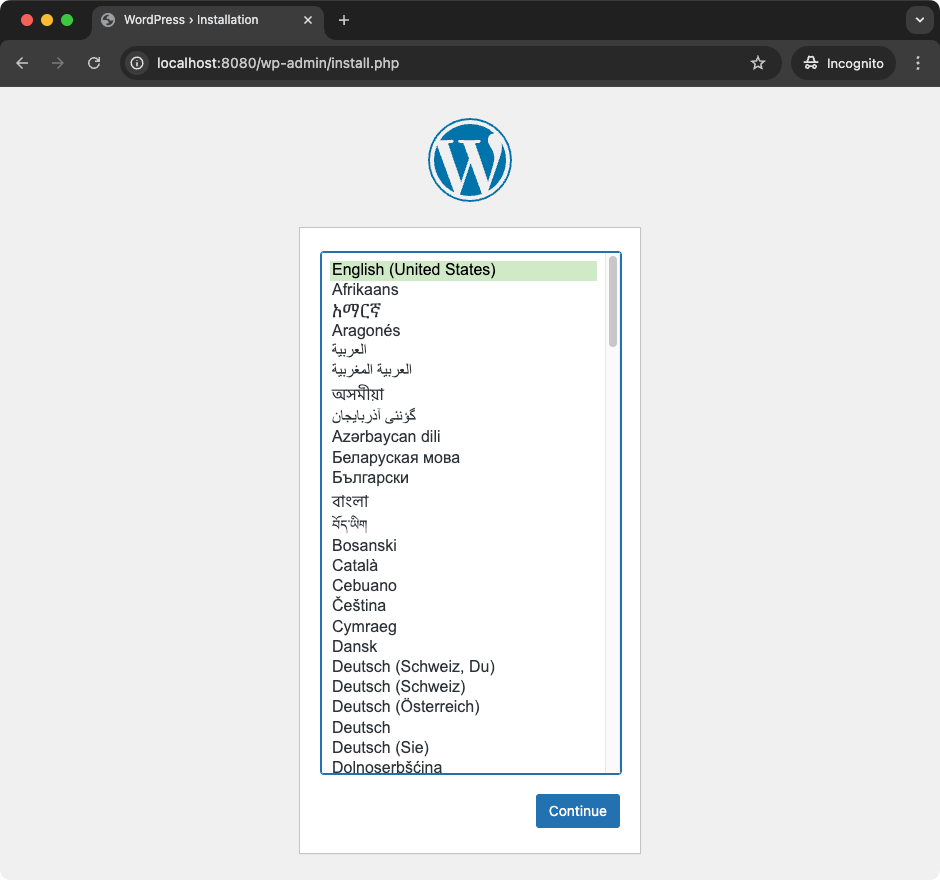
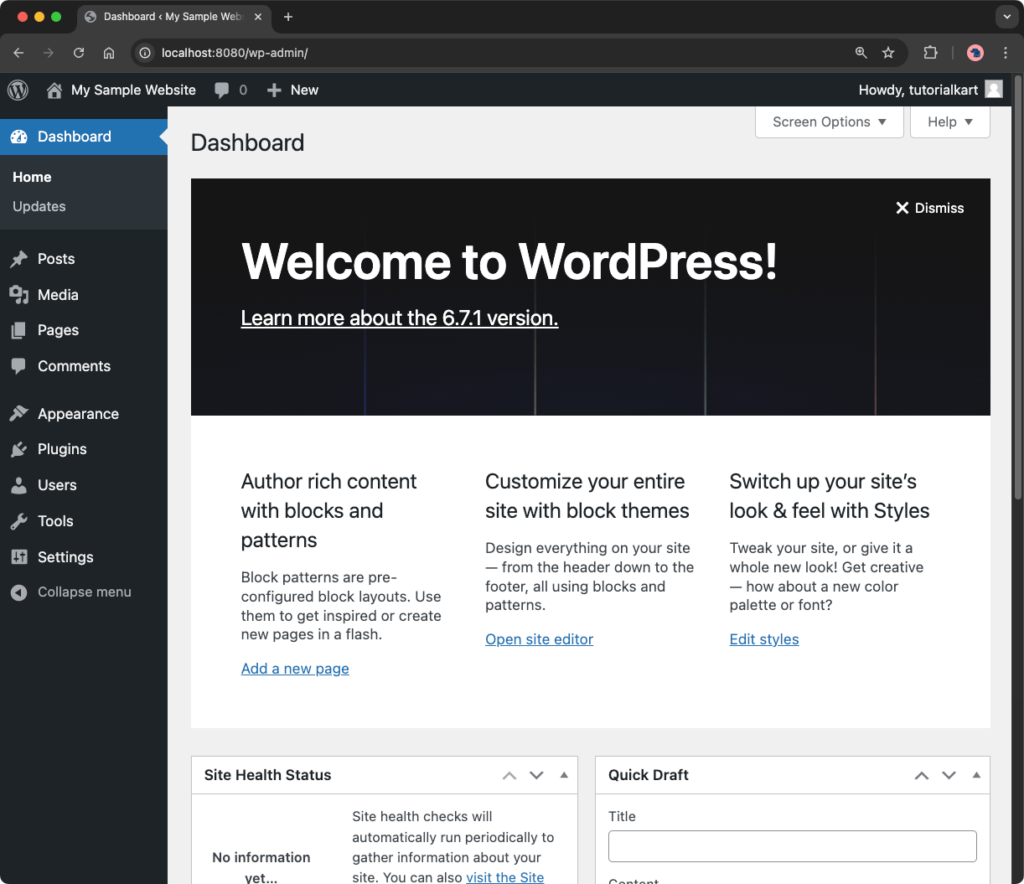
Step 4: Access Your WordPress Site
Open your browser and navigate to http://localhost:8080. You will see the WordPress setup page.
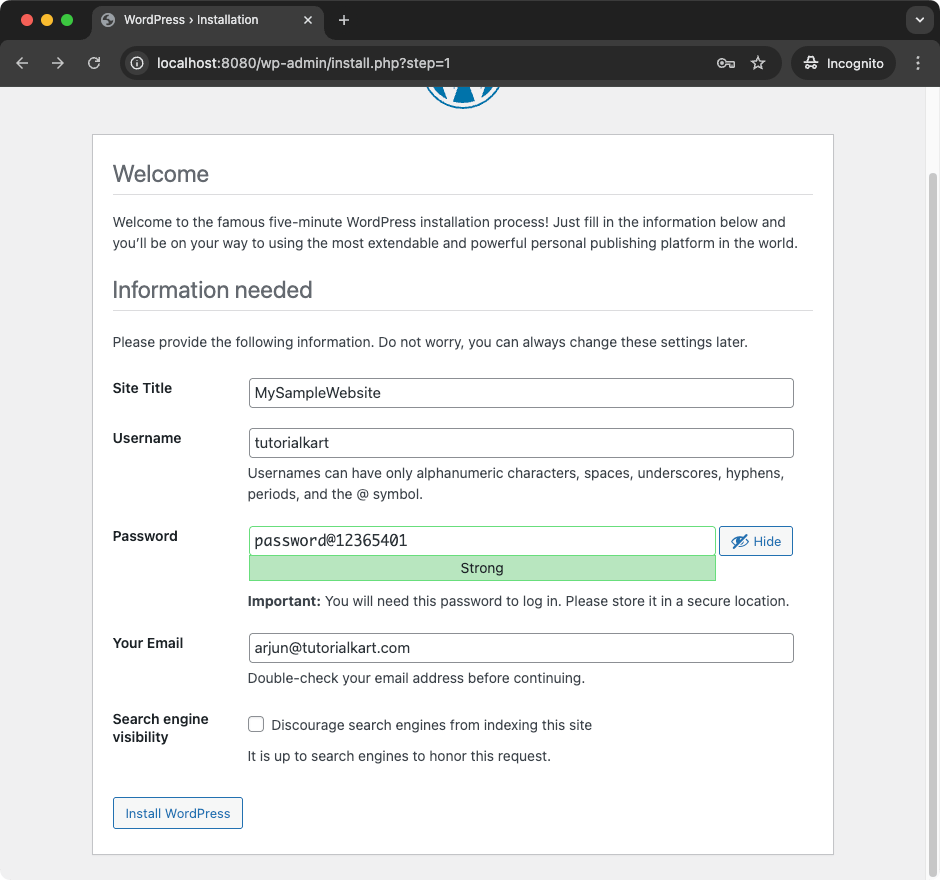
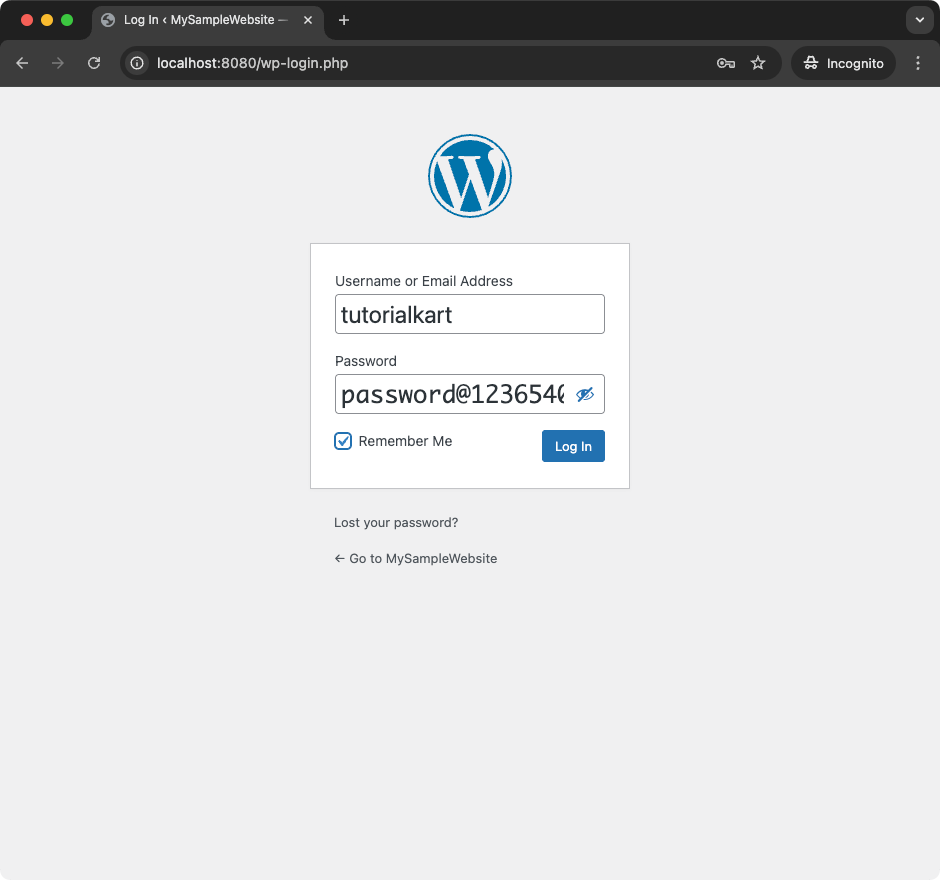
Step 5: Complete the WordPress Setup
Follow the on-screen instructions to:
Choose a language.
Set your site title, username, and password.
Log in to your WordPress admin dashboard.

Step 6: Verify Persistent Data
Stop the containers and restart them to verify data persistence:
docker-compose down
docker-compose up -d
Your WordPress site and data should remain intact due to the mounted volumes.
Step 7: Managing Containers
To manage your containers, use the following commands:
docker ps: List running containers.docker-compose down: Stop and remove containers.docker-compose up: Start the containers again.
Conclusion
You have successfully set up a WordPress website using Docker with MariaDB and data persistence. This setup provides a portable and scalable environment for your WordPress development. Explore further to customize and enhance your setup as needed.