What is Windows PowerShell?
Windows PowerShell is a command-line shell and scripting environment from Microsoft that helps users run commands, automate tasks, and manage Windows systems. Modern PowerShell is cross-platform and can run on Windows, macOS, and Linux. It includes a command-line shell, a scripting language, and a framework for working with commands called cmdlets.
PowerShell is commonly used by system administrators, developers, support engineers, and power users. A beginner can use it for simple tasks such as checking the date, listing files, or stopping a process. An administrator can use it to automate repeated work such as managing users, services, files, event logs, servers, and cloud resources.
The older name Windows PowerShell usually refers to the Windows-only version that is built on the .NET Framework. The newer product is called PowerShell or PowerShell 7, and it is built on modern .NET. Microsoft documentation now generally uses PowerShell for the cross-platform version.
- What is PowerShell?
- Do you need Windows PowerShell?
- What is a shell in PowerShell?
- What are Windows PowerShell cmdlets?
- How is PowerShell different from Command Prompt?
- How to open PowerShell in Windows?
- How to download and install PowerShell on macOS?
- How to run PowerShell on macOS?
Do you need Windows PowerShell on your computer?
Most Windows users do not need to open PowerShell every day, but it is a normal part of Windows and should not be removed casually. Windows tools, administrators, installers, and support scripts may use PowerShell to configure or repair system settings. If PowerShell opens unexpectedly, check which app or script started it before allowing any command to run.
If you are only browsing the web, writing documents, or using normal desktop applications, you may not need to learn PowerShell immediately. If you manage Windows settings, troubleshoot computers, work with servers, or automate repeated tasks, PowerShell is useful to learn.
What is a shell in PowerShell?
A shell is an interface that allows users to interact with an operating system. A shell can accept commands, run programs, display results, and pass information between commands. In Unix and Linux, the shell is commonly a command-line interface. In Windows, users often work through the graphical interface, but Windows also includes command-line shells such as Command Prompt and PowerShell.
PowerShell is more than a basic shell because it also includes a scripting language. This means commands can be saved in script files and reused for automation.
What are Windows PowerShell cmdlets?
The building blocks of PowerShell are called cmdlets, pronounced as “command-lets”. A cmdlet is a lightweight command used in the PowerShell environment. Cmdlets usually follow a Verb-Noun naming pattern, which makes commands easier to read.
- Example: Get-Date displays the current date and time.
- Example: Get-Process displays running processes.
- Example: Start-Service starts a Windows service.
- Example: Stop-Process stops a process.
Get-Date
Get-Process
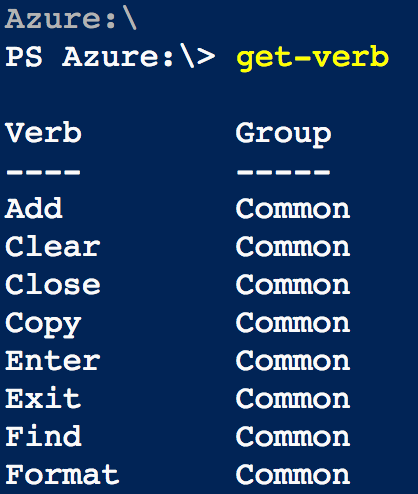
Get-Command
Get-Help Get-ProcessTo get the list of verbs approved by Microsoft for cmdlet names, use the Get-Verb cmdlet as shown below.
Using the verb-noun pattern, you can often understand a command before you run it. For example, Start-Service starts a service and Stop-Process stops a process.
How is PowerShell different from the old Command Prompt?
Command Prompt, also called CMD, is a traditional Windows command-line tool that runs commands such as dir, copy, and ping. PowerShell can run many external commands too, but it is designed for automation and system management. A major difference is that PowerShell works with objects, while Command Prompt mostly works with plain text output.
| Feature | Command Prompt | PowerShell |
|---|---|---|
| Main use | Run traditional Windows commands | Run commands, scripts, and automation tasks |
| Output style | Mostly text | Objects that can be filtered, sorted, and passed through pipelines |
| Scripting | Batch files | PowerShell scripts with cmdlets and functions |
| Common file extension | .bat or .cmd | .ps1 |
| Cross-platform support | Windows focused | PowerShell 7 runs on Windows, macOS, and Linux |
Windows PowerShell and PowerShell 7 difference
Windows PowerShell and PowerShell 7 are related, but they are not exactly the same product. Windows PowerShell is included with many Windows versions and is mainly used for Windows administration. PowerShell 7 is the newer cross-platform edition and uses the pwsh command instead of the older powershell command.
| Point | Windows PowerShell | PowerShell 7 |
|---|---|---|
| Command name | powershell | pwsh |
| Platform | Windows | Windows, macOS, and Linux |
| Runtime | .NET Framework | Modern .NET |
| Typical use | Windows administration and legacy scripts | Cross-platform automation and newer PowerShell development |
For current installation instructions and product information, refer to Microsoft Learn: What is PowerShell? and Microsoft Learn: Install PowerShell on Windows, Linux, and macOS.
Windows PowerShell basics: getting started on Windows
Windows includes Windows PowerShell by default in many supported Windows versions. On current Windows systems, you may also install PowerShell 7 separately if you need the newer cross-platform edition. Before installing a new version, check whether your organization has a standard version requirement.
- To open Windows PowerShell on Windows 7, navigate to the Start button and type powershell.
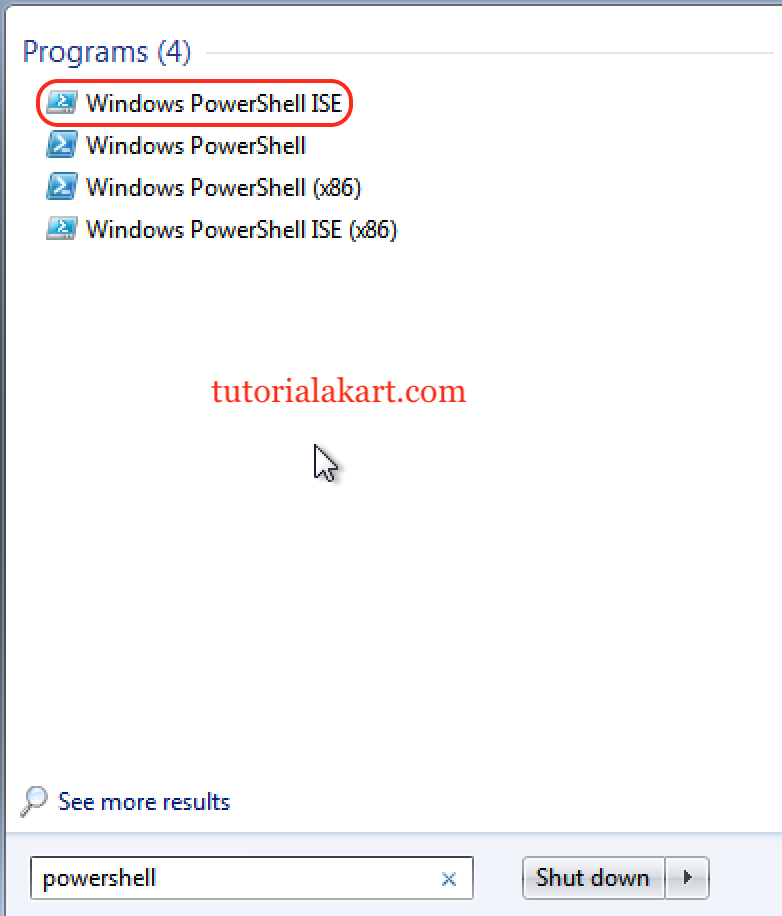
- Select “Windows Powershell ISE” for the GUI version.
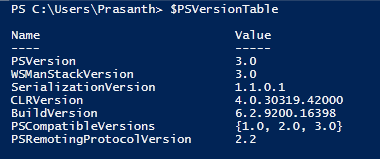
On newer Windows systems, you can also open PowerShell from the Start menu, Windows Terminal, or the Run dialog. To check the installed version, run the following command.
$PSVersionTableHow to install PowerShell 7 on Windows
PowerShell 7 can be installed on Windows separately from Windows PowerShell. Common installation methods include the Microsoft Store, the MSI installer from Microsoft, and command-line installation tools. For the latest supported commands, use the Microsoft Learn installation page because version numbers and supported platforms can change.
winget search Microsoft.PowerShell
winget install --id Microsoft.PowerShell --source winget
After installation, open PowerShell 7 by searching for PowerShell 7 or by running pwsh from a terminal.
How to install PowerShell on macOS
PowerShell can also be installed on macOS. The current recommended methods include downloading the official package from Microsoft/GitHub or using Homebrew. The older instructions below are retained with the original screenshots, but for a new installation you should prefer the latest stable PowerShell package and current Microsoft installation instructions.
Requirements.
- PowerShell .pkg installer or Homebrew package manager.
- A supported macOS version for the PowerShell release you are installing.
- Administrator permission on the Mac.
- Internet access to download the package or Homebrew formula.
Downloading and installing PowerShell from the package file
- To download powershell.pkg installer, go to Microsoft GitHub Powershell project and download the appropriate macOS .pkg release for your processor type.
- Use the x64 package for Intel-based Macs and the arm64 package for Apple silicon Macs, unless Microsoft documentation for your release says otherwise.

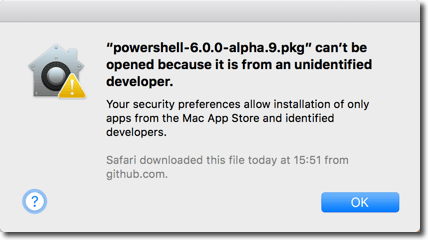
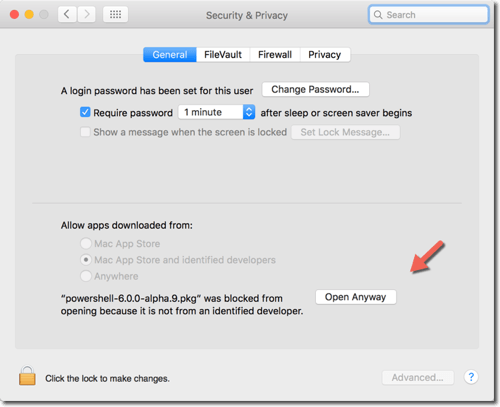
- Now double-click the .pkg file to install. If you are working with default security settings, you may need to allow the package from macOS privacy and security settings before the installer can continue.
To resolve the issue, go to System preference | Security & Privacy and click on Open Anyway as shown below.
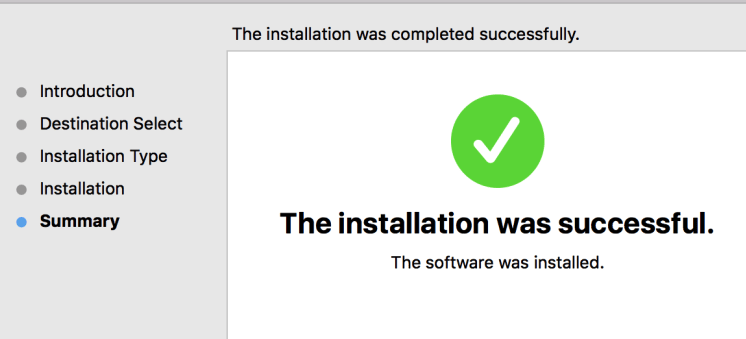
PowerShell on your Mac gets started and click on continue button to complete your installation.
The older AzureRM.NetCore module is no longer the standard starting point for general PowerShell use on macOS. If you are learning PowerShell, start with basic cmdlets first. If you specifically work with Microsoft Azure, use the current Azure PowerShell module recommended by Microsoft for your environment.
Installing PowerShell on macOS with Homebrew
If you prefer Homebrew, you can install PowerShell from the terminal. This method is convenient when you already use Homebrew to manage packages on macOS.
brew install --cask powershellAfter installation, start PowerShell by running the pwsh command.
pwshHomebrew’s OpenSSL libraries
If you have not installed Homebrew on your mac, to install Homebrew enter the command into terminal.
/usr/bin/ruby -e "$(curl -fsSL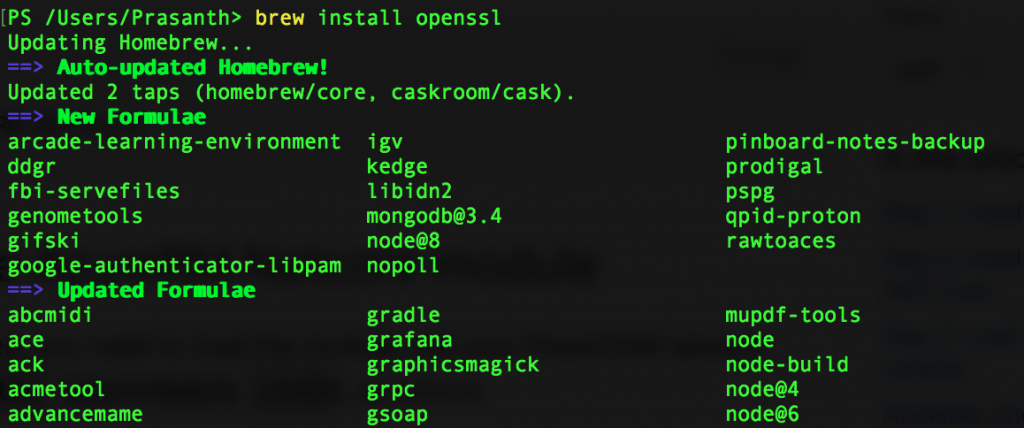
https://raw.githubusercontent.com/Homebrew/install/master/install)"- To install OpenSSL libraries on your mac, enter brew install openssl as shown below.
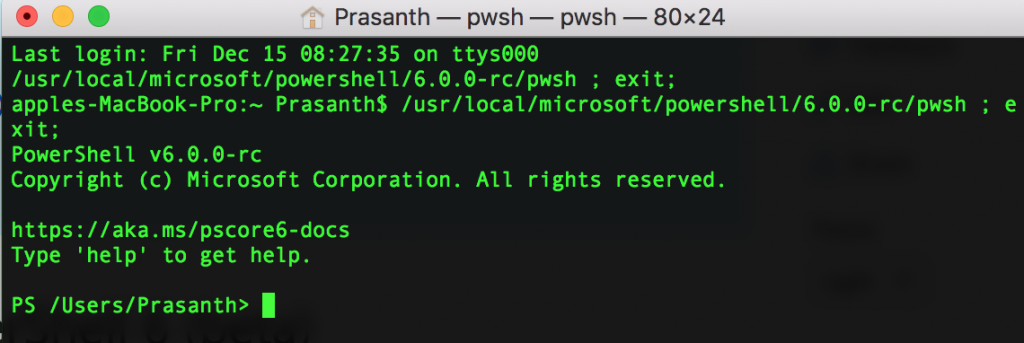
How to run PowerShell on macOS
After successful PowerShell installation, user can run PowerShell on macOS. To get started go to launchpad and click on PowerShell icon.
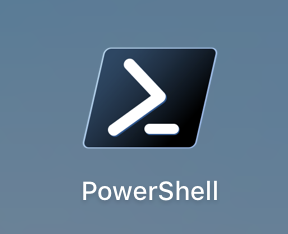
- Open PowerShell from your launchpad as shown below.
- To check PowerShell version, use $PSVersionTable cmdlet on PowerShell terminal.

You can also run the same version check from the terminal after starting PowerShell.
$PSVersionTable.PSVersionFirst PowerShell commands for beginners
After opening PowerShell, start with safe read-only commands. These commands display information and do not change system settings.
| Command | What it does |
|---|---|
| Get-Date | Shows the current date and time |
| Get-Location | Shows the current folder path |
| Get-ChildItem | Lists files and folders in the current location |
| Get-Command | Lists available commands |
| Get-Help | Shows help for PowerShell commands |
Get-Date
Get-Location
Get-ChildItem
Get-Help Get-ChildItem
PowerShell safety notes before running scripts
PowerShell can make system changes, so run commands only when you understand what they do. Do not paste commands from unknown websites into an administrator PowerShell window. Be careful with commands that delete files, change permissions, download scripts, or run code from the internet.
- Use normal PowerShell instead of “Run as administrator” unless elevation is required.
- Read a command before pressing Enter.
- Use Get-Help to understand a cmdlet before using it.
- Do not run unsigned or unknown .ps1 scripts from untrusted sources.
- Keep PowerShell and Windows updated through trusted update channels.
Windows PowerShell FAQs
What is Windows PowerShell used for?
Windows PowerShell is used to run commands, automate administrative tasks, manage files and services, troubleshoot Windows systems, and write scripts. Administrators use it to manage local computers, servers, and cloud services more efficiently.
Do I need Windows PowerShell?
You do not need to use PowerShell for normal daily tasks such as browsing or editing documents. However, PowerShell is a normal Windows component and is useful for troubleshooting, automation, and administration. It is usually better to leave it installed.
Is PowerShell the same as Command Prompt?
No. Command Prompt is an older command-line tool that mainly works with text commands. PowerShell is a more advanced shell and scripting language that works with objects, cmdlets, pipelines, and scripts.
What is the difference between Windows PowerShell and PowerShell 7?
Windows PowerShell is the Windows-only edition built on the .NET Framework. PowerShell 7 is the newer cross-platform edition built on modern .NET and runs on Windows, macOS, and Linux. PowerShell 7 is started with the pwsh command.
How do I check the PowerShell version?
Open PowerShell and run $PSVersionTable. The output shows the installed PowerShell version and related environment details.
QA checklist for this Windows PowerShell tutorial
- Confirm that the article explains PowerShell as a shell, scripting language, and automation tool.
- Confirm that Windows PowerShell and PowerShell 7 are described separately.
- Confirm that beginner questions such as “Do I need PowerShell?” and “How is it different from CMD?” are answered directly.
- Confirm that Windows and macOS installation sections do not rely only on outdated PowerShell 6 alpha-era instructions.
- Confirm that new PowerShell examples use the correct PrismJS class and that the original Homebrew code block is left unchanged.
- Confirm that safety guidance warns users not to run unknown scripts or pasted commands blindly.