 TutorialKart.com
Creating Dynamics 365 App using App Designer
Creating a Dynamics 365 App using App Designer helps administrators and customizers build a focused app experience for a specific business process. Instead of showing every available table, dashboard, view, and form to every user, you can create an app that contains only the navigation and components required for a team such as Sales, Service, Field Service, or a custom department.
The steps below explain the classic Dynamics 365 App Designer flow shown in the screenshots, and also add current guidance for model-driven apps in Power Apps. In newer Microsoft Dataverse environments, the same idea is usually described as creating or editing a model-driven app with the app designer.
Before you create a Dynamics 365 App with App Designer
Before you start, make sure that you have the required customization privileges. A system administrator or system customizer usually creates and publishes apps. It is also better to create the app inside a solution, so that the app, sitemap, tables, forms, views, charts, dashboards, and business process flows can be managed together and moved between environments when required.
- App name: Choose a clear name that tells users what the app is for.
- App URL suffix: Use a short suffix without spaces, because it becomes part of the app URL.
- Solution: Use an unmanaged solution while building and a managed solution for deployment, if your organization follows ALM practices.
- Sitemap: Plan the app navigation before adding components. Users should see only the areas, groups, and subareas they need.
- Security roles: Creating an app does not automatically give users access to all data. Table privileges and app access must still be configured correctly.
Enable App Designer preview in older Dynamics 365 environments
In older Dynamics 365 Customer Engagement environments, App Designer was introduced as a preview feature. In such environments, before creating a Dynamics 365 application, first enable the preview option. To enable it, navigate to Administration | System Settings | App Modules & App Designer Preview.
In current model-driven app environments, you normally create or edit apps from Power Apps maker portal or from a solution, and this preview setting may not appear. If you are using a newer environment, you can skip the preview-enable step and move to the app creation section.
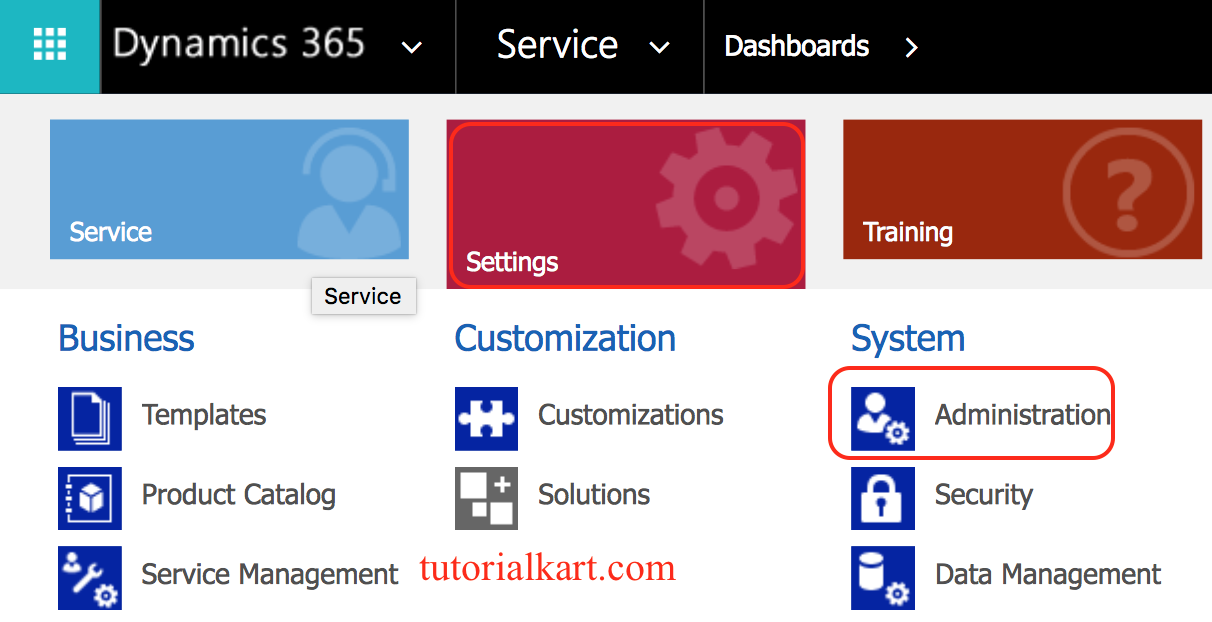
- Click on Administration in the Settings.
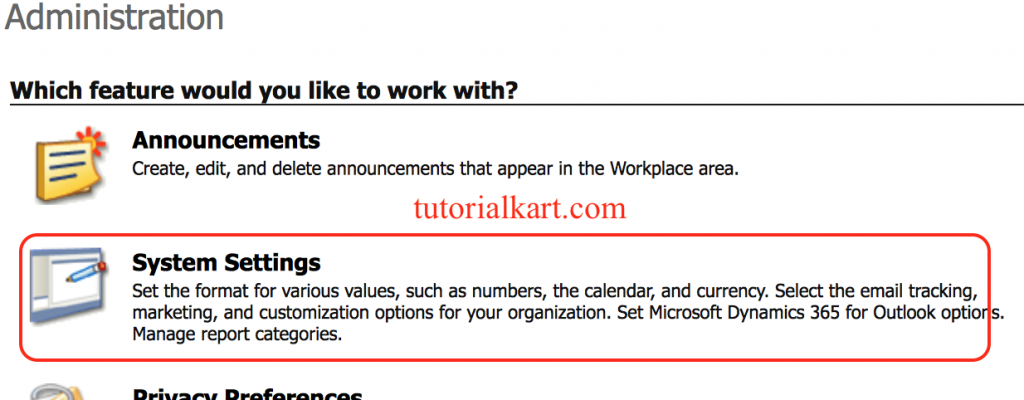
- Select System settings to enable preview for App designer as shown below.
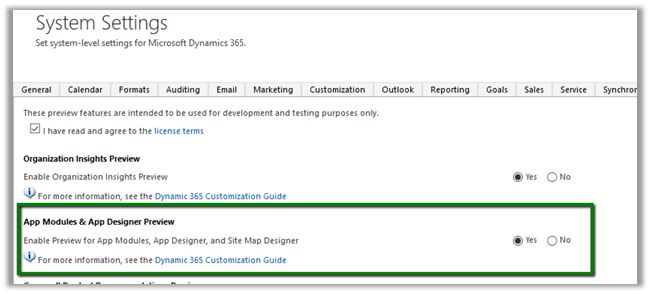
- Click on Save button
Create a Dynamics 365 App from My Apps in classic App Designer
To create Microsoft Dynamics 365 App, Open the app designer from the My Apps page available in the Settings. Navigate to Settings | My Apps | Click New App.
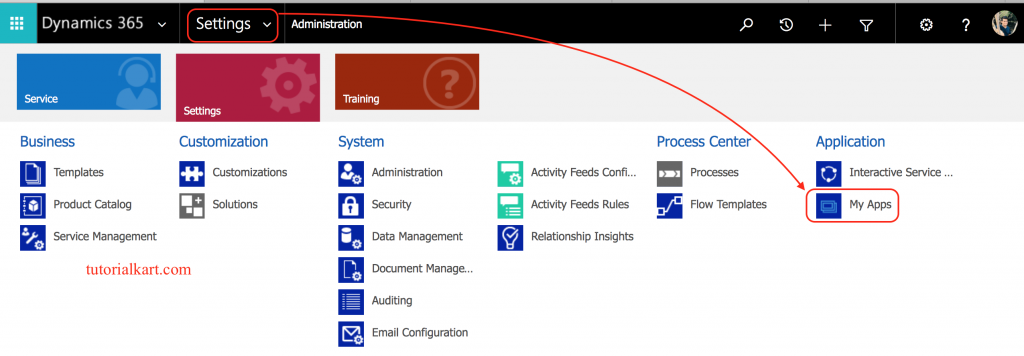
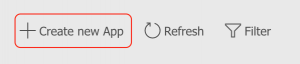
- Click on +Create new App button as shown below, now the app designer opens in a new browser tab
Enter Dynamics 365 App properties in App Designer
The app properties define how the app appears to users and how the app URL is formed. Use a meaningful name and description because these details help users identify the correct app from the app list.
- Type Tutorialkart in the name field and enter description.
- Deselect use default Image to use our own custom Icon image as shown below.
- Add App URL Suffix as Tutorialkart
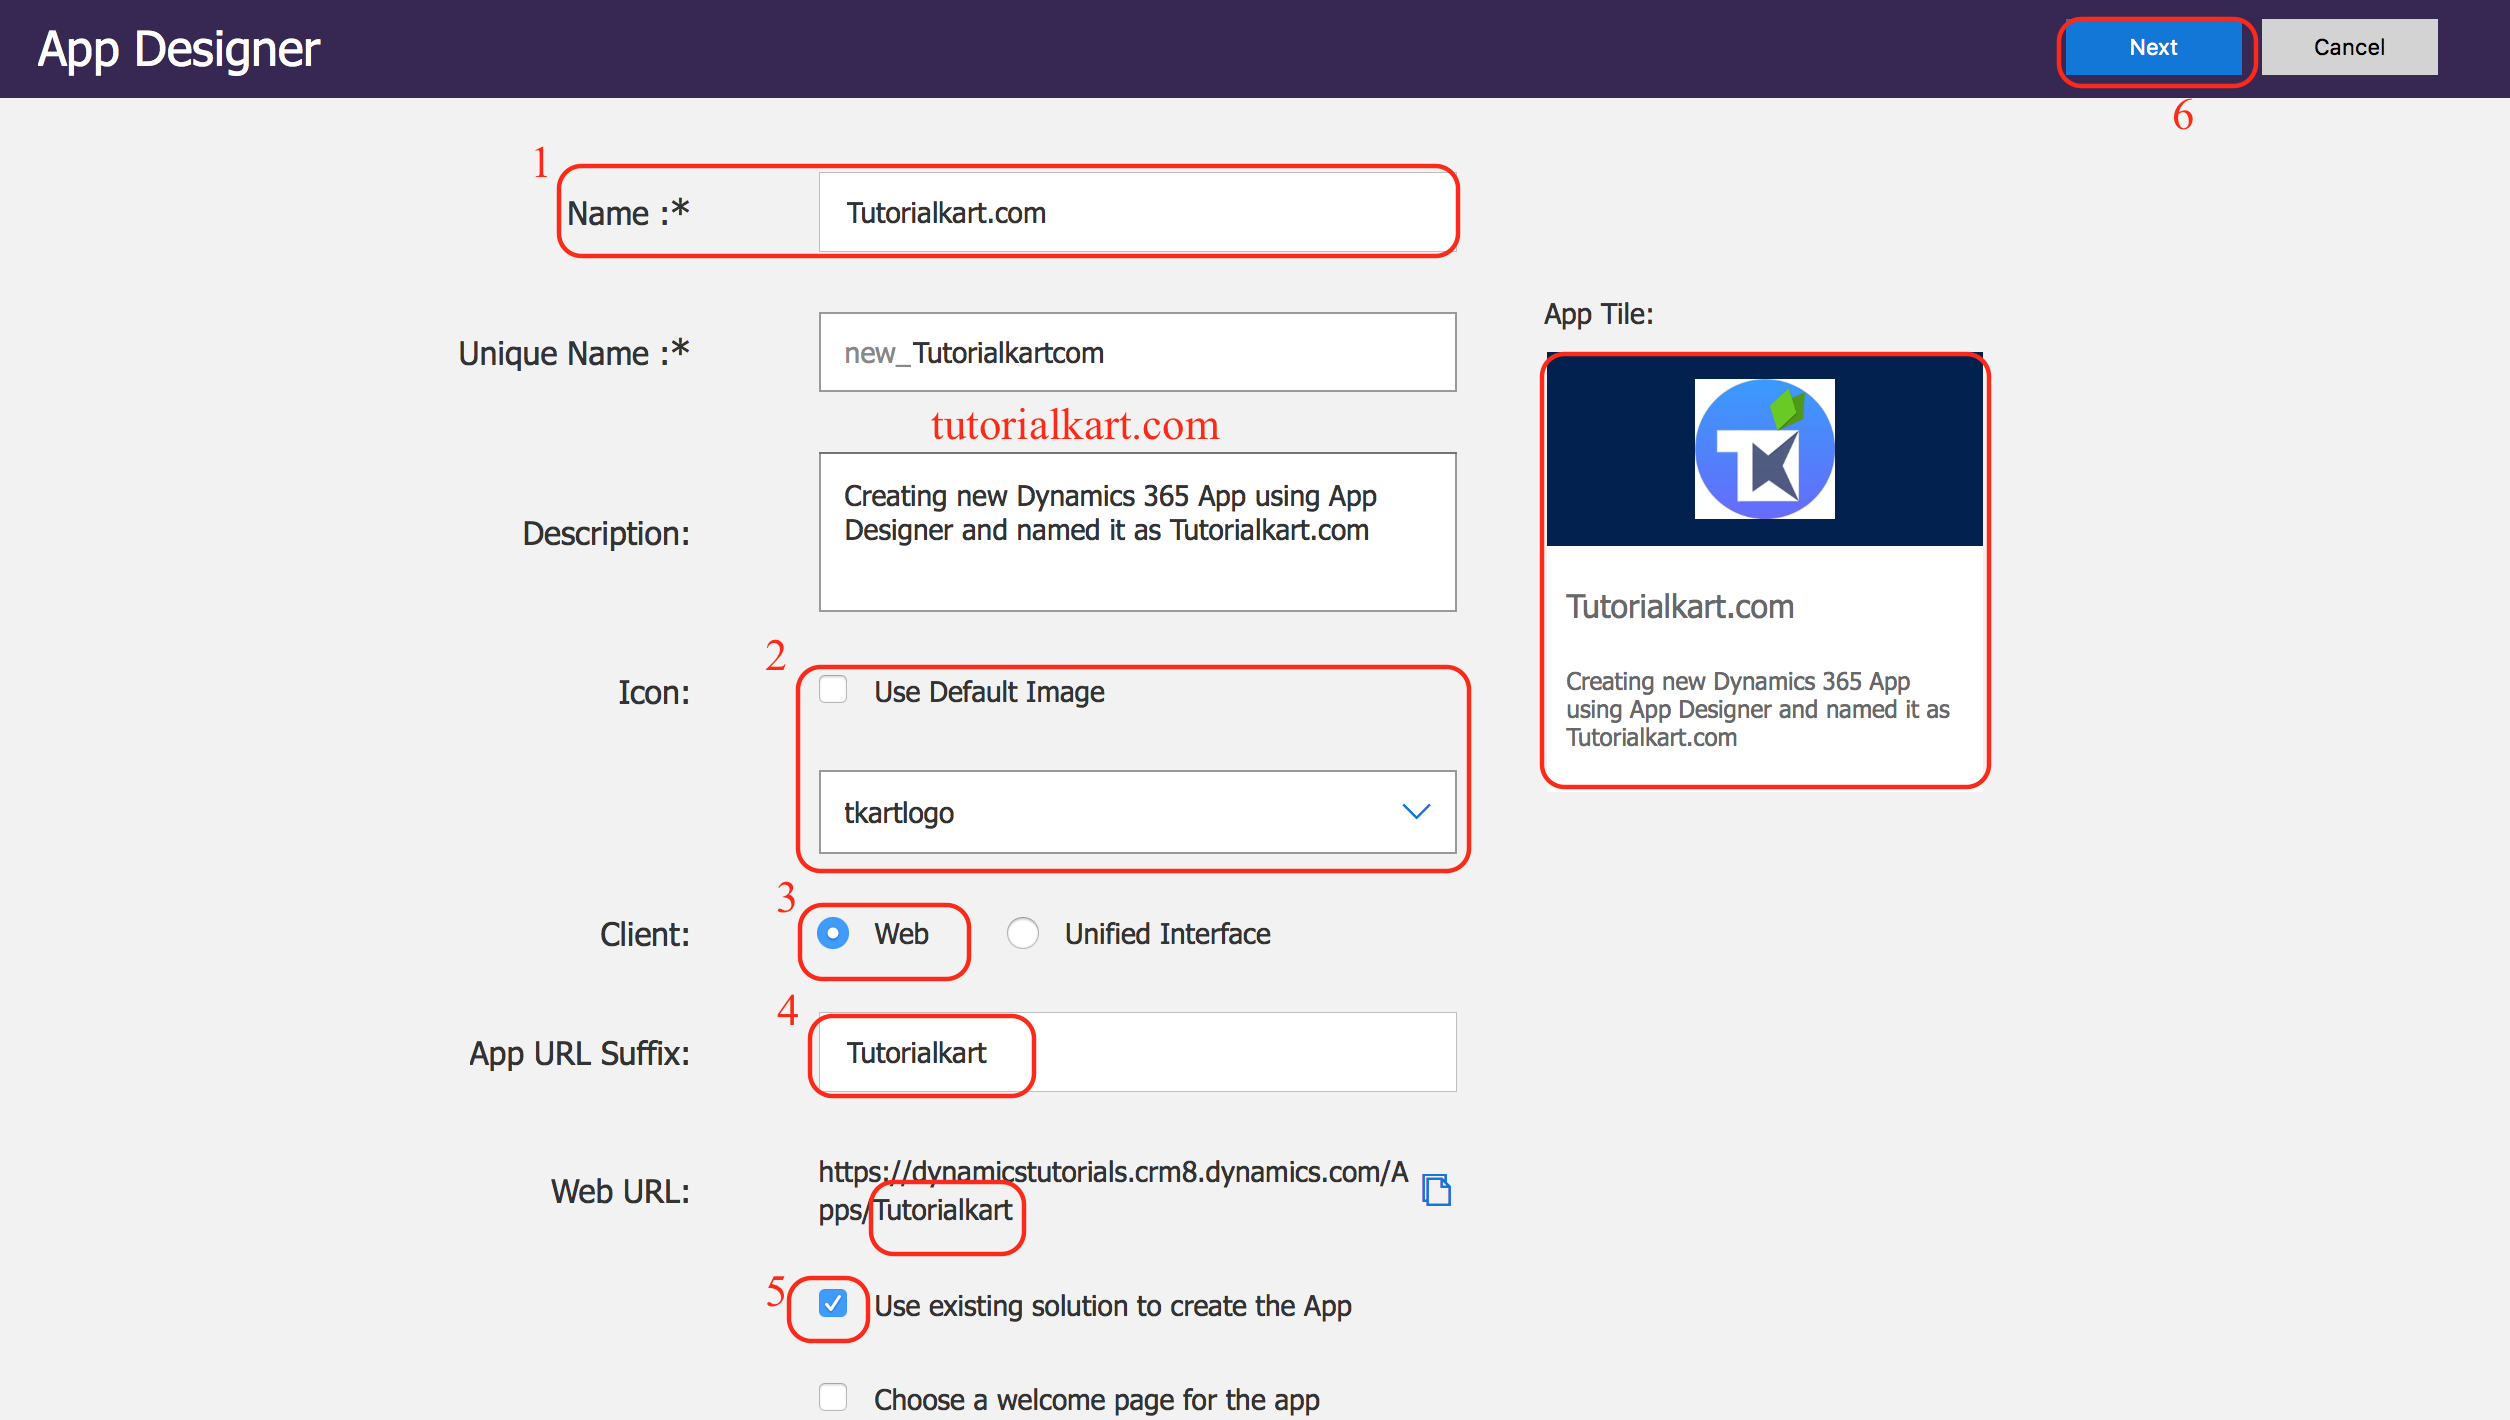
URL suffix will be displayed at the end of the Web URL as shown above. Now Select use existing solution to create the App.
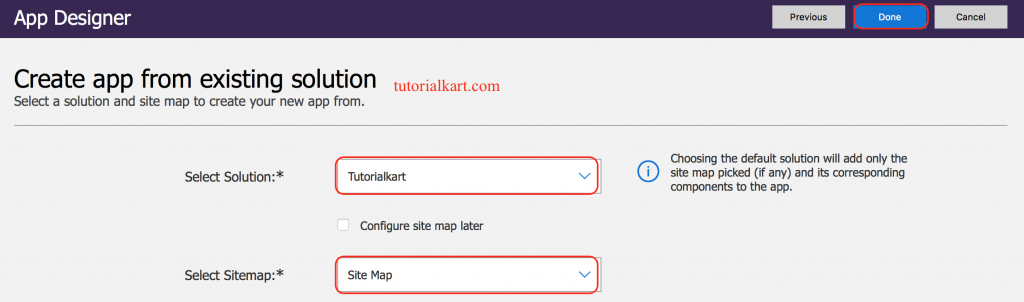
- Select your Solution. (Learn how to create Solution).
- Select Sitemap from the drop down.
Publish the custom Dynamics 365 App after selecting solution and sitemap
After selecting the solution and sitemap, complete the app creation process and publish the app. Publishing is required because users will not see the latest app configuration until the app is published.
- Finally click on Done available in the top-right corner.
- Click on publish button.
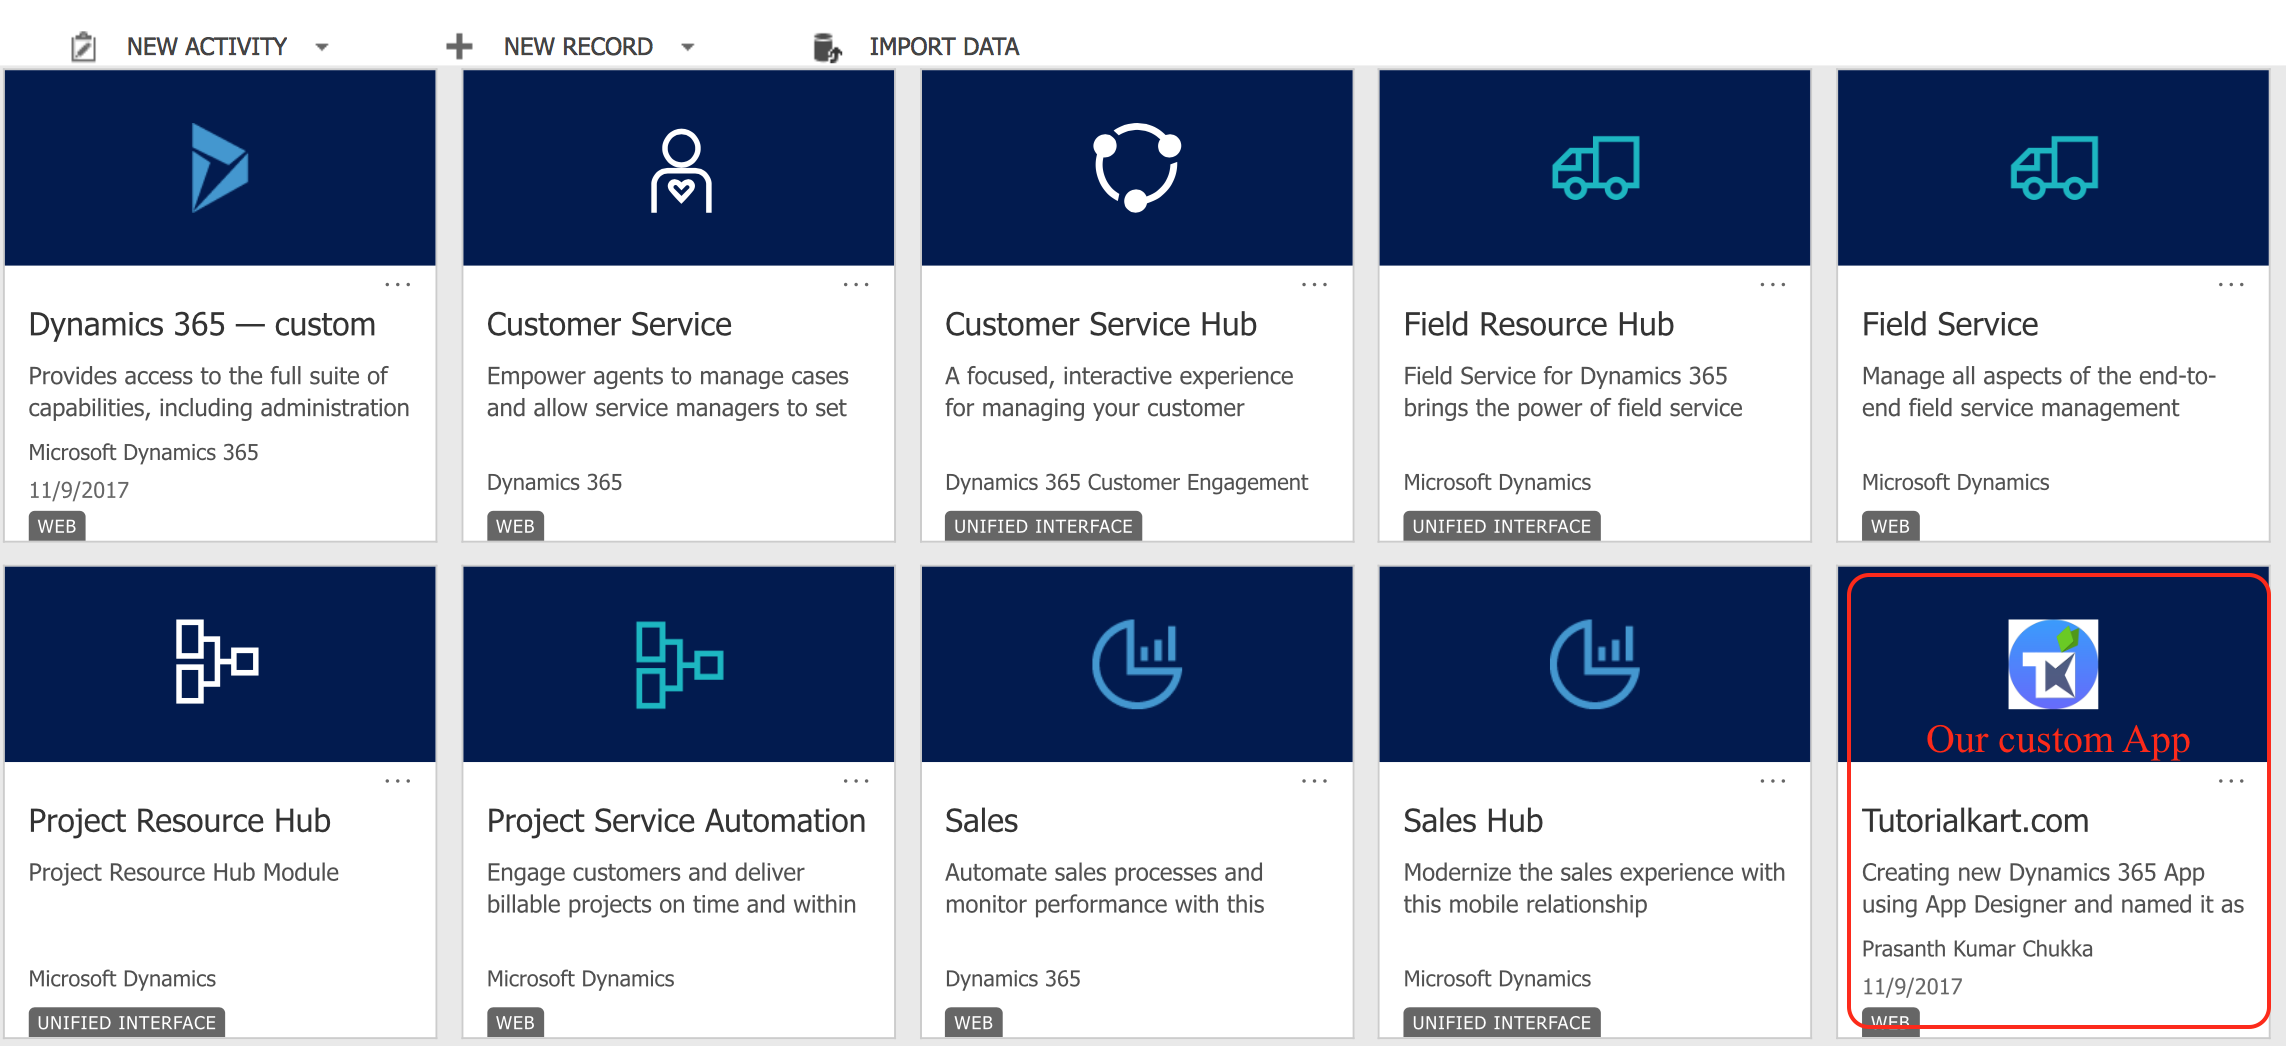
- Now go to Settings and click on My Apps.
Adding components to a Dynamics 365 App Designer app
Dynamics 365 App is composes with two types of components they are artifacts and entity assets. Dynamics 365 artifacts are like Sitemap, Dashboards, Business Process Flows. We can add all the assets of an entity like forms, views and charts.
In newer model-driven app terminology, entities are commonly called tables. When you add a table to an app, you can choose the forms, views, charts, dashboards, and related pages that should be available in that app. This lets the same Dataverse environment support different apps for different teams without showing the same navigation to everyone.
| Dynamics 365 App Designer item | What it controls in the app |
|---|---|
| Sitemap | Controls navigation areas, groups, and subareas shown in the app. |
| Tables or entities | Define the business records available in the app, such as accounts, contacts, cases, or custom tables. |
| Forms | Control how users view and edit individual records. |
| Views | Control record lists such as active accounts, open cases, or custom filtered lists. |
| Charts | Show visual summaries based on table data. |
| Dashboards | Provide a landing page with charts, lists, and important information. |
| Business Process Flows | Guide users through defined process stages, where applicable. |
App Designer canvas and properties in Dynamics 365
App Designer in Dynamics 365 has two main areas they are Left side and Right side. Left side is the canvas where we can add app components. On the right side are the Tabs that you’ll use to select components and set component properties.
The canvas helps you see the app structure while you build it. The properties pane is used to configure the selected item, such as changing the app name, setting a sitemap item title, choosing a table asset, or adjusting component-specific settings. After making changes, validate the app and publish it so that users can open the latest version.
Create a Dynamics 365 model-driven app in modern Power Apps
In current environments, a Dynamics 365-style app is commonly created as a model-driven app from Power Apps. The exact interface may vary, but the general steps are similar.
- Open the Power Apps maker portal and select the correct environment.
- Go to Solutions and open the solution where the app should be created.
- Select New and create a model-driven app.
- Enter the app name, description, and other required properties.
- Add pages for the required tables, dashboards, custom pages, or URLs.
- Configure the navigation so that users can find the records and dashboards they need.
- Save and publish the app.
- Share the app with the correct users or security roles.
The modern app designer uses pages and navigation more directly than the older tile-based designer, but the goal is the same: choose the components that belong inside the app and publish a usable business application.
Configure sitemap navigation for a Dynamics 365 App Designer app
The sitemap decides what users see in the left navigation. A good sitemap is short, organized, and aligned with the work users perform every day. Avoid adding every table to the app. Instead, group related items under clear areas and groups.
- Area: A top-level section of the app navigation, such as Sales or Service.
- Group: A logical grouping inside an area, such as Customers, Work, or Reports.
- Subarea: The actual navigation item that opens a table, dashboard, URL, or another page.
If a table is added to the app but users cannot find it in navigation, check the sitemap. If users can see the navigation item but cannot access records, check security roles and table permissions.
Validate, publish, and share the Dynamics 365 custom app
After adding the app components, validate the app to identify missing required items, incomplete sitemap entries, or component issues. Then publish the app. If the app is not visible to users, check app sharing and security roles. Users need both access to the app and permissions for the data shown inside the app.
- Save the app after making changes in App Designer.
- Validate the app before publishing it.
- Publish the app so that the latest changes are available.
- Assign app access to the required security roles or users.
- Test the app with a non-admin user account to confirm the real user experience.
Common issues while creating a Dynamics 365 App using App Designer
The app may look correct to an administrator but still fail for regular users if security, navigation, or publishing is incomplete. The following checks help identify common configuration problems.
| Issue | What to check in App Designer or security |
|---|---|
| App is not visible to users | Check whether the app is published and shared with the correct users or security roles. |
| Navigation item is missing | Check whether the table, dashboard, or page is added to the sitemap. |
| User sees the app but cannot open records | Check table permissions in the assigned security role. |
| New form or view is not available | Check whether that form or view has been added as an asset for the table in the app. |
| Changes do not appear after editing | Save and publish the app, then refresh the browser session. |
FAQ on creating Dynamics 365 App using App Designer
How do I create a Dynamics 365 app using App Designer?
In classic Dynamics 365, go to Settings, open My Apps, select New App, enter the app details, choose a solution and sitemap, add the required components, and publish the app. In newer environments, create a model-driven app from Power Apps, preferably from inside a solution.
What components can be added to a Dynamics 365 App Designer app?
You can add navigation through a sitemap, tables or entities, forms, views, charts, dashboards, and business process flows. In modern model-driven apps, you can also work with pages, dashboards, custom pages, and URLs depending on your environment features.
Why is my Dynamics 365 custom app not visible to users?
The most common reasons are that the app was not published, the app was not shared with the correct security roles or users, or the users do not have the required table permissions. Check both app access and Dataverse security role privileges.
Is App Designer the same as the model-driven app designer in Power Apps?
They are closely related. Older Dynamics 365 documentation often refers to App Designer, while newer Dataverse and Dynamics 365 customization commonly uses the model-driven app designer in Power Apps. The interface has changed, but the purpose is still to define the app structure, navigation, and components.
Do I need a solution when creating a Dynamics 365 app?
It is strongly recommended to create the app inside a solution. A solution helps organize the app and related components, and it makes deployment to other environments easier when the app is ready to move from development to test or production.
Editorial QA checklist for Dynamics 365 App Designer tutorial
- The tutorial explains both the classic Dynamics 365 App Designer path and the modern model-driven app context.
- The preview-enable step is clearly marked as relevant to older Dynamics 365 environments.
- The article explains why solutions, sitemaps, components, publishing, and security roles matter.
- The existing screenshots and image URLs are retained while adding updated explanatory context.
- The FAQ answers the real search intent: how to create the app, what to add, why users may not see it, and how App Designer relates to modern Power Apps.
Dynamics 365 App Designer creation summary
In this Microsoft Dynamics CRM tutorial, we have learned about how to create Dynamics 365 App using App Designer and in our next tutorial, we will learn about How to add Assets and artifacts to an App in App Designer.
A Dynamics 365 app should be planned around the users who will open it. Choose the correct solution, add only the required components, organize navigation through the sitemap, publish the app, and confirm that the required security roles can access both the app and its data.