Welcome to JIRA Tutorial. In this tutorial, we will learn what JIRA is, what is it used for, and how to use it.
What is JIRA software?
JIRA is a software tool designed for project management. The tool is mainly used for issue tracking.
Core Features of JIRA
Boards
JIRA provides Kanban and Scrum Boards. These boards are visual systems for managing work as it moves through a process.
They provide an immediate overview of the whole project at task level.
JIRA allows team members to customize these board workflows to fit their project.
Business Project Templates
Most of the times, there is always a template that fit your business project requirements. You can choose one from the huge collection of JIRA Business Project Templates. Or you can also modify an existing template to perfectly fit your business structure.
Issues
Every low level task in JIRA is considered an issue. A requirement is an issue. A bug is an issue. A task is an issue.
Each issue can be well detailed. You can provide a description; set a priority; attach required screenshots or documents; label the issue for quick access. You can assign the issue to one of your team members, make another as the reporter for the issue. One more important feature is that your team members can have a discussion on the issue in the form of comments.
Notifications
Emails can be sent to your team members for particular tasks. For example, an email notification will be sent to the ASSIGNEE of the issue. Also, if you can use @mention to notify that member specifically.
Power Search
JIRA provides a powerful search interface. You can search using filters, or advanced features. You can also search based on the details of issues.
Reports
With JIRA, you can generate reports like:
Agile Reports: Burndown Report, Burnup Report, Sprint Report, Velocity Report, Cumulative Flow Diagram, Version Report, Epic Report, Control Chart, Epic Burndown, Release Burndown
Issue Analysis: Average Age Report, Created vs. Resolved Issues Report, Pie Chart Report, Recently Created Issues Report, Resolution Time Report, Single Level Group By Report, Time Since Issues Report
Forecast & management: Time Tracking Report, User Workload Report, Version Workload Report
Other: Workload Pie Chart Report
JIRA Next-gen Templates
JIRA provides next-gen templates that are familiar and easy to use. Each template consists of many features useful for project management.
Some of the templates are:
- Kanban
- Scrum
Agile Projects with JIRA
Most of the project teams are adopting Agile methodology for their projects. JIRA provides a lot of support in terms of templates, reports, etc. to handle Agile projects.
Get started with JIRA Project
You can get a trail period of 7 days and get used to the workflow of JIRA software before purchasing a license or registering for JIRA software.
Step 1
Open a browser and hit the url https://www.atlassian.com/software/jira/try.
In this tutorial, we will choose Jira Software and click on Try it free.
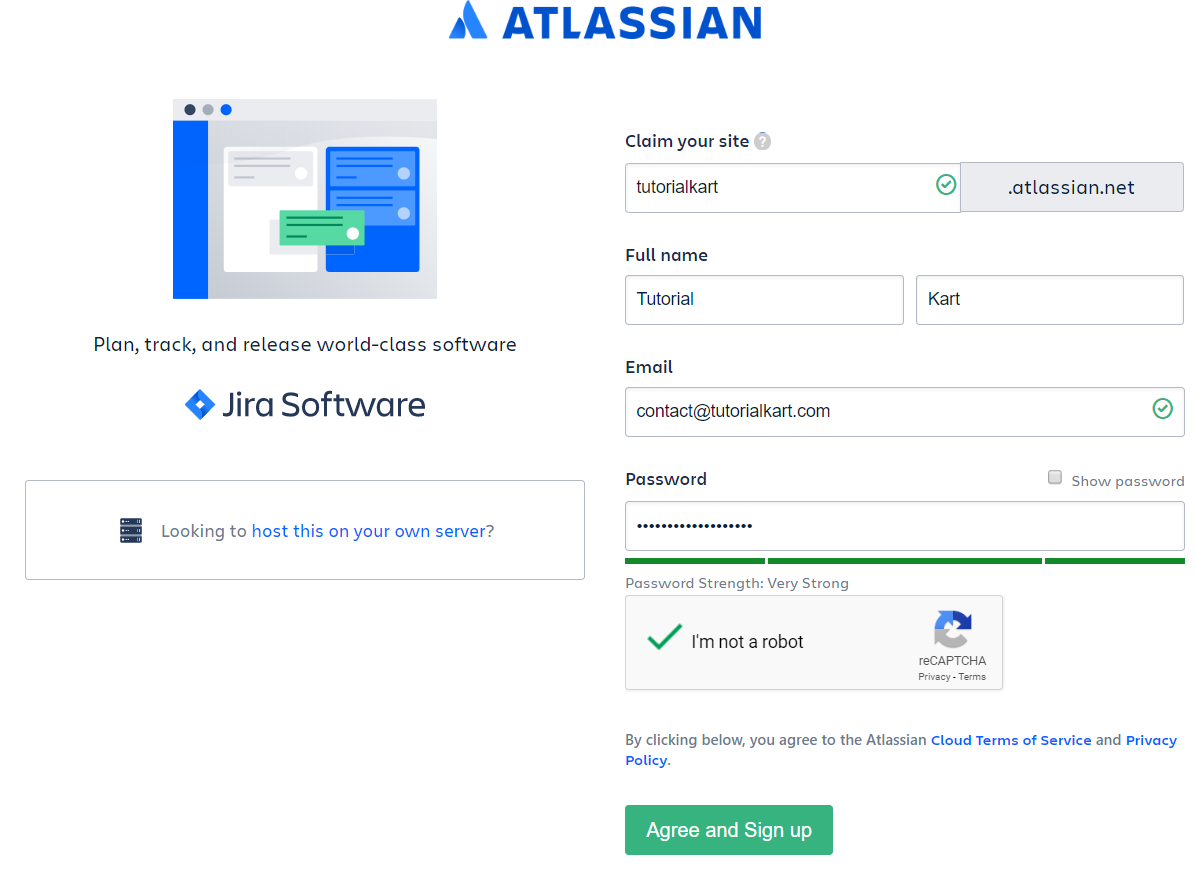
Step 2 – Signup
Fill in the Signup form and click on Agree and Signup.
Step 3 – Email Confirmation
You will receive a confirmation email to the email address you have provided in the above step – signup. Click on the verify button on the email. You will be redirected to the following page in a new tab.

Provide the emails of your team members. Or you can also check the box to let anyone with a verified yourwebsite.com (tutorialkart.com here) email join your Jira site.
Click on Next button.
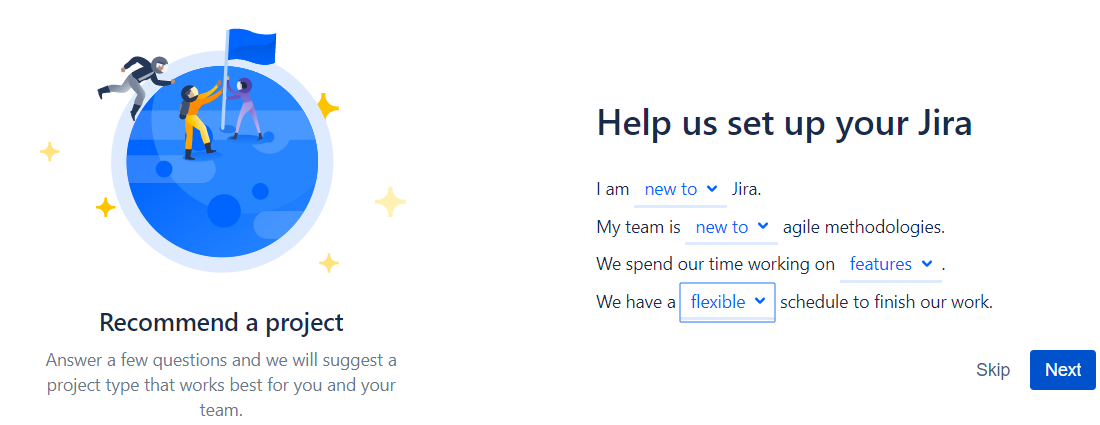
Step 4 – Basic setup
You can select some drop-down options relating to the questions about your team and project structure. This helps JIRA understand your requirements and setup your project accordingly. A sample screenshot is shown below. You can also skip this step.
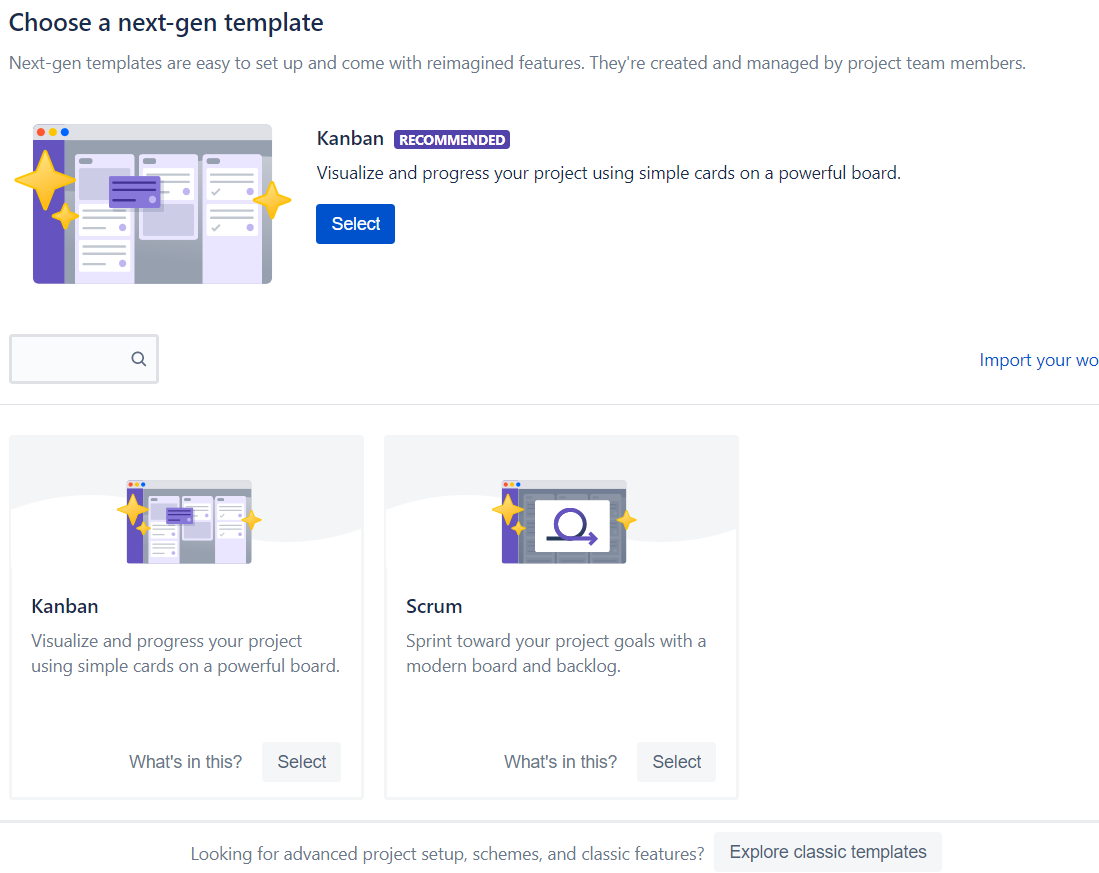
Step 5 – Template Selection
JIRA provides templates to choose from based on your project requirements. We will go with the recommended template and click on select.
Step 6 – Create Project
Once you select a template, you can create your project. Provide a name for your JIRA project and click on Create button.
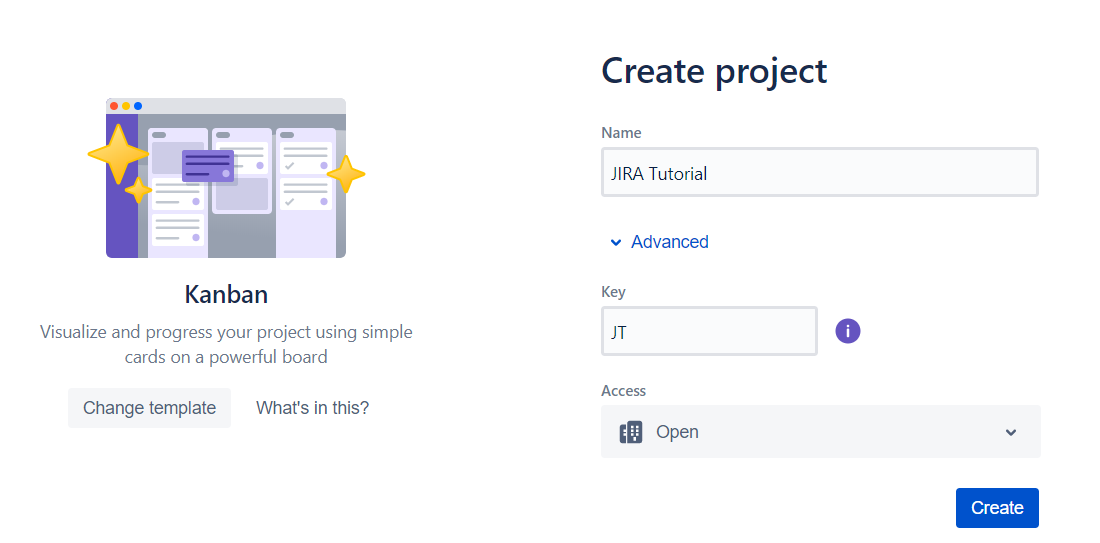
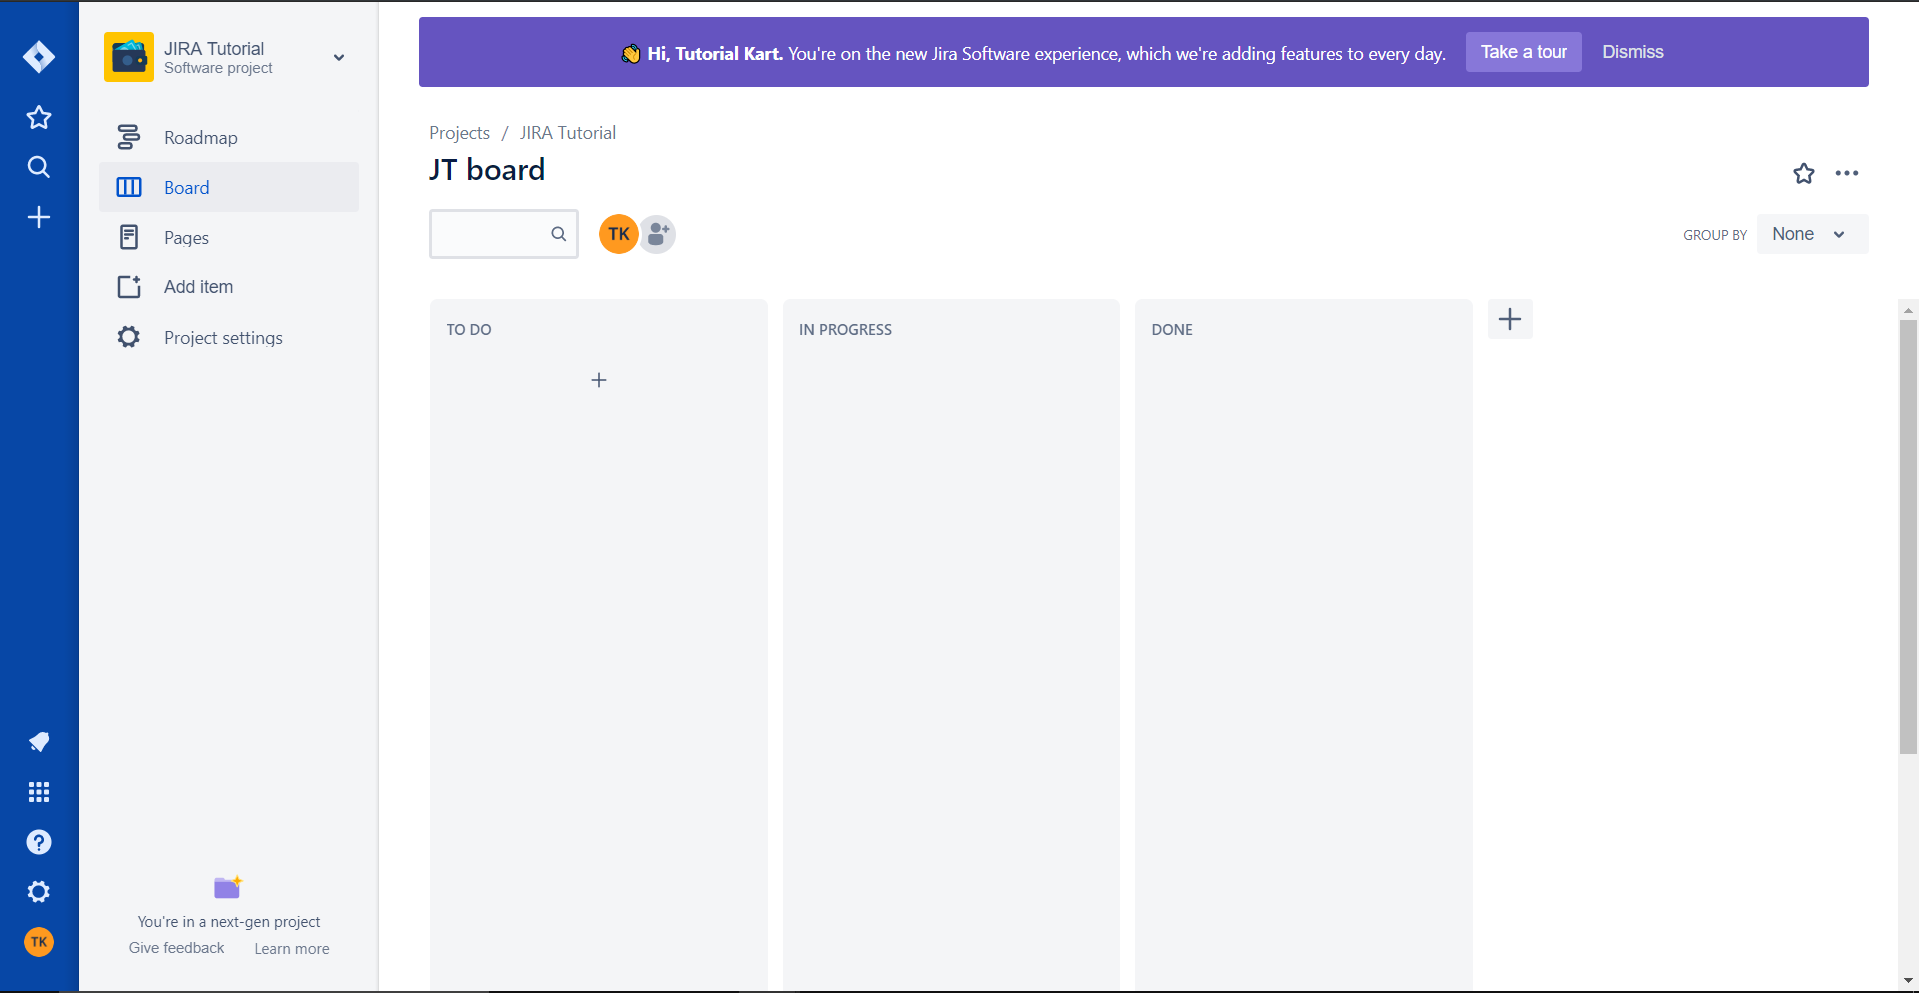
Once you hit the create button, you will be directed to the project dashboard and you have successfully created project in JIRA tool.
JIRA Roadmap
JIRA Roadmap is designed to communicate your plan. Roadmap can easily communicate what’s in flight for your team and future priorities of the project.
In Roadmap, you can manage your work through epics. You can create new epics, manage and visualize them. This helps the users to be on the same page.
JIRA Roadmap provides UI to easily drag and drop work right on your roadmap to quickly plan and prioritize.
Following is a screenshot of JIRA Roadmap when you have just started with your project in JIRA.
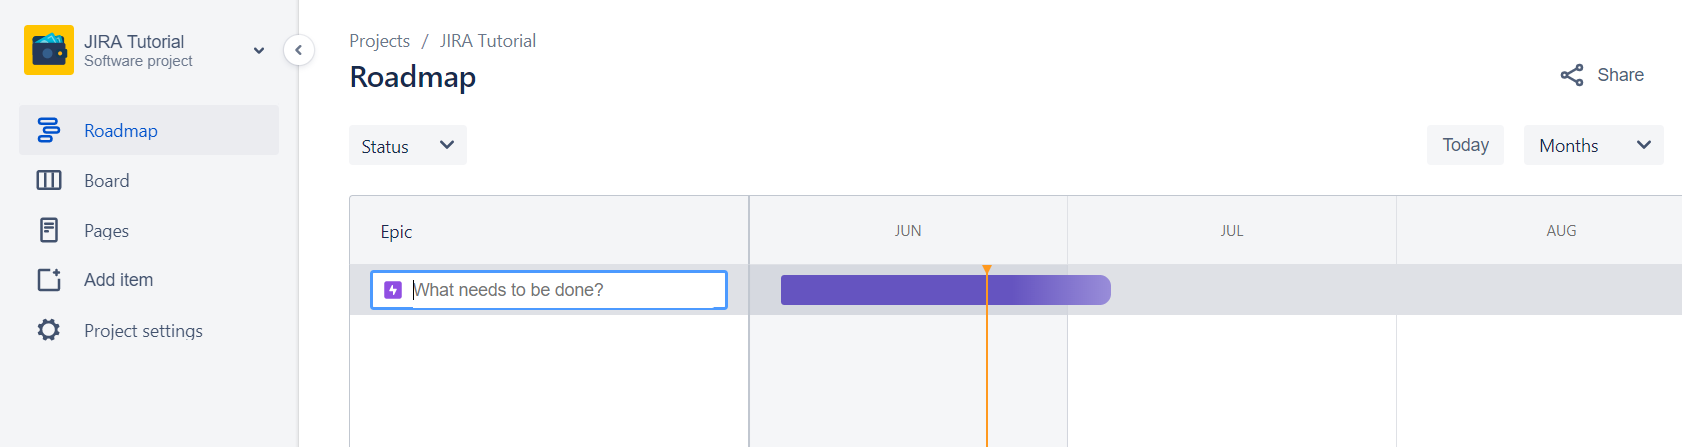
To crate an epic, type in the box with placeholder What needs to be done? and click enter.
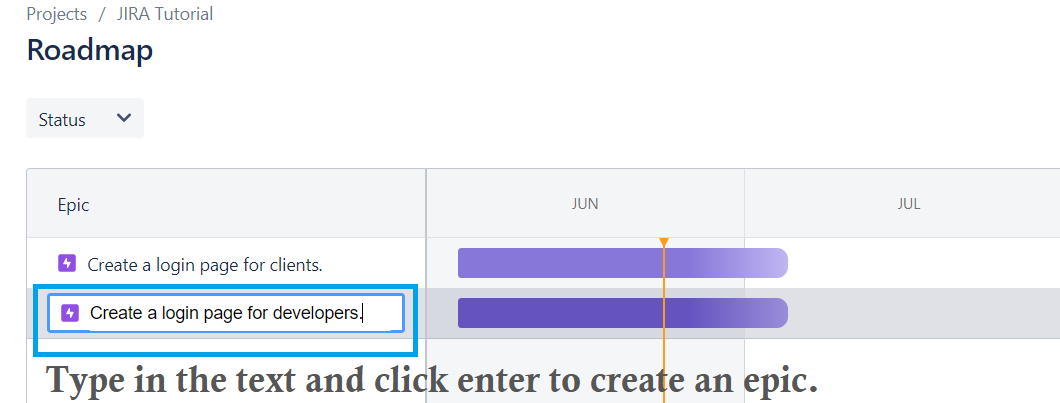
Once the epic is created, click on it to see the details.

Now you can do the following tasks.
- Provide a Description to the epic.
- Assign the epic to ASSIGNEE.
- Label this epic to quickly access epics using LABELS.
- Provide a START DATE and DUE DATE for the epic.
- Change the REPORTER to which this epic has to be reported.
- Comment on this epic during its lifecycle.
JIRA Backlog
Backlog window consists of all the outstanding work. When you create a new Agile JIRA project with Kanban template, you can see a Backlog window in your project.
Backlog involves following tasks.
- Create Issues
- Rank Issues
- Estimate Issues
Ranking of issues helps you prioritize from the list of tasks in Backlog.
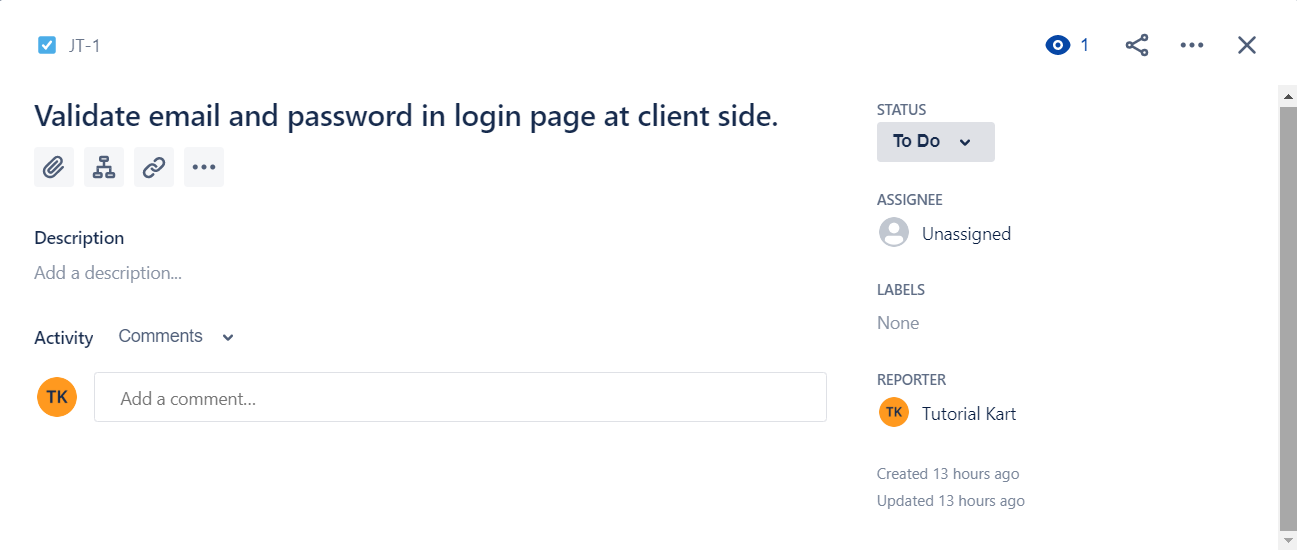
JIRA Issue
JIRA sees all the tasks, work, bugs/defects, user stories, features, etc., as issues.
How to create an issue in Project?
To create an issue in JIRA, click on the + button under TO DO column.
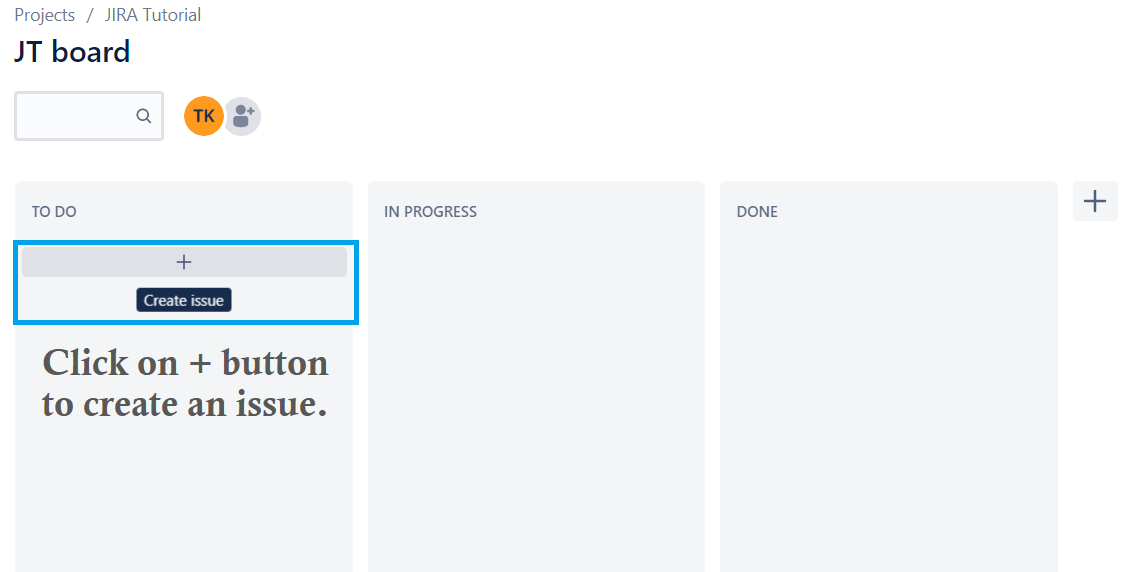
Enter text that describes the issue and click on Create button.
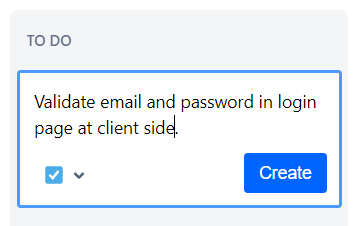
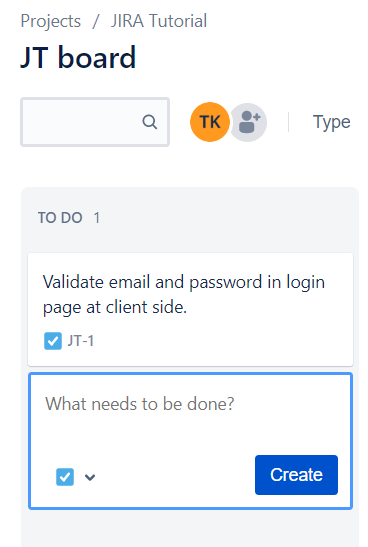
A new issue would be created.
Once an issue is created, you can do following tasks with the issue.
- Provide a Description that elaborates on the issue.
- Attach a screenshot or an attachment.
- Add a child issue making this issue as a parent.
- Link to another issue.
- Comment on the issue.
- Assign the issue to an ASSIGNEE.
- Label the issue for a quick access using LABELS.
- Change the REPORTER to which the assignees have to report.