Steps to Create Issue in JIRA Scrum Board
In this tutorial, we will learn how to create an issue in JIRA Scrum Board with detailed step by step process.
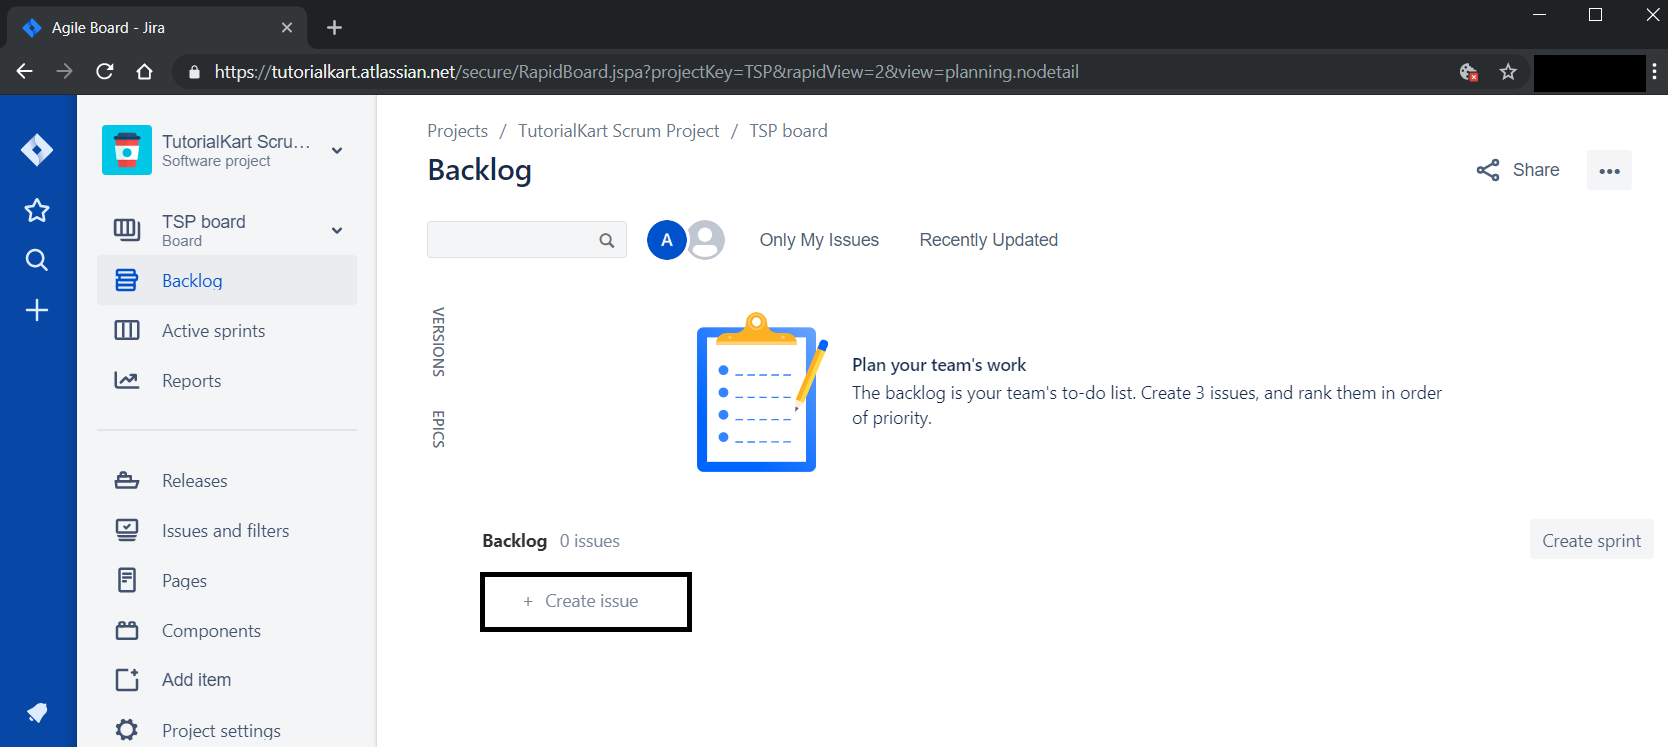
Step 1 – Create Issue
In the Scrum board of the project, click on Create issue button.
Step 2 – Write some text for the issue
When you click on Create issue button, following form appears in the the place of the button.
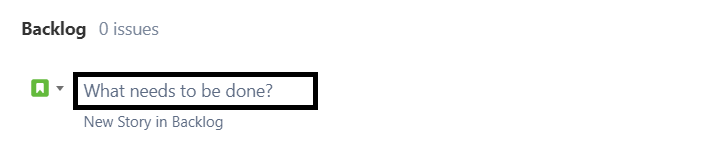
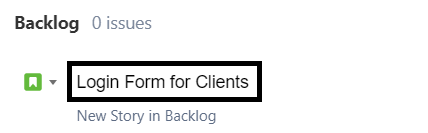
Write some text that describes the issue and click enter.
When you click enter after entering some text, an issue is created and listed as shown below.
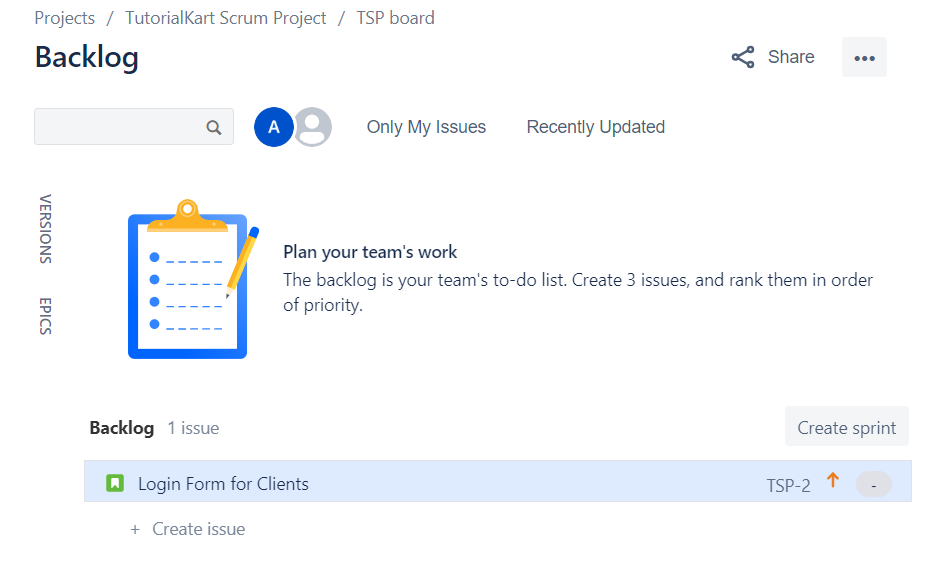
Similarly, you can create multiple issues. These issues are basically tasks, bugs, defects, etc.
Step 3 – Issue Details
You can click on the newly created issue, to view its details.
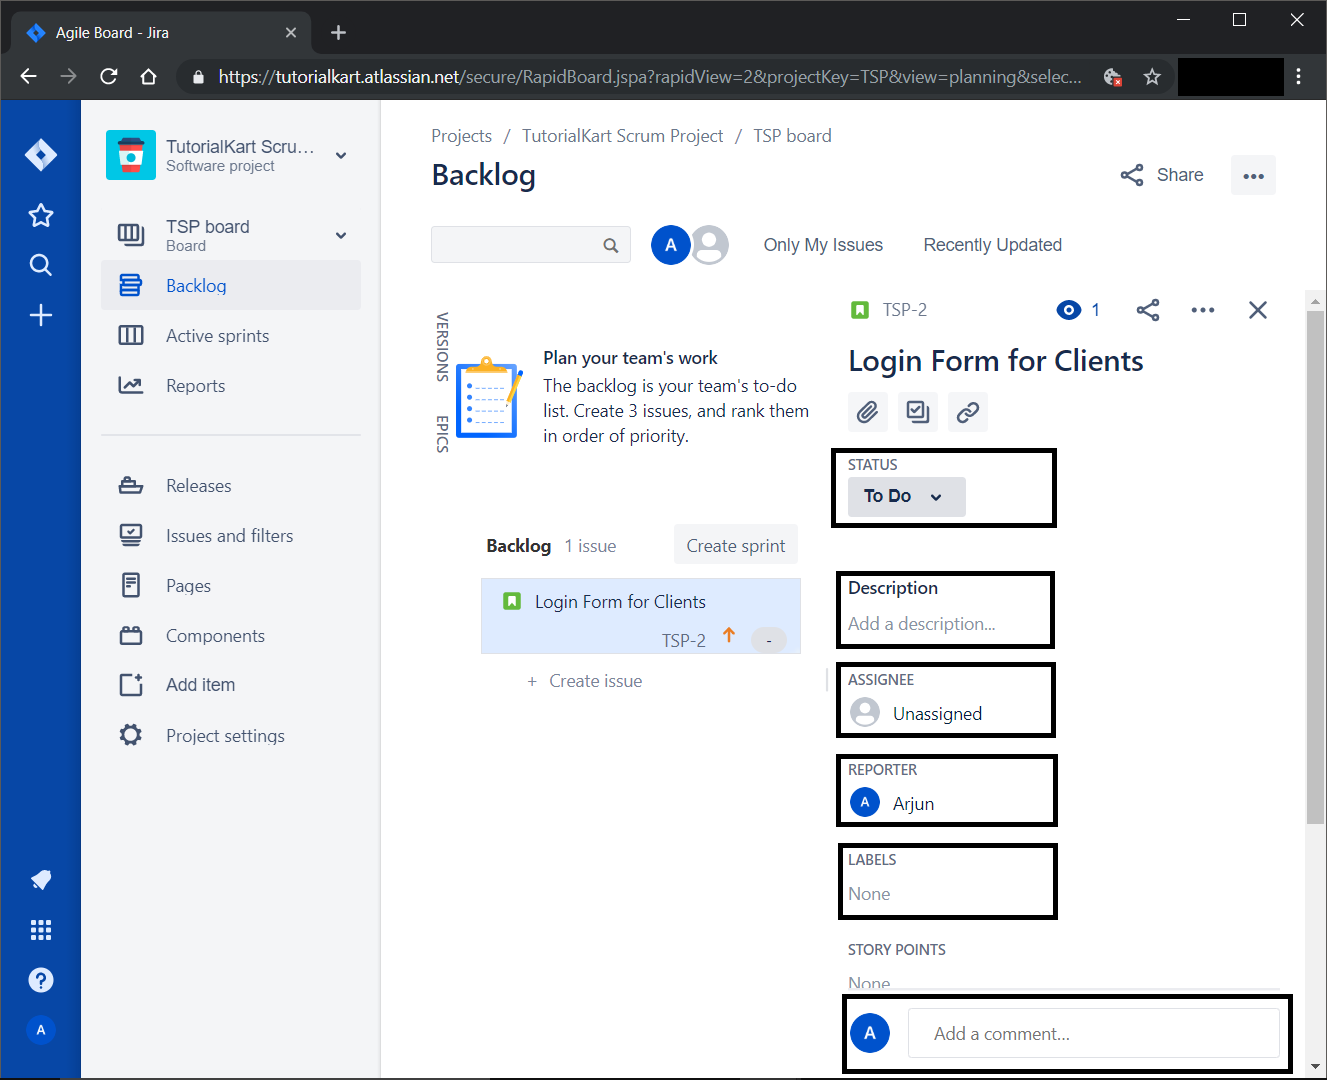
You can change these details like:
- Status (To Do, IN PROGRESS, DONE)
- Description
- ASSIGNEE (You can choose one from the people present in the project)
- REPORTER (You can choose one from the people)
- LABELS (For easy navigation to the issues)
- STORY POINTS
- PRIORITY (Highest, High, Medium, Low, Lowest)
You can also comment on the issue where you can start a discussion on the issue or join the discussion.
Also, while choosing an ASSIGNEE, you can assign to yourself or some other.
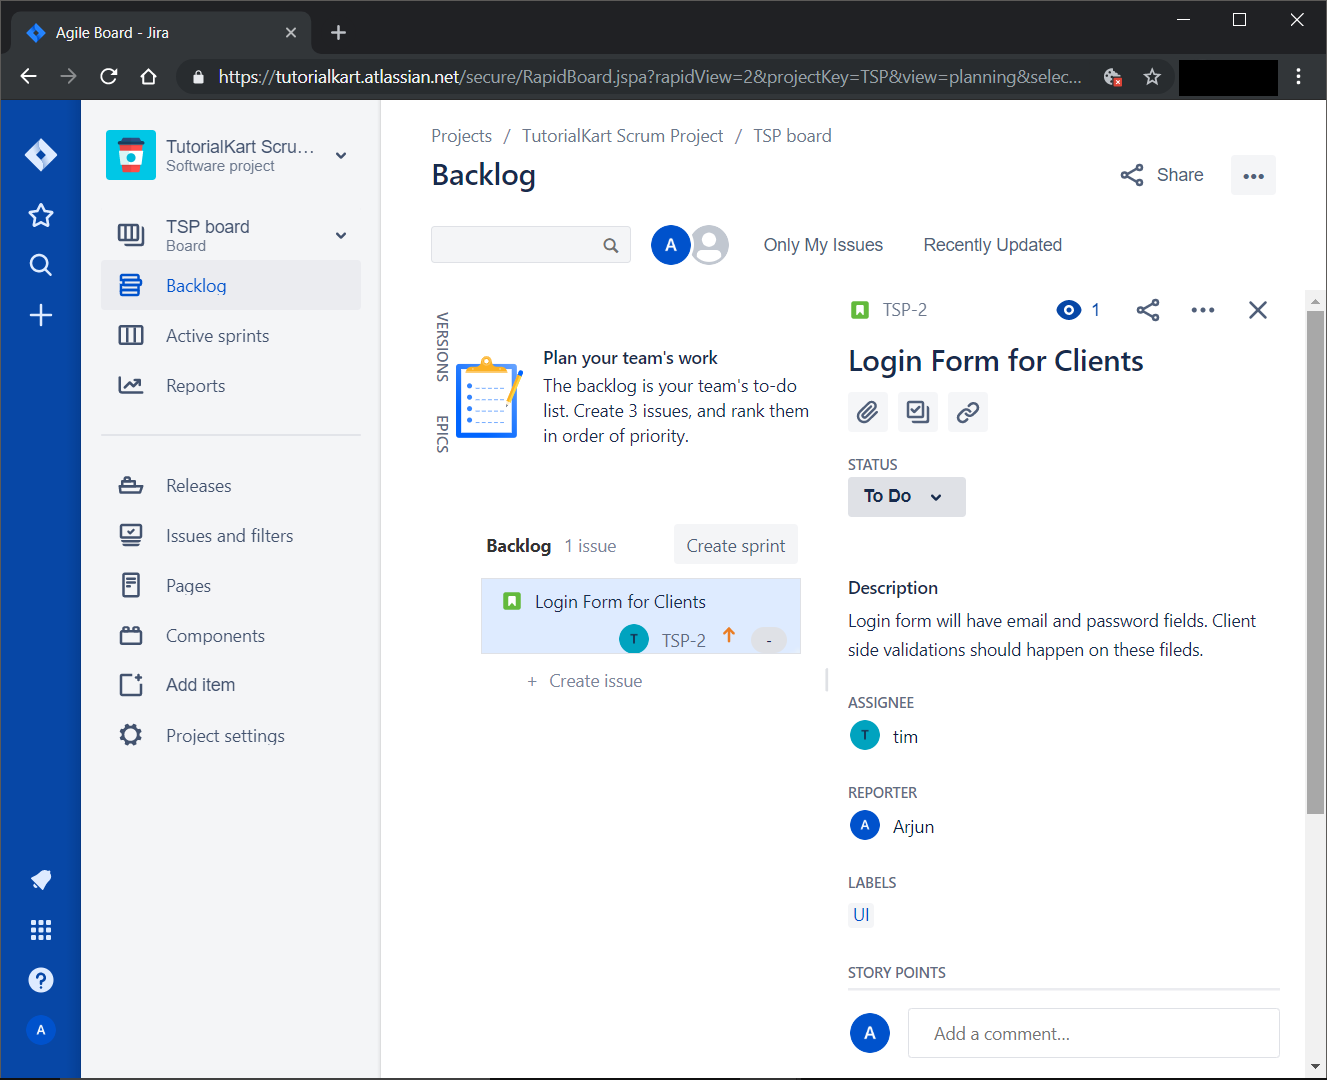
In the following screenshot, you can observe that, we have edited some of the fields.
Summary
In this JIRA Tutorial, we have learned how to create an issue in JIRA Scrum Board.