JavaFX Tip Calculator
In this guide, we will build a JavaFX Tip Calculator application using Eclipse IDE. The Tip Calculator will take user inputs for the bill price and tip percentage, validate the inputs, and display the total amount after calculating the tip.
Step 1: Setting Up Eclipse and JavaFX
Before starting, make sure you have the following installed:
- Eclipse IDE for Java Developers
- Java Development Kit (JDK) 8 or later
We need JavaFX SDK (for JavaFX support) to work with JavaFX applications.
You can download JavaFX SDK from https://openjfx.io/ .

Click on the DOWNLOAD button.
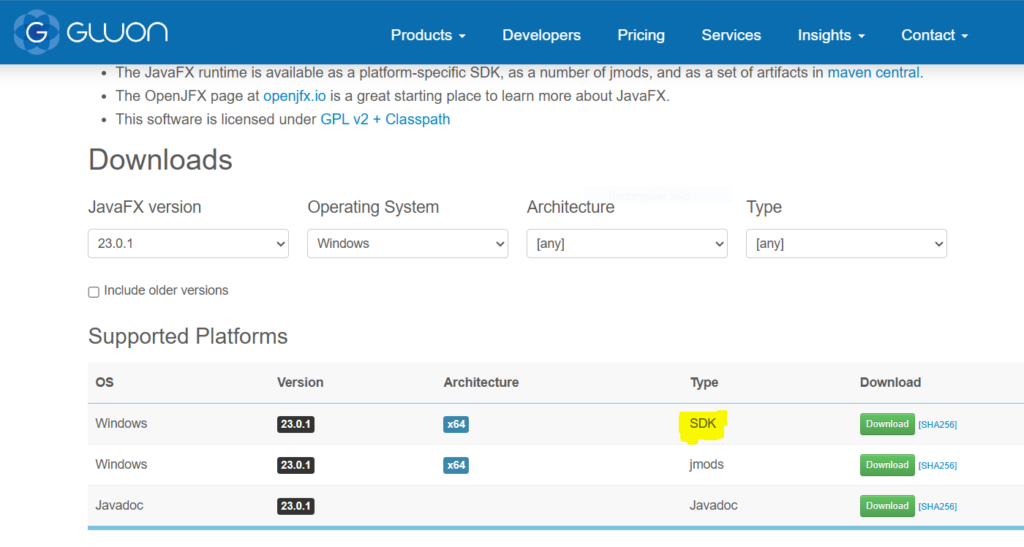
Based on the OS, choose required options, and Download the SDK.
After downloading, extract the contents.
Step 2: Creating a New JavaFX Project in Eclipse
Open Eclipse and select File > New > Java Project. Name your project “TipCalculator“.
Step 3: Configuring Build Path
Right-click on your project in the Package Explorer and choose Build Path > Configure Build Path.
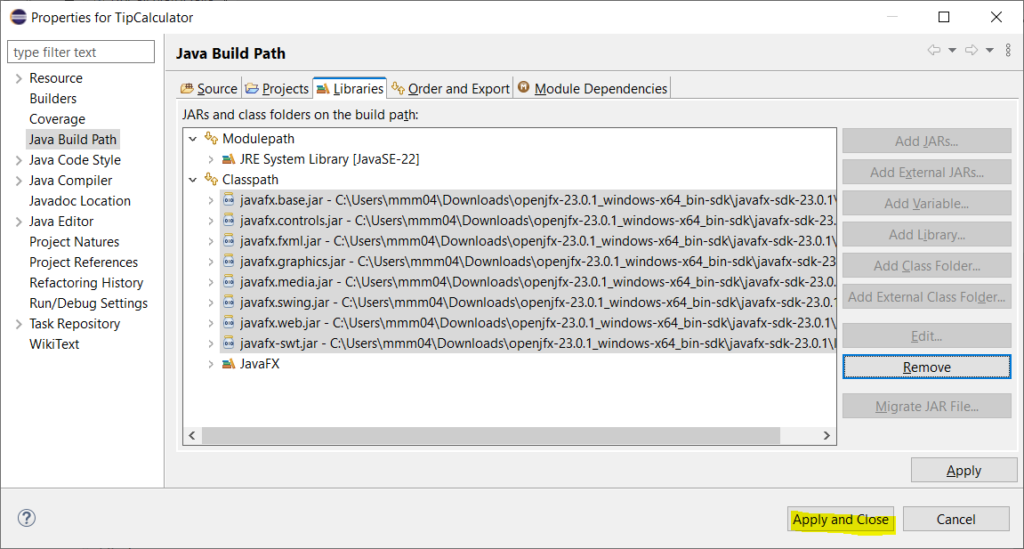
Go to the Libraries tab, click Add External JARs.
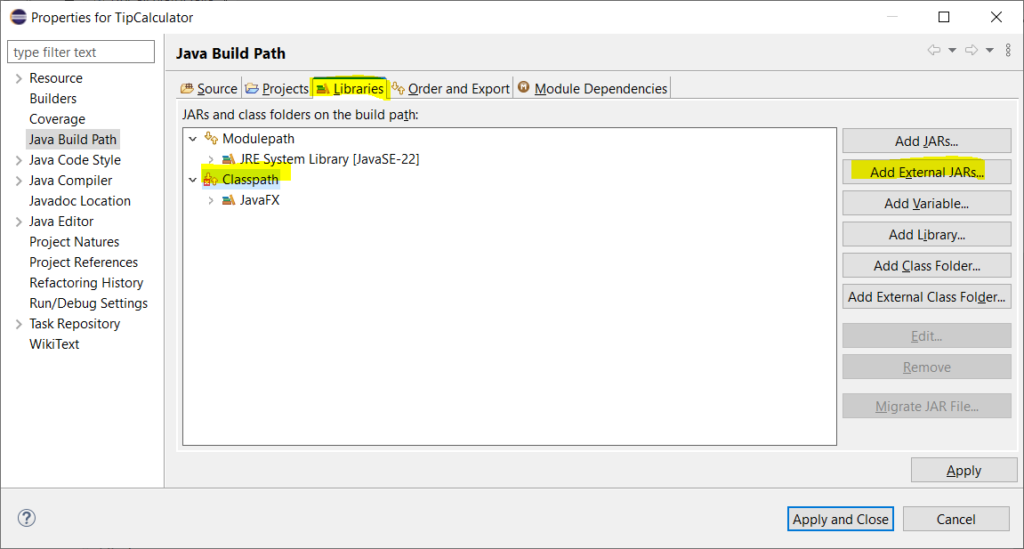
Add all the JARs located in the lib folder of your downloaded SDK contents and click on Open button.
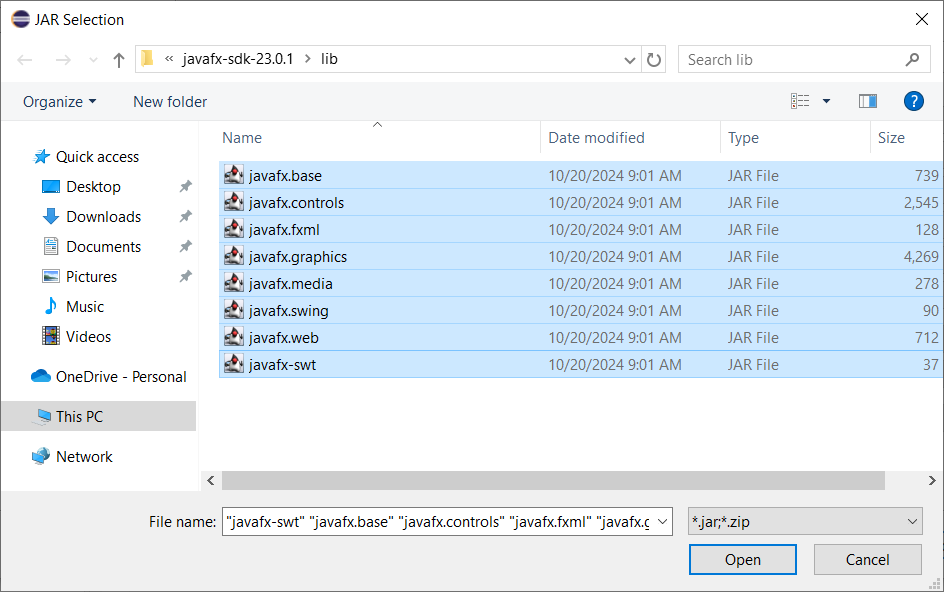
The selected jars should be added to the Classpath. Click on Apply and Close.
Step 4: Adding the TipCalculator Class
Create a new class TipCalculator in the package com.tipcalculator , and copy the following code to this class file.
TipCalculator.java
package com.tipcalculator;

import javafx.application.Application;
import javafx.geometry.Insets;
import javafx.scene.Scene;
import javafx.scene.control.*;
import javafx.scene.layout.GridPane;
import javafx.stage.Stage;

public class TipCalculator extends Application {
    @Override
    public void start(Stage primaryStage) {
        // Create the input fields
        TextField priceField = new TextField();
        TextField tipPercentField = new TextField();
        Label resultLabel = new Label();

        // Create the calculate button
        Button calculateButton = new Button("Calculate");
        calculateButton.setOnAction(e -> {
            try {
                double price = Double.parseDouble(priceField.getText());
                double tipPercent = Double.parseDouble(tipPercentField.getText());
                if (price < 0 || tipPercent < 0) {
                    resultLabel.setText("Please enter positive values.");
                } else {
                    double tipAmount = price * tipPercent / 100;
                    double totalAmount = price + tipAmount;
                    resultLabel.setText("Tip: $" + String.format("%.2f", tipAmount) + ", Total: $" + String.format("%.2f", totalAmount));
                }
            } catch (NumberFormatException ex) {
                resultLabel.setText("Please enter valid numbers.");
            }
        });

        // Set up the layout
        GridPane grid = new GridPane();
        grid.setPadding(new Insets(10, 10, 10, 10));
        grid.setVgap(10);
        grid.setHgap(10);

        grid.add(new Label("Price ($):"), 0, 0);
        grid.add(priceField, 1, 0);
        grid.add(new Label("Tip %:"), 0, 1);
        grid.add(tipPercentField, 1, 1);
        grid.add(calculateButton, 1, 2);
        grid.add(resultLabel, 1, 3);

        // Create the scene and display the stage
        Scene scene = new Scene(grid, 300, 200);
        primaryStage.setTitle("Tip Calculator");
        primaryStage.setScene(scene);
        primaryStage.show();
    }

    public static void main(String[] args) {
        launch(args);
    }
}
The program is structured as follows:
- Imports and Class Declaration: The program imports necessary JavaFX libraries and declares the class
TipCalculatorthat extendsApplication, making it a JavaFX application. - Start Method: This method is called when the application is launched. It contains the code that sets up the user interface (UI) elements.
- TextFields: Two
TextFieldelements are created to allow users to input the price and the tip percentage. - Calculate Button: The
Buttontriggers the calculation when clicked. The action event attached to it reads the user inputs, checks for errors (negative values or non-numeric inputs), calculates the tip and total amounts, and updates the result label accordingly. - Error Handling: A
try-catchblock ensures that invalid inputs (non-numeric values) are handled gracefully by showing an error message in the result label. - GridPane Layout: The UI layout is created using a
GridPane, which arranges UI components in a grid format with spacing and padding for better visual appeal. - Primary Stage: The primary stage sets the scene and displays the UI to the user. It is configured with a title and dimensions for the window.
Step 5: Running the Application
Once you’ve added the code, with the TipCalculator.java open, select (from menu) Run > Run Configurations.
On the left panel, select the Java Application > TipCalculator. In Arguments tab, for VM arguments, add modulepath and add-modules arguments as shown in the screenshot.
--module-path C:\Users\mmm04\Downloads\openjfx-23.0.1_windows-x64_bin-sdk\javafx-sdk-23.0.1\lib --add-modules=javafx.controlsPlease replace the path to lib folder of javafx SDK, with the lib folder path from your system.
Click on Apply for the changes to be applied to the Run configuration for the class.
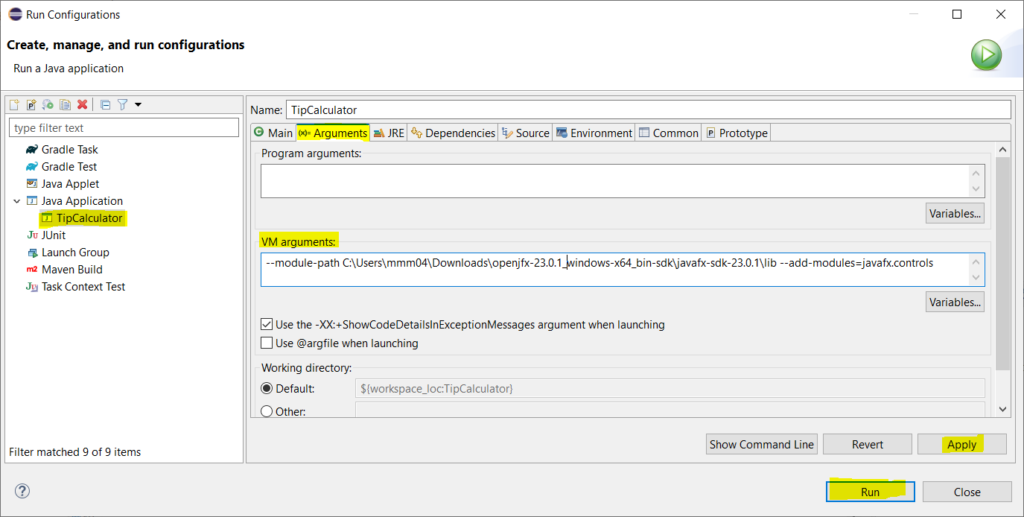
And click on Run button.
This Run configuration setup is required only once. From the second time, you can just run the Application, and the run configuration is applied.
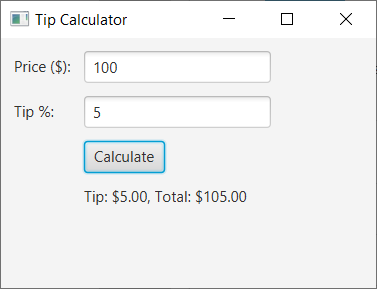
When the program is run, the following window appears.
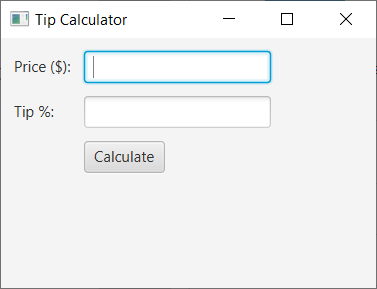
Enter a value for Price, and Tip, and click on the Calculate button.
The Tip and Total are calculated and displayed under the Calculate button.
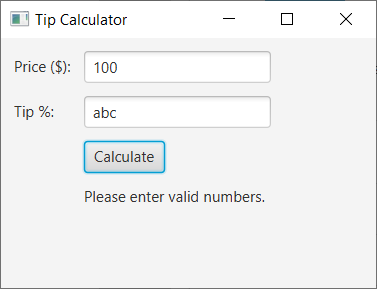
If you enter any invalid values in the input fields, the validation code kicks in and displays a message that the entered values are invalid numbers.