Lookup Transformation in Informatica is a passive transformation used to lookup data in a flat file, relational table, view or synonym. Multiple lookup transformations can be used in a Mapping.
Lookup Transformation in Informatica
Lookup Transformation in Informatica can be used to get a related value, to perform a calculation and can update slowly changing dimension tables. We can get a value from the lookup table based on the source value, this value can be used in calculation in other Informatica transformations.
So how Informatica server queries the lookup table? Informatica Server queries the lookup table based on the ‘lookup port‘ in the transformation and compares lookup transformation port value to lookup table column values based on the lookup condition.
Lookup Transformation in Informatica can be configured to perform 2 different types of lookups.
Connected mode : A connected mode lookup receives source data, performs a lookup and returns data to the pipeline.
Unconnected mode : A unconnected lookup is not connected to source (or) target and is called by transformation in the pipeline by lookup expression, which in turn returns only one column value to the calling transformation.
Lookup Transformation Components
When we configure lookup transformation in a mapping we use different lookup components like Lookup table, Ports, properties, condition and Metadata extensions.
Lookup table : Lookup table can be imported from the mapping source or target database using Informatica server and client.
Lookup condition : Using condition tab, we can enter the condition to determine whether input data qualifies values in the lookup table or cache.
Example : IN_DEPTNO = DEPTNO.
Metadata extension : To store name and creation date with the lookup transformation, we associate information with repository metadata using metadata extension.
Lookup Transformation Port tab.
Informatica Lookup Transformation ports tab contains options such as port name, data type an scale. It contains input port, output port and lookup port type, this lookup port type represents columns of data in the lookup table.
Input ports : Create an input port for each lookup port we want to use in the lookup condition. We must have at least one input (or) output port in a lookup transformation.
Output ports : Create an output port for each lookup ports, we want to link to another transformation. For connected lookups, we must have at least one output port and for unconnected lookup, we must select a lookup port as a return port to pass a return value.
Lookup port : The designer designates each column of the lookup source as lookup port.
Return port : An unconnected lookup transformation has one return port that returns one column of data to the calling transformation through this port.
Note : We can delete the lookup port from a relational lookup, if the mapping does not use the lookup ports which will give us performance gain. But if the lookup source is a flat file then deleting of lookup ports fails the session.
Lookup Transformation properties
Using lookup properties tab, we can configure caching properties, SQL override for the lookup, the lookup table name and can be used for tracing level for the transformation.
Lookup SQL override : We can override the default SQL statement to add WHERE clause or to join multiple tables.
Lookup table name : It is the base table on which the lookup is performed.
Connection Information : Query the lookup table form source or target connection. In each case of the flat file lookup we can give the file path and name, whether direct (or) indirect.
Source type : Source type determines whether the source is relational database table, a flat file or source qualifier pipeline.
Tracing level : It provides the amount of detailed information in the session log for the transformation options available are Normal, Target, Verbose, Initialization, verbose data.
Lookup cache persistent : It indicates whether we are going for persistent cache or non-persistent cache.
Dynamic Cache : When checked, we are going for dynamic lookup cache else static lookup cache is used.
Output old value on update : It defines whether the old value for output ports will be used to update an existing row in dynamic cache
Cache file name prefix : Lookup will use this named persistent cache file based on the base lookup table.
Re-cache from lookup source : When checked, integration service rebuild lookup cache instance is called the session.
Insert ELSE Update : Insert the record if not found in cache, else update it. Insert Else update option is available when using dynamic lookup cache.
Update ELSE Insert : Update the record if found in cache, else insert it. This option is available when using dynamic lookup cache.
Date time format : Used when source type is file to determine the data and time format of lookup columns.
Thousand separator : By default it is none, used when source type is file to determine thousand separator.
Case sensitive string comparison : Case sensitive string comparison must be checked when we want to go for case sensitive string values in lookup. Comparison is used when source type is file.
Null Ordering : It determines whether Null is the highest or lowest value. It is used when source type if file.
Sorted Input : Checked whenever we expect the input data to be sorted and is used when the source type is flat file.
Look up source is static : When checked it assumes that the lookup source is not going to change during the session run.
Pre-build lookup cache : Default option is Auto. If we want the Integration service to start building the cache whenever the session just begins. We can change the option always allowed.
Creating Informatica Lookup Transformation with example
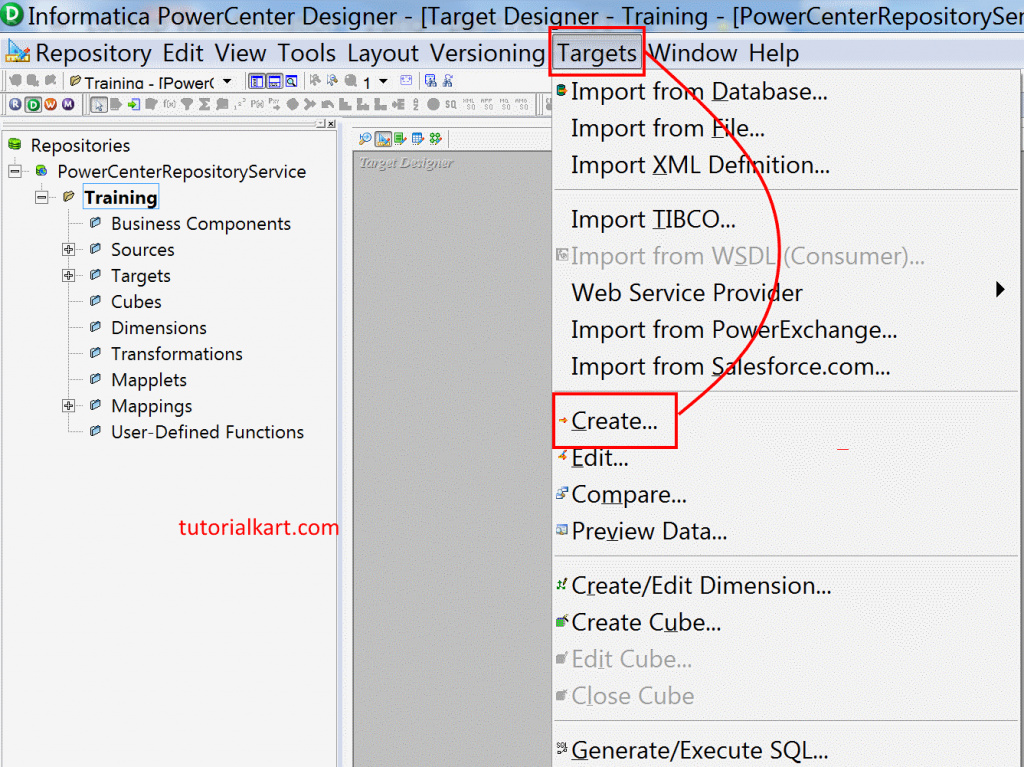
In our previous Aggregator Transformation, we have created target using SqlPlus, but now we are going to create target table using Informatica PowerCenter Designer tools. To create target table open Designer tools and navigate to Targets | Create. Create Target table as per mapping flow diagram.
Now a new window will be opened to create target table, Enter a new name for this target table and select the database as Oracle.
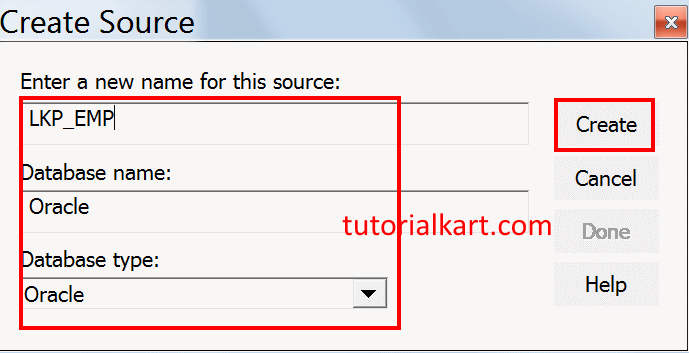
- Click on Create button to create empty table and finally click on Done button.
Our target table has been created successfully, now we have to edit the table to add new columns by renaming the column names. Navigate to Columns and click on Add new column icon as shown below.
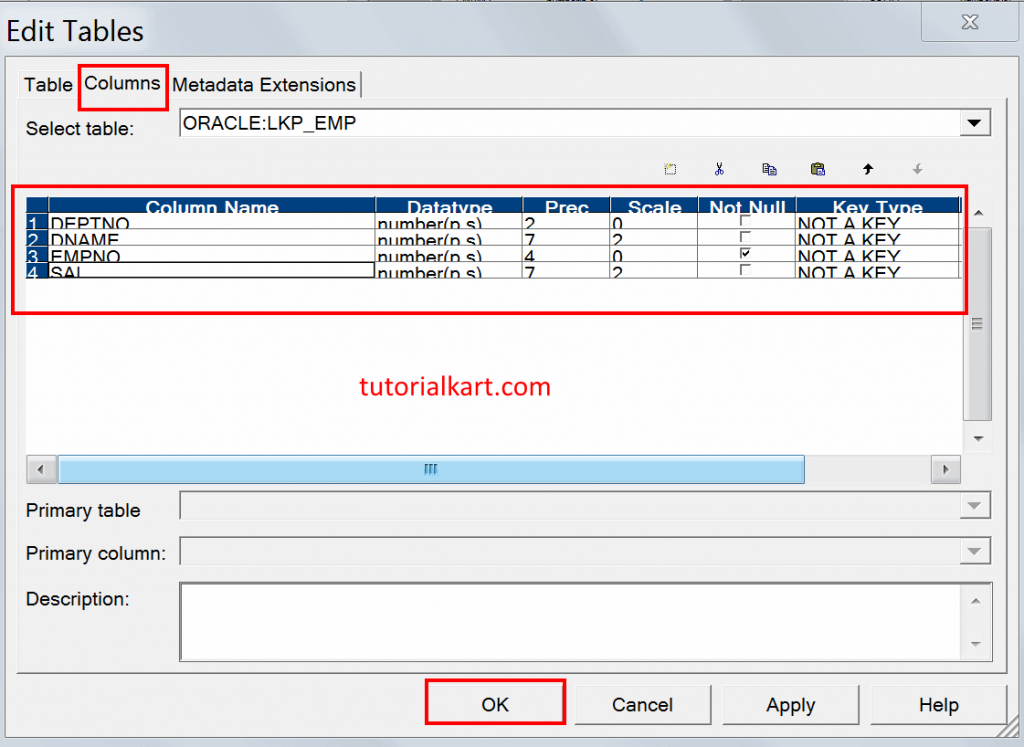
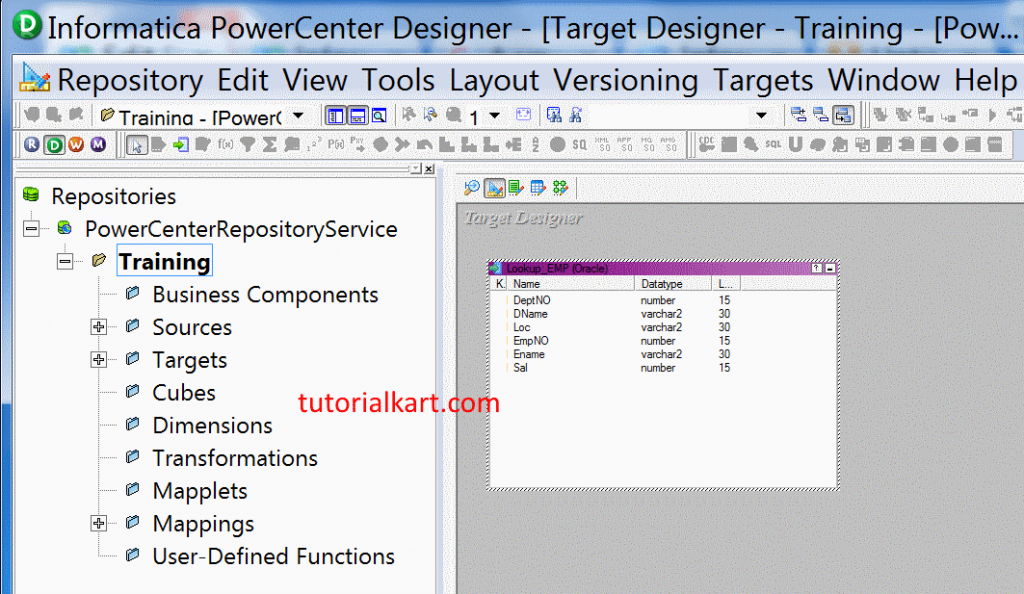
As shown above, our target table in Lookup Transformation in Informatica has six ports after creating click on OK button, then the target table will be appeared in the workspace as shown below.
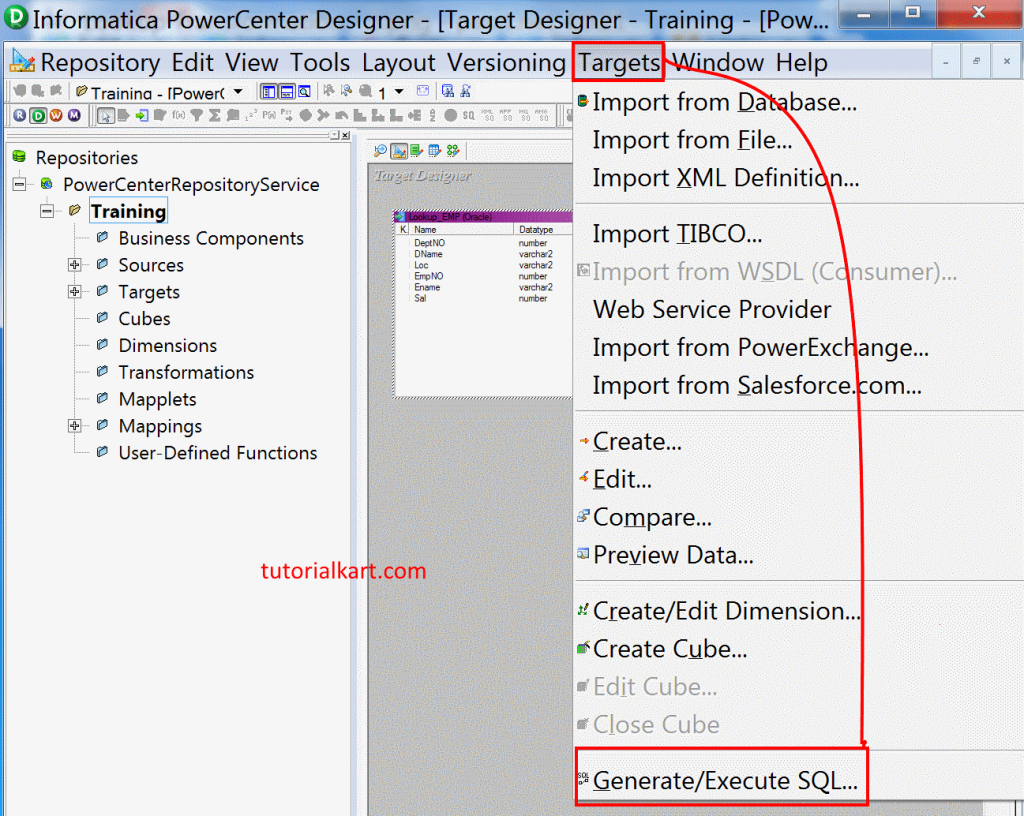
- Go to Target Menu | Generate / Execute SQL. Now again click on Generate and execute.
- Enter Filename and click on Generate and execute button.
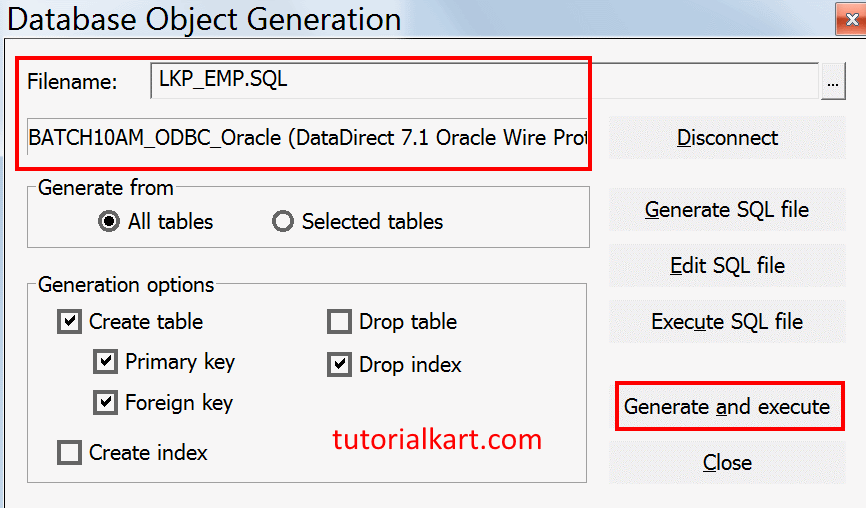
***** Script LKP_EMP.SQL successfully generated.
***** Running ODBC SQL script: file LKP_EMP.SQL ...
CREATE TABLE Lookup_EMP
(
    DeptNO number,
    DName  varchar2(30),
    Loc    varchar2(30),
    EmpNO  number,
    Ename  varchar2(30),
    Sal    number
)
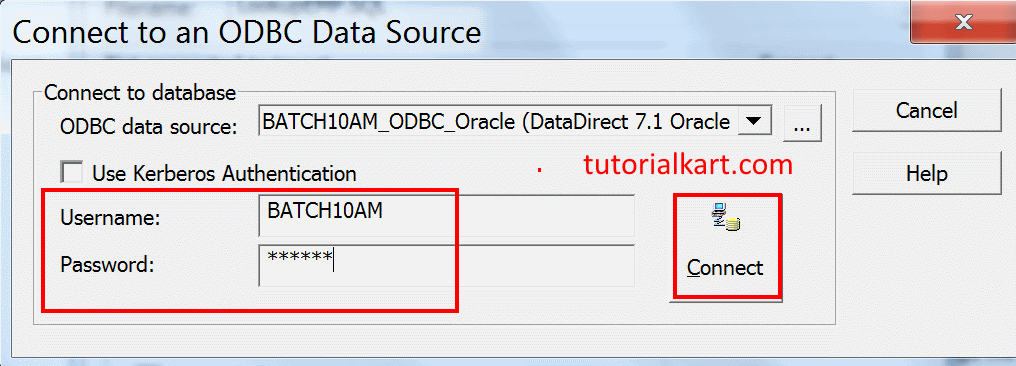
- Select your ODBC data source and enter username and password and finally click on connect button.
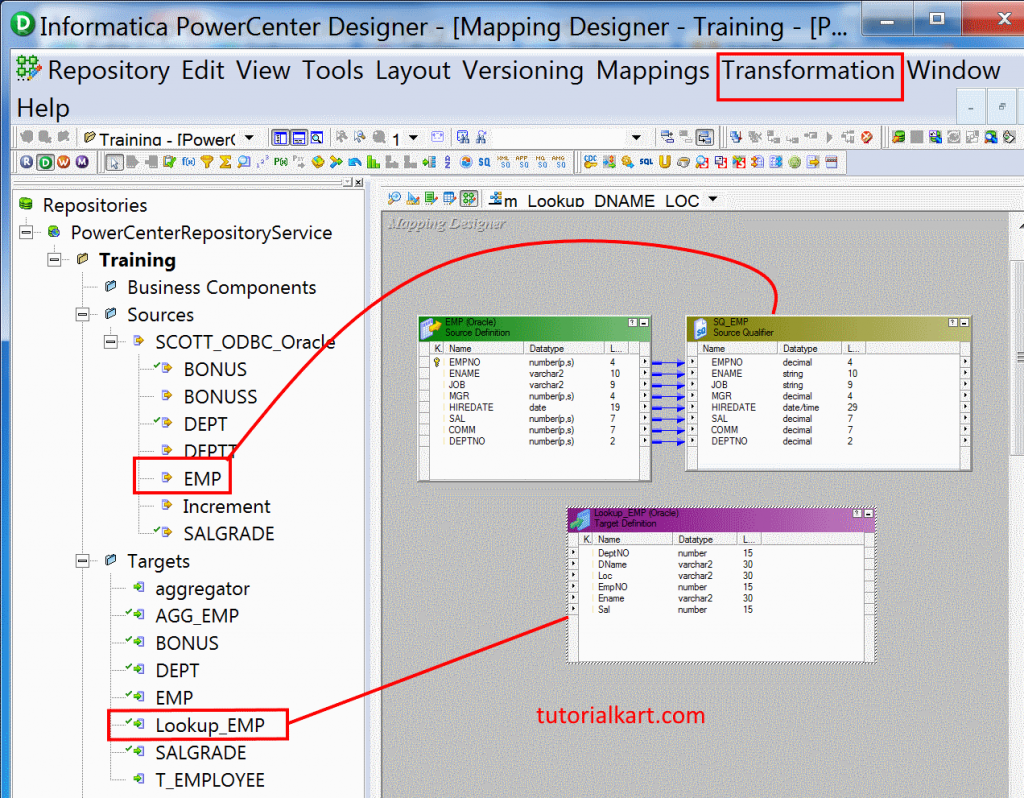
Go to mapping menu and click on create button to create new mapping and name it as m_Lookup_DName_LOC.

Click on OK button, now drag and drop the source and target tables in to the workspace are of mapping window as shown below. Now go to transformation tab to create Lookup transformation in Informatica PowerCenter.
Creating Lookup transformation in Informatica
Go to transformation tab and click on create button. Now select Lookup transformation type and enter a new name for the transformation.
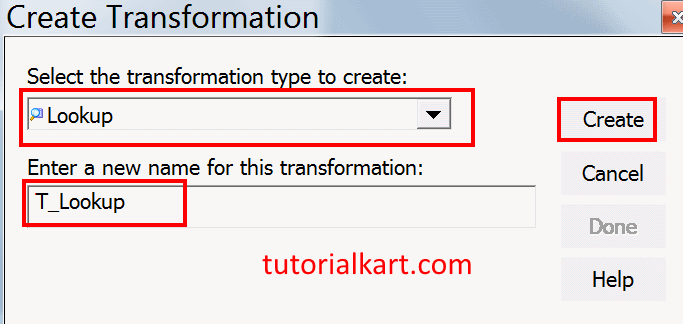
- Click on create button and another new window will be opened to select the target table. Enter target ODBC username and password.
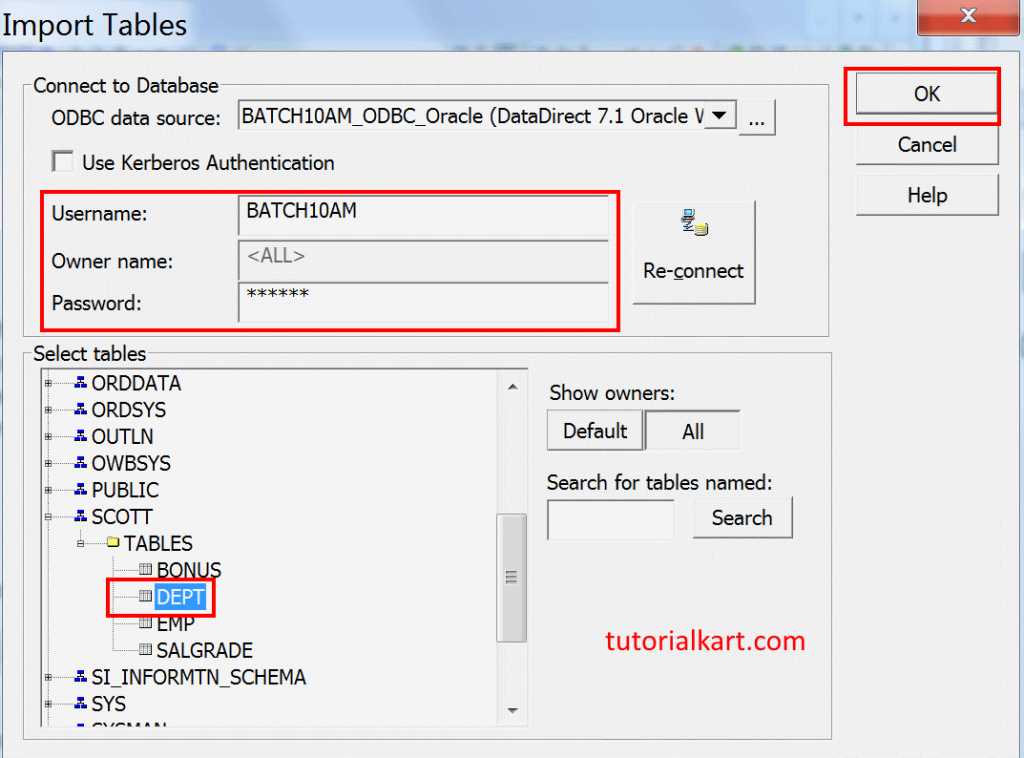
- Select the target table and click on import button, then two options will popup from rational table are from Flat file. Select Rational table and click on OK button.
- Connect DeptNo, EmpNo, Sal from SQ_EMP Source Qualifier to LKP_EMP target table. Now drag and drop DeptNo from SQ_EMP to T_LKP table and connect the Dname from T_LKP to LKP_EMP table.
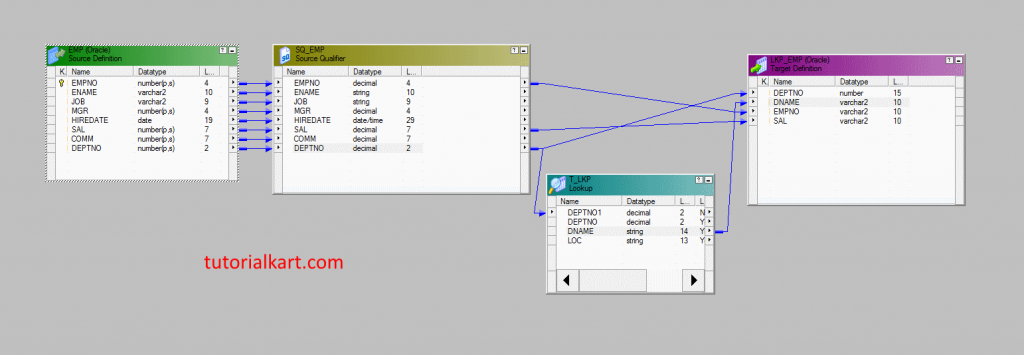
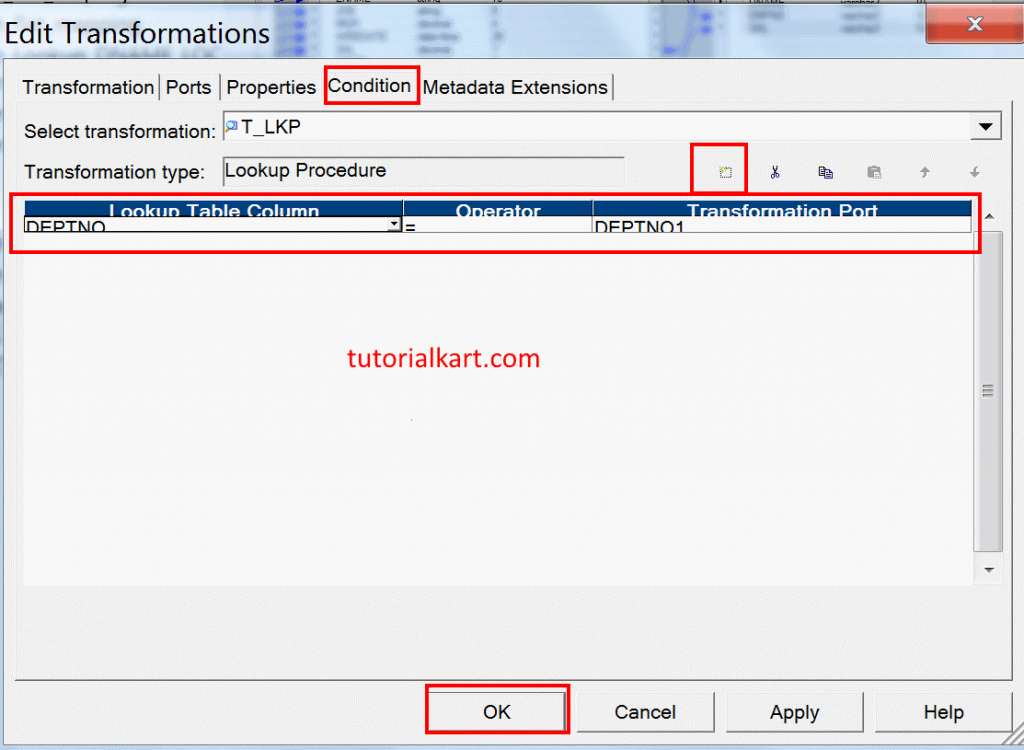
- Double click on T_LKP header to edit lookup transformation and navigate to Condition tab to add new condition.
- Click on new condition icon and make sure Lookup table condition as DEPTNO and Transformation Port as DEPTNO1 as shown below.
The remaining process for creating the Session, creating the Workflow is same., but at the session properties tab, we need to select or map the Lookup Transformation connection type to Source connection, which is similar what we done to map the Source Table to Source connection and Target table is mapped to Target connection.
