This Informatica PowerCenter installation and configuration guide explains the full local setup flow for a learning or practice environment: preparing the machine, installing Oracle Database for the metadata repository, downloading the Informatica PowerCenter files, installing the server, creating the Informatica domain, and installing the PowerCenter client tools.
Informatica PowerCenter is an ETL and data integration tool used to extract data from source systems, transform it according to business rules, and load it into targets such as data warehouses, marts, or operational reporting databases. A working PowerCenter setup normally includes a database repository, a domain, one or more nodes, application services, and client tools such as PowerCenter Designer and Workflow Manager.
The screenshots in this tutorial show an older Windows-based PowerCenter 9.x style installation. The same installation ideas still help you understand PowerCenter setup, but always verify the exact operating system, database, browser, Java, and version support from the product documentation for the software version you are installing.
Informatica PowerCenter installation and configuration roadmap
- Pre-requisites for Informatica PowerCenter Installation
- Download Oracle Database
- Database installation for metadata repository
- Download Informatica PowerCenter
- Informatica PowerCenter Installation
- Informatica Client Installation
Pre-requisites before Informatica PowerCenter installation
Before starting the Informatica PowerCenter installation, complete the pre-installation checks carefully. Many installation failures happen because the repository database is not ready, ports are blocked, the installer files are extracted incorrectly, or the Windows user account does not have enough permissions.
Operating system requirements for PowerCenter server and client
Informatica PowerCenter can be installed on supported Windows and UNIX-based operating systems. For a local practice setup, Windows is commonly used because the server and client tools can be installed on the same machine. For production environments, the server is usually installed on a supported server operating system, and the client tools are installed separately on developer machines.
Before you run the installer, confirm whether your PowerCenter version requires 64-bit Windows, whether the client installer is 32-bit or 64-bit, and whether your database client libraries match the installer architecture.
Repository database requirement for Informatica domain configuration
Informatica PowerCenter requires a relational database to store configuration and repository metadata. Common database choices include Oracle, Microsoft SQL Server, and IBM DB2, depending on the version and platform support. In this tutorial, Oracle Database is used for the metadata repository.
Keep the database name, service name, host name, port number, repository user name, and password ready before you start domain creation. The installer asks for these details while creating the domain configuration repository.
Oracle Database installation for the Informatica metadata repository
To Download Oracle Database, we must create user account at Oracle.com.
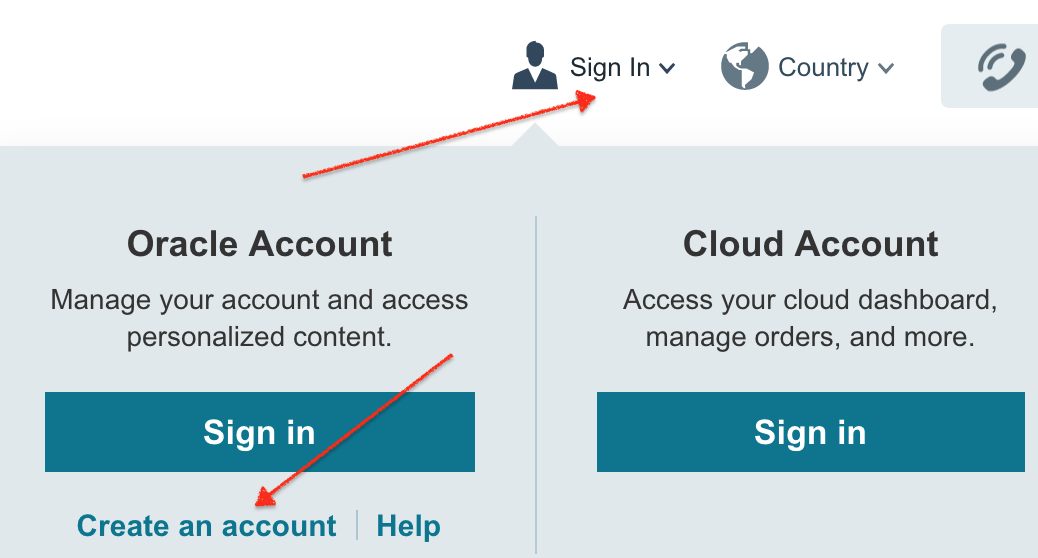
Click here : Download latest Oracle Database 12c Release 2 .
- Download two files from Oracle.com and extract part1 and part2 together.
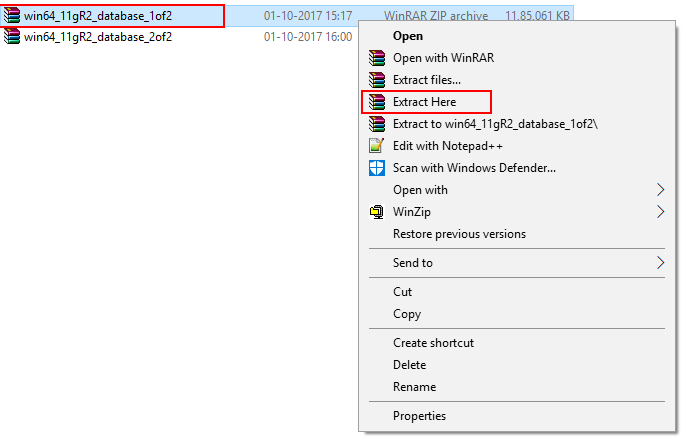
- Extract part2 in part1 folder as shown below.
Now open the folder and click on Setup to Install Oracle Database in your local system. Before installing Database make sure your environment variables are set.

- Click on Setup.

- Click on Next button.
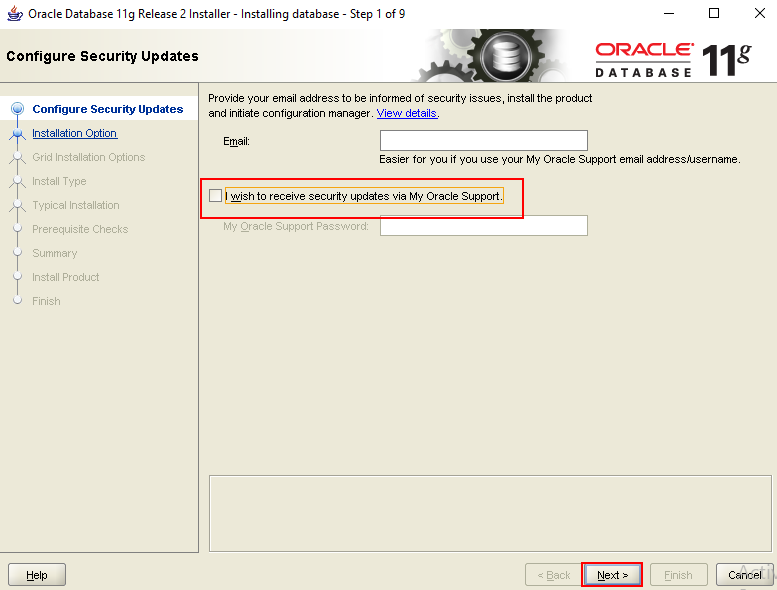
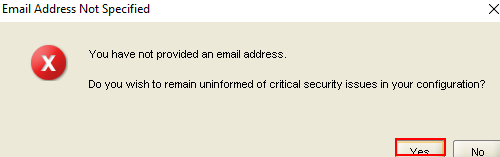
- As shown in above, we have not selected email address for updates from Oracle Support.
- Click on Yes to proceed.
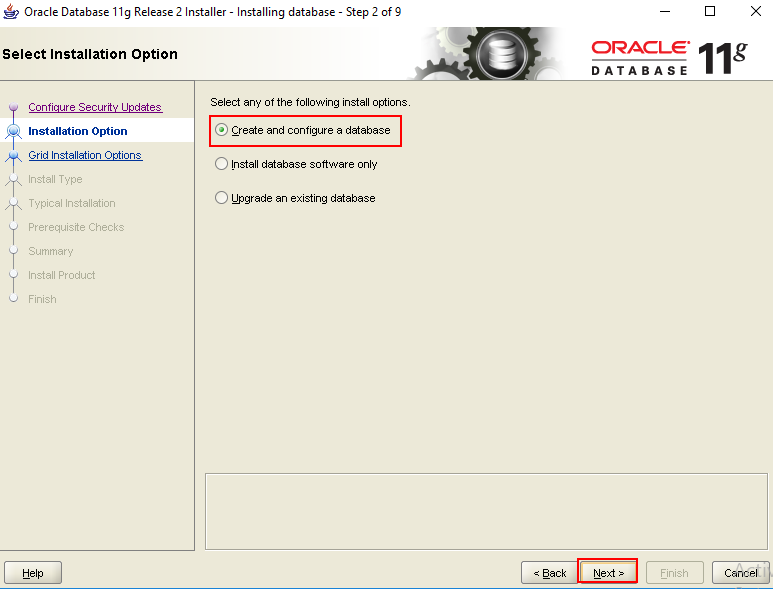
- Now select Create and Configure a database radio button.
- Click on next button to proceed.
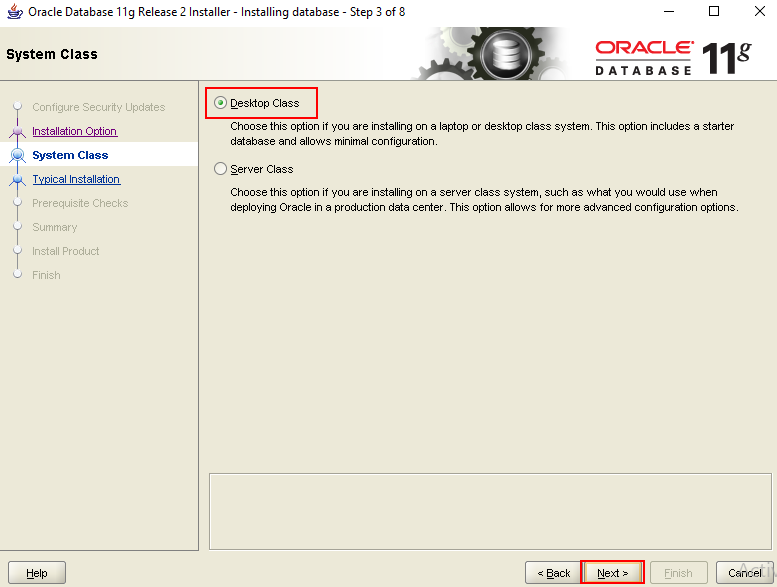
- Select System class as Desktop Class and click on next button.
- In this step we have to select Oracle Database Installation location.
- Click on browse button, select your desires location.
- Enter Database name.
- Enter Administrative password and enter again to confirm administrative password.
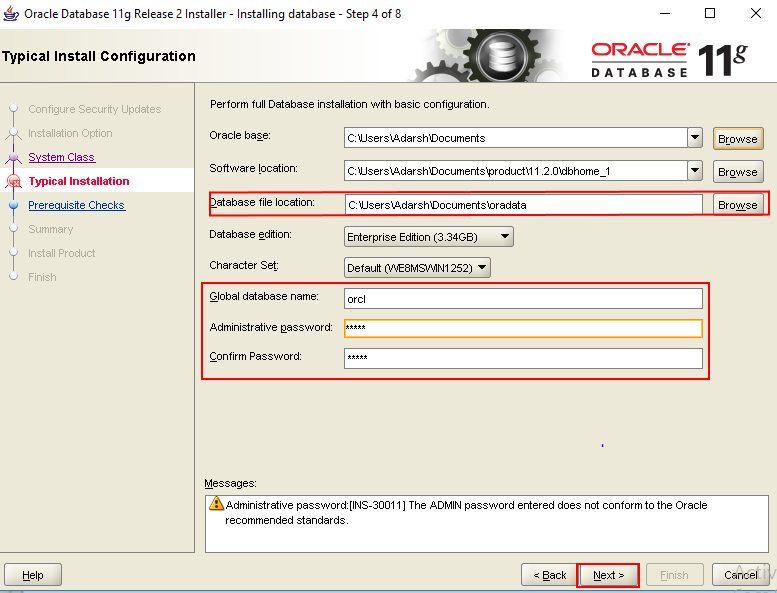
- Click on Next button to proceed.
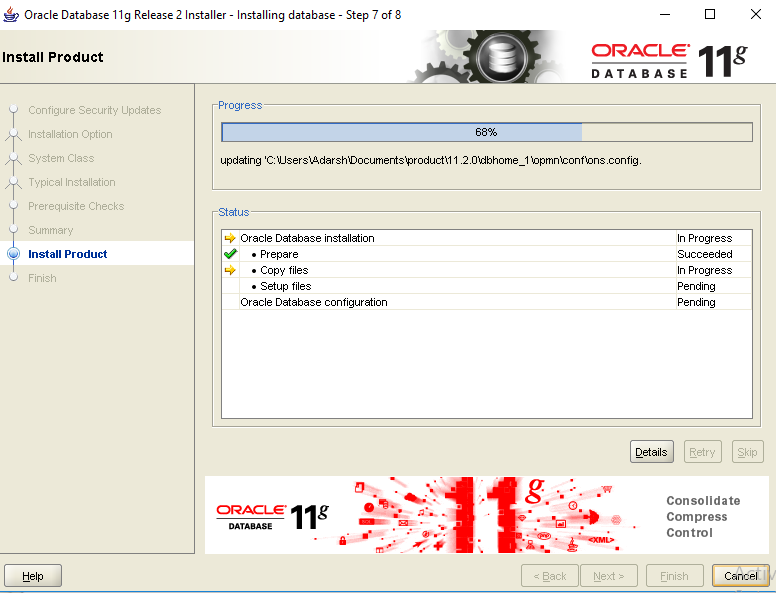
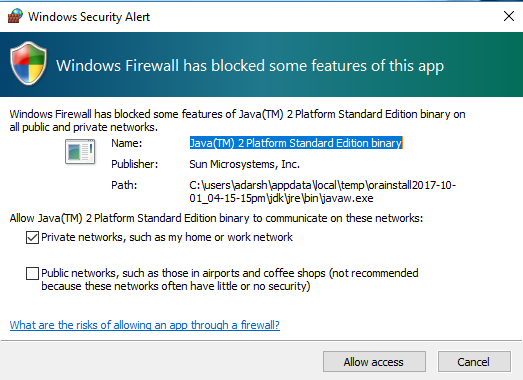
- Click on Allow access.
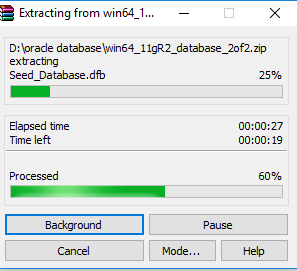
- Installation of Oracle database takes some time, wait till the progress bar shows 100%.
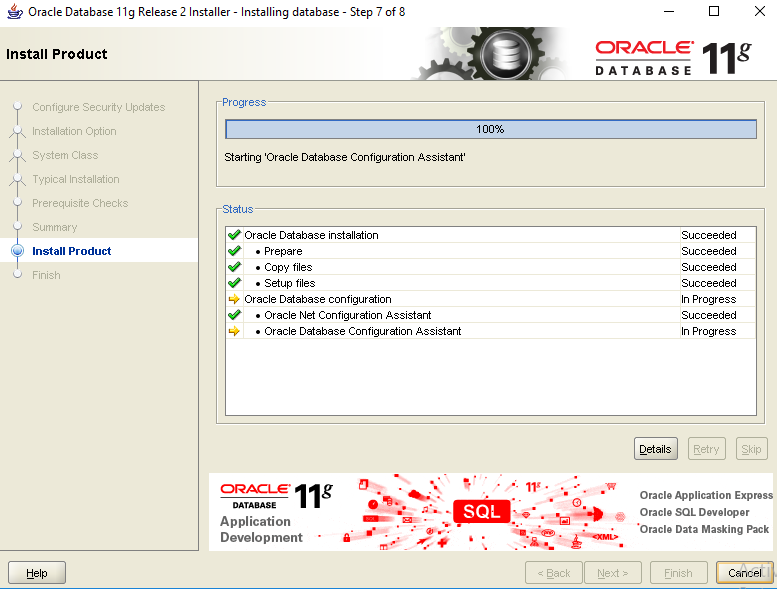
- Finally click on Finish button.
PowerCenter installation hardware and browser checks
Before installing Informatica PowerCenter, make sure that the environment meets the minimum requirements for hardware, operating system, web browser, database client, and third-party software. The exact numbers differ by version, but the following checklist is useful for the Windows setup shown in this tutorial.
- Approximately 35GB of free disk space for installer files, extraction, logs, and installed components.
- Minimum 4GB RAM for a basic local setup; more memory is recommended if Oracle Database and PowerCenter services run on the same machine.
- A supported x86 or x86-64 processor, depending on the installer package.
- Administrator rights on Windows to install services and allow firewall access.
- Database listener running and reachable from the PowerCenter installer.
- Required browser and plug-in support for the older Informatica Administrator interface used by the version being installed.
Also reserve the ports used by the domain, node, Informatica Administrator, repository service, and integration service. If another application already uses a required port, the installer or service startup may fail.
How to download Informatica PowerCenter software for installation
Before Downloading Informatica Software, it is essential to check the bit version(32-bit or 64-bit) of your local system(PC). Informatica PowerCenter 10.1.0 can be installed only on 64-bit but Informatica 9.6.1 can be installed on 32-bit and 64-bit computers.
Step-by-step process to download Informatica software
The best place to download Informatica software is from Oracle e-delivery website. Follow the steps given below to download latest version of the software.
- Visit https://edelivery.oracle.com.
- Sign in with valid Oracle credential. If you don’t have an account in Oracle.com, register for free account in Oracle.
- After logged in with username and password, accept all terms and conditions to download Informatica Software.
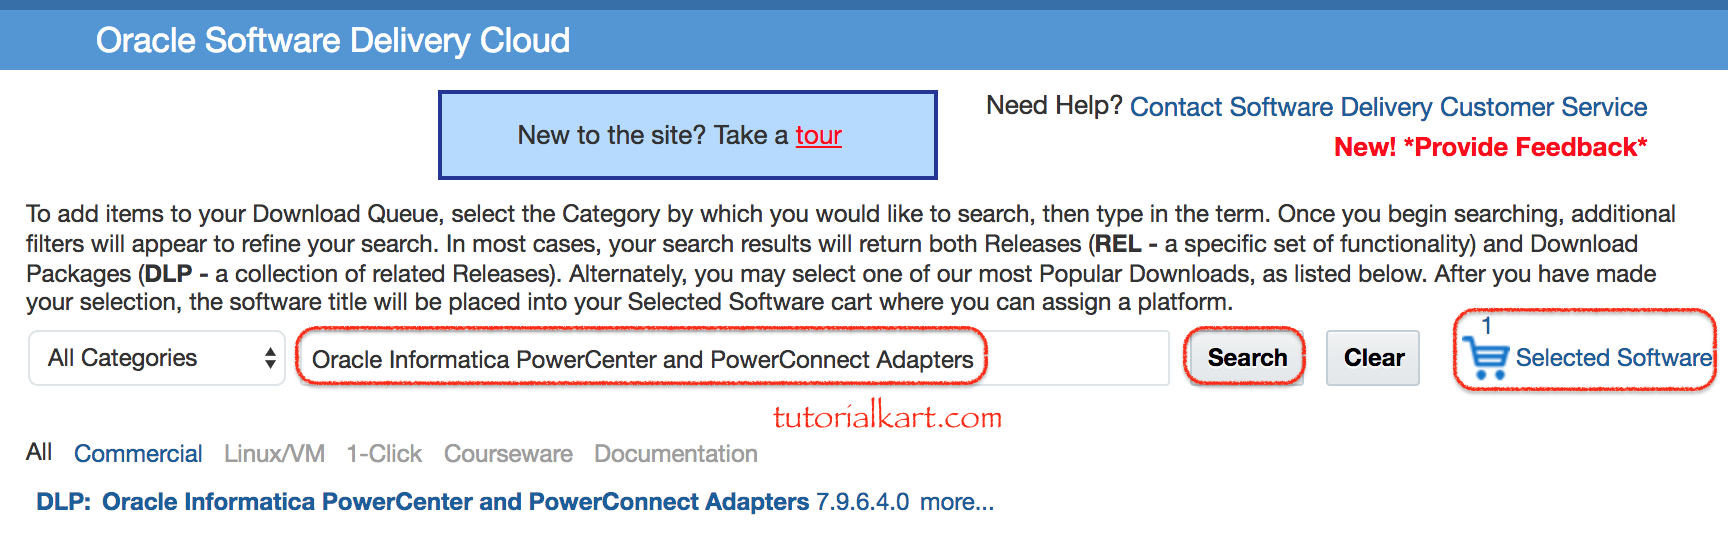
- Select all categories and enter Informatica and click on Search button.
- Now Oracle Informatica PowerCenter and PowerConnect Adapters will be shown below. Click on the link.
- Now click on Selected software.
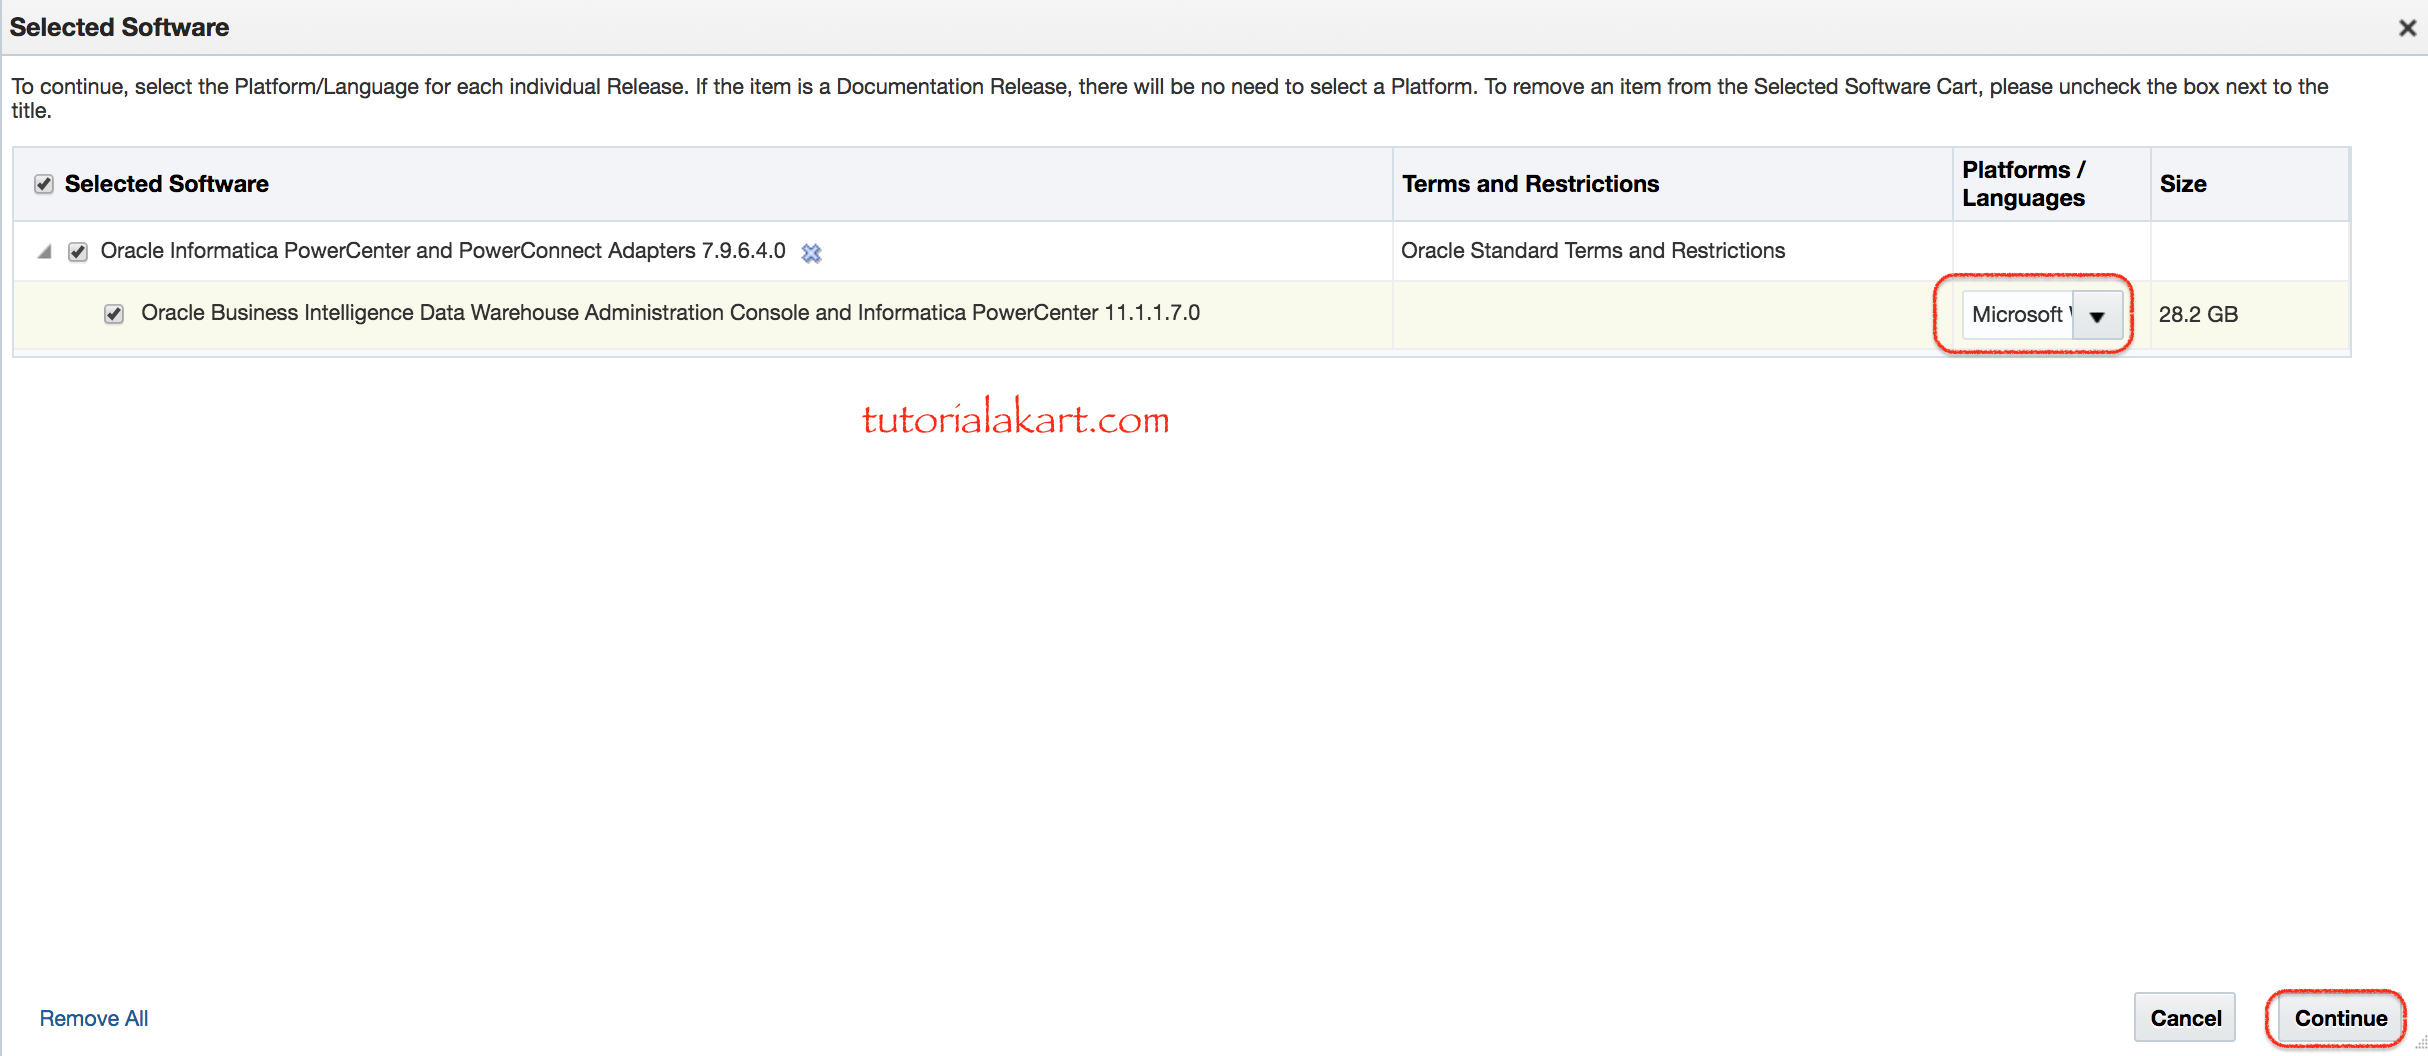
- Select your Operating system from the drop down button and click on continue.
Uncheck the option on the top and select the version of Informatica software. Here we are downloading Informatica 9.6.1 for Microsoft Windows x86-64(64-bit) version.
- Click on Download button.
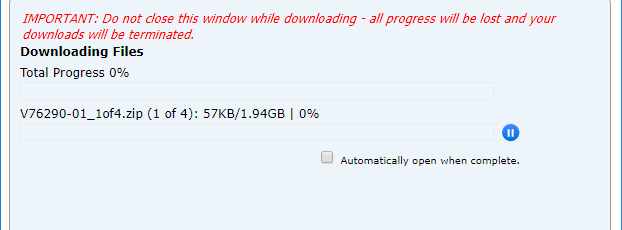
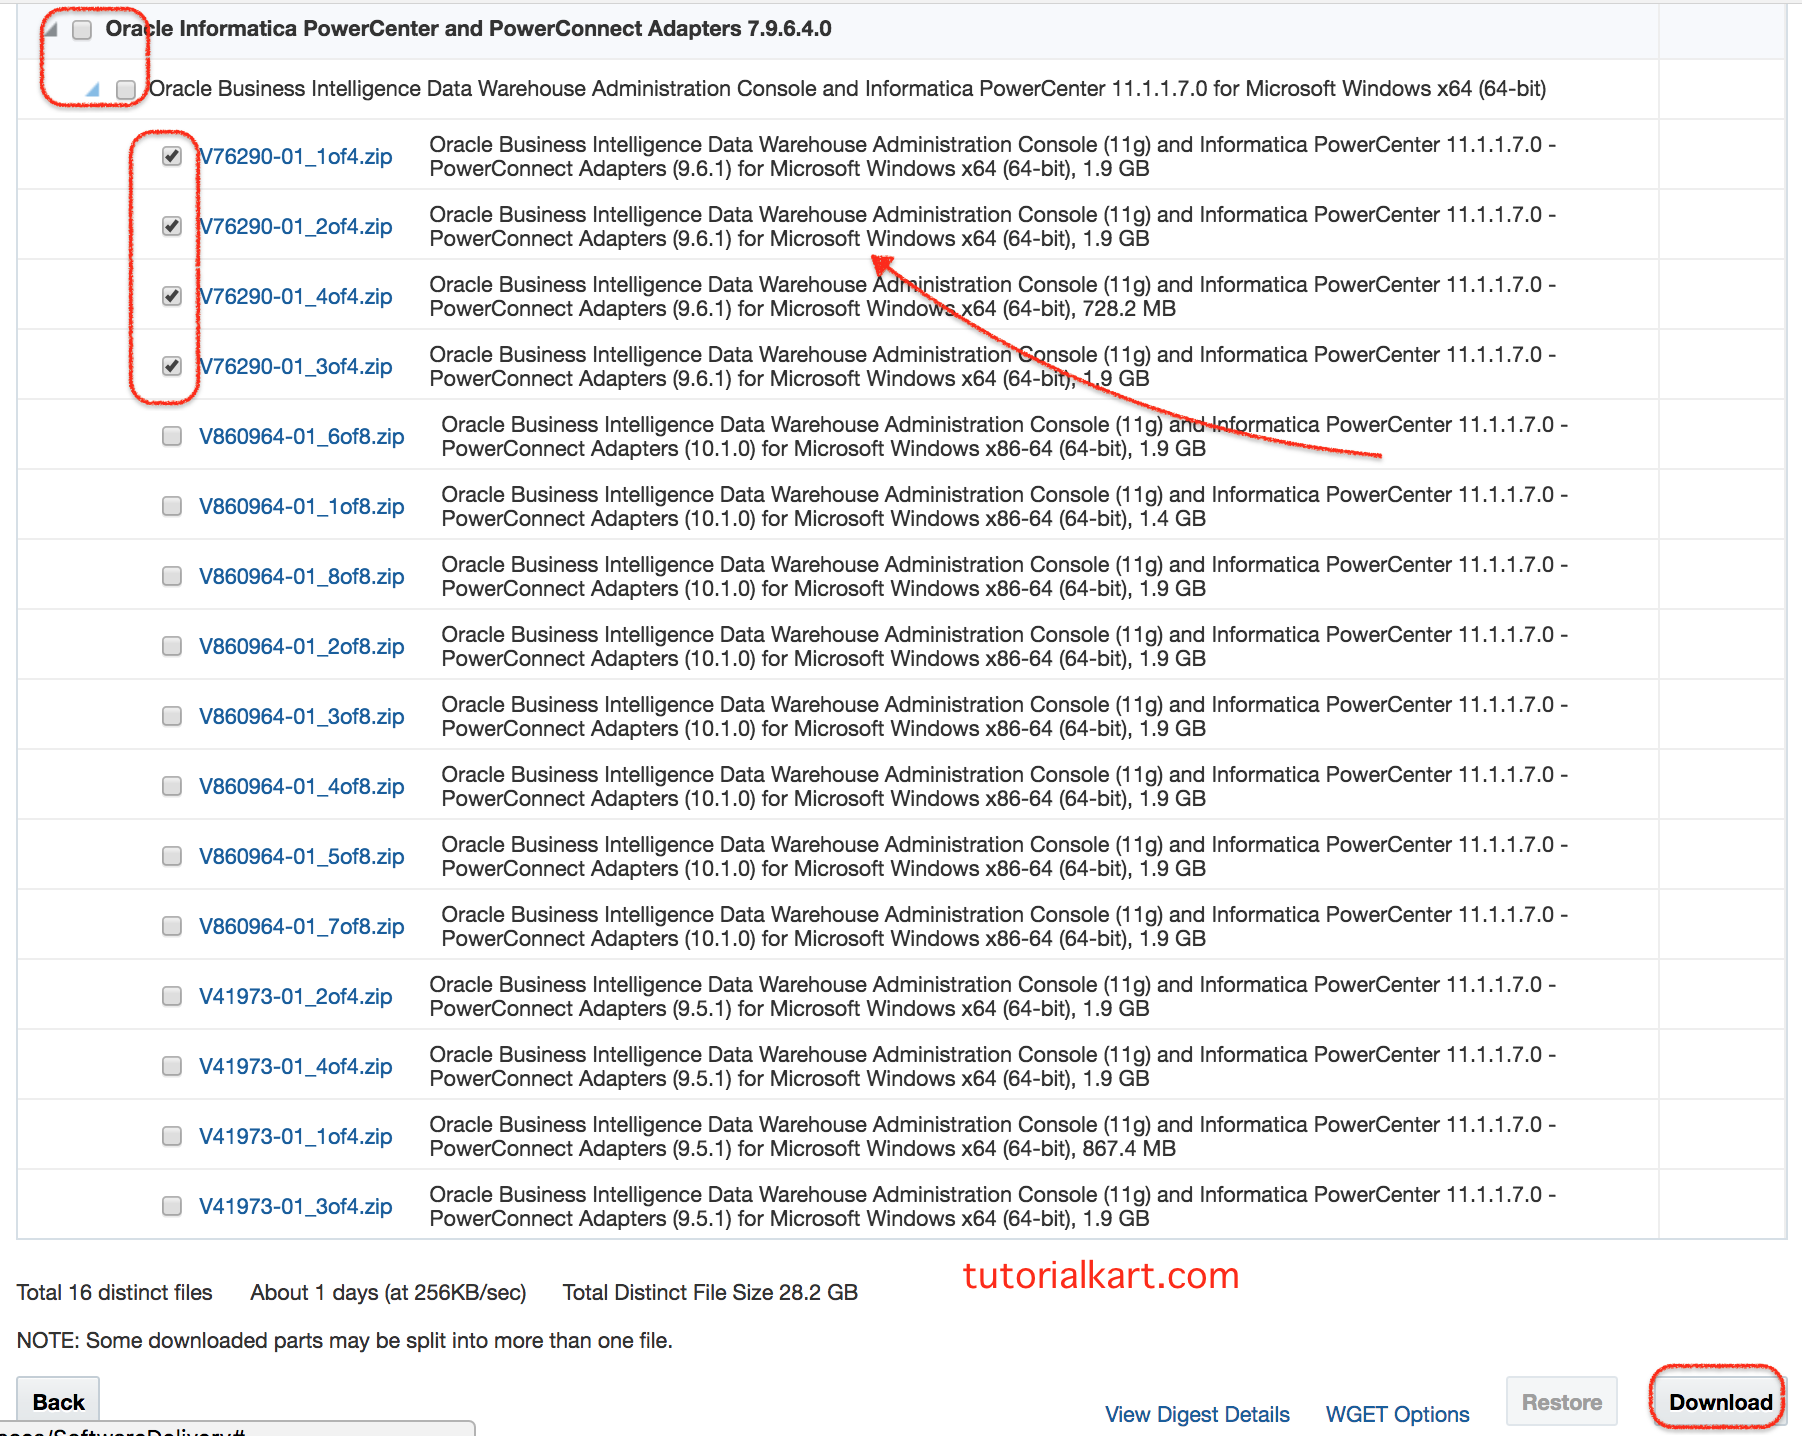
How to extract downloaded Informatica PowerCenter ZIP files
When the download process completed, we now had valid software available in four ZIP files for Informatica PowerCenter 9.6.1. In windows, these zip files must be extracted using Rar Extracter.
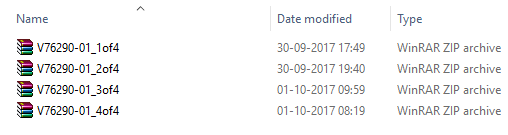
All these four files must be extracted in separate folder for the Informatica files and must have approximately 25GB space for Informatica package extraction. Extracting the files in correct way is very important for installation. As shown above we have four files namely V76290-01_1of4, V76290-01_2of4,V76290-01_3of4,V76290-01_4of4.
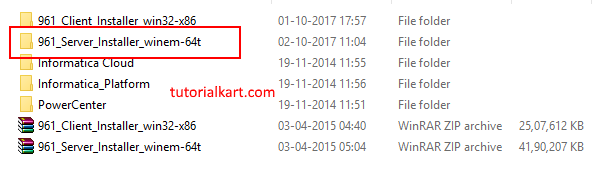
Extract V76290-01_1of4 first, V76290-01_2of4 , V76290-01_4of4 finally extract V76290-01_4of4. After you finish extracting the four ZIP files, you will see another file dac_win_11g_infa_win_32bit_951 along with the other files. Extract the file dac_win_11g_infa_win_32bit_951 in the same folder. You will get two ZIP files: 951HF2_Client_Installer_win32-x86 and 951HF2_Server_Installer_win32-x86.
Now we have two files namely Client Installer and Server installer. These two files must be available in same folder as shown below.

- Oracle_All_OS_product.key is required for installation.
After extraction, verify that the server installer, client installer, license key file, and supporting folders are present before launching setup. Avoid moving only one extracted folder to another location, because some installers expect related extracted files to remain in the same directory structure.
Informatica PowerCenter server installation and domain configuration
Before installing Informatica PowerCenter, we must check preRequisites like System requirements, Oracle database Installation. Informatica PowerCenter Installation completes in three steps and each step must be followed in order.
- Informatica Server Installation.
- Configure Informatica Repository Service and Informatica Integration service.
- Informatica Client installation.
The server installation creates the Informatica domain and node. After the server is installed, you still need to create and enable the application services required for development and workflow execution, especially the Repository Service and Integration Service.
Informatica PowerCenter server installation steps
Informatica Server Installation will completed in 7 steps. Follow the steps carefully for successful Informatica Server installation.
- Go to 961_Serve_Installer_ winem-64 bit folder and click on Install
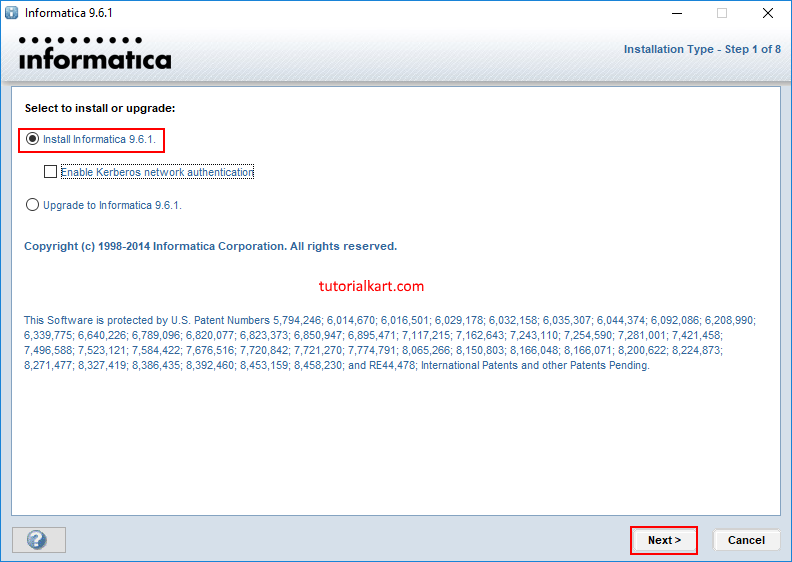
Step 1 : Installation type
- Now go to Serve folder and click on Install.
Once you click on Install application, Informatica Installation wizard will open to select options like Install Informatica 9.6.1 and Upgrade to Informatica 9.6.1. If your are installing Informatica for the first time select install informatica 9.6.1 radio button as shown below.
- Click on Next button.
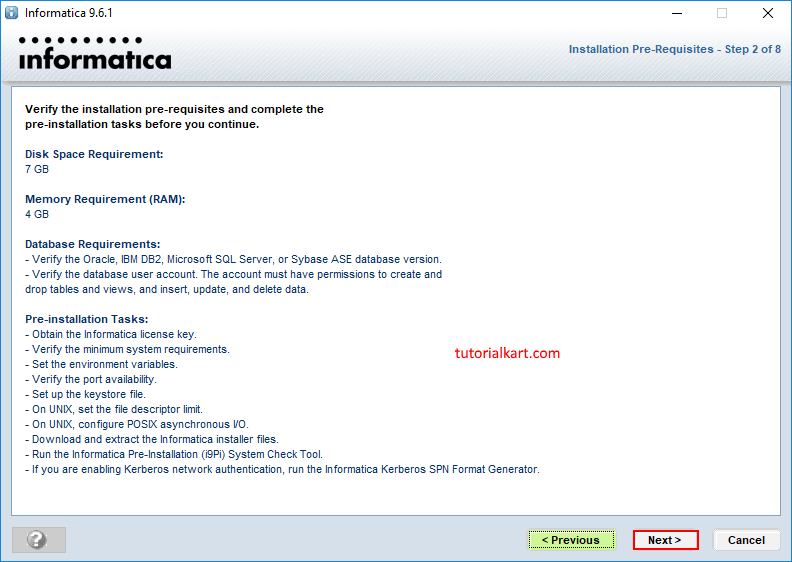
Step 2 : Verifying the installation pre-requisites.
In this steps, it verifies hard disk space, RAM, Database installed or not and other pre-requisites for installing Informatica 9.6.1 version in to your local system.
- Click on Next button.
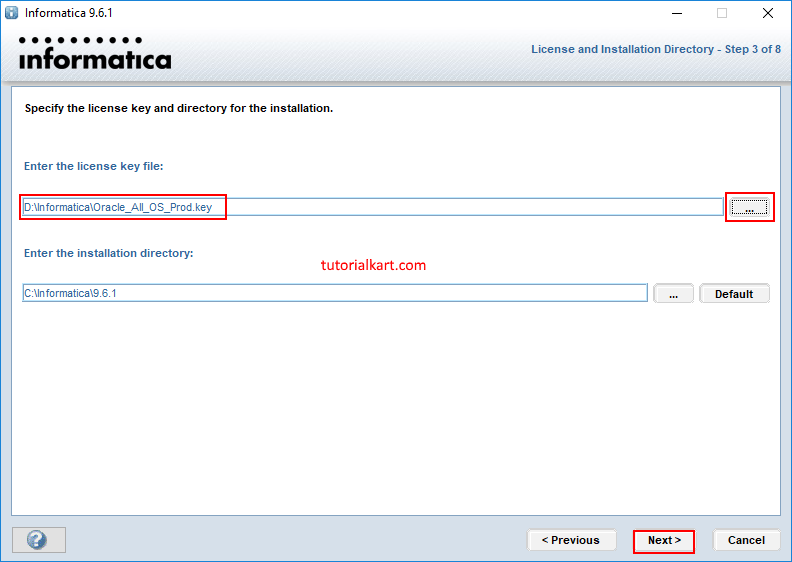
Step 3 : Entering Oracle licence key
In this step, to proceed with Informatica installation we have to select the Oracle license key. Click on … button and navigate to licence key location.
- Click on open and the key file path will be entered as shown below.
- Click on Next button.
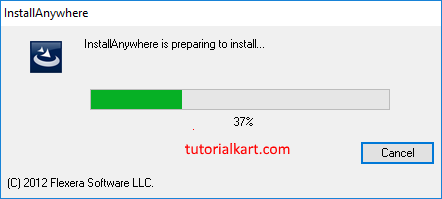
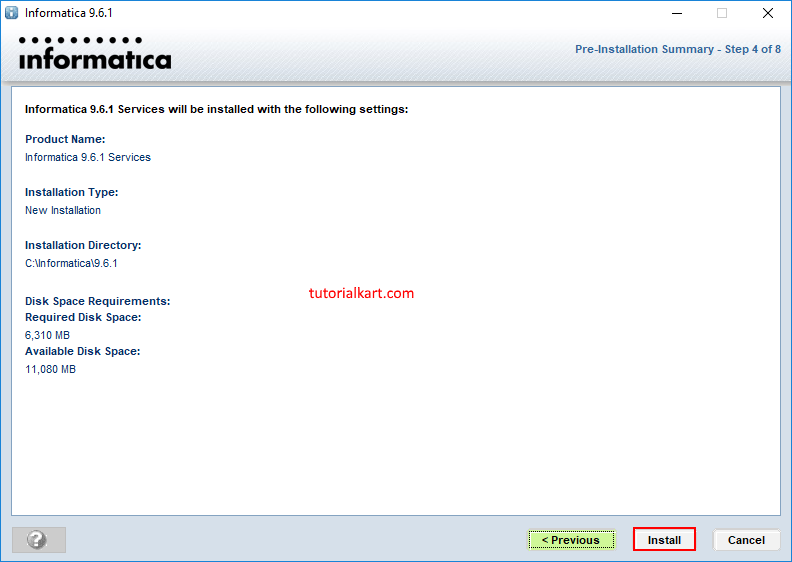
Step4 : Informatica Server installation starts.
After entering Oracle licence key, Informatica Server installation will starts and click on install button to proceed.
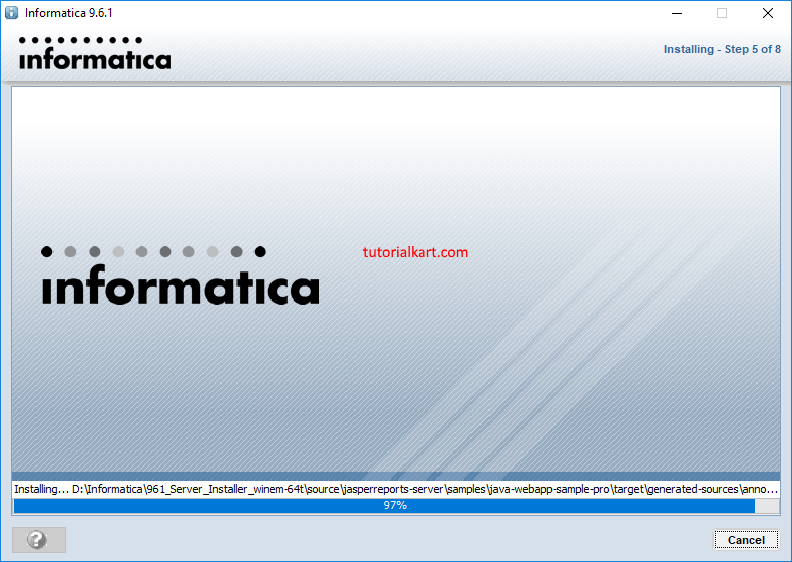
Step 4 : Informatica Server Installation Completes.
In this step, Informatica Server Installation will be completed after 100%. Wait till the installation progress shows 100%.
Step 5 : Creating Domain, Domain Configuration Repository and Domain Security.
In this Step ,we have three steps they are
- Creating an Informatica domain.
- Domain Configuration repository.
- Domain Security – Encryption key.
How to create Informatica domain during PowerCenter installation
In step 5A, we have two options Create a domain and Join a domain. If your are installing Informatica PowerCenter 9.6.1 or Informatica PowerCenter 10.1.1 leave the default settings and click on next button.
- Create Domain : Select this radio button, if your installing Informatica software for the first time.
- Join Domain : Select this radio button, if you want to join the existing domain with the previously created domain.
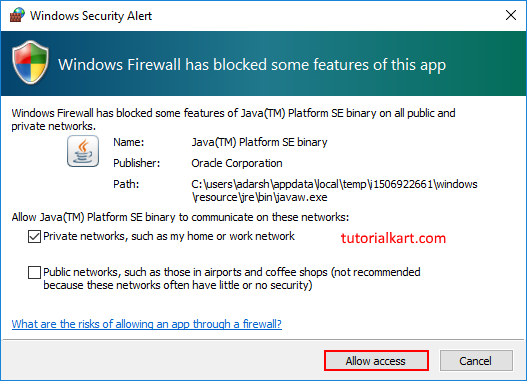
Check Enable HTTPS for Informatica Administrator option and don’t change port number, port number 8443 will be used as default. Check use a keystore file generated by the installer.
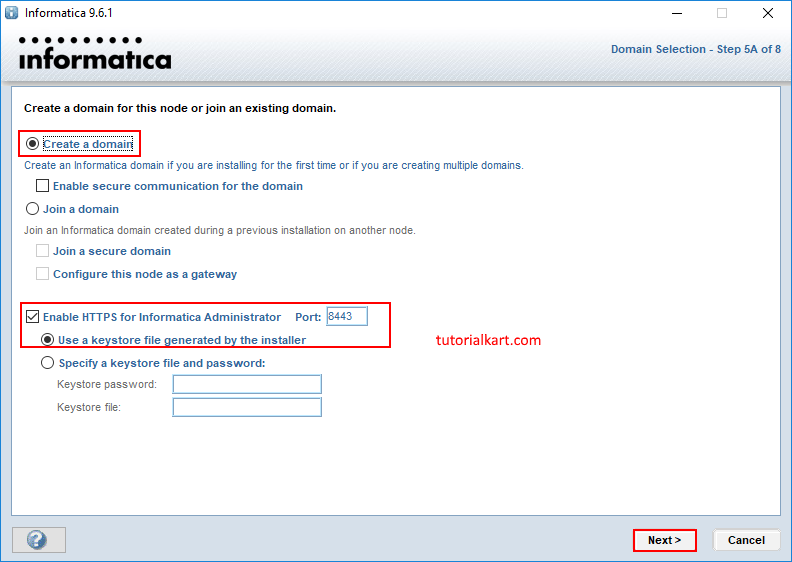
- Click on Allow access button to proceed.
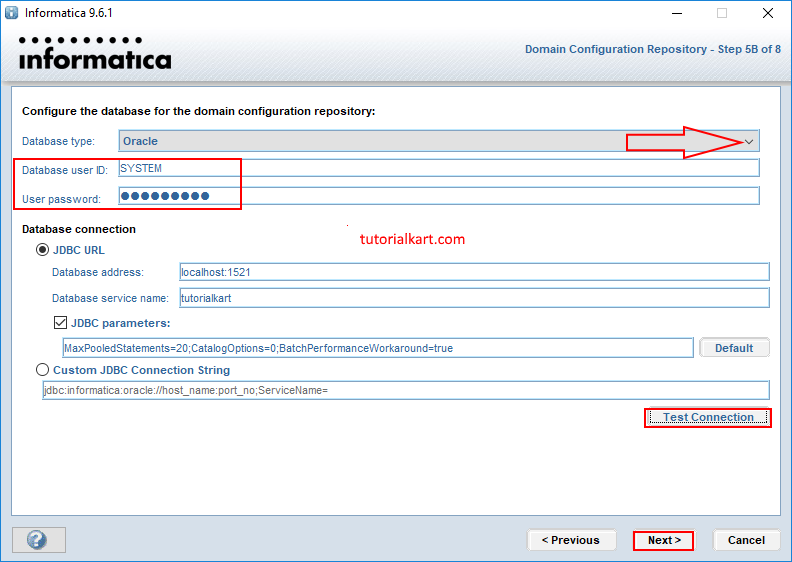
Step 5B : Domain Configuration Repository.
In this step, we have to configure the database settings like database type, Database user ID, user password.
- Select the database type that your are using. Here we using Oracle.
- Enter Database user Id.
- Enter user password.
- Enter Database address which contains hostname and port number.
- Database Service name specify the service name for your database connection.
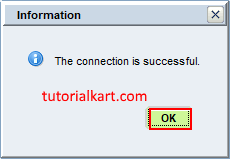
Now click on test connection.
If the connection is successful, it will display a pop up information showing that the connection is successful. Click on Ok button.
- Now click on Next button.
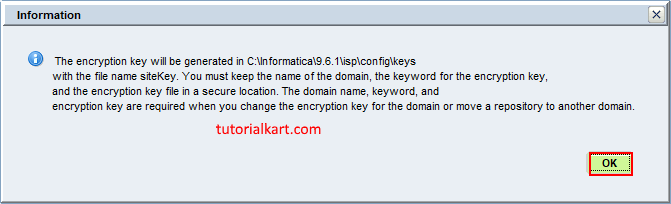
Step 5C : Domain Security – Encryption Key.
In this step, user must enter encryption key details(combination of uppercase and lowercase) for domain security.
- Click on next button.
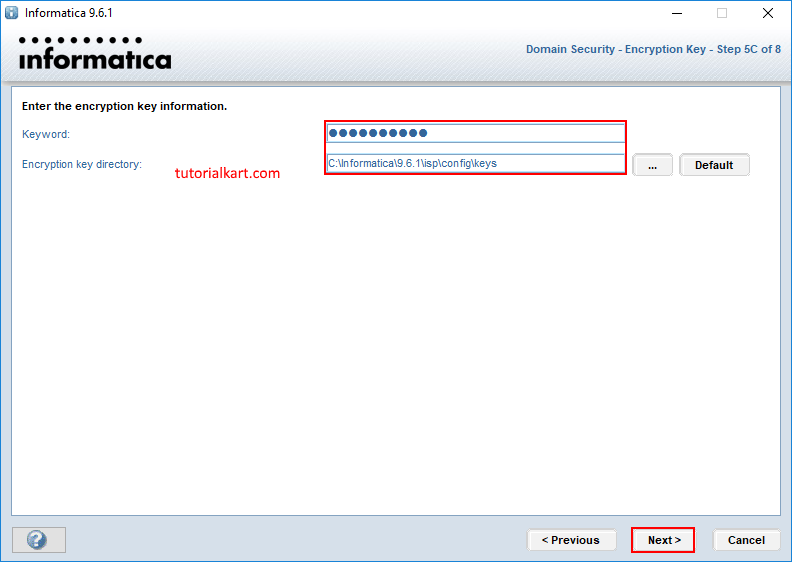
- Domain name, encryption key and keyword are required when you want to change the encryption key for the domain or move a repository to another domain.
- Click on Ok button.
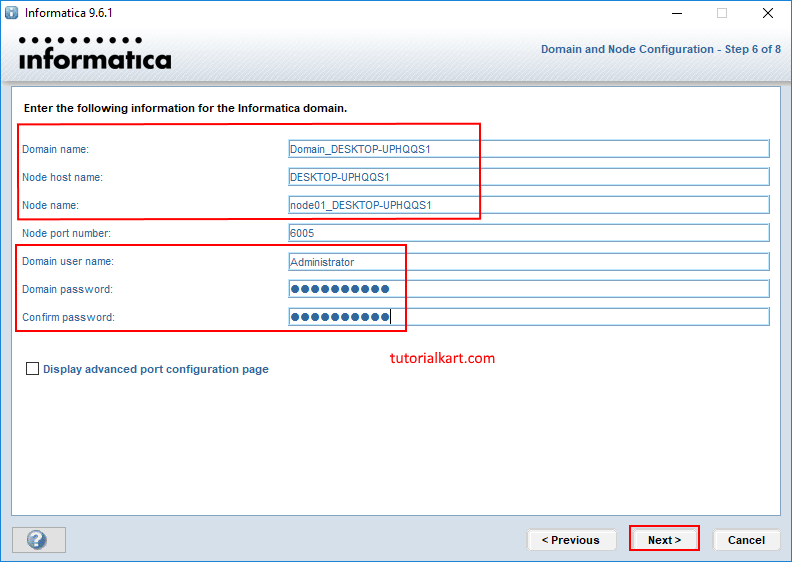
Step 6 : Domain and Node Configuration.
In step 6, Enter domain name that you require, Node host name and Node name, enter Domain username and Domain password. It is very important to save all these details because all these values are used when adding the domains and repository services in Informatica Repository.
- Click on next button.
Step 7 : Windows Service Configuration.
The installer creates a windows service under the current user account. By default, the same user account will be used to run the windows service.
- Click on next button.

Step 8 : Post-Installation Summary.
As shown below, Informatica 9.6.1 is complete and successfully installed in our local hard disk.
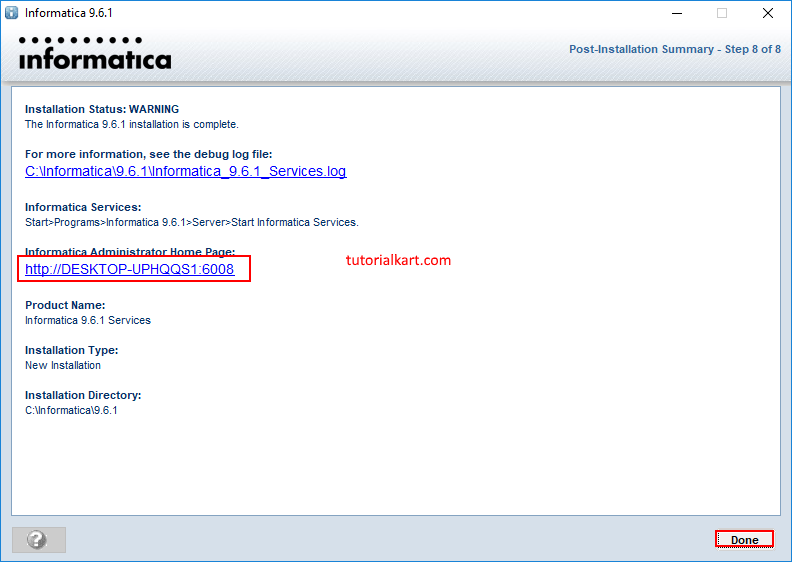
Click on Informatica Administrator Home page to open Informatica Admin Console.
Repository Service and Integration Service after PowerCenter server setup
After the server installation finishes, open Informatica Administrator and check whether the domain and node are running. Then create the PowerCenter Repository Service and PowerCenter Integration Service. Without these services, the client tools may open, but you will not be able to connect to a usable repository or run workflows.
- Repository Service: manages the metadata repository used by PowerCenter Designer, Workflow Manager, Workflow Monitor, and related tools.
- Integration Service: runs sessions and workflows by reading repository metadata and moving data between sources and targets.
- Informatica Administrator: is used to manage the domain, node, users, privileges, services, and service status.
If a service does not start, check database connectivity, repository credentials, port conflicts, license configuration, and the service logs before reinstalling the software.
Informatica PowerCenter client installation on Windows
After installing and configuring informatica repository Service and Integrated Service, we have to learn about informatica client installation and client tools. Navigate to client installer folder and click on install button as shown below.

Now Informatica Client Installation begins when we click on install button.
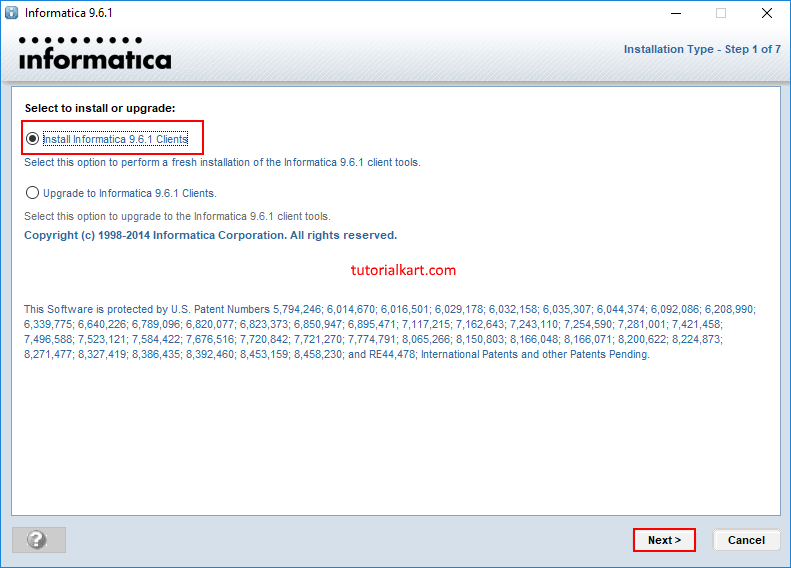
Step 1 : Selecting Installation type.
Informatica client Installation wizard will be opened and in this step we have to select installation type. We have two options :
- Install Informatica client : Select this option to perform a fresh installation of the Informatica 9.6.1 client tools.
- Upgrade to informatica 9.6.1 Clients : Select this option to upgrade to the informatica 9.6.1 tools.
Click on next button to proceed.
Step 2 : Application Client Selection
In this step, select Informatica developer, powerCenter Client, Data Transformation Studio Informatica application client tools and click on next button.

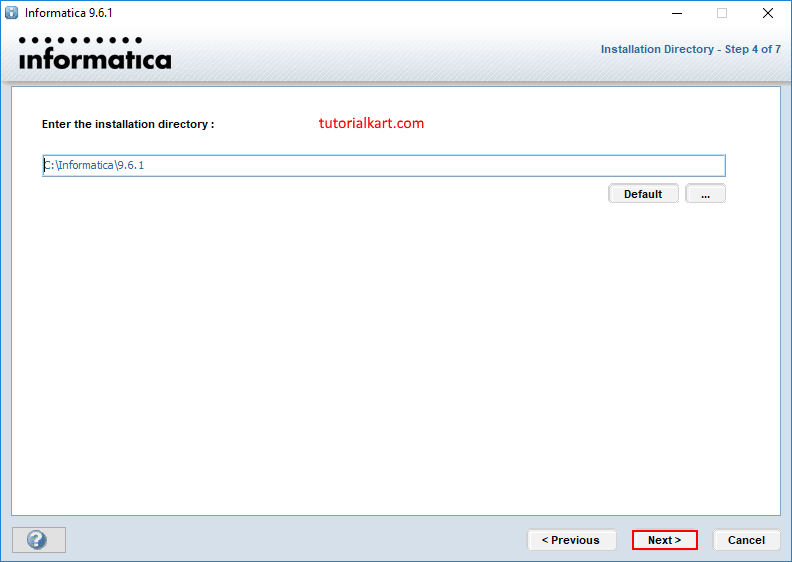
Step 4 : Installation directory.
Enter the installation directory. You can select the default informatica server installation directory. Click on next button.
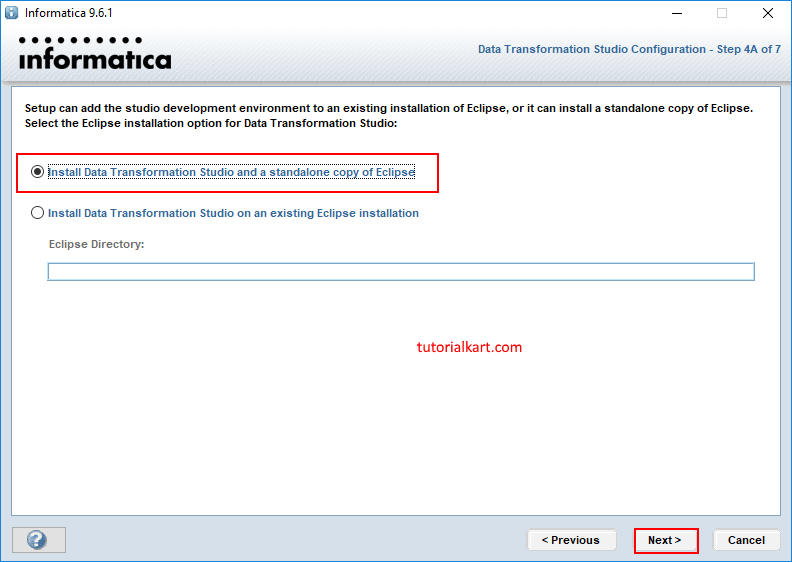
Step 4A : Data Transformation Studio configuration.
In this step, we have to select an option to install data transformation studio and a standalone copy of Eclipse. Click on next button.
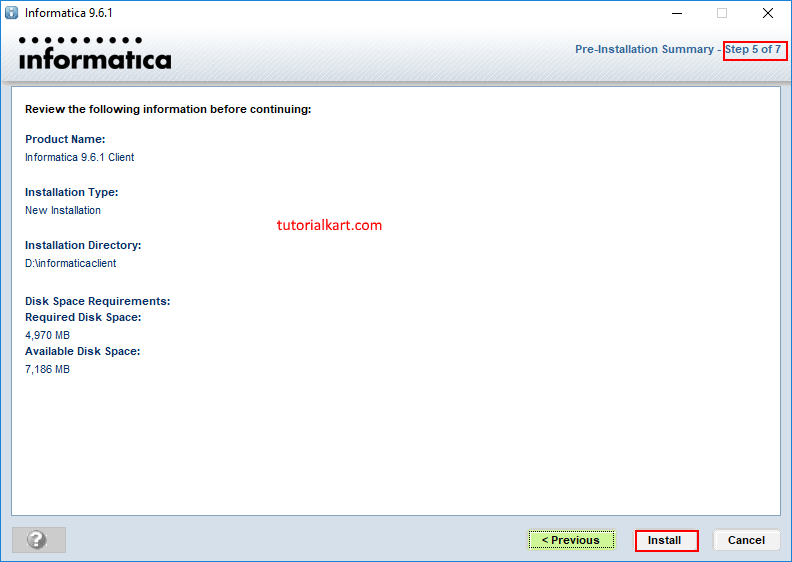
Step 5 : Pre-installation summary.
Click on Install button. Now Informatica Client Installation will start.
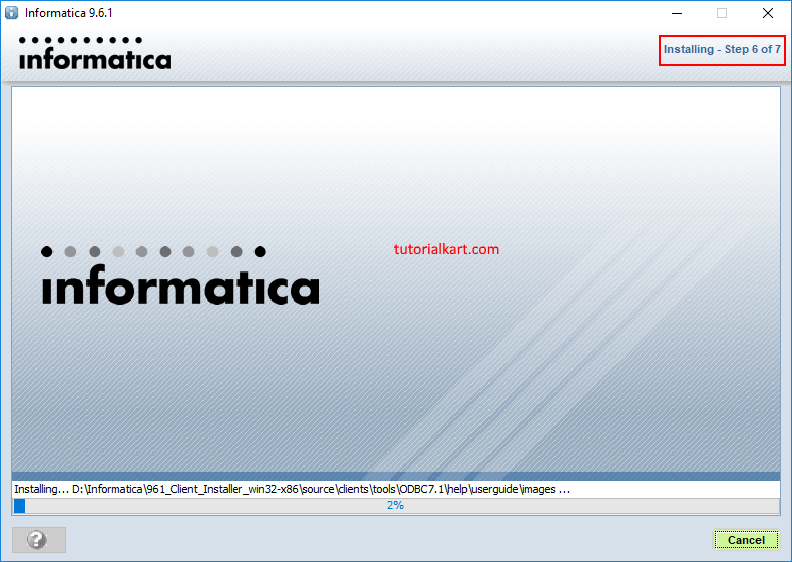
Step 6 : Installation.
Informatica Client tools get installed in our local system. Wait till 100% .
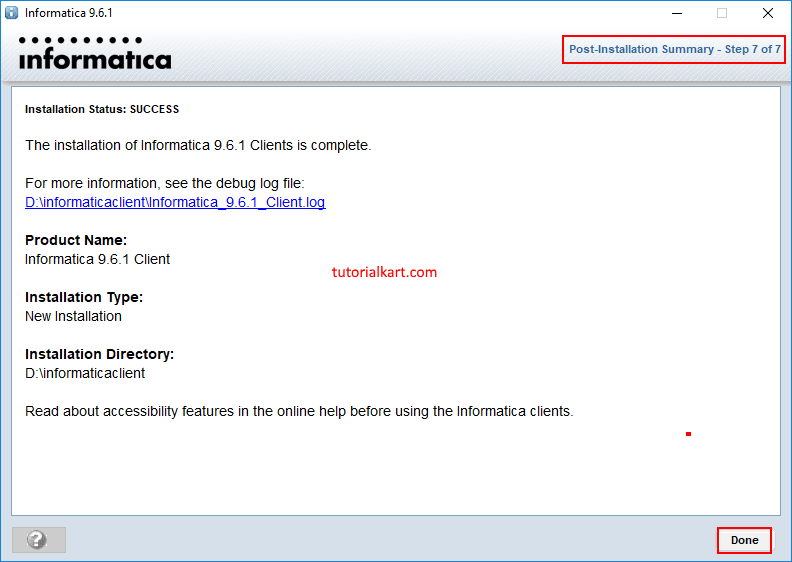
Step 7 : Post-Installation summary.
Once the installation process is complete, you will be redirected to post-installation summary screen. Check the summary and click on Done button.
To check the newly installed tools in windows operation system navigate to Start menu and go to Informatica 9.6.1.

PowerCenter client tools installed after setup
Depending on the components selected during installation, the Windows Start menu may show tools such as PowerCenter Designer, Workflow Manager, Workflow Monitor, Repository Manager, and Informatica Developer. For traditional PowerCenter development, the most commonly used tools are Designer, Workflow Manager, and Workflow Monitor.
- PowerCenter Designer: used to create sources, targets, mappings, mapplets, and transformations.
- Workflow Manager: used to create sessions, workflows, tasks, and schedules.
- Workflow Monitor: used to monitor workflow and session execution.
- Repository Manager: used for folders, repository objects, users, and repository-level operations.
Common Informatica PowerCenter installation errors and checks
If the Informatica PowerCenter installation fails or the domain does not start, check the basic dependencies before repeating the setup. Reinstalling without identifying the cause can create more configuration problems.
- Repository database connection failed: confirm the Oracle listener is running, the service name is correct, and the database user has the required privileges.
- Invalid or missing license key: select the correct product key file from the extracted installation package.
- Port already in use: verify that the Administrator, domain, and node ports are free before installation.
- Windows service not starting: run the service using an account with required permissions and check whether the installation path is accessible.
- Client cannot connect to repository: confirm that the domain is running, the Repository Service is enabled, and the client is using the correct gateway host and port.
Informatica PowerCenter installation QA checklist before publishing or using the setup
- Confirm the tutorial version shown in screenshots matches the version mentioned in the text.
- Verify that the Oracle Database download and installation steps are suitable for the reader’s selected PowerCenter version.
- Check that repository database details include host, port, service name, user ID, and password.
- Confirm that the license key file name and installer folder names match the downloaded package.
- Make sure domain name, node name, gateway port, and Administrator URL are saved after installation.
- Verify that Repository Service and Integration Service are created and enabled after server setup.
- Test at least one client login from PowerCenter Designer or Repository Manager.
FAQs on Informatica PowerCenter installation and configuration
Do I need Oracle Database to install Informatica PowerCenter?
No. Oracle Database is one supported choice for the metadata repository, but PowerCenter versions may also support other databases such as Microsoft SQL Server or DB2. This tutorial uses Oracle Database because the screenshots are based on an Oracle repository setup.
What is created during Informatica domain configuration?
During domain configuration, the installer creates or joins an Informatica domain, configures the domain configuration repository, sets domain security details such as the encryption key, and defines the node name, host name, and administrator user details.
Why does PowerCenter need a Repository Service and Integration Service?
The Repository Service manages metadata stored in the PowerCenter repository. The Integration Service runs workflows and sessions. Both services are required for normal mapping development, workflow execution, and monitoring.
Can Informatica PowerCenter server and client be installed on the same machine?
Yes, for learning and practice installations, the server, repository database, and client tools can be installed on the same Windows machine if the system has enough resources. For production, these components are usually separated for performance, administration, and security.
What should I save after completing PowerCenter installation?
Save the domain name, node name, gateway host and port, Informatica Administrator URL, repository database details, domain administrator credentials, encryption keyword, and license file location. These details are needed for administration, troubleshooting, and client connections.
Conclusion
In this Informatica tutorial, we learned the main steps in Informatica PowerCenter installation and configuration: checking prerequisites, installing Oracle Database for the metadata repository, downloading and extracting the PowerCenter installer files, installing the server, creating the Informatica domain, configuring domain and node settings, and installing the client tools. After installation, the next important step is to create and verify the Repository Service and Integration Service so that PowerCenter Designer, Workflow Manager, and Workflow Monitor can connect and work correctly.