Android LinearLayout – Arrange Children Vertically
To arrange items of LinearLayout vertically, assign android:orientation attribute of this LinearLayout with the value “vertical”.
</>
Copy
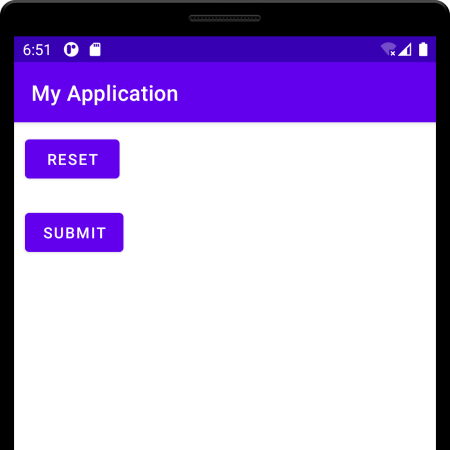
android:orientation="vertical"Let us create an Android application with LinearLayout containing two Button widgets as children. We shall arrange these children vertically.
activity_main.xml
</>
Copy
<?xml version="1.0" encoding="utf-8"?>
<LinearLayout xmlns:android="http://schemas.android.com/apk/res/android"
    android:layout_width="match_parent"
    android:layout_height="wrap_content"
    android:orientation="vertical">
    <Button
        android:layout_width="wrap_content"
        android:layout_height="wrap_content"
        android:layout_margin="10sp"
        android:text="Reset"/>
    <Button
        android:layout_width="wrap_content"
        android:layout_height="wrap_content"
        android:layout_margin="10sp"
        android:text="Submit"/>
</LinearLayout>
MainActivity.kt
</>
Copy
package com.example.myapplication

import androidx.appcompat.app.AppCompatActivity
import android.os.Bundle

class MainActivity : AppCompatActivity() {
    override fun onCreate(savedInstanceState: Bundle?) {
        super.onCreate(savedInstanceState)
        setContentView(R.layout.activity_main)
    }
}
Run this application and you would get the output as shown in the following screenshot.
Conclusion
In this Kotlin Android Tutorial, we learned how to arrange children of LinearLayout vertically.