Android RecyclerView Example
In this Android RecyclerView Tutorial, we will learn how to use RecyclerView widget in our Android Application.
We will take a list of strings and display these as items in the RecyclerView widget.
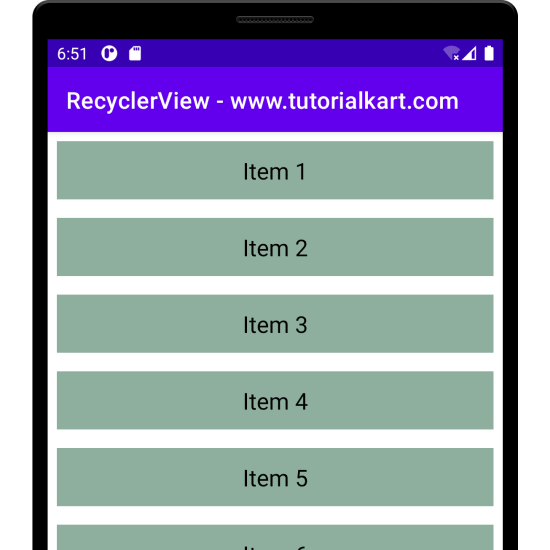
The following screenshot depicts the final result of our RecyclerView tutorial.
The following is a step by step process to display items in a RecyclerView widget.
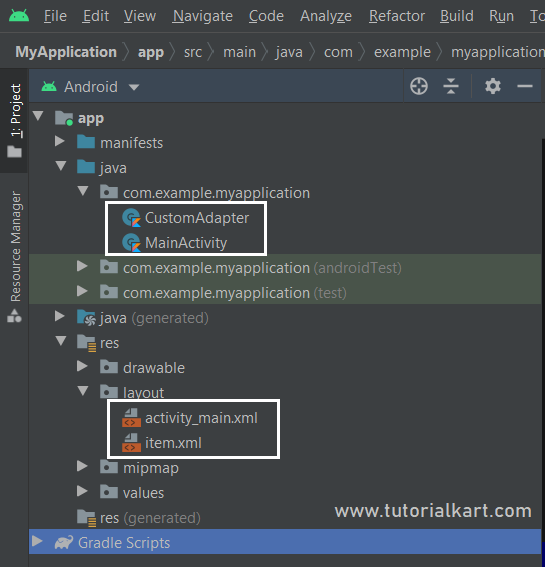
The complete project structure with the file locations is as shown in the following screenshot.
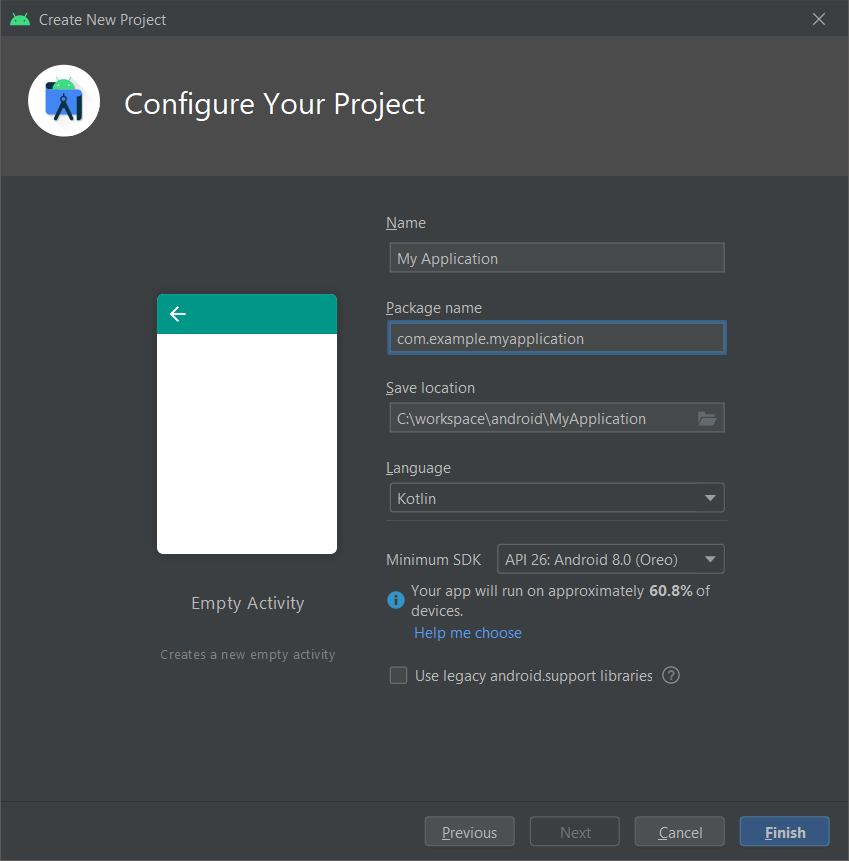
Step 1
Create an Android project with Empty Activity. We are keeping the default values for Name and Package name.
Choose Kotlin for the Language.
Step 2
Add RecyclerView widget to activity_main.xml. Please note the id we provided for this RecyclerView widget.
The width and height of this RecyclerView widget match the parent.
activity_main.xml
<?xml version="1.0" encoding="utf-8"?>
<androidx.constraintlayout.widget.ConstraintLayout xmlns:android="http://schemas.android.com/apk/res/android"
    xmlns:tools="http://schemas.android.com/tools"
    android:layout_width="match_parent"
    android:layout_height="match_parent"
    tools:context=".MainActivity">
    <androidx.recyclerview.widget.RecyclerView
        android:id="@+id/recyclerView"
        android:layout_width="match_parent"
        android:layout_height="match_parent" />
</androidx.constraintlayout.widget.ConstraintLayout>
Step 3
Create a layout file item.xml. This layout file is used to display each item in the RecylcerView widget.
Each item in the RecyclerView is displayed as a LinearLayout with a single TextView in it. Please note the id of the TextView itemTextView. We will need this id to set this TextView’s text with the item’s string value.
item.xml
<?xml version="1.0" encoding="utf-8"?>
<LinearLayout xmlns:android="http://schemas.android.com/apk/res/android"
    android:layout_width="match_parent"
    android:layout_height="wrap_content"
    android:layout_margin="8dp"
    android:background="#8EAF9E">
        <TextView
            android:id="@+id/itemTextView"
            android:layout_width="match_parent"
            android:layout_height="50dp"
            android:layout_alignParentStart="true"
            android:textColor="#000000"
            android:gravity="center"
            android:textSize="20sp" />
</LinearLayout>
Step 4
Create a custom Adapter that extends RecyclerView.Adapter. This adapter takes care of populating the items in it with values.
In Custom Adaptor class, we override three methods that are responsible for creating and setting values for the items in RecyclerView.
onCreateViewHolder()creates the MyViewHolder widget for each item, with the specifieditem.xmllayout.onBindViewHolder()gets the MyViewHolder widget for each item, and the position of the item as arguments. Using the position, we can get the item from the items list. And we can use this item (String in this case) to update MyViewHolder widget that is displayed as item (LinearLayout with TextView) in the RecyclerView.- getItemCount() sets the number of elements to be displayed in the RecyclerView. We are setting this size with the the size of ArrayList<String>
itemsListin which we are storing the strings.
CustomAdapter.kt
package com.example.myapplication
import android.view.LayoutInflater
import android.view.View
import android.view.ViewGroup
import android.widget.TextView
import androidx.annotation.NonNull
import androidx.recyclerview.widget.RecyclerView
internal class CustomAdapter(private var itemsList: List<String>) :
   RecyclerView.Adapter<CustomAdapter.MyViewHolder>() {
   internal inner class MyViewHolder(view: View) : RecyclerView.ViewHolder(view) {
      var itemTextView: TextView = view.findViewById(R.id.itemTextView)
   }
   @NonNull
   override fun onCreateViewHolder(parent: ViewGroup, viewType: Int): MyViewHolder {
      val itemView = LayoutInflater.from(parent.context)
      .inflate(R.layout.item, parent, false)
      return MyViewHolder(itemView)
   }
   override fun onBindViewHolder(holder: MyViewHolder, position: Int) {
      val item = itemsList[position]
      holder.itemTextView.text = item
   }
   override fun getItemCount(): Int {
      return itemsList.size
   }
}
Step 5
Inside MainActivity,
- Get reference to the RecyclerView in layout file activity_main.xml. The id of the RecyclerView in layout file is
recyclerView. - Initialize CustomAdapter with the items List.
- Set Layout Manager with LinearLayoutManager for the RecyclerView.
- Set adapter with CustomAdapter for the RecyclerView.
- Now we can prepare the items and update RecyclerView via CustomAdapter using
notifyDataSetChanged().
MainActivity.kt
package com.example.myapplication
import androidx.appcompat.app.AppCompatActivity
import android.os.Bundle
import androidx.recyclerview.widget.DefaultItemAnimator
import androidx.recyclerview.widget.LinearLayoutManager
import androidx.recyclerview.widget.RecyclerView
class MainActivity : AppCompatActivity() {
    private val itemsList = ArrayList<String>()
    private lateinit var customAdapter: CustomAdapter
    override fun onCreate(savedInstanceState: Bundle?) {
        super.onCreate(savedInstanceState)
        setContentView(R.layout.activity_main)
        title = "RecyclerView - www.tutorialkart.com"
        val recyclerView: RecyclerView = findViewById(R.id.recyclerView)
        customAdapter = CustomAdapter(itemsList)
        val layoutManager = LinearLayoutManager(applicationContext)
        recyclerView.layoutManager = layoutManager
        recyclerView.adapter = customAdapter
        prepareItems()
    }
    private fun prepareItems() {
        itemsList.add("Item 1")
        itemsList.add("Item 2")
        itemsList.add("Item 3")
        itemsList.add("Item 4")
        itemsList.add("Item 5")
        itemsList.add("Item 6")
        itemsList.add("Item 7")
        itemsList.add("Item 8")
        itemsList.add("Item 9")
        itemsList.add("Item 10")
        itemsList.add("Item 11")
        itemsList.add("Item 12")
        itemsList.add("Item 13")
        customAdapter.notifyDataSetChanged()
    }
}
Step 6
Run this Android Application. We will get the following screen.
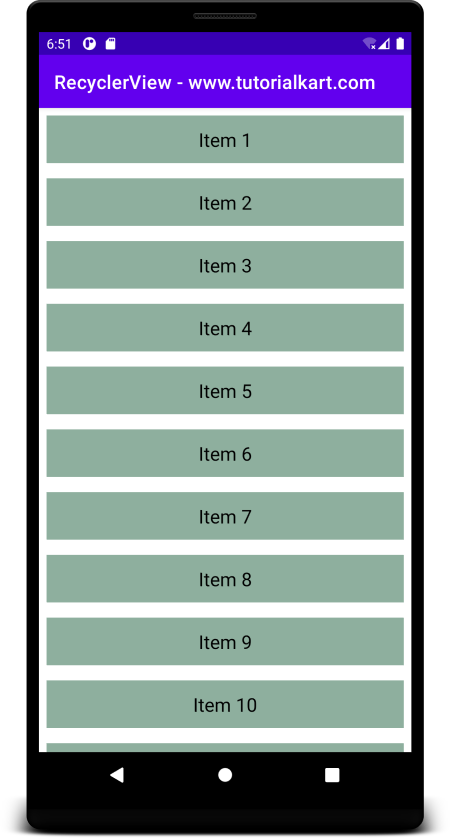
RecyclerView is scrollable. So, we should be able to scroll through the items in this RecyclerView.
Step 7
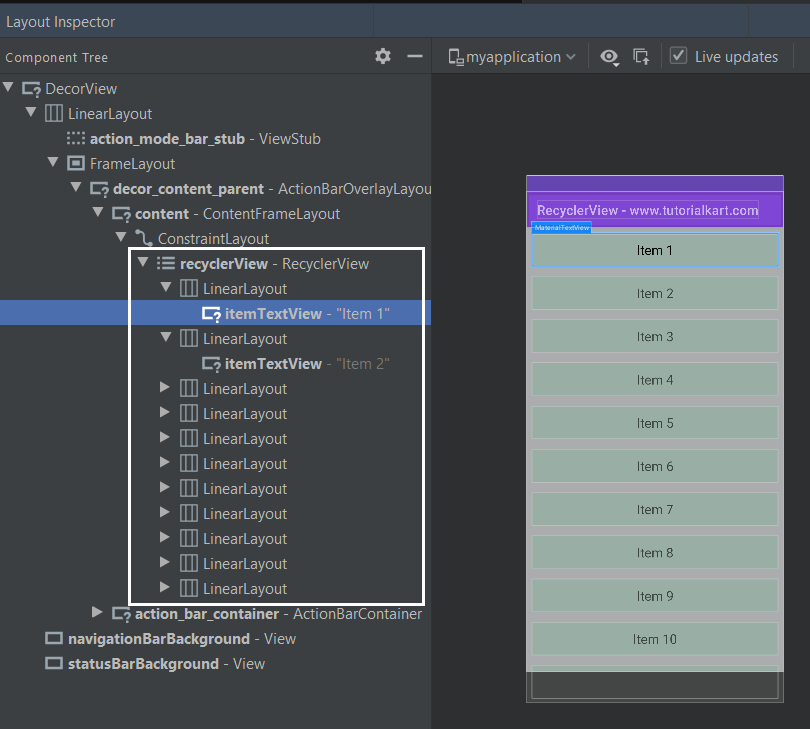
You may open Layout Inspector in Android Studio 4, Menu > View > Tool Windows > Layout Inspector, and observe the items inside RecyclerView.
Conclusion
In this Kotlin Android Tutorial, we learned how to display a list of items in a RecyclerView, in a step by step process, with the help of example Android Application.