Sorter Transformation in Informatica is an Active transformation used to sort data from a source transformation either in ascending order (or) in descending order into the target table. The port on which sorting takes place is represented as ‘key’.
Sorter Transformation in Informatica
Why Sorter transformation is an active transformation? Sorter transformation eliminate duplicates (distinct), this property makes a sorter as an Active T/R.
Sorter T/R properties.
- Distinct output Rows.
- It treats null values.
- It sorts uppercase characters higher that lowercase characters.
- Work directory.
- Maximum sorter cache is 16,777,216 bytes by default.
Before creating Sorter transformation in Informatica, connect repository service using admin console credentials.
- Source table : Employees.
- Target table : T_SORTER_EMP.
- Transformation : Sorter transformation.
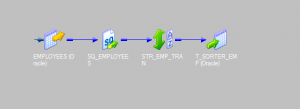
Mapping Diagram
Creating Sorter Transformation
To create any transformation in Informatica, we must follow some steps. Check the following steps to create sorter transformation.
- Creating source defintion.
- Create target definition table.
- Create Mapping.
- Create sorter Transformation.
- Create Workflow and session.
- Run workflow and Monitor.
Creating source definition.
In this example, we are using already created table (Employees ) in oracle HR user as our source definition. We can also create new data source table from sources (or) simply import from database.
Creating Mapping
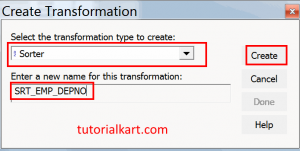
To create new mapping for a transformation open Informatica PowerCenter Designer and navigate to tools | mapping designer | Mappings and select create option. Now a new window will be opened to select transformation type and name.
- Select Sorter transformation and enter name.
Adding Source and Target Definition to Mapping Designer
In this step we must add source and target table to mapping designer workspace. Drag and drop the source definition from navigator to workspace. Source Qualifier will be added automatically
Adding Sorter Transformation
To create sorter transformation in Informatica PowerCenter, navigate to Menu bar | Transformation tab and select create option. Enter unique name for the transformation.
After creating sorter transformation it will be added to the mapping designer automatically. Select required ports from Source Qualifier table and drop those ports to sorter transformation as shown below.
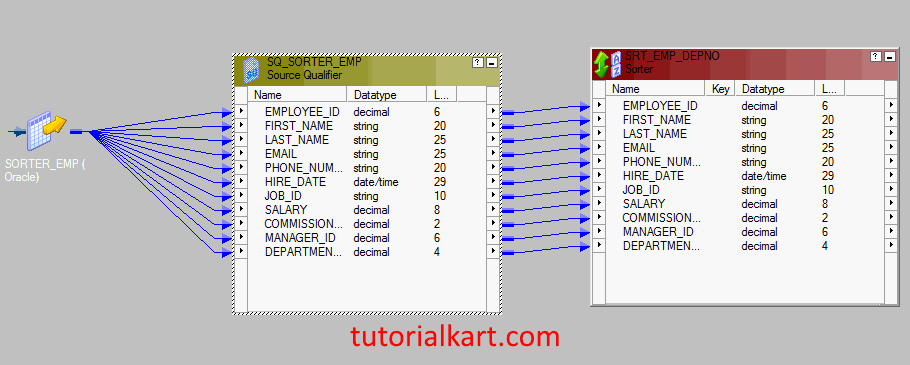
Connect all the ports using Auto link option provided in the menu bar. From the above screenshot , we observed that we connected source qualifier to sorter transformation successfully. Now our main aim to add ‘Key field‘ to sort the data based on Deptno.
Now, double click on header of the Sorter transformation and click on Ports tab. Enable the Check box under Key field corresponding to the DEPTNO, which is marked by Red colored rectangle as shown below.
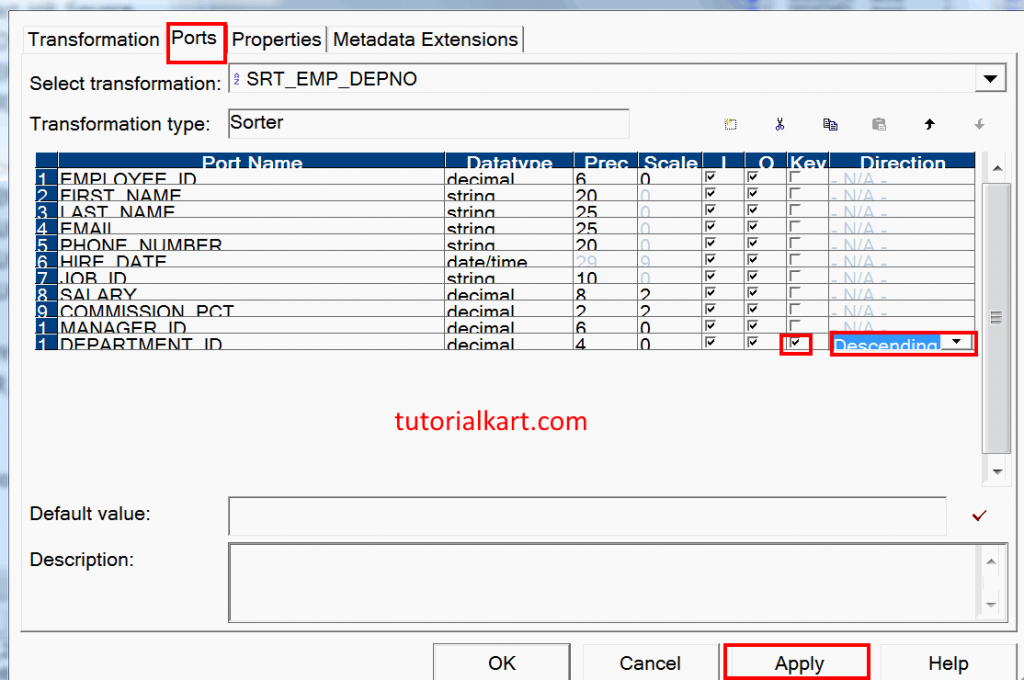
- Select the direction, Ascending order (A to Z)or Descending order (Z to A) to which direction the data is to be sorted.
- Click on Apply and Ok button.
Adding Target Definition
To create target definition table, navigate to menu bar | Target designer | target and Import from database. It is very essential that after importing table, generate and execute SQL.
Drag and drop the target table to mapping designer. Select required ports from Sorter transformation and drop those ports into Target table (SORTER_EMP).
- Connect all the ports as shown below.
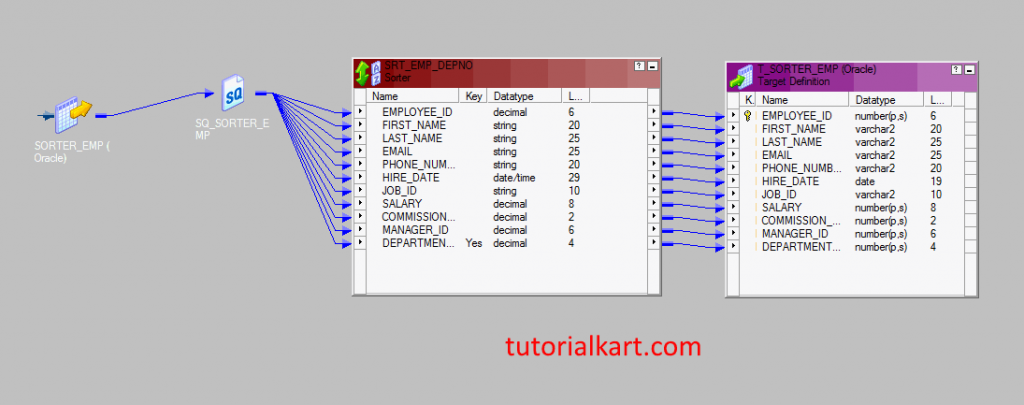
- Save the mapping.
Creating Workflow & Session
After creating mapping, our next step is to create a workflow. A workflow in Informatica can be created manually or by using wizard. In this Information tutorial, we will create workflow and session using wizard.
- Open Workflow Manager | Workflows | Wizard.
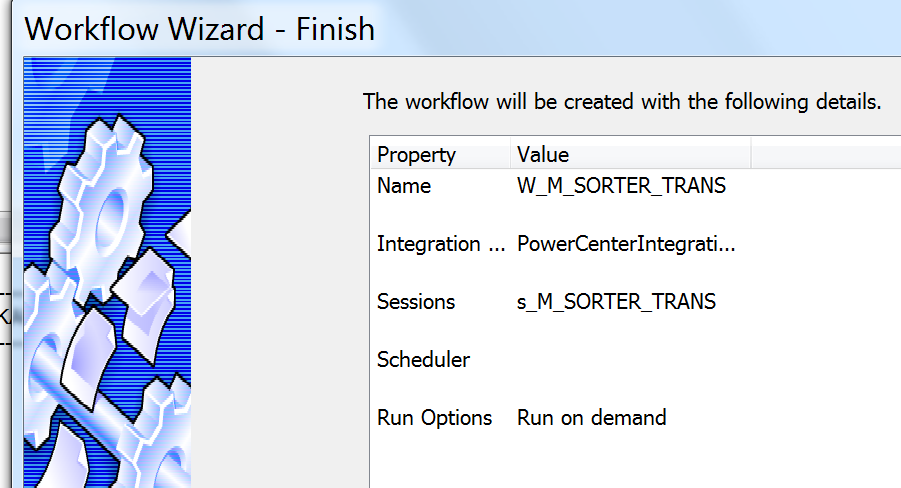
In this process, it involves 3 steps to create Workflow and session.
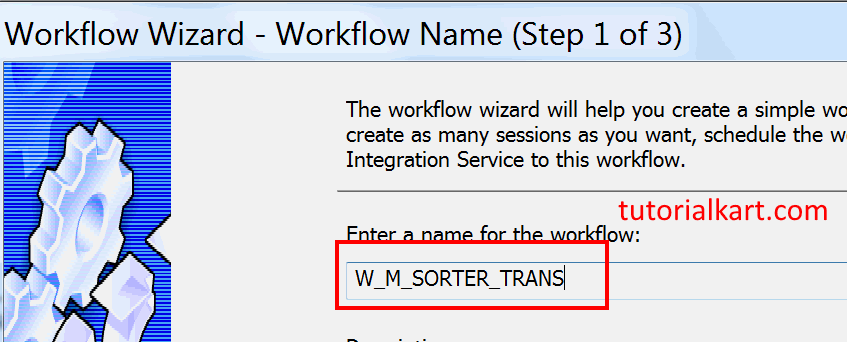
Step 1 : Creating workflow.
- Enter name for the workflow and click on next button.
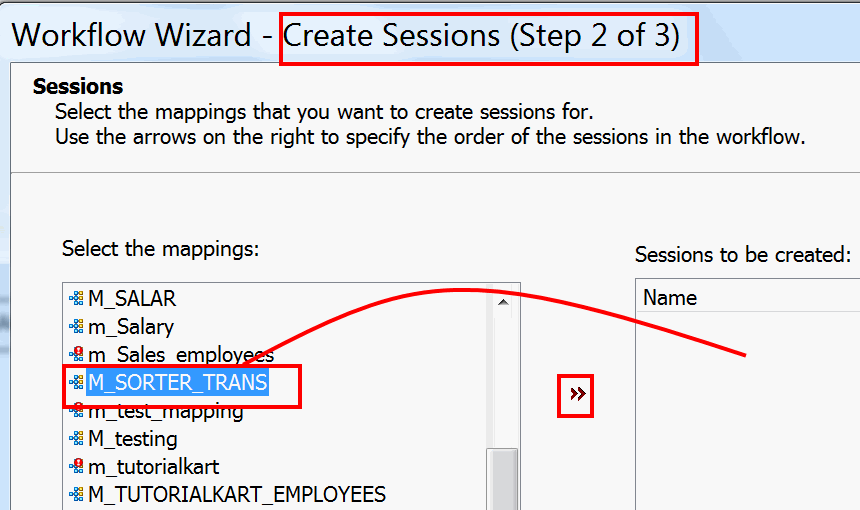
Step 2 : Creating session.
In step 2, select the mapping (M_SORTER_TRANS) that you want to create session for. Use the arrow on the right to specify the order of the session in the workflow.
- Click on Next button.
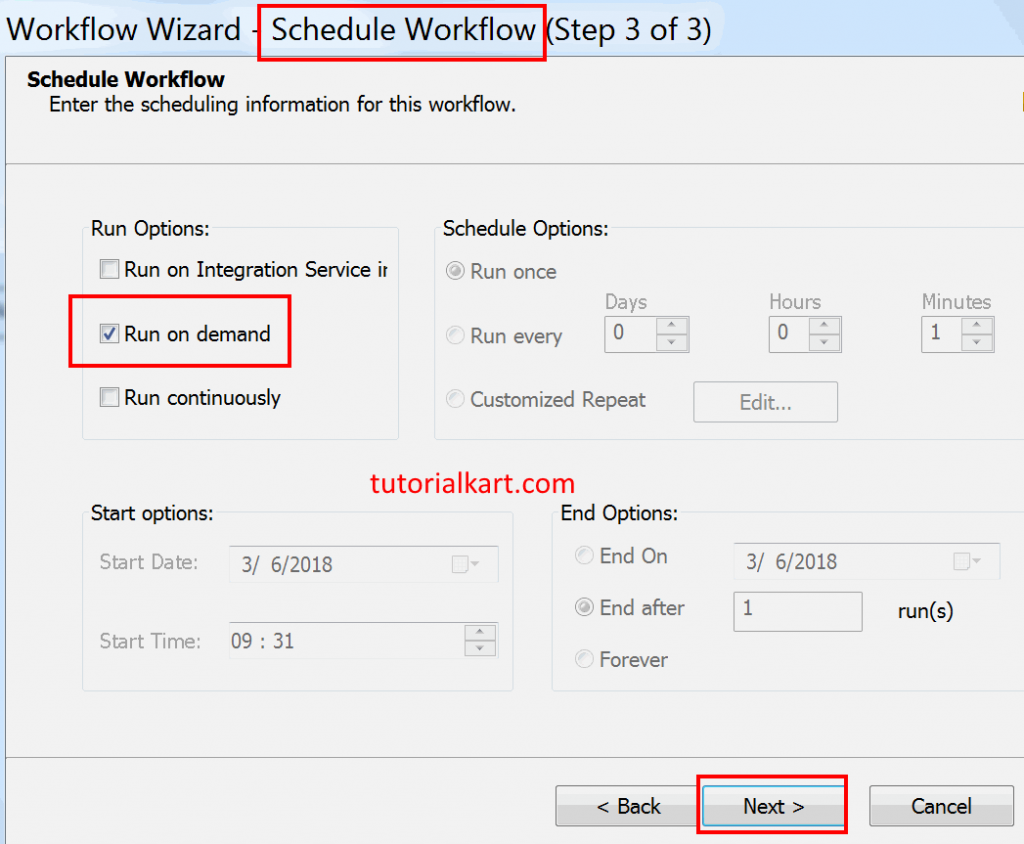
Step 3 : Schedule workflow.
Select run option as run on demand and click on Next button.
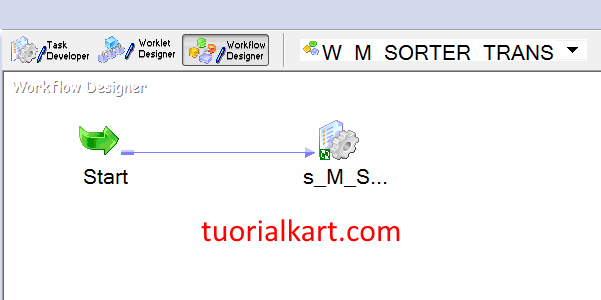
As shown below session(s_M_SORTER_TRANS) has been created and added to workspace automatically.
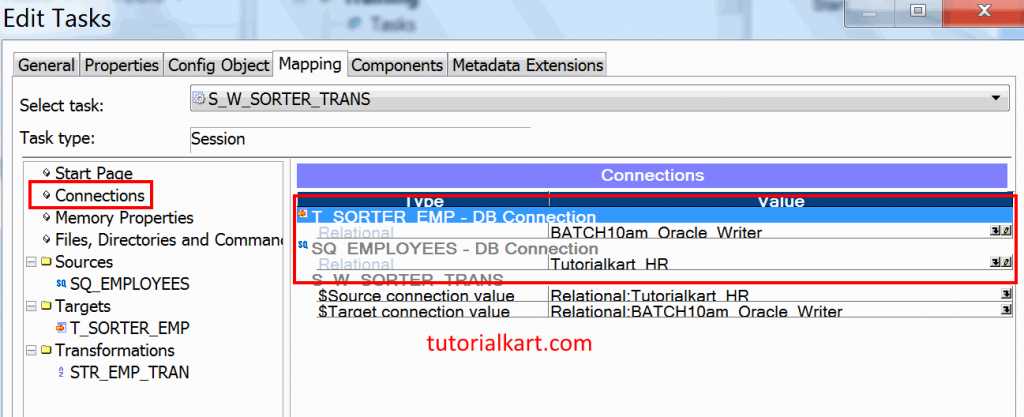
Go to Informatica PowerCenter Workflow manager and double click on Session to configure sources, target and some common properties like target load type, truncate target table.
Navigate to Mapping tab | connections and select source and target database connections.
- SQ EMPLOYEES – DB connection – Tutorialkart HR (Source ODBC connection).
- T_SORTER_EMP – DB connection – BATCH10am Oracle writer (Target ODBC connection).
- Change target load option from Bulk to Normal option.
- Select truncate target table option to truncate the existing data from the destination table.
- Save the workflow .
Run & Monitor Workflow
Before starting workflow, validate your workflow to check Informatica workflow is a valid one or not. Let us start the Informatica Workflow by navigating to Workflows menu and select Start Workflow option.
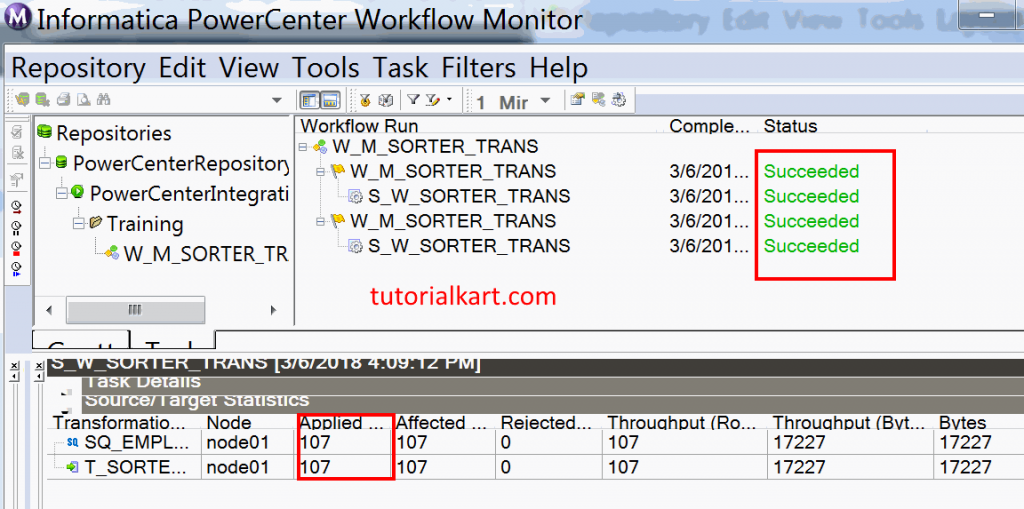
To monitor workflow status, open Informatica PowerCenter Workflow monitor. As shown below our workflow and session have been completed successfully.
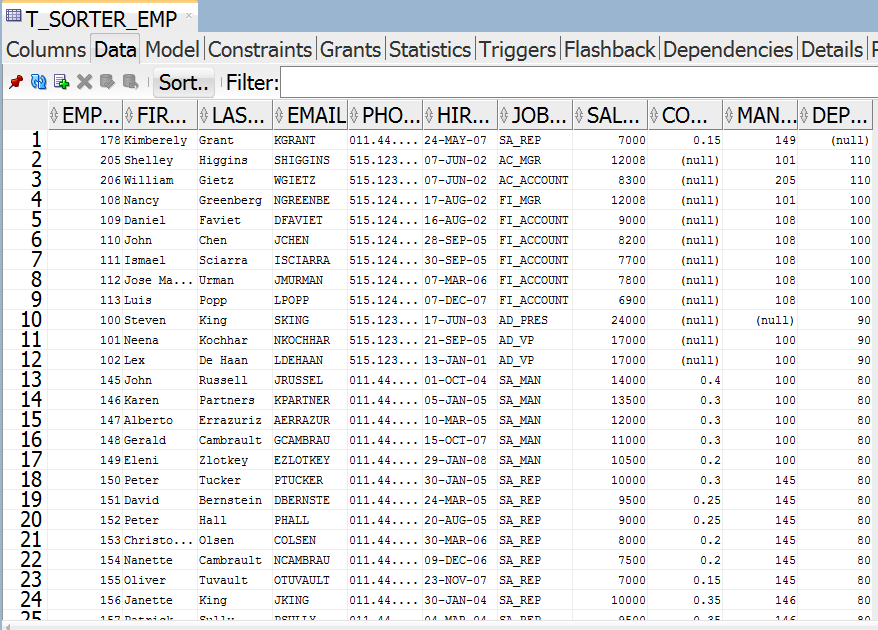
Sorter Transformation Output in SQL developer is