 TutorialKart.com
This guide explains how to download Tally ERP 9 and install it on a Windows computer. It also covers the practical options for running the Windows application on a Mac. Tally.ERP 9 is an older product, so the official download page may offer TallyPrime or another current release instead. Use Tally.ERP 9 only when you specifically need that version for an existing company, course, integration, or licence.
If you are new to the application, read what Tally ERP 9 is before installing it. Download installation files from Tally Solutions or another source you trust. Avoid modified installers, unofficial APK files, shared-drive copies, and websites that bundle unrelated software.
What to check before downloading Tally ERP 9
- Confirm that you need Tally.ERP 9 rather than the current Tally product available from the official website.
- Use a Windows account that is allowed to install applications.
- Keep the Tally serial number, administrator credentials, and licence details available if you plan to activate a licensed installation.
- Back up every existing company before upgrading, reinstalling, or moving Tally to another computer.
- Close other Tally sessions before changing program or data files.
- Check that security software permits the installer to run and that sufficient disk space is available.
The installer can be used without immediately activating a paid licence. The exact restrictions of an unlicensed or educational session depend on the release. A free installer does not mean that all business features are licensed for unrestricted commercial use.
How to download Tally ERP 9 from Tally Solutions
- Open the official Tally Solutions website at https://tallysolutions.com.
- Select the downloads option provided on the website.
- Look for Tally.ERP 9 if your account, support page, or regional download page still provides the legacy installer.
- Select Install Now when you want the small online setup program to download the required files during installation.
- Select Download for Later when an offline or full installer is available and you want to save it before starting the installation.
- Save the installer in a known folder and verify that its publisher is Tally Solutions before allowing it to make changes to Windows.
Legacy download references: The following links were supplied for older Tally.ERP 9 installers. Their availability and compatibility can change. Use them only after confirming that the download is served by Tally Solutions.
Download Latest Version of Tally from here
How to install Tally ERP 9 on Windows
After downloading the Tally ERP 9 setup file, complete the following steps. The labels and screens may differ slightly between releases, but the installation sequence remains similar.
- Open File Explorer and go to the folder in which the Tally installer was saved.
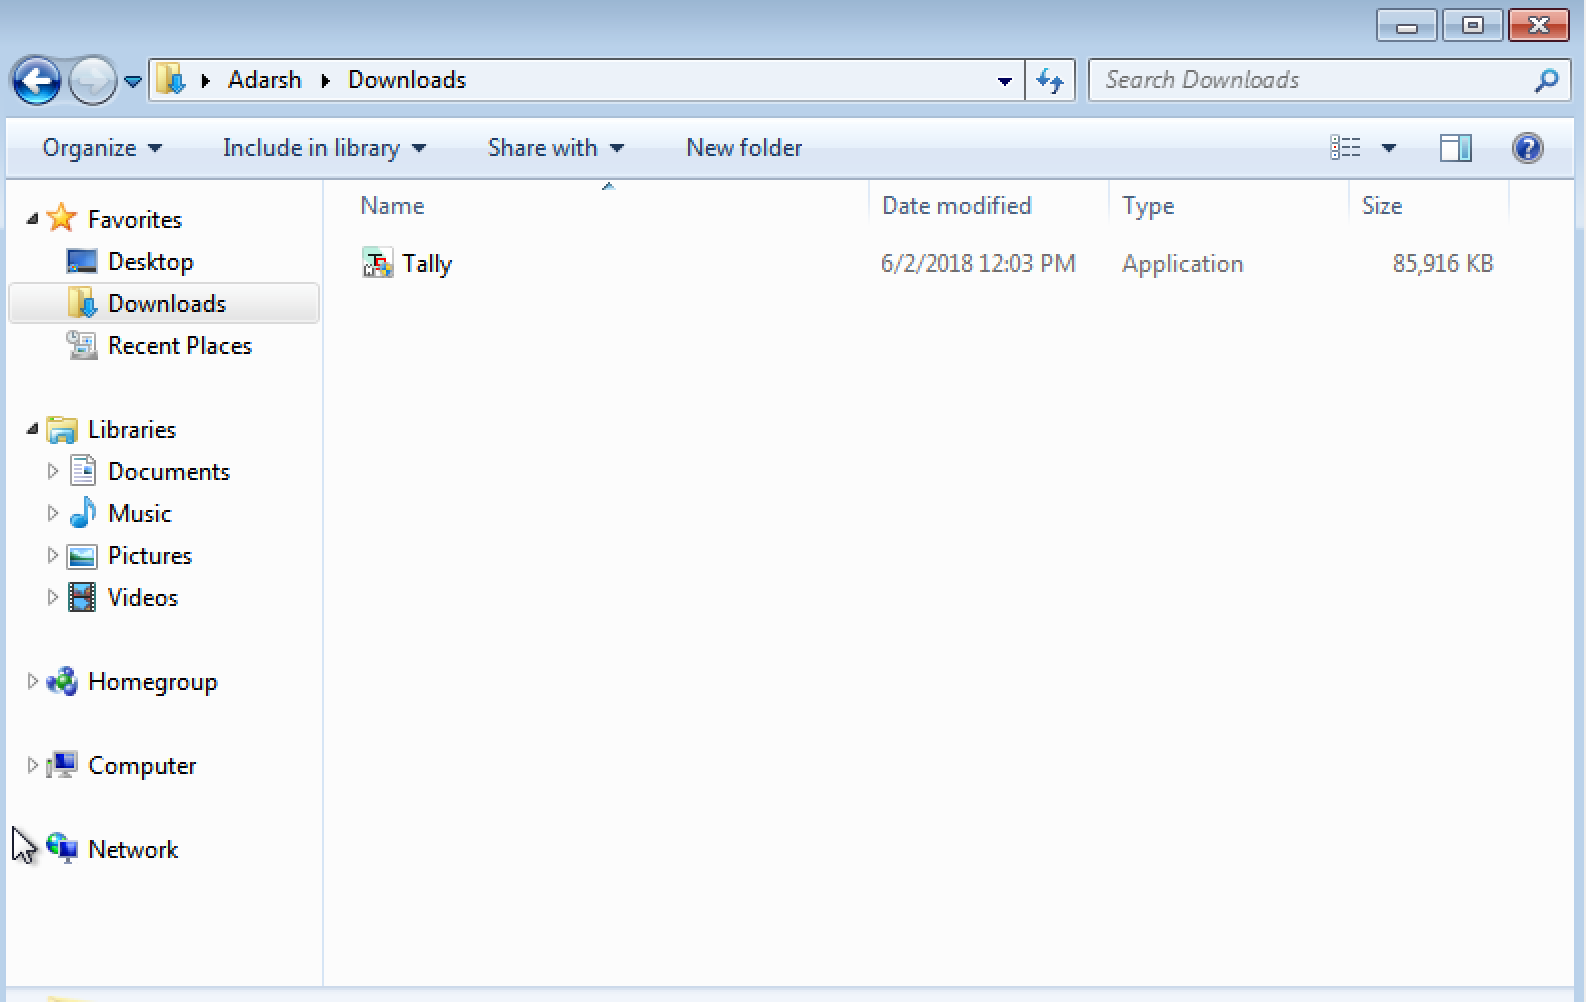
- Double-click the Tally setup application.
- When Windows User Account Control asks whether the application can make changes to the computer, confirm the verified publisher and click Yes.
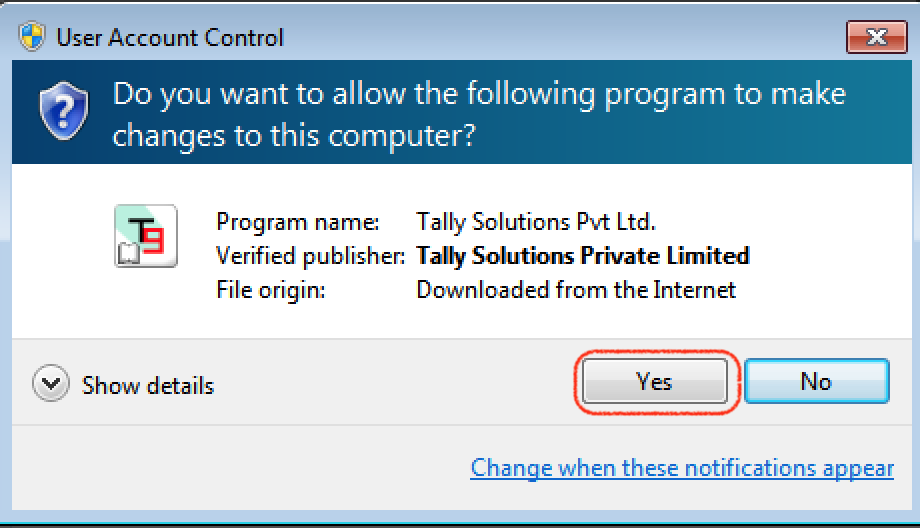
- Review the application installation path. Keep the default location unless your organisation uses a defined software folder.
- Check the data-directory setting separately. The program folder and company-data folder serve different purposes and should not be treated as interchangeable.
- Click Install and wait for the setup process to finish.
- Open Tally.ERP 9 and select the appropriate licensing or educational option.
- Before opening an old company, create a separate backup of its data. A newer release may alter data during migration.
Installing Tally ERP 9 with the online installer
The online installer is a small setup program that downloads the required application files during installation. Use a stable internet connection and keep the setup window open until it completes.

- Select Install Now on the download page.
- Open the downloaded folder and double-click the setup icon.
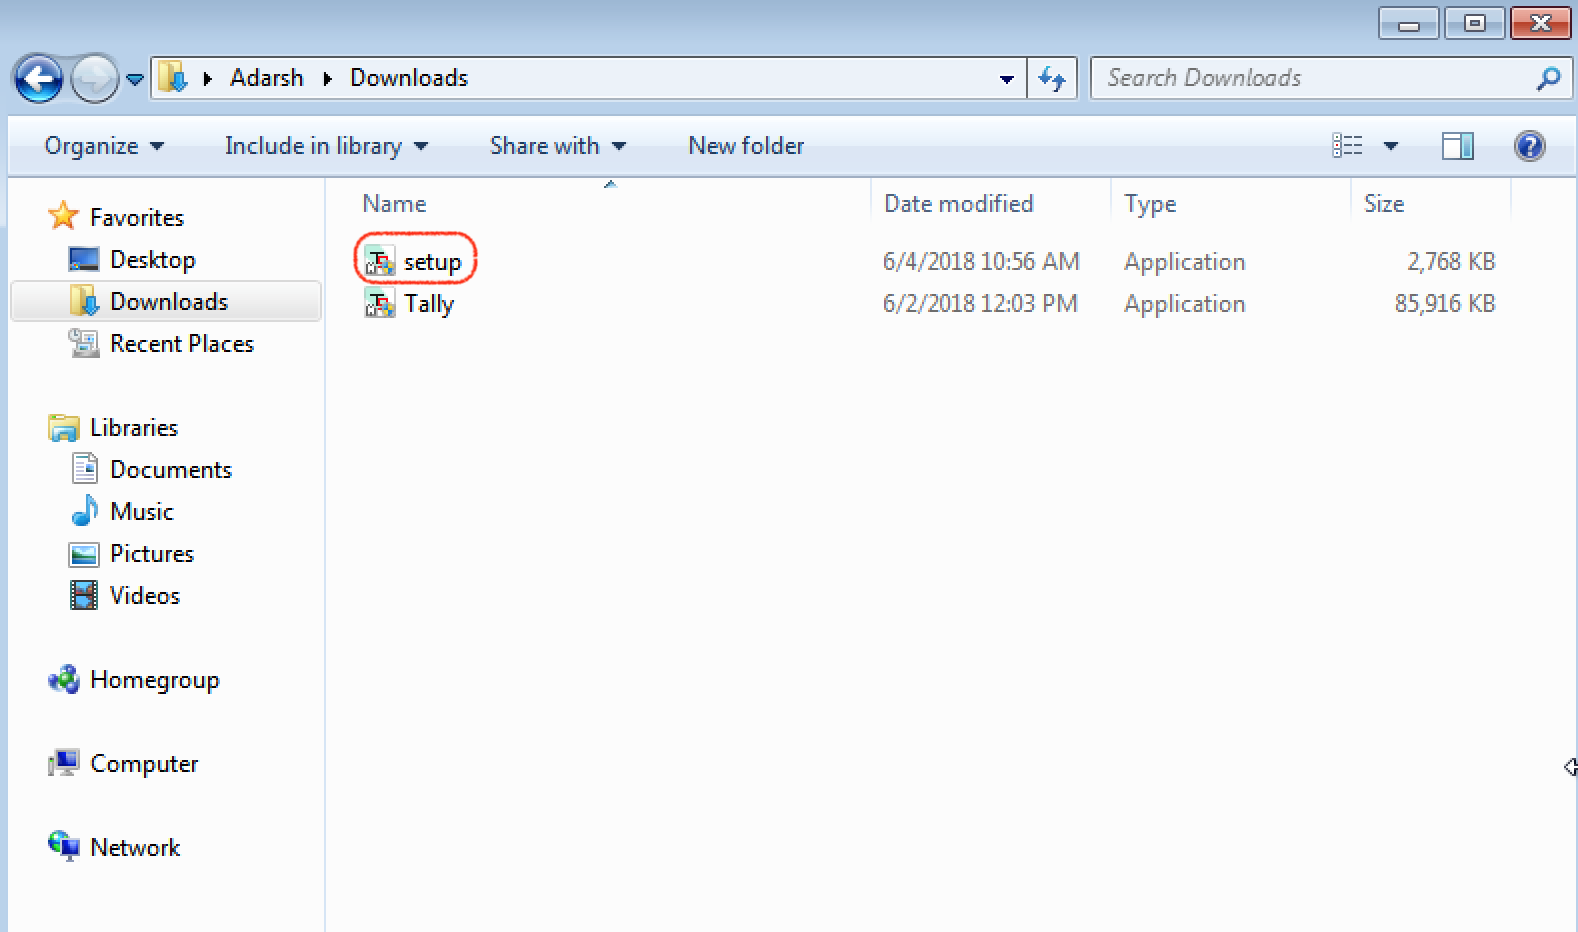
- Confirm the verified publisher in the User Account Control window, and then select Yes.
- Review the installation folder and click Install.
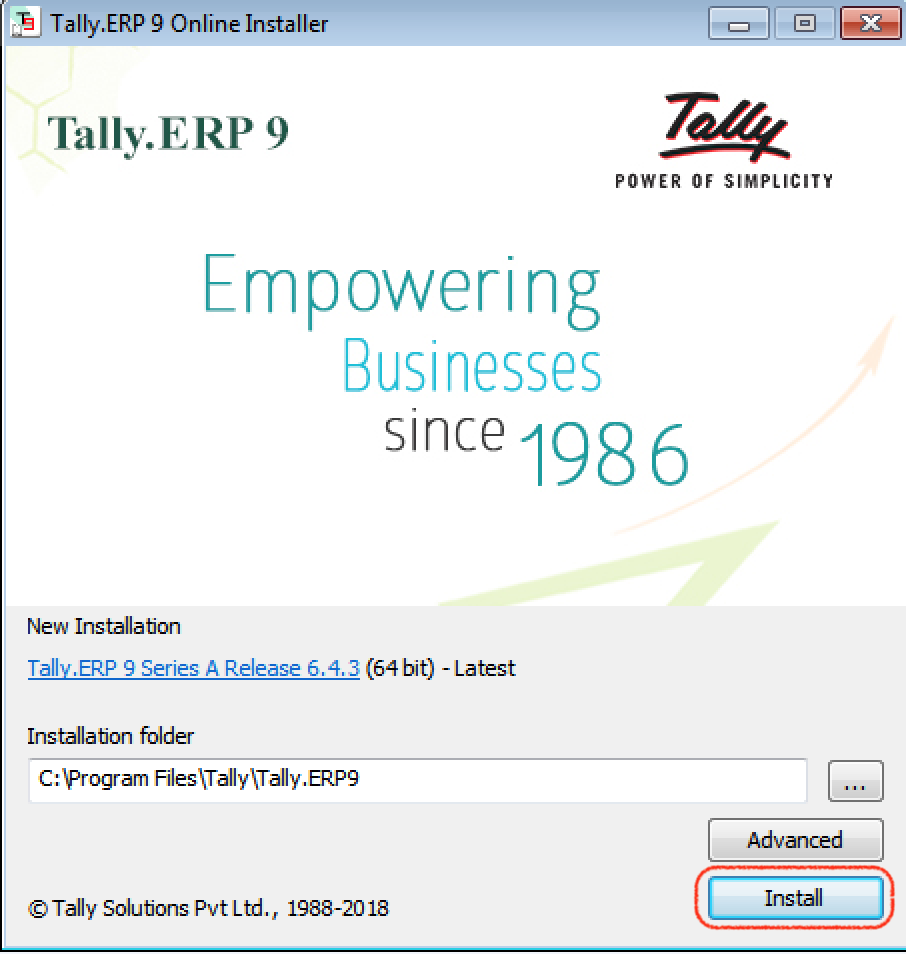
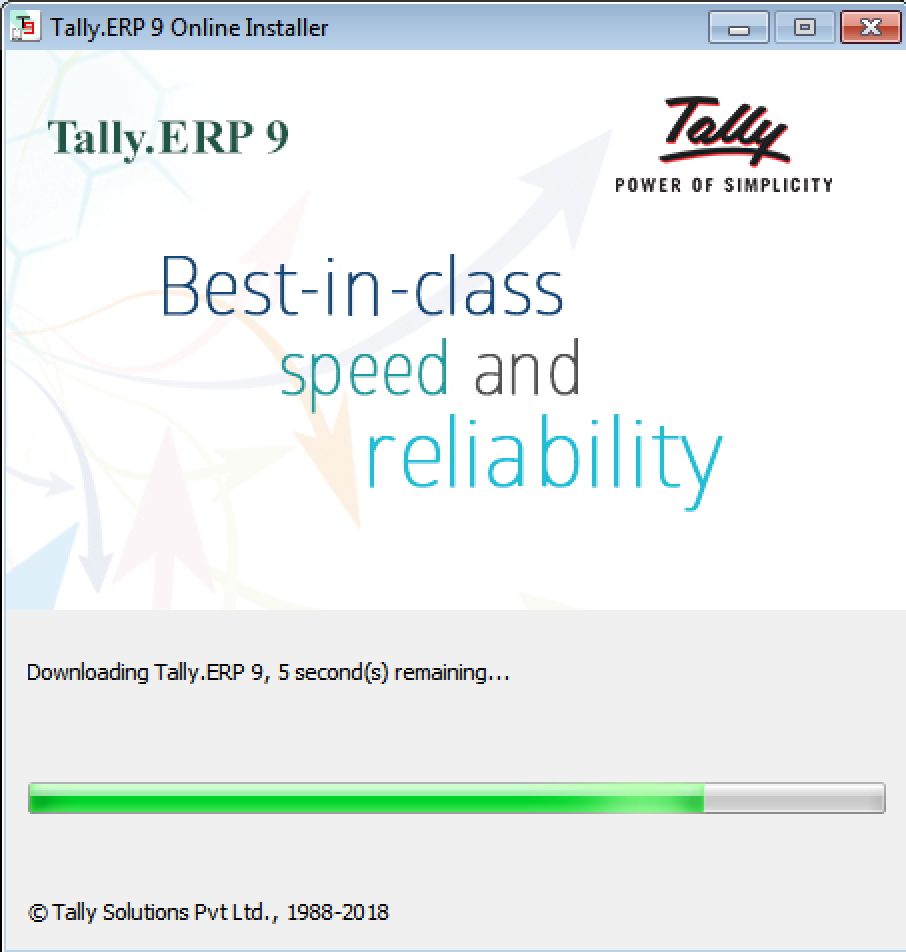
The installer displays its progress while it downloads and installs the necessary files. Do not disconnect the network or close the setup application during this stage.
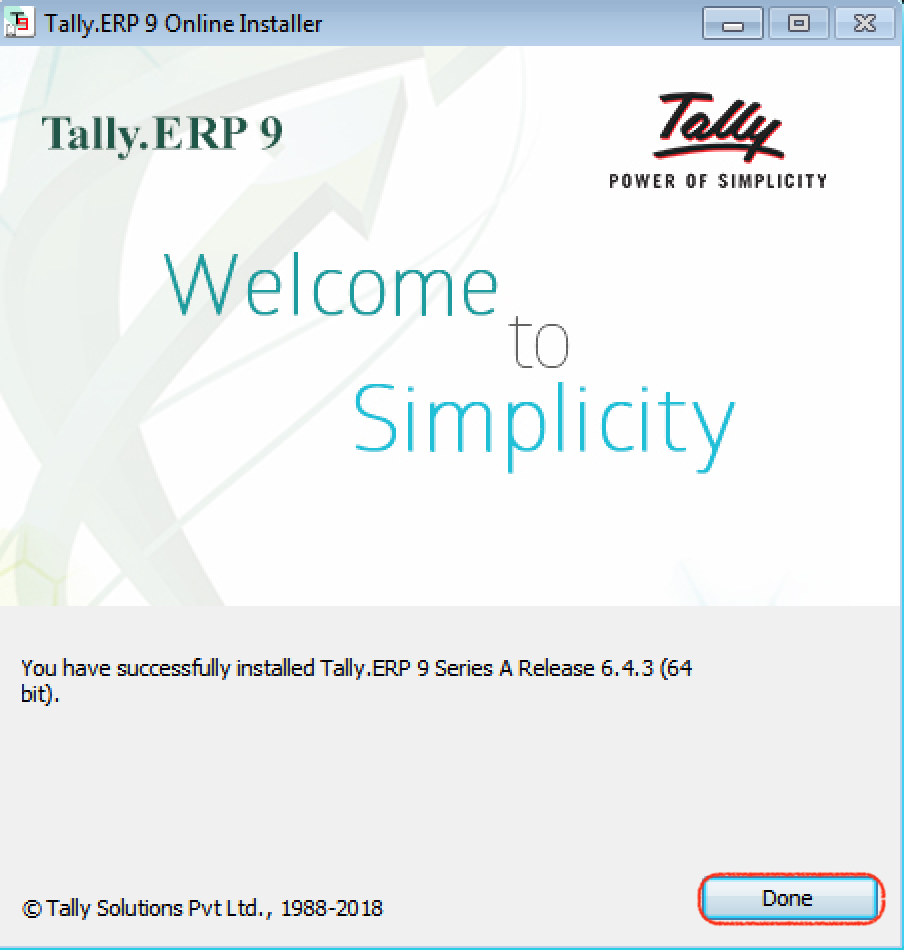
When the completion message appears, note the installed Tally.ERP 9 release and close the installer.
First startup, licence selection, and company-data location
Start Tally.ERP 9 from the desktop shortcut or Windows Start menu. The first screen may ask you to activate, reactivate, configure, or use the available educational mode. Select the option that matches your licence status.
- New practice installation: Use the educational option offered by the installed release and create a sample company rather than entering live financial data.
- Licensed installation: Follow the activation process associated with your serial number and account. Network and firewall access may be required.
- Existing company: Confirm the data path before selecting the company. Do not overwrite its only copy.
- Shared data: Obtain the correct server or network path from the administrator and verify that the user has the required permissions.
How to install Tally ERP 9 on another Windows computer
Installing the application on another computer and moving a company are separate tasks. Install the required Tally release first, and then transfer the company by using Tally’s backup and restore functions. Copying only the desktop shortcut or setup program does not move the accounting data.
- Open the original installation and create a current backup of each company.
- Copy the backup to a controlled storage location.
- Install a compatible Tally.ERP 9 release on the destination computer.
- Restore the backup into a new destination folder rather than overwriting unrelated data.
- Open the restored company and verify its name, financial period, latest vouchers, ledgers, statutory settings, and user access.
- Reactivate or transfer the licence only through the licensing process applicable to your entitlement.
- Retain the original backup until the destination installation has been checked and accepted.
Do not open the only production copy while testing a different Tally release. Data upgraded by a newer release may not open in an older release without a suitable backup.
Can Tally ERP 9 be installed directly on macOS?
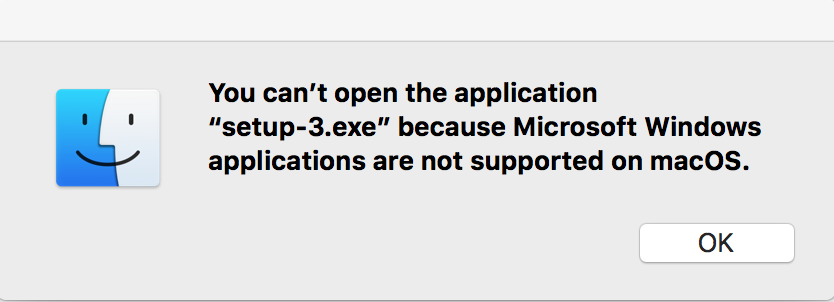
Tally.ERP 9 is a Windows desktop application and its Windows installer does not run directly as a native macOS application. Opening the downloaded setup file on macOS can therefore produce an unsupported-file or application error.
Common ways to access Tally from a Mac include using a Windows virtual machine, connecting to a managed Windows computer through remote desktop, or using a hosted Windows environment approved by the organisation. Compatibility depends on the Mac model, processor architecture, macOS release, Windows licence, virtualisation software, and required Tally version.
Running Tally ERP 9 in a Windows virtual machine on Mac
The screenshots below demonstrate an older Intel Mac, VirtualBox, and Windows workflow. They should be treated as a legacy example rather than current compatibility guidance. The linked VirtualBox 5.2.12 installer is also an archived version and may not run on a recent Mac. Before proceeding, obtain a compatible virtualisation application and a properly licensed, supported Windows installation.
Step 1: Download Oracle Virtual Box (File Size: 95 Mb) – click here to download
Step 2: Open the downloaded package and install VirtualBox if that release is compatible with the Mac. Approve only the permissions required by the virtualisation software.
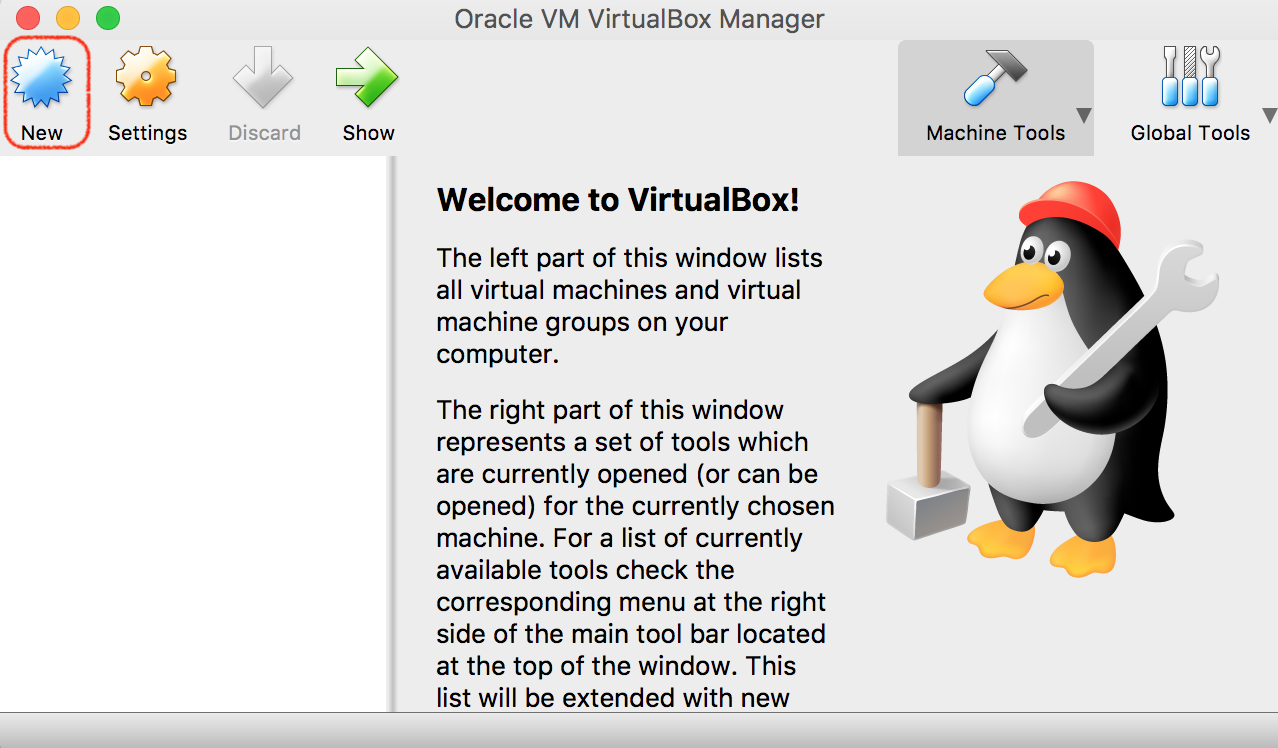
Step 3: Open VirtualBox and select New to create a Windows virtual machine.
Step 4: Enter a name for the virtual machine and select the Windows type and version that match the installation media. The screenshot uses Windows 7 64-bit as a historical example; use an operating system that is supported in your environment.
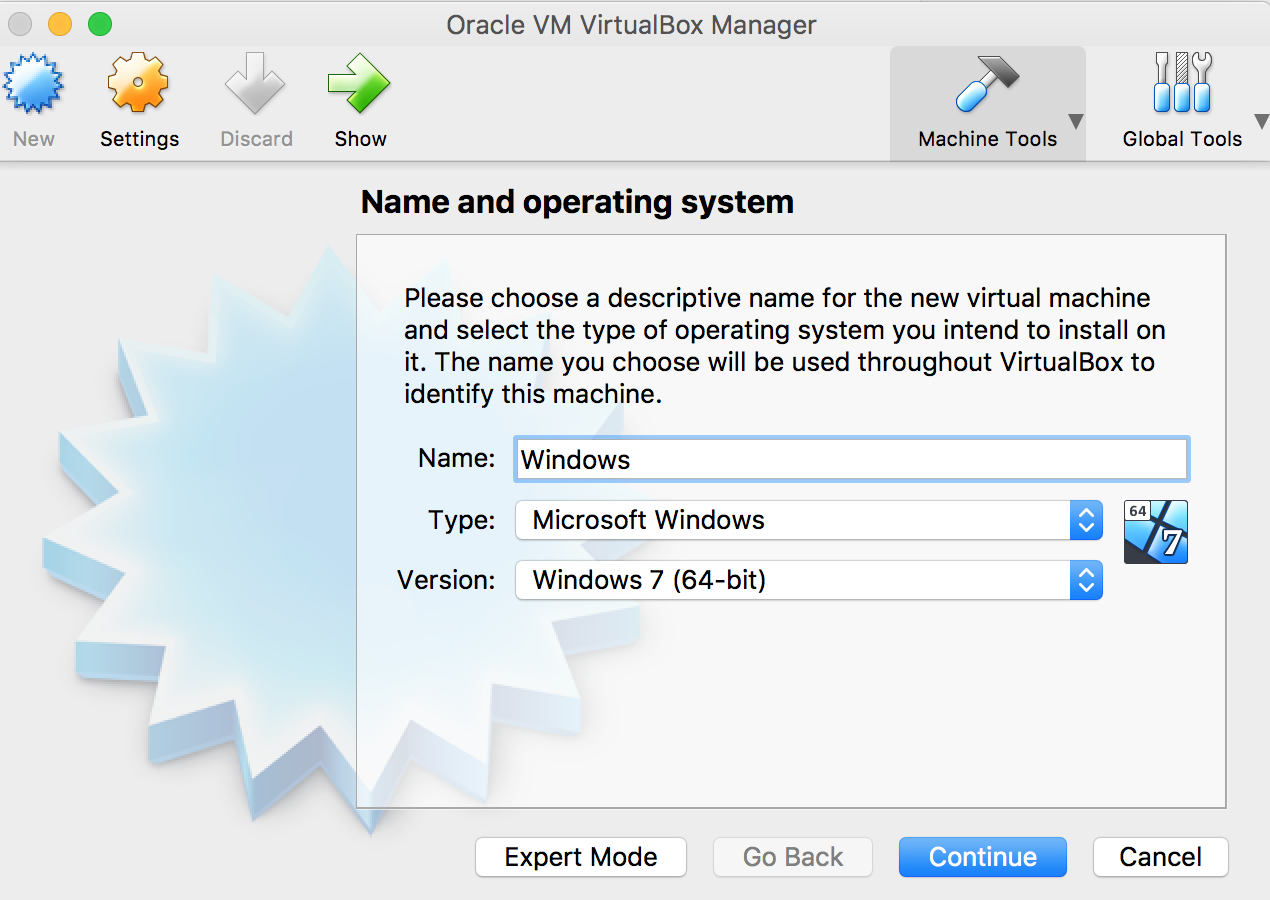
Step 5: Allocate memory to the virtual machine without assigning so much that macOS becomes unstable. The suitable value depends on the Mac’s installed memory and the Windows version.
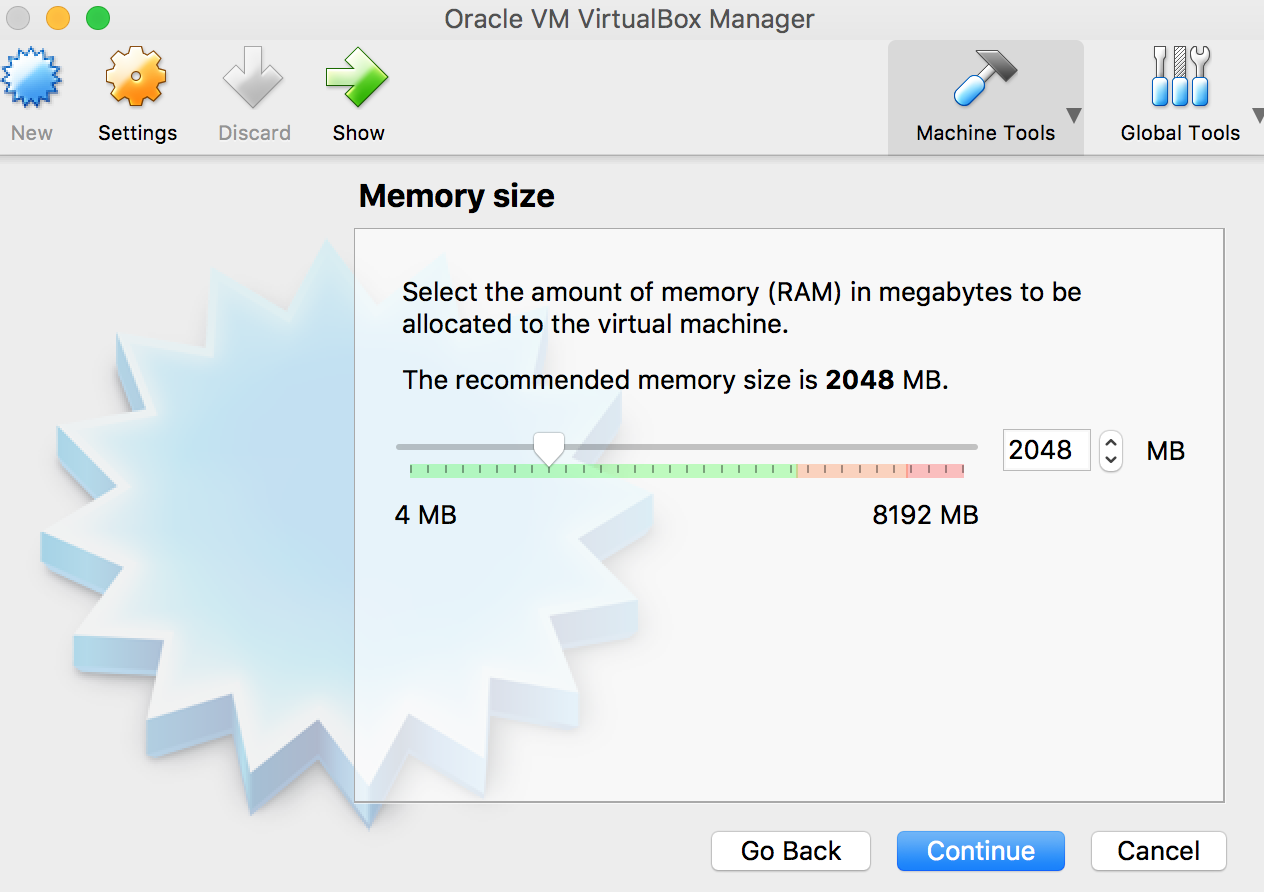
Step 6: Select Create a virtual hard disk now, and then click Create.
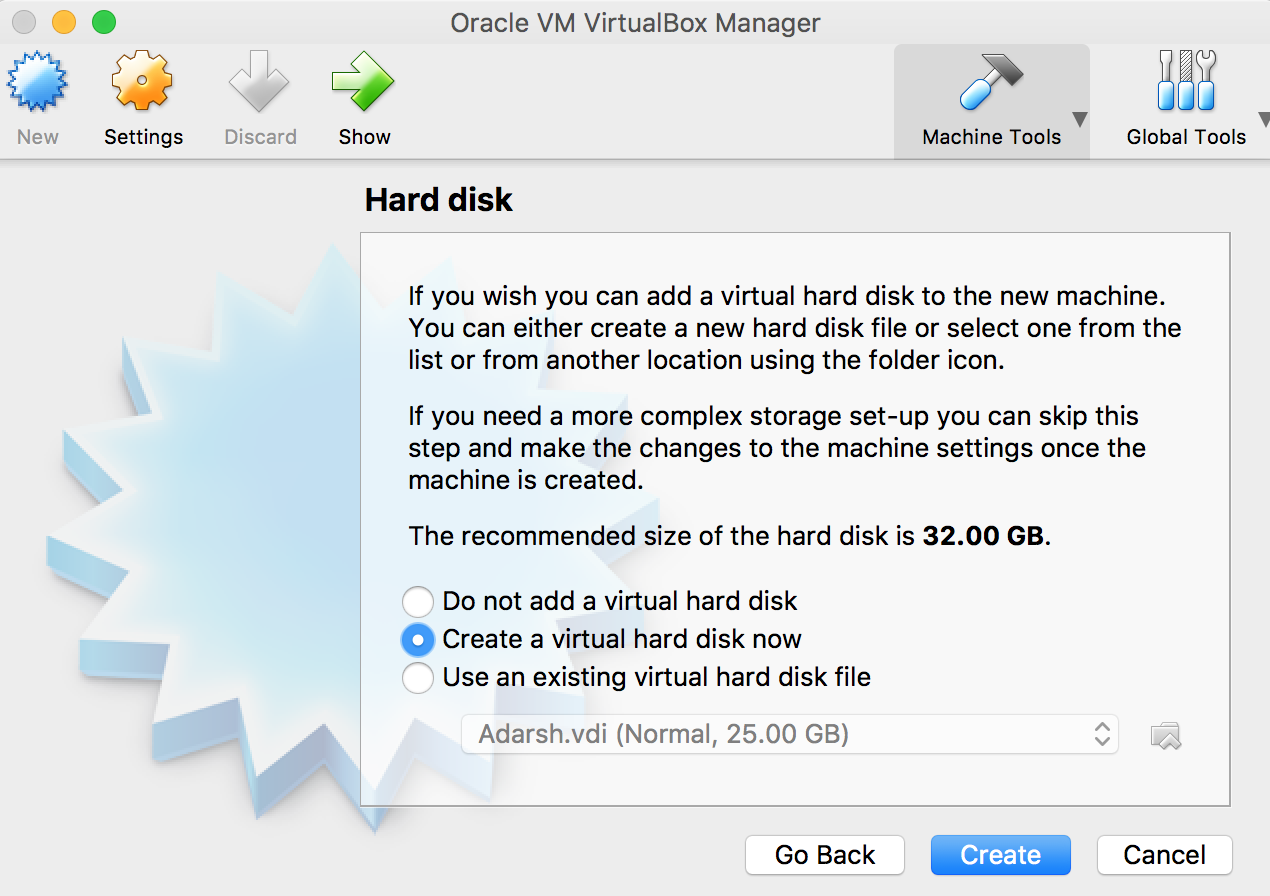
Step 7: Select the virtual-disk format required by your virtualisation setup. The older example selects VHD.
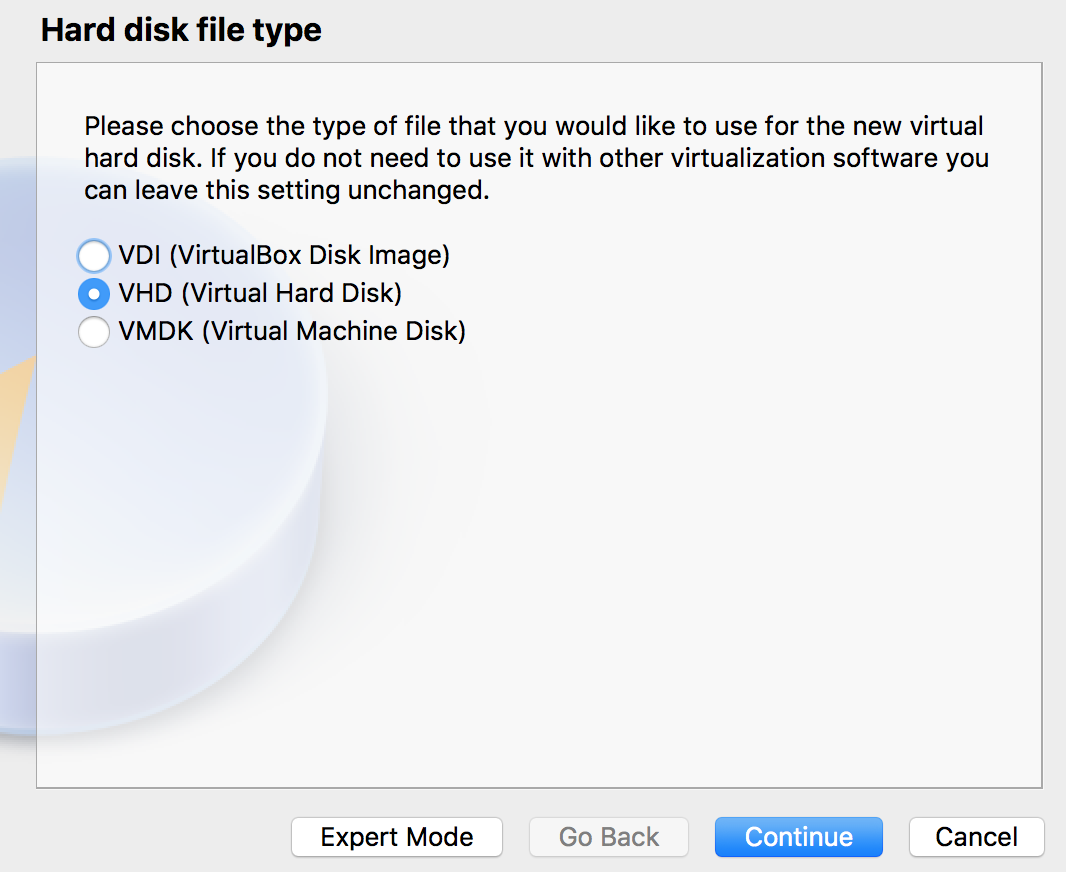
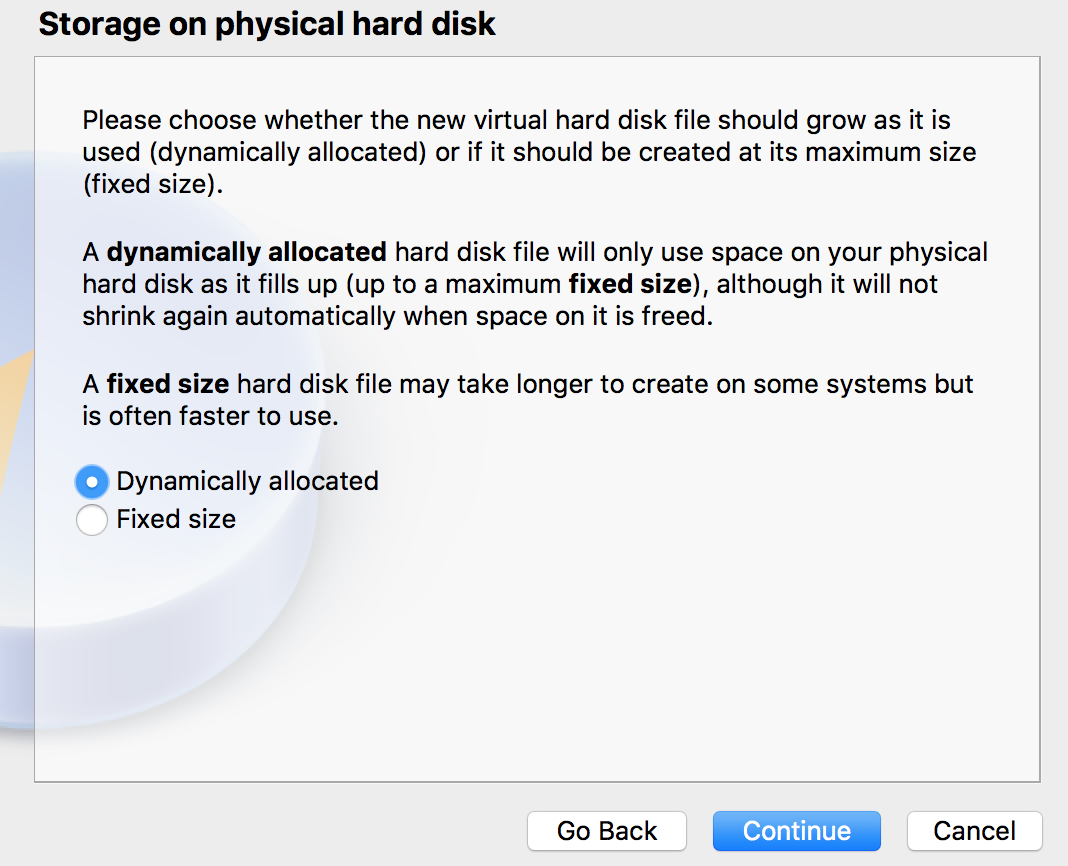
Step 8: Choose a dynamically allocated or fixed-size virtual disk. A dynamic disk initially consumes less physical storage, but it grows as data is written.
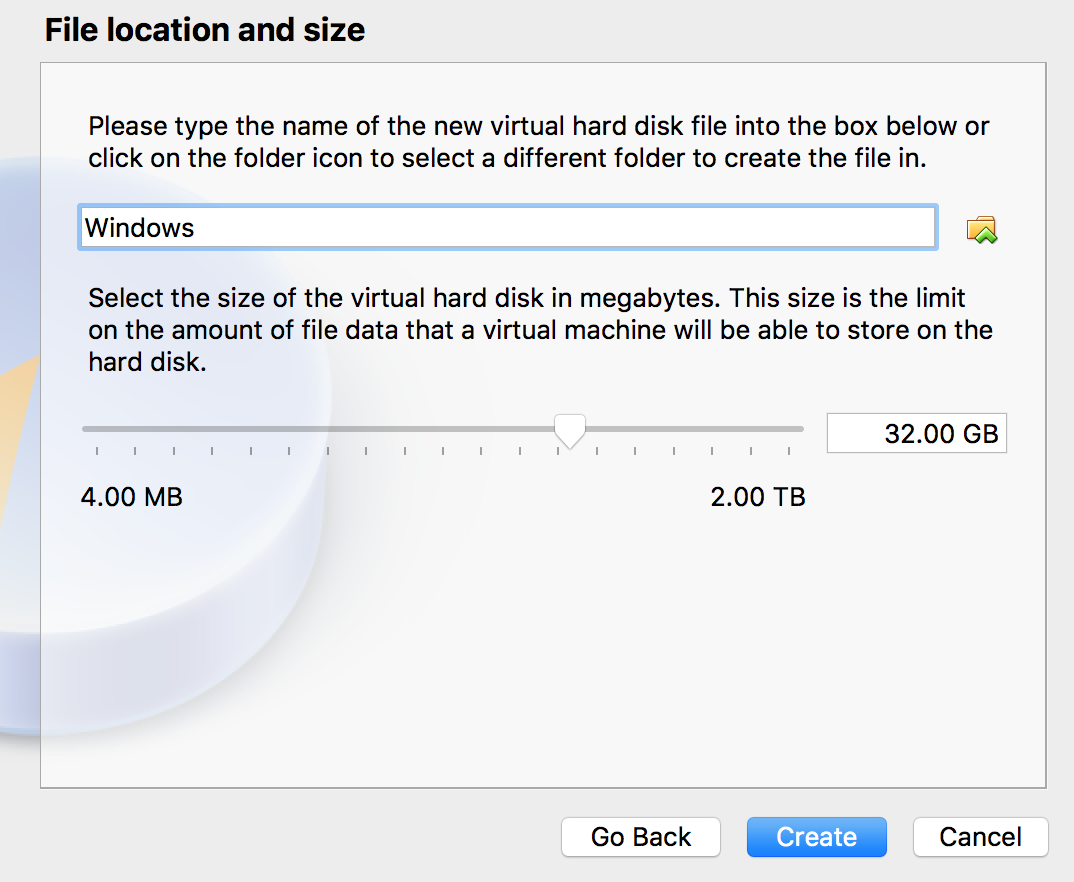
Step 9: Choose the virtual-disk file location and capacity, and then create the virtual machine. Allow space for Windows, updates, Tally, company backups, and normal system operation.
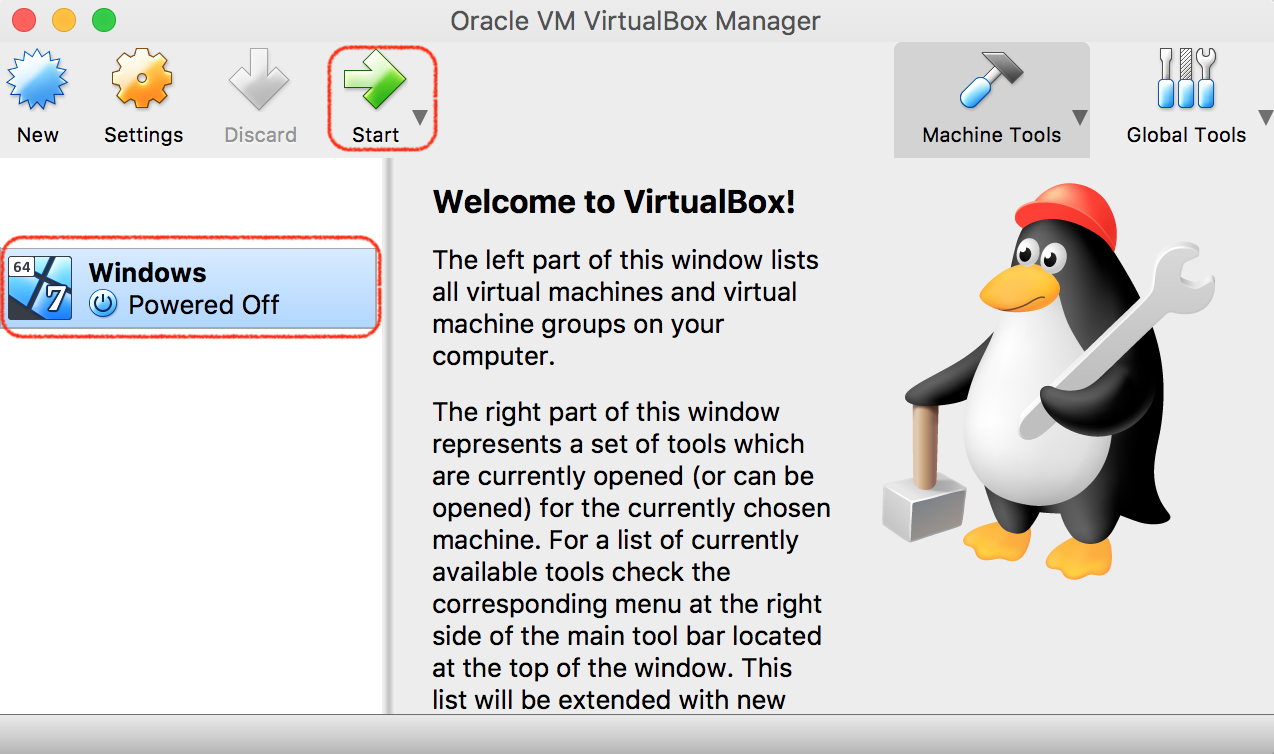
Step 10: Select the newly created virtual machine and click Start.
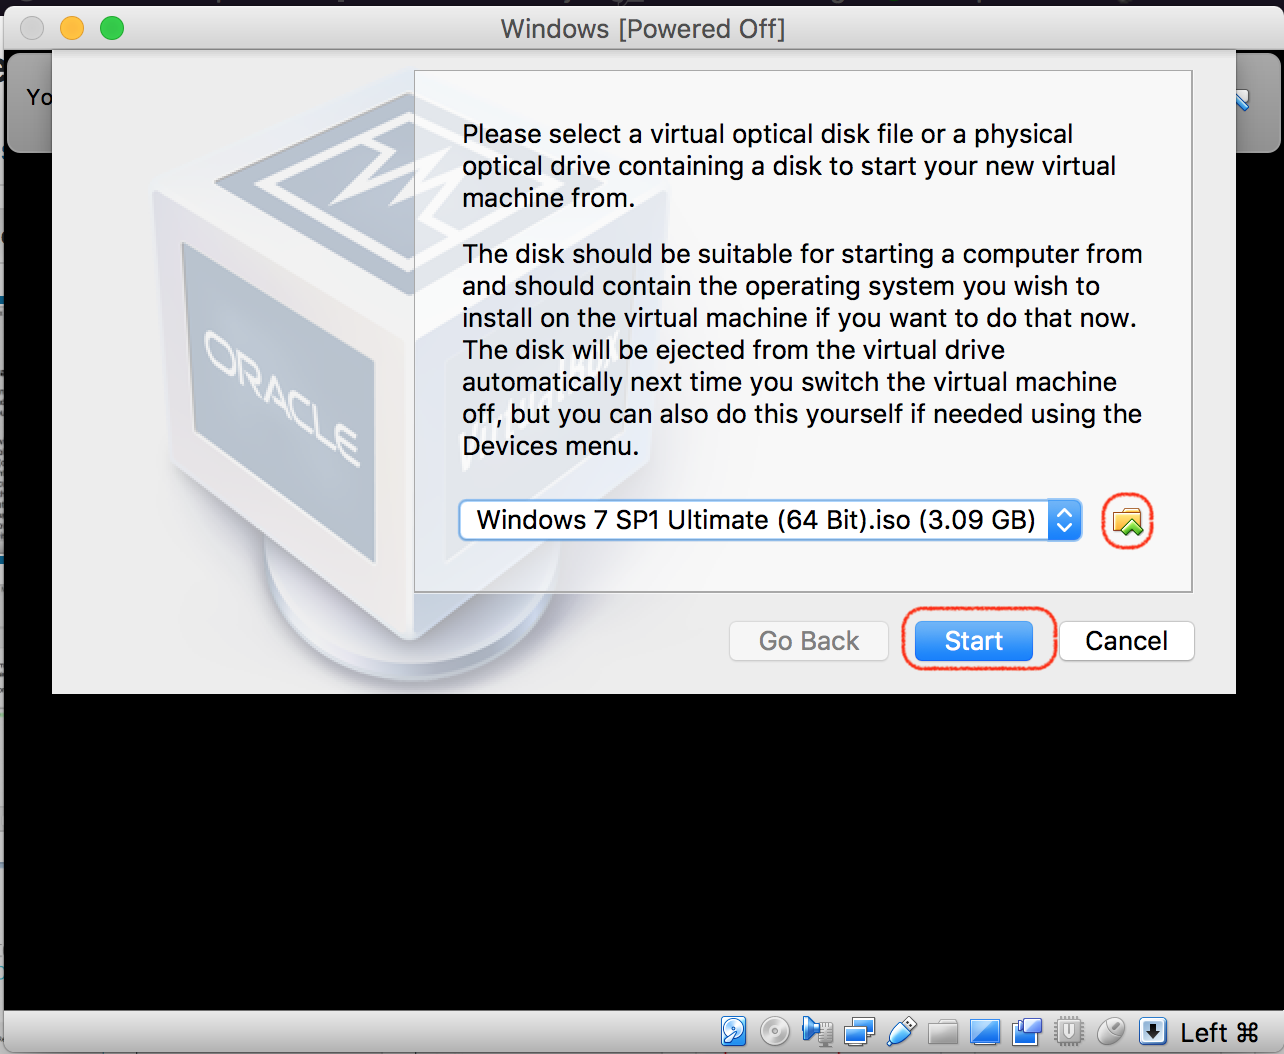
Step 11: Select the licensed Windows installation image or optical-disk file and start the virtual machine.
Step 12: Complete the Windows setup, install system updates and virtual-machine integration tools, and restart Windows if required.
Step 13: Inside the Windows virtual machine, download Tally from a trusted source and follow the Windows installation procedure described earlier. Keep Tally company backups outside the virtual machine as well, because losing or corrupting the virtual-disk file can make its internal data unavailable.
Tally ERP 9 installation problems and practical checks
| Installation problem | What to check |
|---|---|
| The setup file does not open | Confirm that it is a Windows installer, download it again from a trusted source, and check whether Windows security has blocked the file. |
| User Account Control rejects setup | Use an account with installation permission and verify the publisher before approving the prompt. |
| Online installation stops | Check the network connection, available disk space, proxy settings, firewall rules, and temporary-file access. Use an official offline installer if one is available. |
| Tally opens but no company appears | Confirm the configured data path. Installing Tally does not automatically copy companies from another computer. |
| An old company cannot be opened | Check the Tally release used to create or last alter the data. Work from a backup and avoid repeated conversion attempts on the only copy. |
| Licence activation fails | Check the serial number, administrator credentials, network access, computer date and time, and whether the licence is already active elsewhere. |
| The Mac reports that the application cannot be opened | The Windows Tally installer is not a native macOS application. Run it inside a compatible Windows environment or access a Windows computer remotely. |
Tally ERP 9 download and installation FAQs
Can I download Tally ERP 9 for free?
You may be able to download an installer without paying for the file, but licensed business use depends on the product terms and licence assigned to you. If the official website no longer lists Tally.ERP 9, do not substitute an unofficial or modified installer.
Can I install Tally ERP 9 directly on a Mac?
No native macOS installation is described in this guide. Tally.ERP 9 uses a Windows installer, so Mac users generally need a compatible Windows virtual machine, a remote Windows computer, or an approved hosted Windows environment.
How do I move Tally ERP 9 to another computer?
Install a compatible Tally release on the destination computer, create a verified backup on the original computer, and restore that backup at the destination. Handle licence reactivation separately and retain the original backup until the transferred company has been checked.
Is a Tally ERP 9 Android APK an official replacement for the Windows program?
Do not assume that an APK using the Tally name is an official version of the Windows desktop application. Verify mobile products through Tally Solutions and avoid downloading accounting software from untrusted APK websites or shared-drive links.
Tally ERP 9 installation QA checklist
- The installer was obtained from Tally Solutions or another verified source.
- The installed product and release match the company data and organisational requirements.
- The Windows installation folder and Tally company-data folder have been identified separately.
- A restorable company backup exists outside the computer or virtual machine being changed.
- Licence activation or educational-mode selection has been completed correctly.
- At least one company was opened and its latest vouchers, financial period, ledgers, and statutory configuration were checked.
- Mac instructions are presented as Windows virtualisation or remote-access options, not as a native macOS installation.
- Legacy Windows, VirtualBox, and Tally screenshots are not treated as proof of compatibility with current hardware or operating systems.