 TutorialKart.com
Create Multiple Ledgers in Tally.ERP 9
The Multiple Ledgers option in Tally.ERP 9 lets you create several ledger accounts from one screen. This is useful when entering a list of customers, suppliers, expenses, or other accounts that belong to the same group. Before creating the ledgers, create the required account group or identify the appropriate predefined group in Tally.
This tutorial uses the Tally.ERP 9 interface shown in the screenshots. TallyPrime uses different menus, but the accounting principle remains the same: every ledger must be placed under a suitable group.
Open the Multiple Ledger Creation Screen in Tally.ERP 9
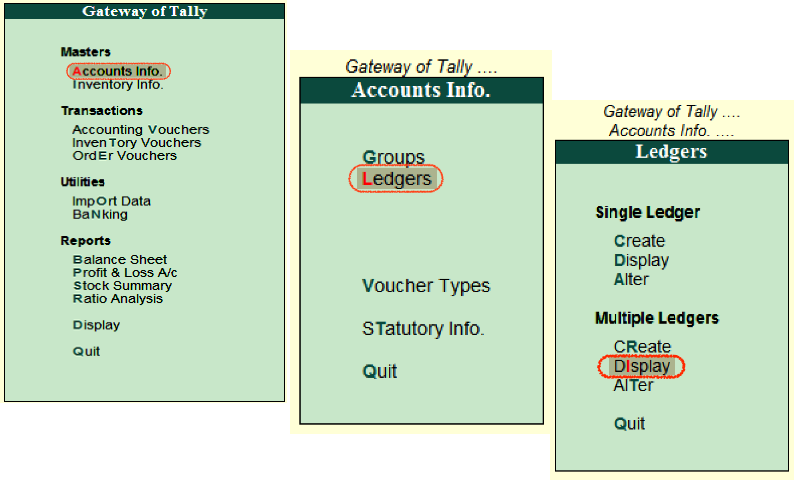
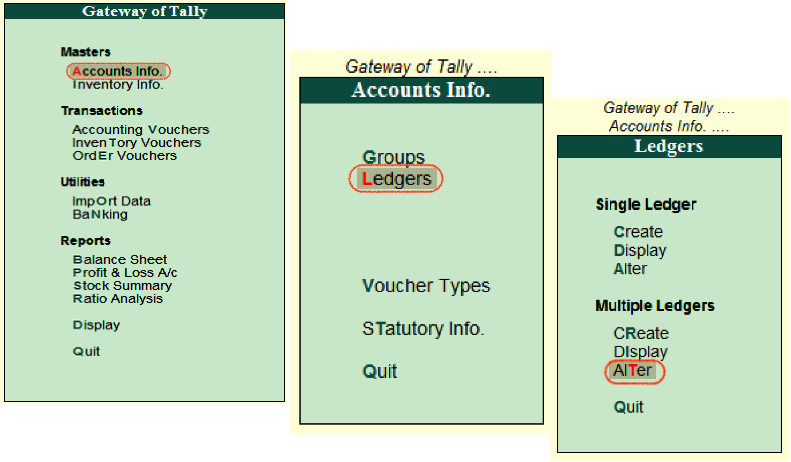
Step 1: From the Gateway of Tally, select Accounts Info.
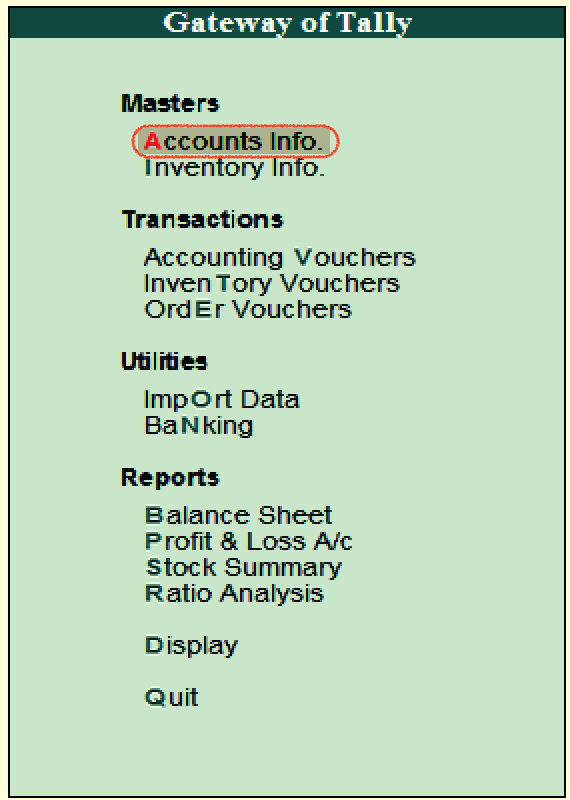
Step 2: Under Accounts Info., select Ledgers.
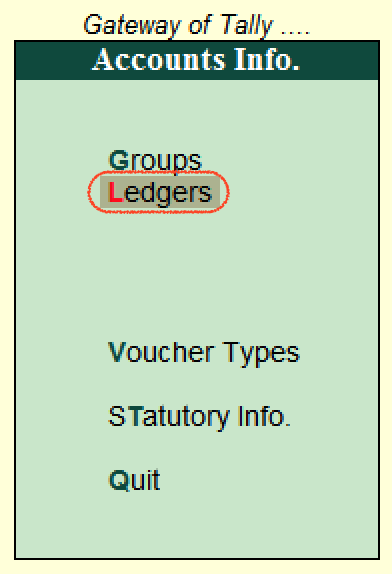
Step 3: In the Multiple Ledgers section, select Create.
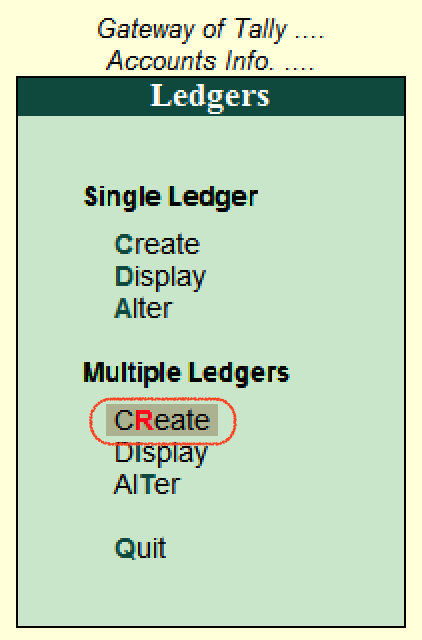
The complete navigation path is:
Gateway of Tally → Accounts Info. → Ledgers → Multiple Ledgers → Create
Select the Group for the New Ledgers
Step 4: On the Multi Ledger Creation screen, select the group under which the ledgers must be created. In this example, the group is Bangalore Debtors. You can locate a group by typing its name in the Under Group field.
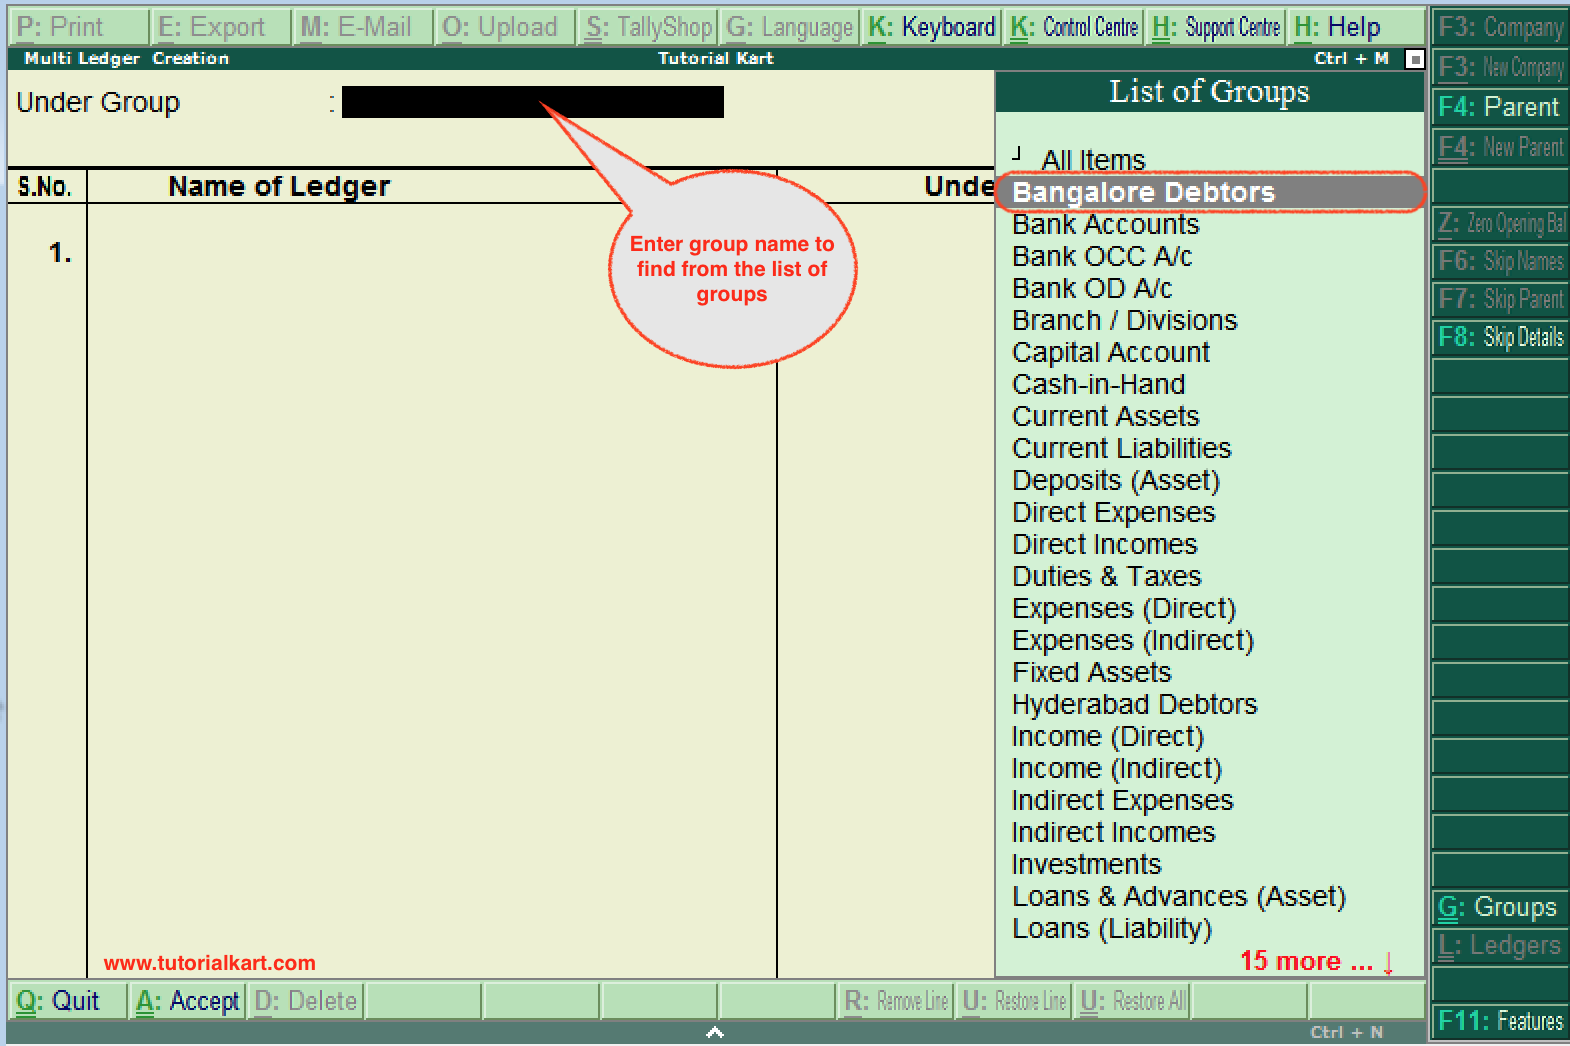
Selecting the correct group is important because Tally uses the group to classify the ledger in financial reports. For example, customer accounts are generally placed under Sundry Debtors, while supplier accounts are generally placed under Sundry Creditors. Use the group that matches the actual nature of the account.
Enter Ledger Names and Opening Balances
Step 5: On the ledger entry screen for Bangalore Debtors, enter each ledger on a separate row.
- Name of Ledger: Enter a clear and unique name for the ledger.
- Under: Tally automatically fills this field with Bangalore Debtors because that group was selected on the previous screen.
- Opening Balance: Enter the balance as of the company’s books beginning date when an opening balance exists. Select the correct Dr or Cr designation.
- Press Enter to move through the fields and add the next ledger.
- After entering all required ledgers, accept the screen by choosing Yes when Tally displays the acceptance prompt.
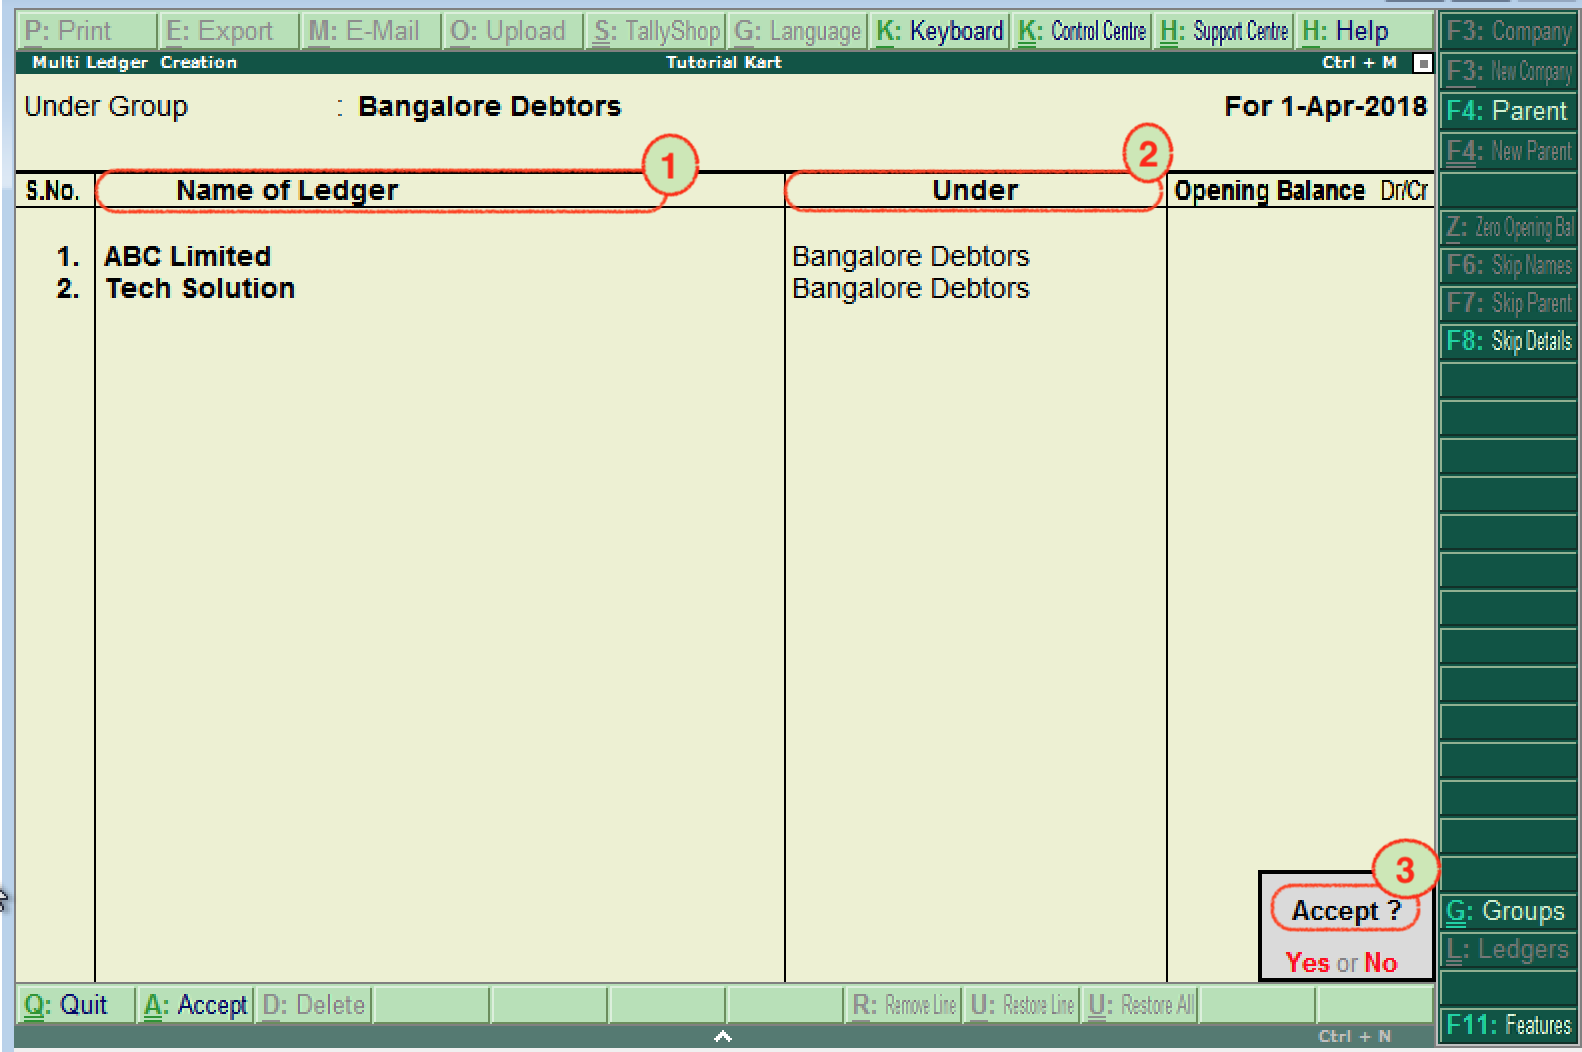
The ledger records are saved after the Multi Ledger Creation screen is accepted. If ledgers must be created under different groups, complete the entries for the current group and then repeat the process for another group.
Checks Before Accepting Multiple Ledgers
- Confirm that every ledger name identifies the correct customer, supplier, bank, expense, or other account.
- Check that the selected parent group matches the accounting nature of every ledger on the screen.
- Verify opening-balance amounts and their Dr or Cr designation against the source records.
- Avoid creating a second ledger for an account that already exists under a slightly different spelling.
- Review the rows before accepting because an incorrect group can affect how balances appear in reports.
Display Multiple Ledgers in Tally.ERP 9
After creating the ledgers, use the Display option to review the ledgers belonging to a selected group.
Path: Gateway of Tally –> Accounts Info –> Ledgers –> Multiple Ledgers (Display).
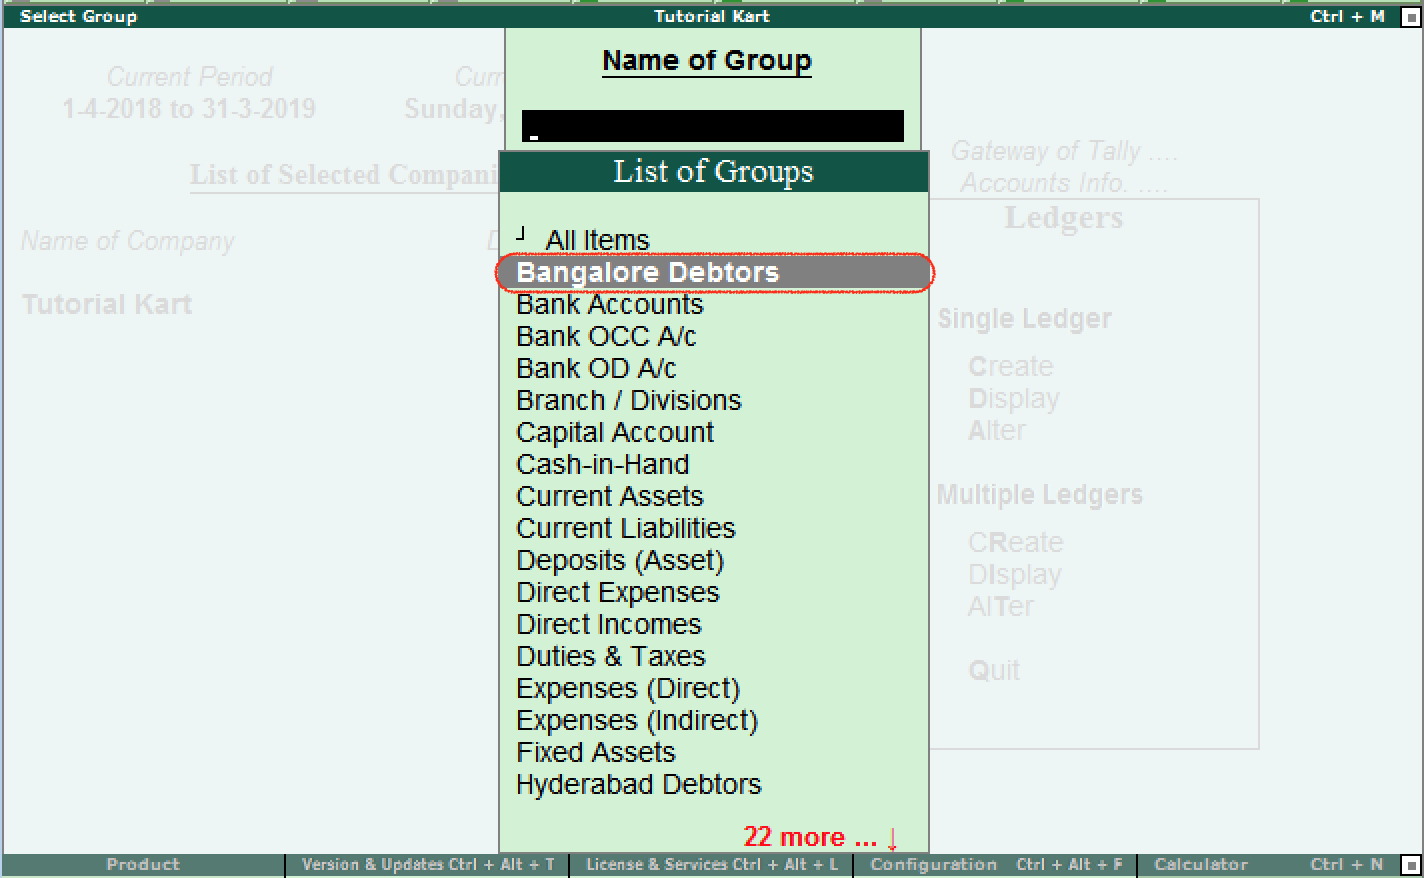
On the Select Group screen, choose Bangalore Debtors or the group whose ledgers you want to inspect.
Tally then displays the ledgers associated with the selected group.
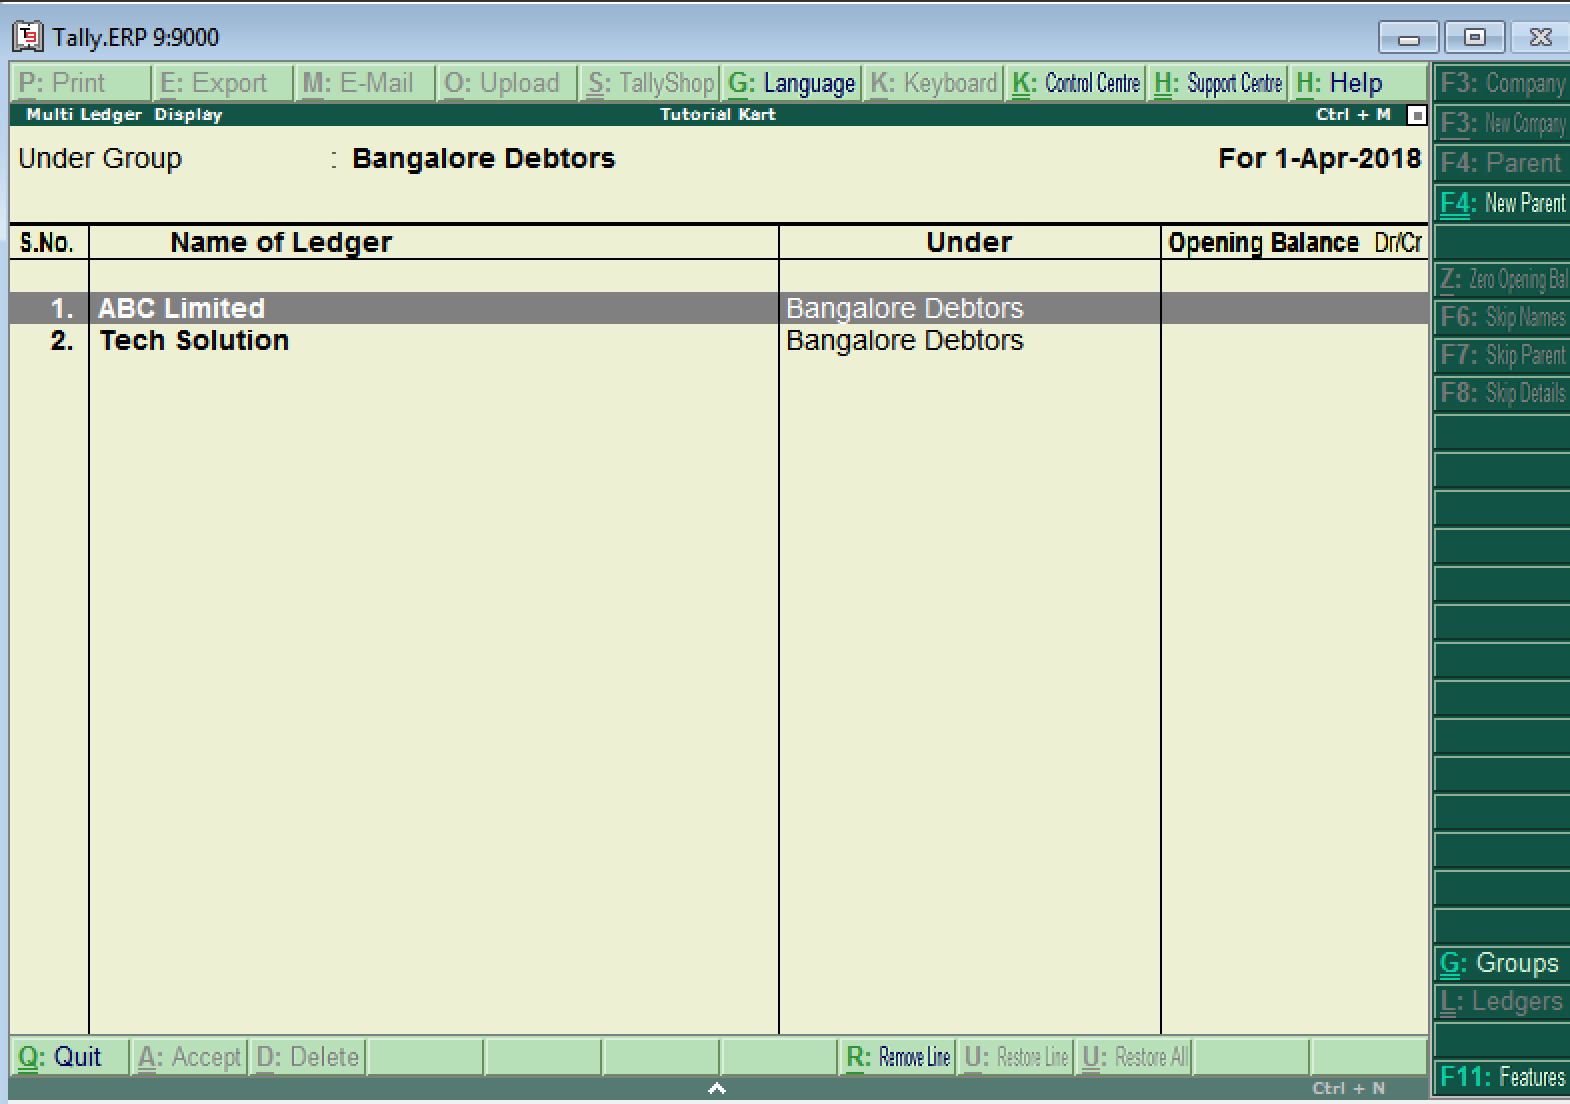
Note: Display mode is intended for viewing records. To change ledger names, opening balances, or other available details, open the Multiple Ledgers Alteration screen.
Alter Multiple Ledgers in Tally.ERP 9
The Alter option opens multiple ledgers belonging to a selected group in an editable list.
Path: Gateway of Tally –> Accounts Info –> Ledgers –> Multiple Ledgers –> Choose Alter
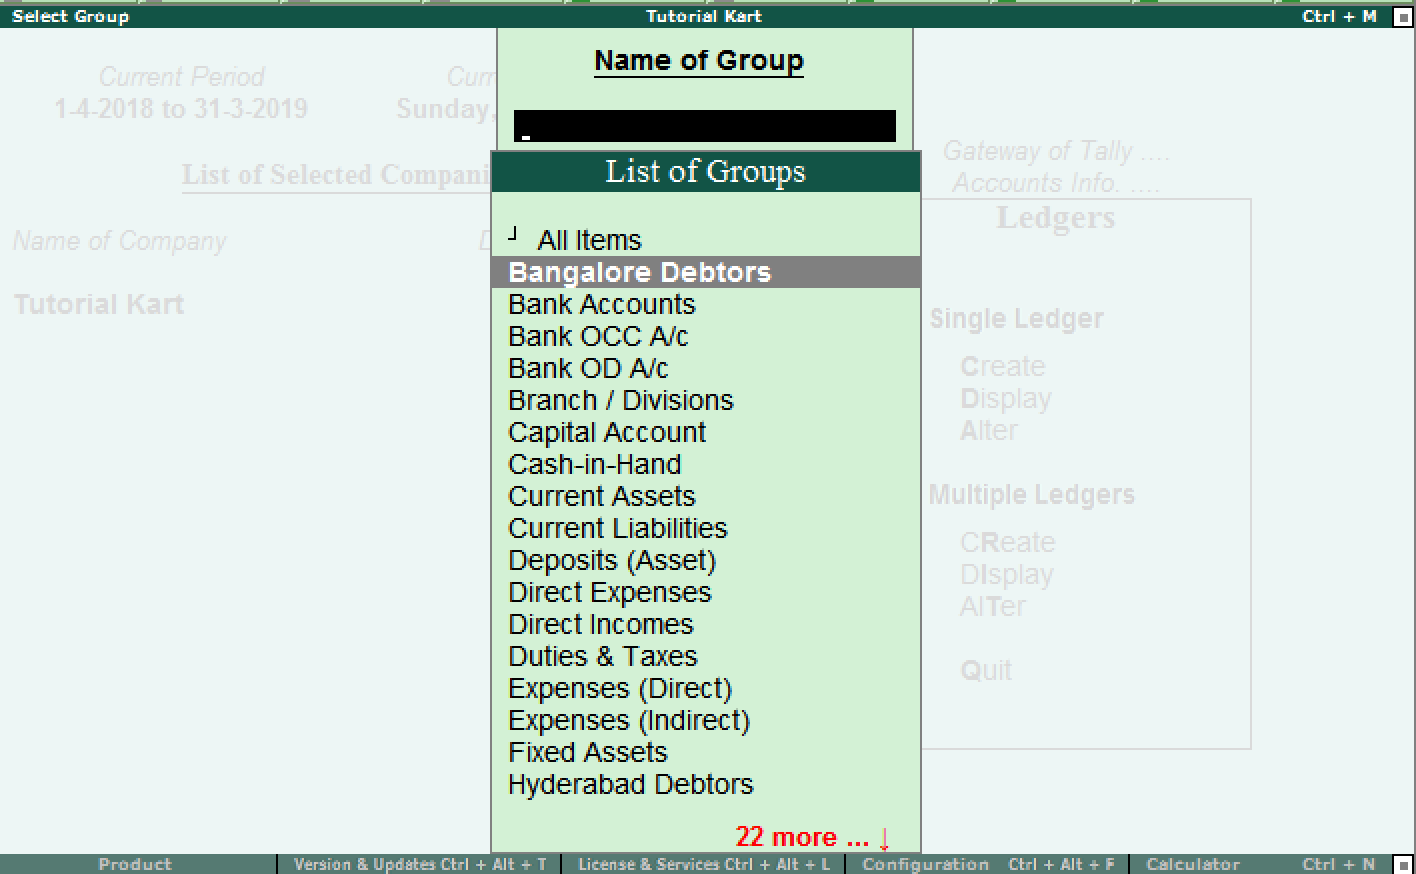
Select the required group from the list. Tally will load the ledgers associated with that group.
On the Multi Ledger Alteration screen, review or update the available fields. Depending on the ledger and configuration, this screen can be used to:
- Add ledger entries to the selected group.
- Remove an unwanted row where Tally permits the change.
- Correct a ledger name.
- Update an opening balance and its Dr or Cr designation.
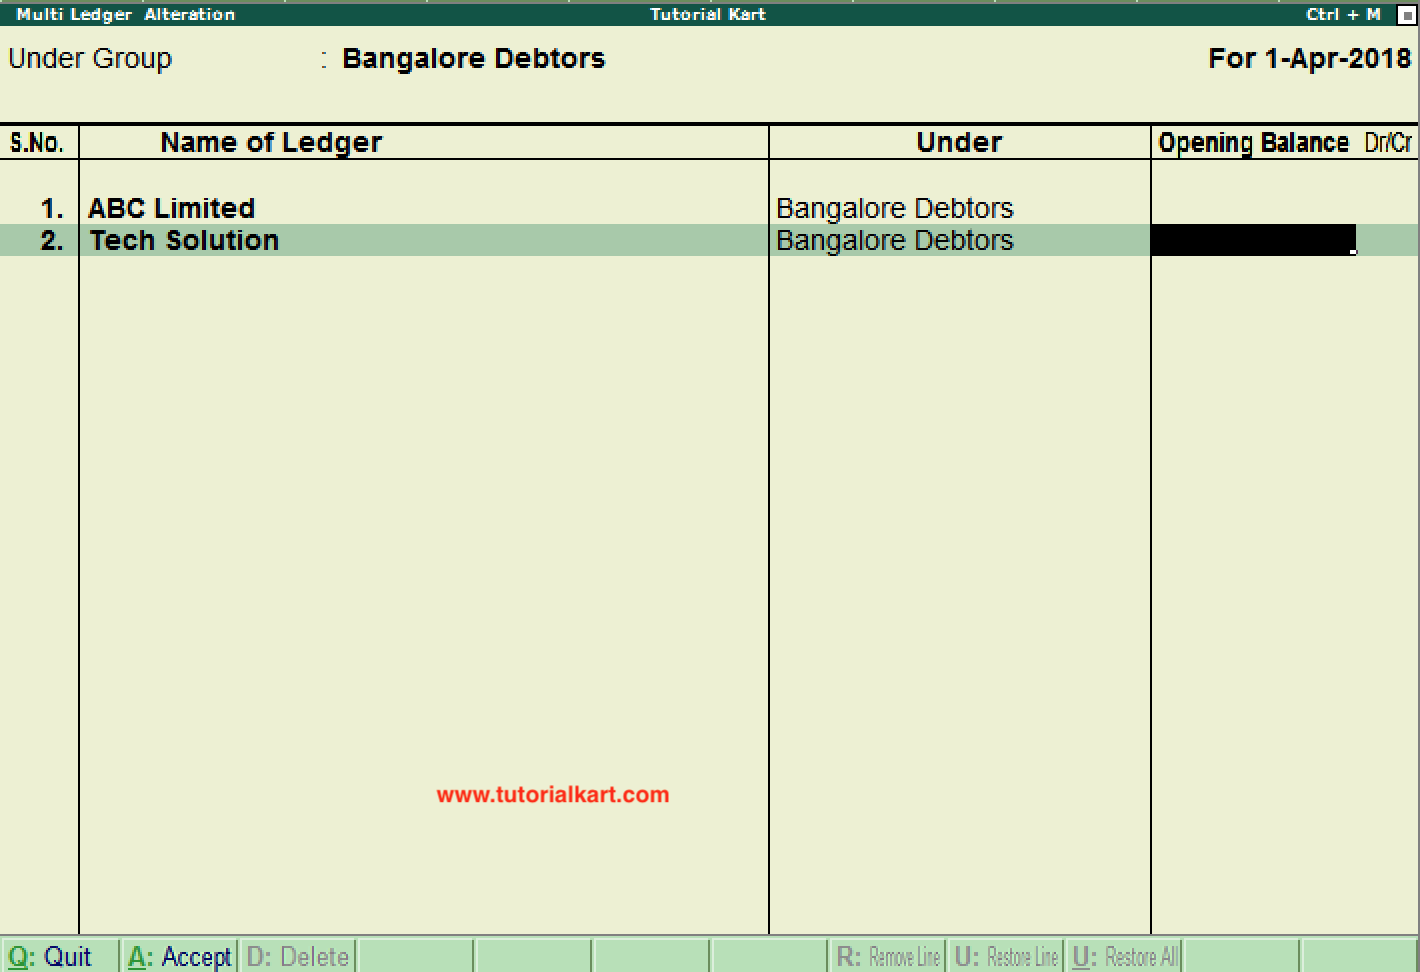
Press Enter through the remaining fields and accept the screen to save the changes. Review existing vouchers and reports after making material changes to a ledger.
Single Ledger and Multiple Ledger Creation in Tally
Use single-ledger creation when an account requires detailed configuration that is not available on the multi-ledger screen. Use multiple-ledger creation when several accounts share a group and only their basic details and opening balances need to be entered.
| Requirement | Suitable option |
|---|---|
| Create one account with detailed settings | Single Ledger Create |
| Create several accounts under one group | Multiple Ledgers Create |
| Review ledgers without editing them | Multiple Ledgers Display |
| Update several existing ledgers | Multiple Ledgers Alter |
Frequently Asked Questions About Multiple Ledgers in Tally
Can I create more than one ledger in Tally at the same time?
Yes. In Tally.ERP 9, open Accounts Info., select Ledgers, and choose Create under Multiple Ledgers. You can then enter several ledger names on the same screen.
How many ledgers should I create in Tally?
Create one ledger for each account that must be tracked separately, such as an individual customer, supplier, bank account, expense category, or income category. The required number depends on the company’s transactions and reporting needs.
Can multiple ledgers be created under different groups on one screen?
The usual multi-ledger workflow begins by selecting a group, and the subsequent ledger rows inherit that group. When the ledgers belong to different groups, create them in separate group-wise batches or use the available group-selection option supported by the configured Tally screen.
Why is the correct ledger group important in Tally?
The group determines how Tally classifies the ledger and where its balance appears in accounting reports. A ledger placed under the wrong group can cause an amount to be presented in an inappropriate section of a report.
How do I correct a ledger created with the wrong details?
Open Gateway of Tally → Accounts Info. → Ledgers → Multiple Ledgers → Alter, select the relevant group, make the permitted corrections, and accept the screen. Use the single-ledger Alter option when the required field is not available in the multiple-ledger view.