Flutter GridView
Flutter GridView displays its children widgets as a grid (2D array).
In this tutorial, we will learn how to create a GridView and display some widgets in it as a grid.
Code Snippet
A quick code snippet to display a grid of widgets using GridView class is
GridView(
  gridDelegate: const SliverGridDelegateWithFixedCrossAxisCount(
    crossAxisCount: 3,
  ),
  primary: false,
  padding: const EdgeInsets.all(20),
  children: <Widget>[
    // widgets
  ]
)
The default main axis is vertical axis, and the cross axis is horizontal axis. Using gridDelegate property, we have set the number of widgets to be arranged in the cross axis to 3.
We can also use GridView.count() constructor to create a grid of widgets with fixed number of tiles in the cross axis as shown in the following code snippet.
GridView.count(
  primary: false,
  padding: const EdgeInsets.all(20),
  crossAxisSpacing: 10,
  mainAxisSpacing: 10,
  crossAxisCount: 2,
  children: <Widget>[
    // widgets
  ],
)
Example
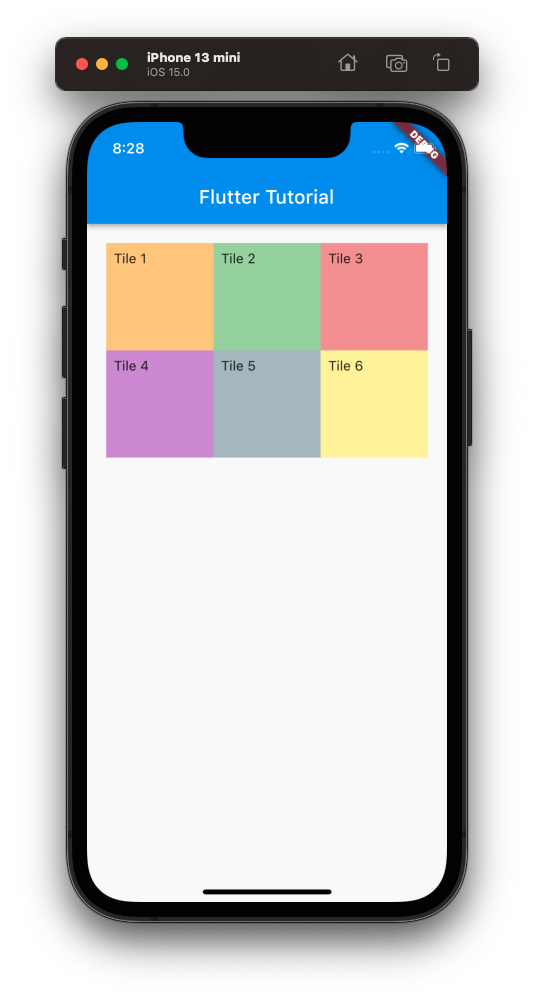
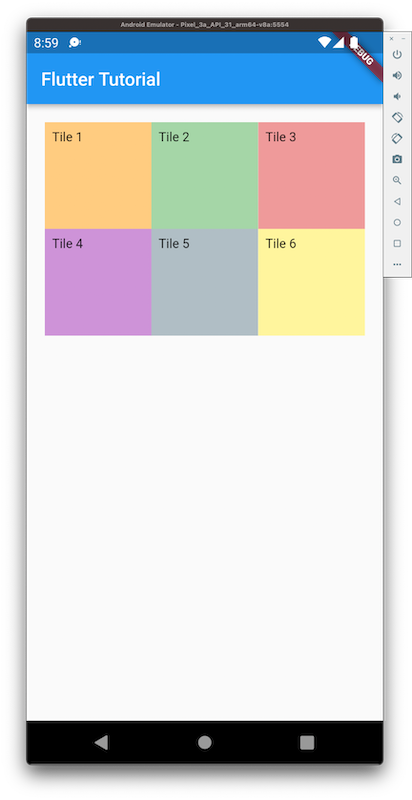
In the following example, we display six widgets in a Grid View with three elements in the cross axis, meaning three items would be arranged along the horizontal axis. The items would be arranged from left to right, top to bottom.
main.dart
import 'dart:ui';

import 'package:flutter/material.dart';

void main() => runApp(const MyApp());

class MyApp extends StatelessWidget {
  const MyApp({Key? key}) : super(key: key);

  static const String _title = 'Flutter Tutorial';

  @override
  Widget build(BuildContext context) {
    return MaterialApp(
      title: _title,
      home: Scaffold(
        appBar: AppBar(title: const Text(_title)),
        body: const MyStatefulWidget(),
      ),
    );
  }
}

class MyStatefulWidget extends StatefulWidget {
  const MyStatefulWidget({Key? key}) : super(key: key);

  @override
  State<MyStatefulWidget> createState() => _MyStatefulWidgetState();
}

class _MyStatefulWidgetState extends State<MyStatefulWidget> {
  @override
  Widget build(BuildContext context) {
    return Center(
      child: GridView(
        gridDelegate: const SliverGridDelegateWithFixedCrossAxisCount(
          crossAxisCount: 3,
        ),
        primary: false,
        padding: const EdgeInsets.all(20),
        children: <Widget>[
          Container(
            padding: const EdgeInsets.all(8),
            child: const Text("Tile 1"),
            color: Colors.orange[200],
          ),
          Container(
            padding: const EdgeInsets.all(8),
            child: const Text("Tile 2"),
            color: Colors.green[200],
          ),
          Container(
            padding: const EdgeInsets.all(8),
            child: const Text("Tile 3"),
            color: Colors.red[200],
          ),
          Container(
            padding: const EdgeInsets.all(8),
            child: const Text("Tile 4"),
            color: Colors.purple[200],
          ),
          Container(
            padding: const EdgeInsets.all(8),
            child: const Text("Tile 5"),
            color: Colors.blueGrey[200],
          ),
          Container(
            padding: const EdgeInsets.all(8),
            child: const Text("Tile 6"),
            color: Colors.yellow[200],
          ),
        ],
      )
    );
  }
}
Screenshot – iPhone Simulator

Screenshot – Android Emulator

Conclusion
In this Flutter Tutorial, we learned what a GridView is, and how to display items in a grid view, with examples and tutorials.
