 TutorialKart.com
Flutter Login Screen with Username and Password Fields
In this tutorial, we will build a simple Flutter login screen with a username field, password field, forgot-password action, login button, and sign-up link.
The example focuses on the user interface and reading values entered in the text fields. It does not connect to an authentication server or verify credentials. In a production application, the login button should submit the credentials to a secure authentication service instead of printing the password.
Widgets Used in the Flutter Login Screen
The login screen contains the following Flutter widgets:
ListViewkeeps the form scrollable when the keyboard reduces the available screen height.TextFieldaccepts the username and password.TextEditingControllerprovides access to the values entered by the user.TextButtonis used for the forgot-password and sign-up actions.ElevatedButtoncreates the main login action.ContainerandPaddingprovide spacing and layout control.
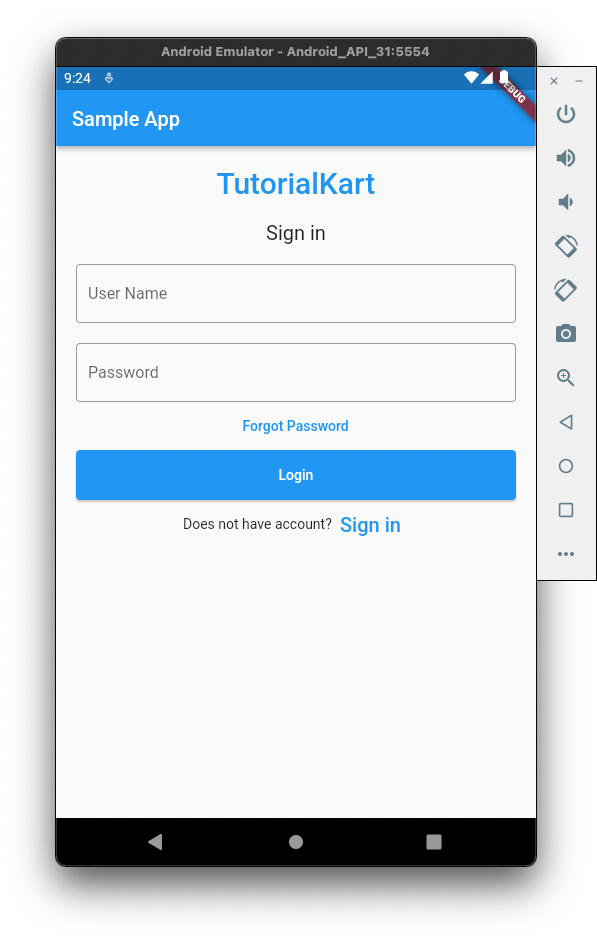
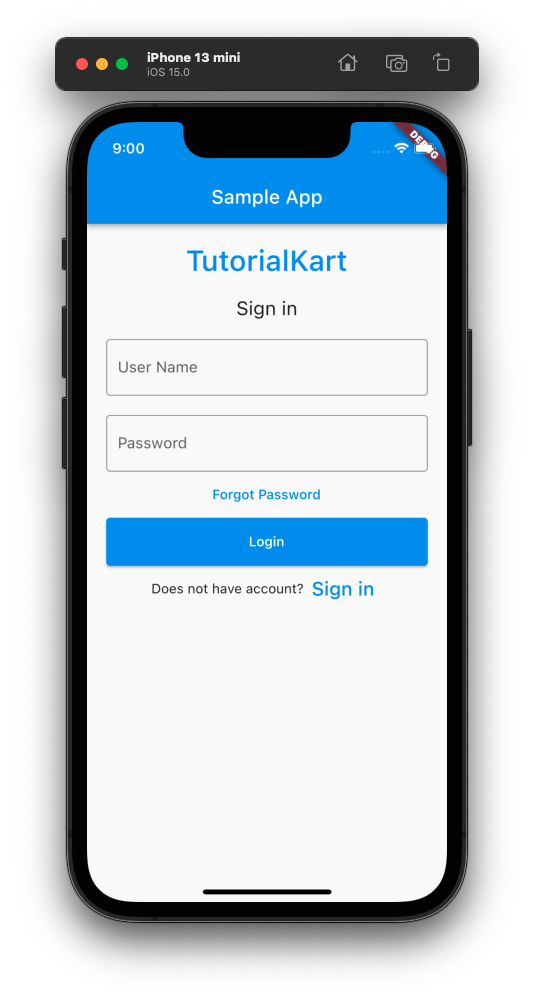
The screen first displays the application name and a sign-in heading. It then shows two input fields for the username and password. A TextButton widget provides the forgot-password action, and an ElevatedButton widget is used for the login button. A second text button can take users to a sign-up screen.
Complete Flutter Login Screen Example
The following code is the content of main.dart file. If you create a basic Flutter application and replace the contents of main.dart with the following file, you should see UI as shown in the screenshot attached after this code.
main.dart
import 'package:flutter/material.dart';

void main() => runApp(const MyApp());

class MyApp extends StatelessWidget {
  const MyApp({Key? key}) : super(key: key);

  static const String _title = 'Sample App';

  @override
  Widget build(BuildContext context) {
    return MaterialApp(
      title: _title,
      home: Scaffold(
        appBar: AppBar(title: const Text(_title)),
        body: const MyStatefulWidget(),
      ),
    );
  }
}

class MyStatefulWidget extends StatefulWidget {
  const MyStatefulWidget({Key? key}) : super(key: key);

  @override
  State<MyStatefulWidget> createState() => _MyStatefulWidgetState();
}

class _MyStatefulWidgetState extends State<MyStatefulWidget> {
  TextEditingController nameController = TextEditingController();
  TextEditingController passwordController = TextEditingController();

  @override
  Widget build(BuildContext context) {
    return Padding(
        padding: const EdgeInsets.all(10),
        child: ListView(
          children: <Widget>[
            Container(
                alignment: Alignment.center,
                padding: const EdgeInsets.all(10),
                child: const Text(
                  'TutorialKart',
                  style: TextStyle(
                      color: Colors.blue,
                      fontWeight: FontWeight.w500,
                      fontSize: 30),
                )),
            Container(
                alignment: Alignment.center,
                padding: const EdgeInsets.all(10),
                child: const Text(
                  'Sign in',
                  style: TextStyle(fontSize: 20),
                )),
            Container(
              padding: const EdgeInsets.all(10),
              child: TextField(
                controller: nameController,
                decoration: const InputDecoration(
                  border: OutlineInputBorder(),
                  labelText: 'User Name',
                ),
              ),
            ),
            Container(
              padding: const EdgeInsets.fromLTRB(10, 10, 10, 0),
              child: TextField(
                obscureText: true,
                controller: passwordController,
                decoration: const InputDecoration(
                  border: OutlineInputBorder(),
                  labelText: 'Password',
                ),
              ),
            ),
            TextButton(
              onPressed: () {
                //forgot password screen
              },
              child: const Text('Forgot Password',),
            ),
            Container(
                height: 50,
                padding: const EdgeInsets.fromLTRB(10, 0, 10, 0),
                child: ElevatedButton(
                  child: const Text('Login'),
                  onPressed: () {
                    print(nameController.text);
                    print(passwordController.text);
                  },
                )
            ),
            Row(
              children: <Widget>[
                const Text('Does not have account?'),
                TextButton(
                  child: const Text(
                    'Sign in',
                    style: TextStyle(fontSize: 20),
                  ),
                  onPressed: () {
                    //signup screen
                  },
                )
              ],
              mainAxisAlignment: MainAxisAlignment.center,
            ),
          ],
        ));
  }
}
How the Flutter Login Screen Code Works
The two TextEditingController objects store and expose the text entered in the username and password fields. The controllers are assigned through the controller property of each TextField.
The password field uses obscureText: true, which hides the entered characters on the screen. The example login button reads the values through nameController.text and passwordController.text.
The form is placed inside a ListView instead of a fixed Column. This allows the screen to scroll if the keyboard covers part of the form or if the available display height is limited.
Flutter Login Screen Output on Android and iPhone
The following are the screenshots when you run this app in an Android Emulator or iPhone Simulator.
Android Emulator
iPhone Simulator
Add Validation to the Flutter Login Form
For field validation, use Form and TextFormField instead of plain TextField widgets. A GlobalKey<FormState> can then validate all fields before the login request is submitted.
final _formKey = GlobalKey<FormState>();

Form(
  key: _formKey,
  child: Column(
    children: [
      TextFormField(
        controller: nameController,
        decoration: const InputDecoration(
          border: OutlineInputBorder(),
          labelText: 'User Name',
        ),
        validator: (value) {
          if (value == null || value.trim().isEmpty) {
            return 'Enter your user name';
          }
          return null;
        },
      ),
      const SizedBox(height: 16),
      TextFormField(
        controller: passwordController,
        obscureText: true,
        decoration: const InputDecoration(
          border: OutlineInputBorder(),
          labelText: 'Password',
        ),
        validator: (value) {
          if (value == null || value.isEmpty) {
            return 'Enter your password';
          }
          return null;
        },
      ),
      const SizedBox(height: 16),
      ElevatedButton(
        onPressed: () {
          if (_formKey.currentState!.validate()) {
            // Submit credentials to the authentication service.
          }
        },
        child: const Text('Login'),
      ),
    ],
  ),
)
The validator functions return an error message when a value is invalid and return null when the field passes validation. Validation should run before sending credentials to an authentication API.
Add a Show or Hide Password Button
A password visibility button makes it easier for users to check what they entered. Store the visibility state in a Boolean variable and update obscureText when the icon is pressed.
bool _hidePassword = true;

TextField(
  controller: passwordController,
  obscureText: _hidePassword,
  decoration: InputDecoration(
    border: const OutlineInputBorder(),
    labelText: 'Password',
    suffixIcon: IconButton(
      icon: Icon(
        _hidePassword ? Icons.visibility : Icons.visibility_off,
      ),
      onPressed: () {
        setState(() {
          _hidePassword = !_hidePassword;
        });
      },
    ),
  ),
)
Dispose Flutter TextEditingController Objects
Controllers created by a stateful widget should be disposed when the widget is removed. This releases the resources used by the controllers.
@override
void dispose() {
  nameController.dispose();
  passwordController.dispose();
  super.dispose();
}
Connect the Flutter Login Button to Authentication
The example prints the entered values only to demonstrate how controllers work. A real login flow should validate the fields, show a loading state, send credentials over HTTPS to an authentication service, handle errors, and navigate only after successful authentication.
Do not log, print, or permanently store plain-text passwords. Authentication tokens and other sensitive values should be handled using platform-appropriate secure storage and the requirements of the authentication provider.
Flutter Login Screen Common Questions
Why is ListView used for the Flutter login screen?
ListView allows the login form to scroll when the software keyboard reduces the available height. This helps prevent vertical overflow on smaller screens.
How do I hide the password in a Flutter login field?
Set obscureText to true on the password field. You can connect it to a Boolean state variable when the screen also needs a show-or-hide password button.
Should a Flutter login form use TextField or TextFormField?
Use TextField for simple input collection. Use TextFormField inside a Form when the login screen requires built-in validation and error messages.
How do I navigate from login to sign-up in Flutter?
Call Navigator.push() from the sign-up button and provide a route whose builder returns the sign-up screen widget. The forgot-password action can use the same navigation pattern.
Flutter Login Screen Tutorial Summary
This Flutter login screen demonstrates how to collect a username and password with text fields, hide password characters, read values with controllers, and add login, forgot-password, and sign-up actions. For a complete application, add form validation, dispose the controllers, connect the login button to a secure authentication service, and handle loading and error states.