 TutorialKart.com
Salesforce Extension Pack for Visual Studio Code
The Salesforce Extension Pack adds Salesforce development tools to Visual Studio Code. It supports projects that contain Apex, Lightning Web Components, Aura components, Visualforce, and Salesforce metadata. The extensions use Salesforce CLI behind the scenes to create projects, authorize orgs, retrieve and deploy source, run tests, and execute queries.
This tutorial explains how to install Visual Studio Code, add the Salesforce extensions, open a Salesforce DX project, connect to a production org or sandbox, create an Apex class, and run a SOQL query.
Salesforce VS Code installation requirements
- Visual Studio Code for Windows, macOS, or Linux.
- The Salesforce Extension Pack from the Visual Studio Marketplace.
- Salesforce CLI, which the VS Code extensions use to run Salesforce commands.
- A supported JDK for Apex language services. Salesforce currently recommends JDK 21, while the Apex extension supports Java versions greater than 11.
- A Salesforce DX project containing an
sfdx-project.jsonfile. - Access to a Salesforce org, sandbox, Developer Edition org, Trailhead Playground, or scratch org.
The screenshots in this tutorial were created with an earlier Salesforce DX interface. Current versions may show some commands with updated labels, but the workflow remains similar. Check the current Salesforce installation instructions when selecting supported versions.
Step 1: Download and install Visual Studio Code
Download Visual Studio Code from code.visualstudio.com. Select the installer for your operating system, run it, and complete the setup.
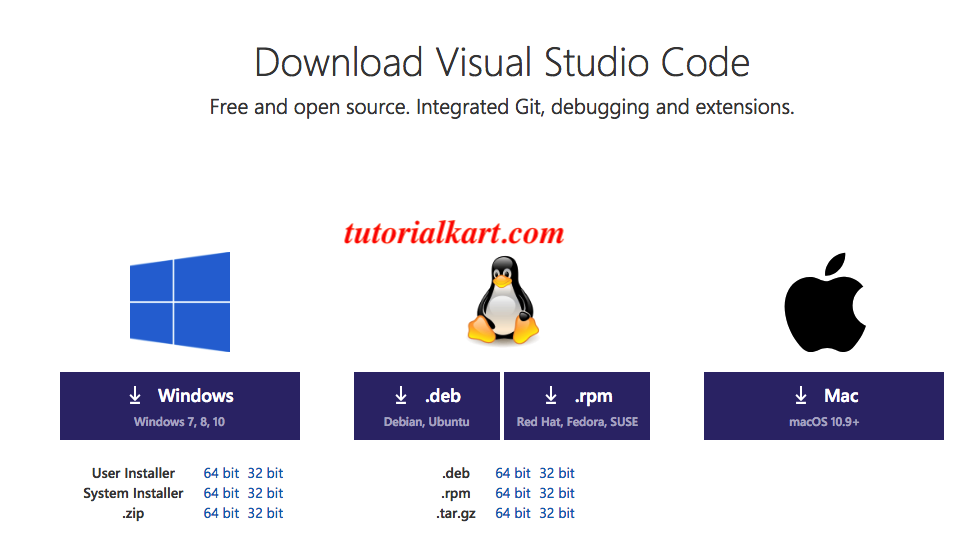
After installation, open Visual Studio Code and confirm that the Extensions view and Command Palette are available.
Step 2: Install Salesforce CLI and verify it
Install Salesforce CLI before using Salesforce commands in VS Code. After installation, open a terminal and verify that the sf command is available.
sf --versionIf the command is not found, restart the terminal or Visual Studio Code and check that the Salesforce CLI installation directory is included in your system path.
Step 3: Configure Java for the Salesforce Apex extension
The Apex Language Server requires a JDK. Install a supported JDK and make sure Visual Studio Code can locate it through JAVA_HOME, JDK_HOME, or the Salesforce Apex extension setting named salesforcedx-vscode-apex.java.home.
Older setup guides commonly referenced JDK 8. The earlier resource remains here for historical context: Java Standard Edition Development Kit. For a new installation, follow the supported Java versions in the current Salesforce documentation.
Step 4: Install the Salesforce Extension Pack in VS Code
Open the Extensions view in Visual Studio Code and search for Salesforce Extension Pack. Confirm that the publisher is Salesforce, and then select Install. The pack provides the main tools for Apex, Lightning Web Components, Aura, Visualforce, and Salesforce CLI integration.
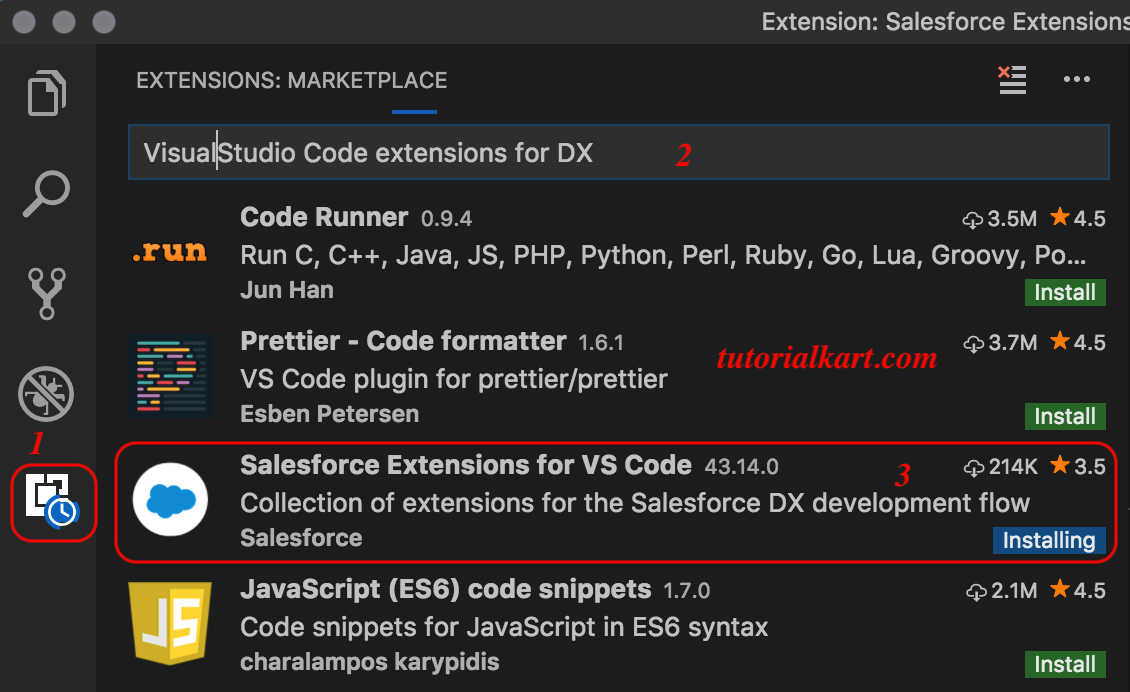
Salesforce also provides an expanded extension pack with additional development utilities. For a basic setup, begin with the standard Salesforce Extension Pack and add other extensions only when they are required by your workflow.
Open or create a Salesforce DX project in Visual Studio Code
Salesforce commands are enabled when Visual Studio Code recognizes the workspace as a Salesforce DX project. Open the project folder that contains sfdx-project.json at its root.
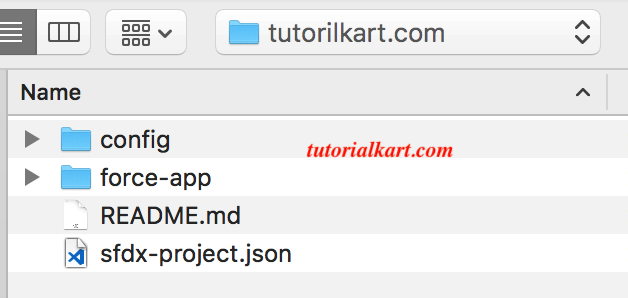
Use File > Open Folder, select the Salesforce DX project directory, and open it in Visual Studio Code.
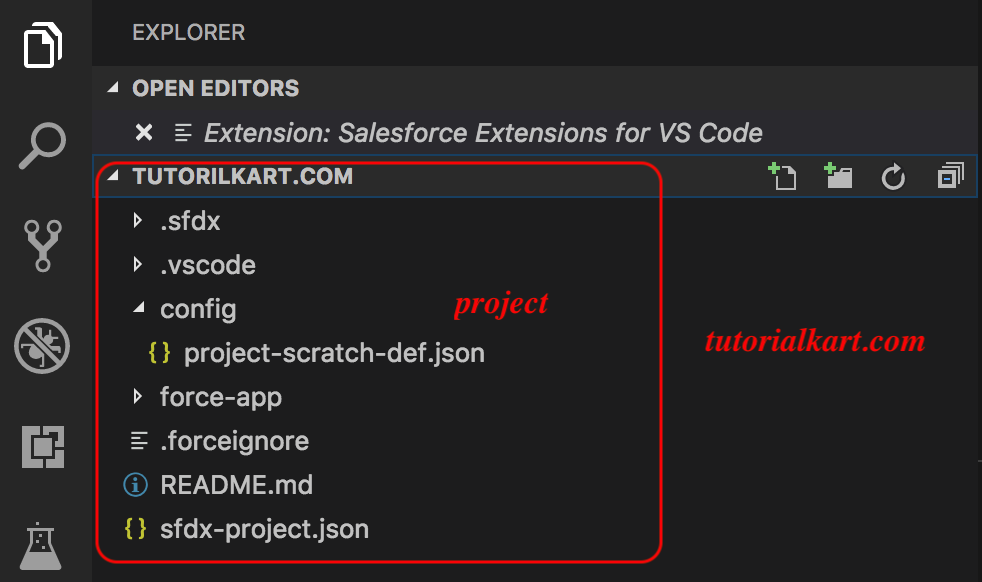
To create a project instead, open the Command Palette and run SFDX: Create Project with Manifest. Select a project type, enter a project name, and choose the parent directory. The generated project includes sfdx-project.json and a standard Salesforce source structure.
You can also review the existing TutorialKart guide for creating a Salesforce DX project.
Connect Visual Studio Code to a Salesforce org or sandbox
Before retrieving metadata, deploying source, or running SOQL, authorize the Salesforce org that the project will use.
- Open the Command Palette with
Ctrl+Shift+Pon Windows or Linux, orCommand+Shift+Pon macOS. - Run SFDX: Authorize an Org.
- Select the appropriate login type, such as Production or Sandbox.
- Enter an alias that clearly identifies the org.
- Complete the browser login and allow access.
- Return to Visual Studio Code and confirm that the org appears in the Org Picker.
For a sandbox, select the sandbox login option during authorization. Using a clear alias such as dev-sandbox reduces the risk of running commands against the wrong org.
You can verify authorized orgs from the integrated terminal:
sf org listCreate an Apex class with the Salesforce VS Code extension
After opening a Salesforce DX project and authorizing an org, use the Command Palette to create an Apex class.
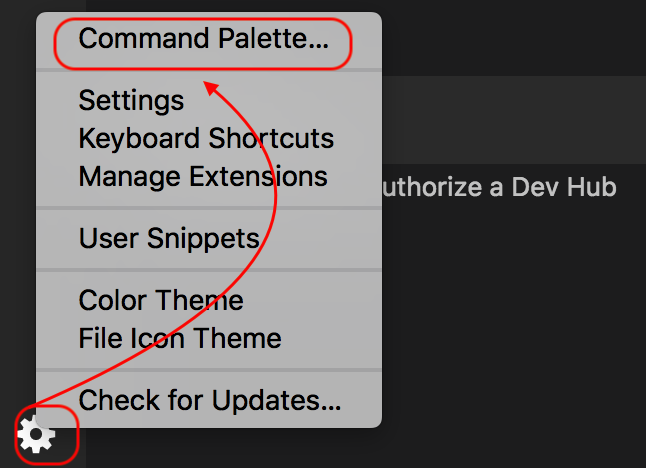
Type SFDX in the Command Palette to display the Salesforce commands available for the current project.
- Select SFDX: Create Apex Class.
- Enter the Apex class name, such as
tutorialkart. - Select the target directory, normally the project path used for Apex classes.
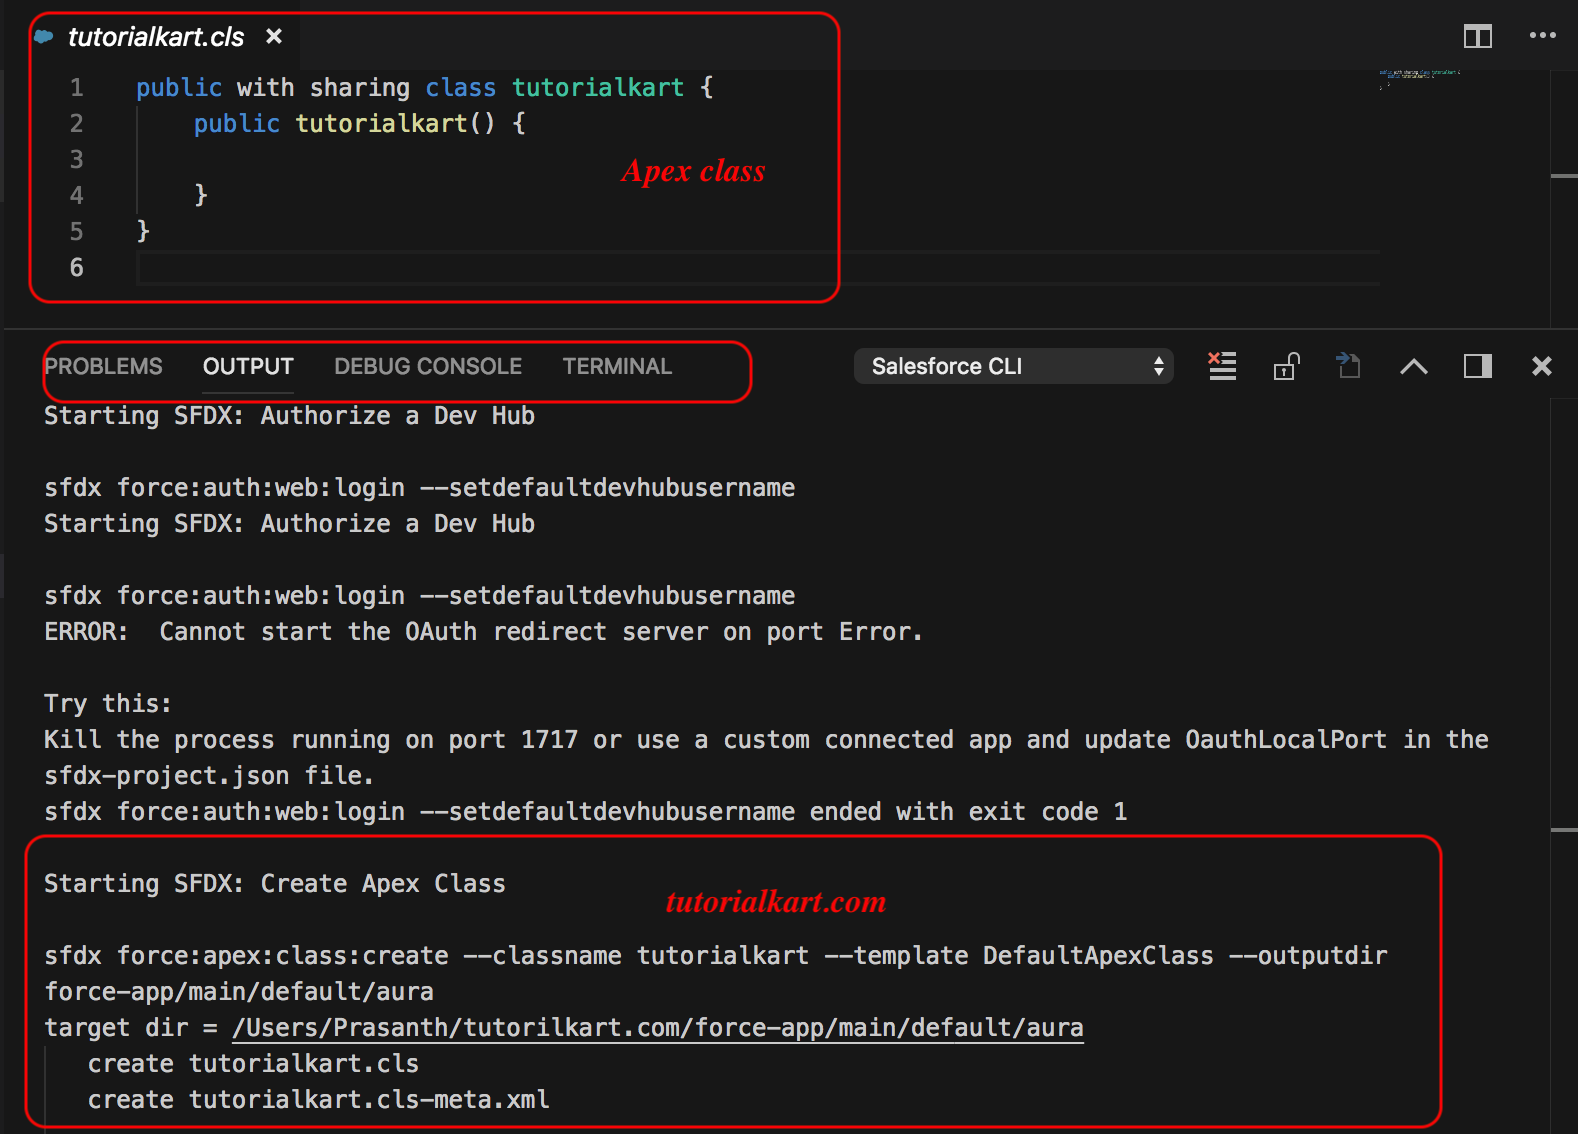
- Press Enter to create the class and its metadata file.
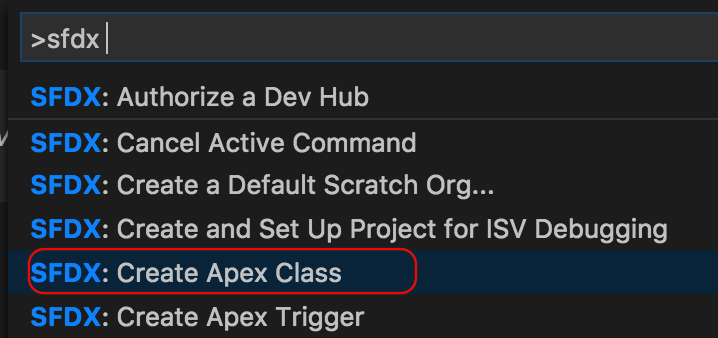

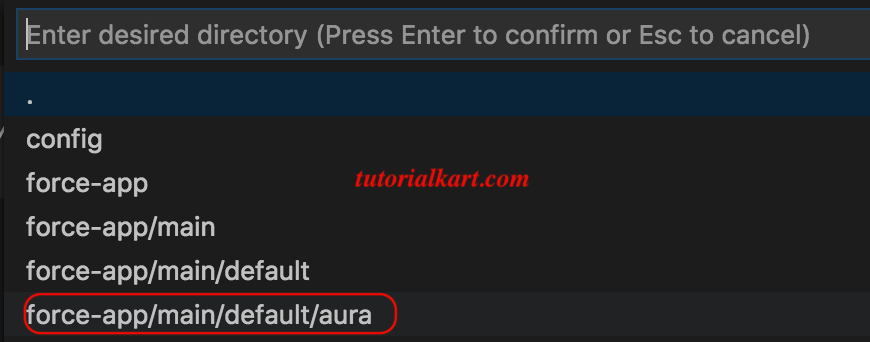
The generated Apex class and its -meta.xml file appear in the selected directory.
Run SOQL in Visual Studio Code
The Salesforce Extension Pack supports SOQL in standalone .soql files, selected text, and SOQL Builder. Make sure the project has an authorized default org before running a query.
Execute a SOQL query from the Command Palette
- Open the Command Palette.
- Run SFDX: Execute SOQL Query….
- Enter a query such as the example below.
- Select the API option when prompted.
- Review the records in the Visual Studio Code output area.
SELECT Id, Name
FROM Account
ORDER BY Name
LIMIT 10
Build and run SOQL with SOQL Builder
Run SFDX: Create Query in SOQL Builder from the Command Palette. Select an object, choose fields, add filters or ordering, and select Run Query. You can save the query as a .soql file and export results when needed.
For code completion in SOQL files, run SFDX: Refresh SObject Definitions so that the language server has current object and field metadata from the org.
Retrieve and deploy Salesforce metadata from VS Code
After authorizing an org, you can retrieve metadata into the project and deploy local changes. The exact command depends on the development model and the selected files.
- Use the Org Browser or a manifest to retrieve metadata from an org.
- Right-click a source file or directory and select the Salesforce command for retrieving or deploying source.
- Review the Output panel after each operation instead of assuming that a deployment succeeded.
- Keep retrieved source in version control and avoid treating the org as the only copy of your work.
- Check the selected default org before a retrieve, deploy, test, or data command.
Salesforce VS Code setup troubleshooting
SFDX commands do not appear in the Command Palette
Open the folder that directly contains sfdx-project.json. Also confirm that the Salesforce Extension Pack is enabled and Salesforce CLI is installed. Reload the Visual Studio Code window after correcting the setup.
The Apex Language Server does not start
Check the Apex channel in the Output panel. Verify the installed JDK version and the path configured through JAVA_HOME or salesforcedx-vscode-apex.java.home. The configured value must point to the JDK directory, not directly to the Java executable.
Salesforce org authorization opens the wrong login page
Run the authorization command again and choose the correct login type. Use the sandbox option for a sandbox and the production option for a production, Developer Edition, or Trailhead Playground login unless your organization uses a specific My Domain workflow.
SOQL or metadata commands run against the wrong org
Check the Org Picker in the Visual Studio Code status bar and use sf org list to review aliases. Set or select the intended default org before executing the command.
Salesforce Extension for Visual Studio Code FAQs
What is the Salesforce plugin for VS Code?
The main Salesforce plugin is the Salesforce Extension Pack. It combines extensions for Salesforce CLI integration, Apex, Lightning Web Components, Aura, Visualforce, and supporting project workflows.
Do I need Salesforce CLI when using the VS Code extension?
Yes. The Salesforce extensions call Salesforce CLI for many project and org operations, so the CLI must be installed even when commands are launched from the Visual Studio Code interface.
How do I open Salesforce code in Visual Studio Code?
Open the Salesforce DX project folder that contains sfdx-project.json. To obtain code from an org, first authorize the org and then retrieve the required metadata through the Org Browser, a manifest, or the relevant retrieve command.
How do I connect Visual Studio Code to a Salesforce sandbox?
Run SFDX: Authorize an Org, select the sandbox login option, enter an alias, and complete the browser login. Confirm the selected sandbox in the Org Picker before running commands.
How do I run SOQL in Visual Studio Code?
Use SFDX: Execute SOQL Query…, execute selected SOQL text, or open SFDX: Create Query in SOQL Builder. Query results appear in the output or query results view.
Salesforce VS Code tutorial QA checklist
- Confirm the workspace root contains
sfdx-project.json. - Verify Salesforce CLI responds to
sf --version. - Verify the Salesforce Extension Pack is installed from the Salesforce publisher.
- Check that the JDK path allows the Apex Language Server to start.
- Confirm the intended production org, sandbox, or scratch org is selected before running commands.
- Create an Apex class and confirm that both the class and metadata file are generated.
- Run a small SOQL query and verify that results come from the expected org.
- Review the Output panel for retrieve, deploy, test, and query errors.